With the impending move to one of the state’s premier recreation areas, I’m embarking upon setting up a customized data systems based on the Raspberry Pi, that will collect and display recreation related data. Some of the goals of this project are:
THE PLAN
River flow rate — knowing what the current river flow helps decided if it will be a weekend of tubing, kayaking or finding something else to do. River flow is managed by the Army Corps of Engineers and can vary greatly. Knowing the current flow helps plan the day.
Lake Level — certain boat ramps, beaches and parks are better at near-full level than not. Having a good idea of what the beaches and marinas might be like before heading down the hill to the lake can be helpful.
Area Traffic — this one will be tricky, but the plan is to leverage TXDOT traffic APIs to find out what the traffic might be like heading into the major cities (ex. Austin or San Antonio) should there be a need to do so. There are a lot of existing resources but having it all in a dashboard would be nice to have.
WX — of course.. some sort of simple weather forecast dash to show the day’s expected temps, if lightning is in the forecast (you don’t want to be on the river/lake when the heavens open up), etc.
THE RECREATION DEVICE
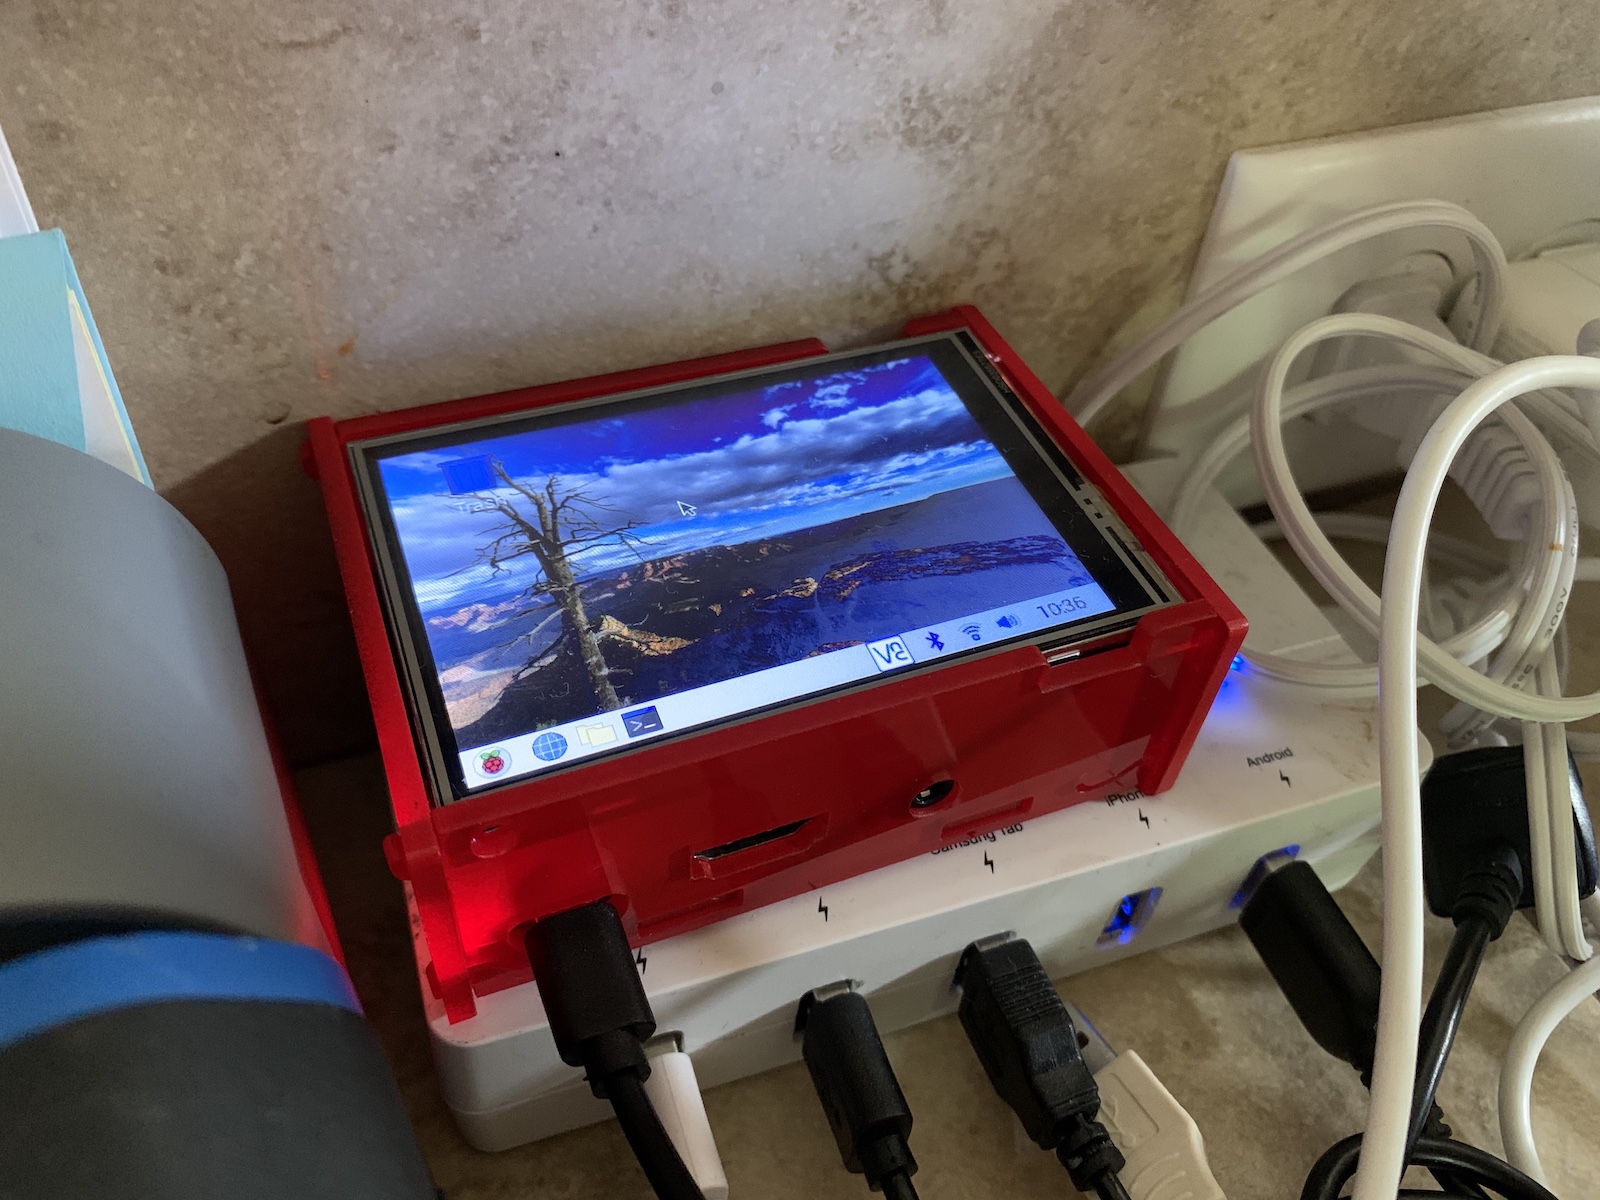
The plan is to use a Raspberry Pi 3b as the data harvesting and webapp platform. In addition to the standard Pi, I’ve added a 3.5″ touchscreen to display the data in a stand-alone format.
Raspberry Pi 3b with 3.5″ touchscreen
The full plan for the webapp will support both the micro 3.5″ display as well as interface versions for larger displays such as a table or desktop.
CONFIGURING THE PI
Once you have downloaded the Pi Image you want to run, have it burned to the micro SD card and the system booted up, you’ll need to have it either plugged into your network on an ethernet cable, or attached via HDMI to a monitor.
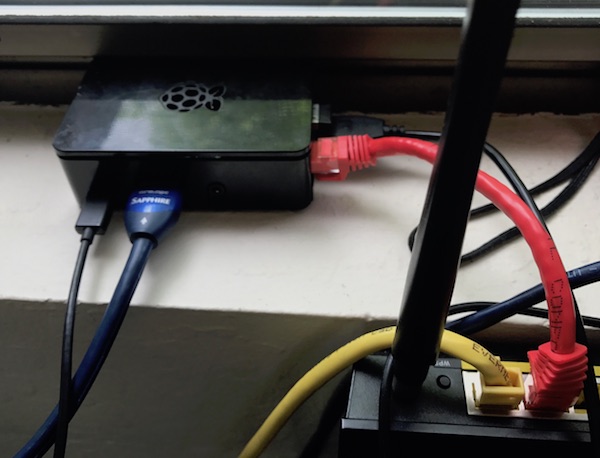
I plugged the stripped down device into the router with short cable:
Once it was powered on, checked the router to locate it’s DHCP IP address, in this case it’s 192.168.1.220
Using the terminal window on my, I ssh’d into the device as the user ‘pi’ using default password ‘raspberry’ . Once connected, I set about updating the PI.
sudo apt-get upgrade
If you face a dpkg error.. this command will resolve it, and you can re-run the command above.
sudo dpkg --configure -a

sudo apt-get upgrade
SETTING UP WIFI
To untether the device from my LAN, you’ll need to configure the Pi to connect to your WiFi. If you are running the desktop version of Raspberian, you can do this with the networking setup dialogs. If you do not, here are the steps for setting up your networking, including defining your network and password.
Locate the wifi network configuration file and add the following data. You can of course use tools to encrypt the password in this file, but I’m not super-concerned about an exploit on my LAN so I’ve let this in plain text.
sudo vi /etc/wpa_supplicant/wpa_supplicant.conf
Add the following block, with your network specifics
Now setup the wlan with a static IP address. You could configure a DNS service to automagically detect the IP address of the system, but for me it was easier for me to pick a static IP and configure the Pi’s network accordingly.
Edit the network/interfaces file:
sudo vi /etc/network/interfaces
Add the following block. This will set a static IP (make sure it’s in a range not managed by your DHCP to avoid future conflicts).
The display that I have installed in the Pi’s case is the MHS-3.5 display. Installing the drivers requires only a few commands. While logged in as the user ‘pi’ download the LCD-show package from git and configure execute the display configuration script.
git clone https://github.com/Lcdwiki/LCD-show.git
Move to the cloned directory and run the setup script
cd LCD-show
sudo ./MHS35-show
This will download and install packages required to use the display. Once it completes, you’ll want to reboot the Pi to verify that it is working properly.
sudo init 6
Upon reboot, the screen should become visible and operable.
In Part 2, I’ll cover installing Node, Maven and Node Package Manager.
It’s 2020, we’re deep in the throws of the COVID-19 PanicDemic, so I decided to build a refreshed receiver. Once completed, this fixed-station Stratux receiver will double as a FlightRadar24 feed node.
The initial effort was quite successful, so, I’m taking recommended ‘Social Distancing’ mandates to re-document the setup process I used to accomplish the following:
The first step was performing a default STRATUX install to a micro SD card. I selected a 16GB card for this project, but Stratux will run on anything down to 4 GB, based on what I observed with the default file system (default size is under 2GB).
I won’t repeat the installation instruction here, since they might have changed since this article was written. The instructions I used, and link to the latest Pi Image are located here: [ STRATUX.me ]
Preliminary Work
Once the card was imaged, I plugged in an HDMI cable, keyboard, mouse and Ethernet cable to start work.
Stratux Pi preliminary setup
Once powered up and the boot sequence completes, your are challenged with a simple login prompt. The initial login is: pi and the password is raspberry.
Once you login, you’ll see this welcome screen (sorry for the crappy photo.. if I can figure out how to PiP the HDMI output to my Mac to snap a good screen shot, I’ll re-do this!
Stratux first login
You will WANT to change that default password first!
Changing Default Password
Switch user to root and change the pi user’s password. You do not NEED to be root to change your own password, but we’ll need to be root from here on out.. and why not just do it that way? pi@raspberrypi: sudo su -
root@raspberrypi: passwd pi Enter new UNIX password: enter your password here Retype new UNIX password: re-enter your password here
Next, will be the modifications to disable the adhoc network and enable local WiFi connectivity.
Disable adhoc ‘stratux’ WiFi
Now that you are logged into the Stratux via ssh, assume root user and then cd to the networking directory again: pi@raspberrypi:~ $ sudo su -
root@raspberrypi:~# cd /etc/network
root@raspberrypi:~# vi interfaces
Now, this time the interfaces file will be heavily modified to configure the eth0 and wlan0, along with some rational routing, using the ‘metric’ setting to prioritize route assignments.
At the top of the file a new line will be added: auto lo auto wlan0
iface lo inet loopback
Then replacing the wlan0 entries with the following block of text. NOTE: The line `wireless-power off` will disable the power management for WiFi. If this is not done, I have found that the chip will shut down after a couple of hours and the device will become unreachable via wifi, until it’s rebooted. This discovery took no short amount of time to discovery and remedy.
iface lo inet loopback
iface lo inet loopback
iface wlan0 inet static
metric 0wireless-power off
hostname Stratux-eth0wpa-conf /etc/wpa_supplicant/wpa_supplicant.conf
address 10.100.0.210
netmask 255.255.255.0
gateway 10.100.0.1
network 10.100.0.0
broadcast 10.100.0.255
dns-nameservers 10.100.0.18.8.8.8
Configure the wlan0 WiFi
NOTE!: As of 19-APR-2020 and Raspberry Pi 3b; 5.0GHz Wifi IS NOT SUPPORTED.
Now.. the really fun part.. connecting the Pi to your WiFi network. You will need to find the SSID you want to connect to and the password for that network before starting.
The networking configuration that you setup in the previous step contains this setting: ‘wpa-conf /etc/wpa_supplicant/wpa_supplicant.conf‘. The next step is to create/configure that file.
The file is fairly simple, and with the SSID and Password you already obtained for your network (you did that already.. right?). You’ll simple fill that information into the blanks named _SSID_ and _NETWORK_PASS_.
Open the file and edit: root@raspberrypi:~# vi /etc/wpa_supplicant/wpa_supplicant.conf
Add this block below the original lines, using your settings. _SSID_ for the ID of the 2.4GHz network you are connecting too, and _NETWORK_PASS_ will be the plain-text password for that network. NOTE: For more security you can configure this block to use an encrypted password. That is beyond the scope of this basic tutorial; there are many pages that detail that process if you want to implement it.
network={
        ssid="_SSID_"
        psk="_NETWORK_PASS_"
}
Save this file, restart networking, signal a daemon reload, and then, reboot of the device. Once the networking is back up, check to make sure you are able to contact the machine via it’s WiFi connection.
After 2-3 Min. the Pi should have completed restarting and you should be able to verify a successful WiFi login. IngeniiGroup:STRATUX$ ssh pi@192.168.1.210
Increasing Root Filesystem Space
By default, the size of the disk partitions on the image is VERY small; less than 2GB. Most of that space is used by by the base Stratux install, leaving about 400MB of space to save logs (and your replay database if you turn it on). You can see this with the ‘df’ command:
This just isn’t enough space, especially for the ‘/var/log’ directory where a lot of transient/logging data is written. My solution is to create a disk partition and mount it to `/var/log`.
Locate the disk device
Instructions on the web are not exactly correct, some suggest /dev/sda as the main device, however my testing shows it’s actually this named ‘/dev/mmcblk0’. root@raspberrypi:~# fdisk -l | grep Disk [...] Disk /dev/mmcblk0: 14.5 GiB, 15523119104 bytes, 30318592 sectors
… with the following partitions:Device Boot Start End Sectors Size Id Type /dev/mmcblk0p1 8192 131071 122880 60M c W95 FAT32 (LBA) /dev/mmcblk0p2 131072 3887103 3756032 1.8G 83 Linux
Running fdisk
With the physical partition located.. start fdisk: fdisk -u /dev/mmcblk0
Welcome to fdisk (util-linux 2.25.2). Changes will remain in memory only, until you decide to write them. Be careful before using the write command.
First, order of business is to increase the size of the main partition, to give it a big more room than just 1.8GB. I like to bump it up to around 4GB to leave room for installing more system updates and tools. To do this you will need to know the starting and ending blocks of the partition. That is available with the ‘print’ command: Command (m for help): p
Disk /dev/mmcblk0: 14.5 GiB, 15523119104 bytes, 30318592 sectors Units: sectors of 1 * 512 = 512 bytes Sector size (logical/physical): 512 bytes / 512 bytes I/O size (minimum/optimal): 512 bytes / 512 bytes Disklabel type: dos Disk identifier: 0xe6a544c8
Device Boot Start End Sectors Size Id Type
/dev/mmcblk0p1 8192 131071 122880 60M c W95 FAT32 (LBA)
/dev/mmcblk0p2 131072 3887103 3756032 1.8G 83 Linux
Now delete the partition. Yes.. feels VERY dangerous.. and it is.. but as long as the starting block is maintained, and the end block number is increased.. this will end up being a safe operation. Verify that you targeted the correct partition by using ‘p’ again: Command (m for help): d Partition number (1,2, default 2): 2
Partition 2 has been deleted.
Command (m for help): p Disk /dev/mmcblk0: 14.5 GiB, 15523119104 bytes, 30318592 sectors Units: sectors of 1 * 512 = 512 bytes Sector size (logical/physical): 512 bytes / 512 bytes I/O size (minimum/optimal): 512 bytes / 512 bytes Disklabel type: dos Disk identifier: 0xe6a544c8
Device Boot Start End Sectors Size Id Type
/dev/mmcblk0p1 8192 131071 122880 60M c W95 FAT32 (LBA)
If this is correct, now recreate it with same number (2), start and type but with a bigger end (taking care not to overlap with other partitions). Try to align things on a megabyte boundary that is for end, make it a multiple of 2048 minus 1. Change the type if needed with t (for partitions holding an extX or btrfs filesystem, the default of 83 is fine). Then `w` to write and `q` to quit. Command (m for help): n Partition type p primary (1 primary, 0 extended, 3 free) e extended (container for logical partitions) Select (default p): p Partition number (2-4, default 2): 2 First sector (2048-30318591, default 2048): 131072 Last sector, +sectors or +size{K,M,G,T,P} (131072-30318591, default 30318591): 8451072
Created a new partition 2 of type ‘Linux’ and of size 4 GiB.
Command (m for help): w The partition table has been altered. Calling ioctl() to re-read partition table. Re-reading the partition table failed.: Device or resource busy
The kernel still uses the old table. The new table will be used at the next reboot or after you run partprobe(8) or kpartx(8).
root@raspberrypi:~#
The partition table will have been modified but the kernel will not be able to take that into account as some partitions are mounted.
However, if in-use partitions were only enlarged, you should be able to force the kernel to take the new layout with: root@raspberrypi:~# partx /dev/mmcblk0 NR START END SECTORS SIZE NAME UUID 1 8192 131071 122880 60M e6a544c8-01 2 131072 8451072 8320001 4G e6a544c8-02
If the command works the next step is to expand the filesystem. In my case I needed to reboot before the kernel picked up the new partition size, despite running partx to fill up this new space. root@raspberrypi:~# init 6
Following the restart, execute `resize2fs` and run an on-line expansion of the filesystem, and finally verify it again with ‘df -h’ root@raspberrypi:~# resize2fs /dev/mmcblk0p2 resize2fs 1.42.12 (29-Aug-2014) Filesystem at /dev/mmcblk0p2 is mounted on /; on-line resizing required old_desc_blocks = 1, new_desc_blocks = 1 The filesystem on /dev/mmcblk0p2 is now 1040000 (4k) blocks long.
The next step is to add a 3rd partition which will then be mounted to `/var/log`
Creating a dedicated filesystem for logging / database
I ended up creating 3 primary partitions, the largest of which will be mounted to `/var/log`. fdisk /dev/mmcblk0
Command (m for help): n Partition type p primary (2 primary, 0 extended, 2 free) e extended (container for logical partitions) Select (default p): p Partition number (3,4, default 3): 3 First sector (2048-30318591, default 2048): 8451073 Last sector, +sectors or +size{K,M,G,T,P} (8451073-30318591, default 30318591): 30318591
Created a new partition 3 of type ‘Linux’ and of size 10.4 GiB.
Command (m for help): w The partition table has been altered. Calling ioctl() to re-read partition table. Re-reading the partition table failed.: Device or resource busy
The kernel still uses the old table. The new table will be used at the next reboot or after you run partprobe(8) or kpartx(8).
root@raspberrypi:~# partprobe
Checked to make sure the device was crated by checking the `/dev` directory: root@raspberrypi:~# ls -l /dev/mmcblk0* brw-rw---- 1 root disk 179, 0 May 15 15:11 /dev/mmcblk0 brw-rw---- 1 root disk 179, 1 May 15 15:11 /dev/mmcblk0p1 brw-rw---- 1 root disk 179, 2 May 15 15:11 /dev/mmcblk0p2 brw-rw---- 1 root disk 179, 3 May 15 15:11 /dev/mmcblk0p3
Next, put a filesystem on this new partition. Using df to determine the type of filesystem currently in use; I recommend that you stick with it for this most basic of operations: root@raspberrypi:~# df -T
Run mkfs to initialize the filesystem. /sbin/mkfs -t ext4 /dev/mmcblk0p3
Creating filesystem with 2733439 4k blocks and 684096 inodes Filesystem UUID: 94f004af-7008-4dbe-8805-3eb2d739436b Superblock backups stored on blocks: 32768, 98304, 163840, 229376, 294912, 819200, 884736, 1605632, 2654208
Allocating group tables: done
Writing inode tables: done
Creating journal (32768 blocks): done
Writing superblocks and filesystem accounting information:... this might go on for a bit..
Once completed.. mount this where the logs and databases live. To do this the first thing that needs to happen is to check your current fstab: cat /etc/fstab proc /proc proc defaults 0 0 /dev/mmcblk0p1 /boot vfat defaults 0 2 /dev/mmcblk0p2 / ext4 defaults,noatime 0 1 # a swapfile is not a swap partition, no line here # use dphys-swapfile swap[on|off] for that
My first order of business was to copy the current `/var/log` to a new location, create a new clean mount point for `/var/log` and then mount the new filesystem, and then verify it’s mounted using `df -h` root@raspberrypi:~# mv /var/log /var/log2 root@raspberrypi:~# mkdir /var/log root@raspberrypi:~# mount -t ext4 /dev/mmcblk0p3 /var/log root@raspberrypi:~# df -h Filesystem Size Used Avail Use% Mounted on /dev/root 3.9G 1.4G 2.4G 36% / devtmpfs 459M 0 459M 0% /dev tmpfs 463M 0 463M 0% /dev/shm tmpfs 463M 6.2M 457M 2% /run tmpfs 5.0M 4.0K 5.0M 1% /run/lock tmpfs 463M 0 463M 0% /sys/fs/cgroup /dev/mmcblk0p1 60M 20M 41M 34% /boot /dev/mmcblk0p3 11G 27M 9.6G 1% /var/log
Edit the fstab file to create a mount point for the new partition where the logs used to be written (added the orange line), and ran mount to verify that it will automount on a restart. root@raspberrypi:~# vi /etc/fstab
proc /proc proc defaults 0 0 /dev/mmcblk0p1 /boot vfat defaults 0 2 /dev/mmcblk0p2 / ext4 defaults,noatime 0 1 /dev/mmcblk0p3 /var/log ext4 defaults,noatime 0 0 # a swapfile is not a swap partition, no line here # use dphys-swapfile swap[on|off] for that
root@raspberrypi:~# mount -a
Restart and verify
Restart the little box and verify that the mount was preserved. init 6
Log back in, and run df to check the filesystem health. It should now has the the main filesystem has some breathing room again: pi@raspberrypi:~ $ df -h Filesystem Size Used Avail Use% Mounted on /dev/root 3.9G 1.4G 2.4G 36% / devtmpfs 459M 0 459M 0% /dev tmpfs 463M 0 463M 0% /dev/shm tmpfs 463M 6.2M 457M 2% /run tmpfs 5.0M 4.0K 5.0M 1% /run/lock tmpfs 463M 0 463M 0% /sys/fs/cgroup /dev/mmcblk0p1 60M 20M 41M 34% /boot /dev/mmcblk0p3 11G 27M 9.6G 1% /var/log
Setting Time with NTPD
If you do not have a GPS receiver attached to your Stratux, then it might not be able to determine proper system time. When this is the case, enabling ntpd will be your solution. Using national time sync services, it will keep your system clock correct. If you have your GPS plugged in, it’s getting really good timing signals already.. or the location function would not work at all! For the non GPS users:
Install ndptdate: root@raspberrypi:~# apt-get install ntpdate Reading package lists... Done Building dependency tree Reading state information... Done [...] Do you want to continue? [Y/n] Y Get:1 http://mirrordirector.raspbian.org/raspbian/ jessie/main liblockfile-bin armhf 1.09-6 [18.2 kB] Get:2 http://mirrordirector.raspbian.org/raspbian/ jessie/main liblockfile1 armhf 1.09-6 [14.7 kB] Get:3 http://mirrordirector.raspbian.org/raspbian/ jessie/main ntpdate armhf 1:4.2.6.p5+dfsg-7+deb8u2 [69.0 kB] [...] Setting up ntpdate (1:4.2.6.p5+dfsg-7+deb8u2) ... Processing triggers for libc-bin (2.19-18+deb8u3) ...
It should now start at bootup and resolve any timing issues you might have.
Update your Pi with the latest updates and security patches
Some might remember “Black Friday” when a worm created some serious disruption in the tech world.. including at hospitals in the UK. And it happened primarily because people are not applying their security patches! Although the risk of your Pi being botified and ransomed my not be high.. you should be updating it regardless! So, let’s do that now. root@raspberrypi:~# apt-get install ntpdate root@raspberrypi:~# apt-get dist-upgrade
Finish up with this command to clean up some of the used disk space. Since you’ve already bumped the numbers on your partitions in the previous steps.. this is not nearly as necessary, but why leave unused stuff lying around? Your mother taught you to clean up afteryourself, right? root@raspberrypi:~# sudo apt-get clean
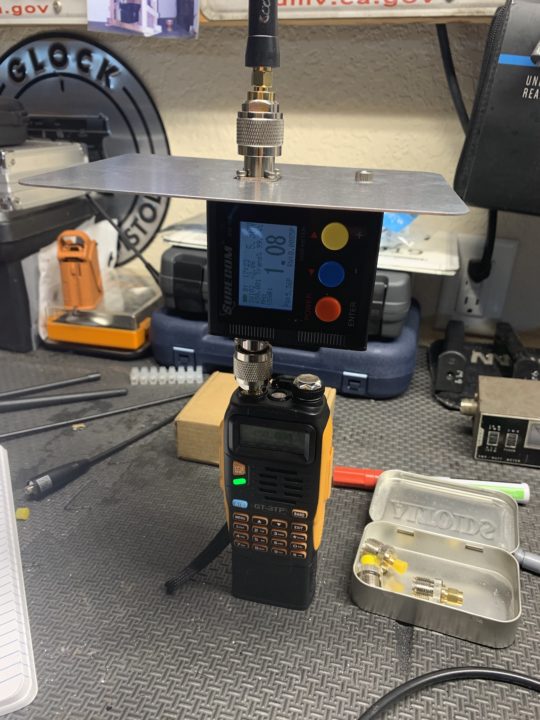
I recently acquired a new wide-band SWR meter from Amazon, and I wanted to revisit the antenna tests I’d run in the past with my old 70’s 11m test equipment.
So, today I got together all of my the rubber-duck dual-band antennas, picked one of my ChiComm radios and took some measurements.
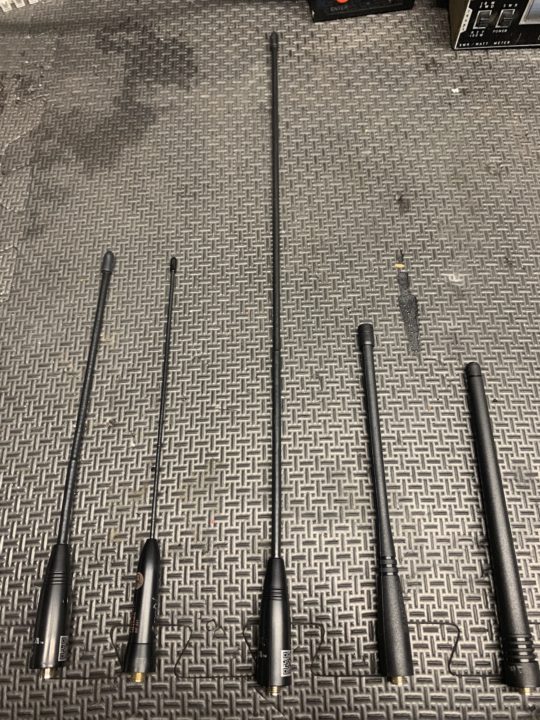
Here are the antennas I tested (left to right).
Nagoya NA-701
SaineSonic INF-641
Nagoya NA-771
Baofeng stock (long)
Baofeng stock (short)
Here are the results for my test. I ran each antenna 3 times in each band; at the lower phone boundary, upper phone boundary and close to the center of the band.
VHF Lo – 144.1 MHz
UHF Low – 420.0 MHz
VHF Center – 146.0 MHz
UHF Center – 435.0 MHz
VHF High – 148.0 MHz
UHF High – 450 MHz
Antenna
VHF(l)
VHF(c)
VHF(h)
UHF(l)
UHF(c)
UHF(h)
NA-701
2.19:1
1.83:1
2.44:1
2.18:1
1.17:1
1.31:1
INF-641
1.79:1
1.09:1
1.37:1
1.08:1
1.02:1
1.77:1
NA-771
2.39:1
2.20:1
2.21:1
2.08:1
1.16:1
1.97:1
Stock (L)
1.59:1
1.03:1
1.02:1
2.07:1
1.07:1
1.15:1
Stock (S)
2.76:1
2.18:1
1.79:1
1.09:1
1.59:1
1.70:1
I was really surprised by how well (from an SWR standpoint) the little SaineSonic that came with my GT-3TP was. I was also shocked at how bad the two Nagoyas seemed to be. There was a 6th antenna (not stock, or Nagoya) that was in the 3:1+ range across all the bands. Either it was damaged, a fake.. or maybe they are simply garbage.
These tests are hardly scientific. I did, however, hold the radios in free space away from me, instead of testing them on the bench surrounded by metallic objects.. for those about to try and drop some truth bombs on me.
Once I figure out a fair rig to install the antennas into, I’ll hook up my little nanoVNA and see what it has to say. Could confirm these results, or it could say something completely different. What I’d like to see from the nanoVNA are some gain estimates. The little antennas might match well, but do they also have good gain; that is an important question.
Working in the Search sector for nearly a decade now, it would seem like this is an easy question to answer. However, to a degree, it is not. Why can it be such a vexing concern? As simply put as I can; it’s all in the context of the search, not so much the content.
You can (and should) build the more beautifully indexed body of content imaginable, but without relevance applied to a search, it’s use is limited at best. Identifying the context of the search is critical to determining the relevancy of the results.
A good example from a book recently read, illustrated the importance of relevancy signals to search. Take the case of two doctors searching the term ‘myocardial infarction’.
Doctor #1 is in his office, looking for recent research into the causes of sudden death from heart attacks. He’s most interested in the latest articles regarding predictive signals or other metrics that might more accurately predict the likelihood of an event in his patients.
Doctor #2 is in the ER, faced with a perplexing acute MI; and is in need of a procedure that will stabilize the patient as rapidly as possible. Perhaps there is a new class of drugs that can help, and he needs to know how to administer them, quickly, or even know if his facility caries the desired drug.
Both of these physicians may be searching on the same term, but they needs are strikingly different. Giving each of these doctors the right (relevant) results quickly can only occur with the application of signals. Signals might include the location of the search? Is it coming from a network in the ER, or the subnet in the offices? Are their other signals such as which doctor may be making the search? Some doctors are assigned to ERs, others may not ever rotate through. These are all signals that can impact the relevancy of a search.
So, how does the search engine know the context? It needs to be fed the signals so it can calculate the relevancy of each result to the search being conducted. These signals need to be identified and provided by an intervening layer that understands the context of the search. That context might be the geolocation or known assignment, or even the past search history of a specific user that includes information on which links they more often explore. All of these are signals that can be expressed to a search engine (or appliance) to improve relevancy.
How might these signals be expressed? Some examples, if I might diverge down a rabbit hole related to my own decade or so experience with Solr, would be applying boost formulas to specific fields containing results stored in certain fields or term sets in the body of content.
Perhaps for the ER doctor, documents with a field property of medical_procedure:myocardial medical_procedure:infarction would boost the score by a major factor, pushing how-to or other information to the top of the list.
In opposition to that, the other doctor’s search might look at boosting publication date (more recent, more boost) and other fields such as a flag indicating the content is research (e.g. research:true article:true). The way relevancy can be identified and improved will always require the application of some signals, of one type or another.
Other examples of signals that can be applied, might originate from the content curator. Any good search application needs to have SMEs (subject mater experts) and content curators continually updating the data and reviewing the results. Something a curator might do is apply a boost factor for products that are currently on sale, or have a ‘most popular’ rank that has recently changed. Maybe the product is over-stocked, or perhaps it was just discontinued. The curator is a critical pat of the relevancy solution. It can’t be left solely on the shoulders of the search engineering team to ‘guess’ that is relevant today, and what is not.
There needs to be a concentric circle of needs, so to speak, when considering the factoring and refactoring of the search (relevancy) solution. The layers (outer to inner) of this concentric feedback look might look like this.
Poor feedback / upset users / lost sales
Business and domain awareness
Content curation
Paired relevance tuning
Test-driven relevance.
The Takeaway
More important to a good search solution, and thus a good customer experience is a TEAM of people looking at the changing relevancy of content, tuning to meet the most urgent business and customer needs, and method of signaling the context of a search to ensure the most relevant results are returned, every time.
Dictionary of active ports found on a typical STRATUX ADS-B device.
Running nmap, between ports 100 and 48000, the following ports were found to be open on my STRAUX receiver:
Nmap scan report for 192.168.1.200

Host is up (0.0037s latency).

Not shown: 47892 closed ports

PORT      STATE SERVICE

8080/tcp  open  http-proxy

9977/tcp  open  unknown

30001/tcp open  pago-services1

30002/tcp open  unknown

30003/tcp open  unknown

30004/tcp open  unknown

30005/tcp open  unknown

30006/tcp open  unknown

30104/tcp open  unknown
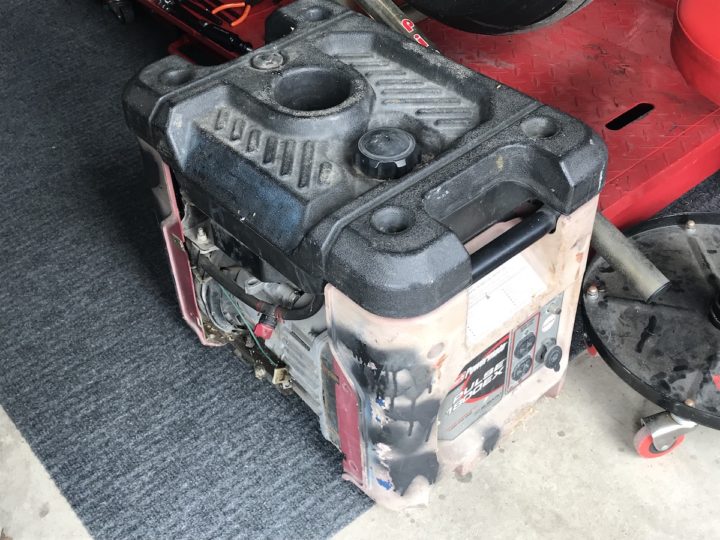
I’m not sure if this is a Southern thing, but in the non-owner neighborhood we live in, when people move out they seem to leave a lot of old junk on the curb in the hopes someone else will repurpose it. Perhaps they just don’t want to pay the feeds to have the junk hauled off. But not all of this is a bad thing, and that’s how I came to own my first Subaru.
A few weeks hence, while drinking a dram of some of Scotland’s finest Water of Life, I spied some boxy looking thing a couple of doors down the street, where a couple (or what was actually left of a couple) was moving out. Whatever it was, it looked like it had caught fire and was ready for an unceremonial dumping into the trash.
The thing languished on the curb for some time, and curiosity got the best of me. Upon inspection of this trash, I discovered that it was a generator, exactly the type of generator and capacity for a good day at the race track.
With the pull-cable hanging out, spots of black spray paint adorning the faded plastic ends, panels hanging off, and parts clearly missing, it was no prize. But grab it I did. Having recently watched some YouTube videos on restoring generators to working order I felt emboldened to take on a project. Besides, my daily work is in the cyber world and tasking myself with tangible project was a nice respite. Grunting and groaning at 3:00 AM, I hauled the wreck back to my garage and closed the door on my new project until the next morning.
Upon completion of my weekly day-job obligations, I changed clothes and set to examining this pile of junk that more assuredly would end up out on my curb by week’s end.
It was quickly appearant that the primary issue with the pull cable was the faded plastic end housing had cracked around the opening where the cable existed and was holding it fast. After some effort, the cable was freed from the housing, and with a pull I heard the sweet sweet sound of a small engine trying to puff to life. It wasn’t seized, it had compression and the pull start mechanism as in tact. At this point some excitement began to emerge… this just might be salvageable!
The next couple of hours involved removing many semi-fixed and rusted screws, panels and the plastic gas tank. Thank goodness it was plastic and not metal, I had no worries about rust! Once I had the remaining panels removed, it was then that I discovered that this was not some typical Chinese junk-pile motor in the generator. Instead it was clearly marked as an OHC (overhead camshaft) engine made by Subaru. This was a choice acquisition in deed! Even if I could not resurrect the electronics, this engine had value that far exceeded the appropriation cost of a short walk down the street.
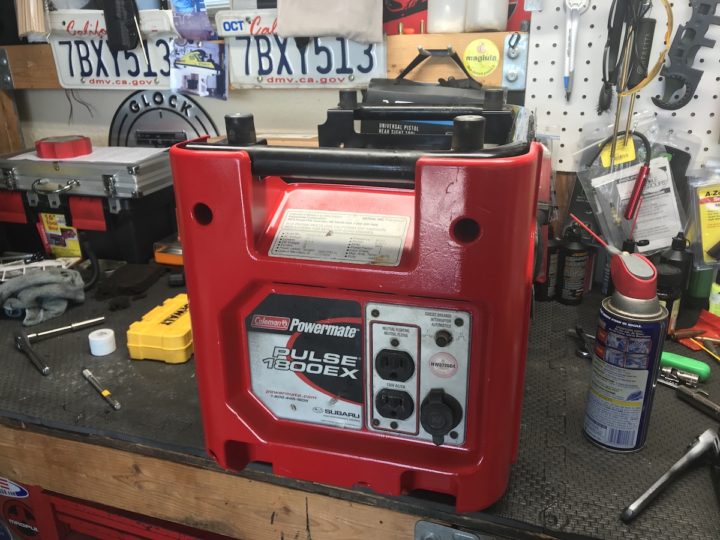
Next order of business was to pull the spark plug and check for spark. After some fiddling around in the old tool box for the right spark plug removal tools, I had removed it to find the plug clean and free of rust. Things were looking better and better!
Placing the plug against the cylinder head and pulling the now freed pull start cable, a weak but detectable spark was seen. Yes.. this is going swimmingly. Two of three basic engine requirements satisfied. This seemed to have good compression and it makes spark. All I needed to do now was feed it some fuel and see if there was anything home! Just a quick shot of starting fluid answered that question too, as it briefly sputtered to life. Time to invest a little money in this project.
Over the next couple of days, I washed out, drained and dried the fuel tank, which was full of what looked like rocks. How or why those got in there is still a mystery to me, but I had some success in clearing them and the water out. While that progressed I spent $5 on a can of red paint, $4 on a can of TruFuel and another $5 on a fuel filter to prevent damage to the carburetor from anything I failed to remove from the gas tank.
After improving the aesthetics with some paint, and cleaning out all the nooks and crannies with the trusty air compressor, my first Subaru was ready for re-assembly.
With some pride and a solid sense of accomplishment, I summed the family to observe what I hoped would be a successful startup. With a single pull the generator sprang to life, and I’d further cemented my reputation as the fix-it-dad.
The little red Subaru now lives in the garage next to my other generator, waiting for a new job to do.
This is generally a simple process to install CapserJS on a *NIX box, but had not done this on a Raspberry Pi before, and ran into a couple of minor gotchas. This is a stripped down explanation of what I needed to do, but it will server as a reference for me, and maybe for some other people as well.
Prerequisites for installing CapserJS
Node
npm
PhantomJS
Node
Installing node is very simple, but you should grab root access to do it. This should be simple and run without any issues.
apt-get install nodejs
npm
The Node Package Manager will be used later to actually install CasperJS, once PhantomJS has been successfully installed.
apt-get install npm
PhantomJS
PhantomJS is a web automation framework, that CasperJS uses to run it’s extended suite of tools. NOTE. I found that I needed to modify my user’s (pi in this case) environment to tell Phantom that not to expect a console for rendering webpages; I’ll document that at the bottom.
apt-get install phantomjs
CasperJS
Installing CasperJS is done most simply via the npm (Node Package Manager):
npm install -g casperjs
Handling the PhantomJS Display Error
pi@raspberrypi:~ $ casperjs QXcbConnection: Could not connect to display
PhantomJS has crashed. Please read the bug reporting guide at and file a bug report.
Aborted
The fix is to add this line to the .bashrc file, which will stop the error. I simply added this to the last line of the file.
export QT_QPA_PLATFORM=offscreen
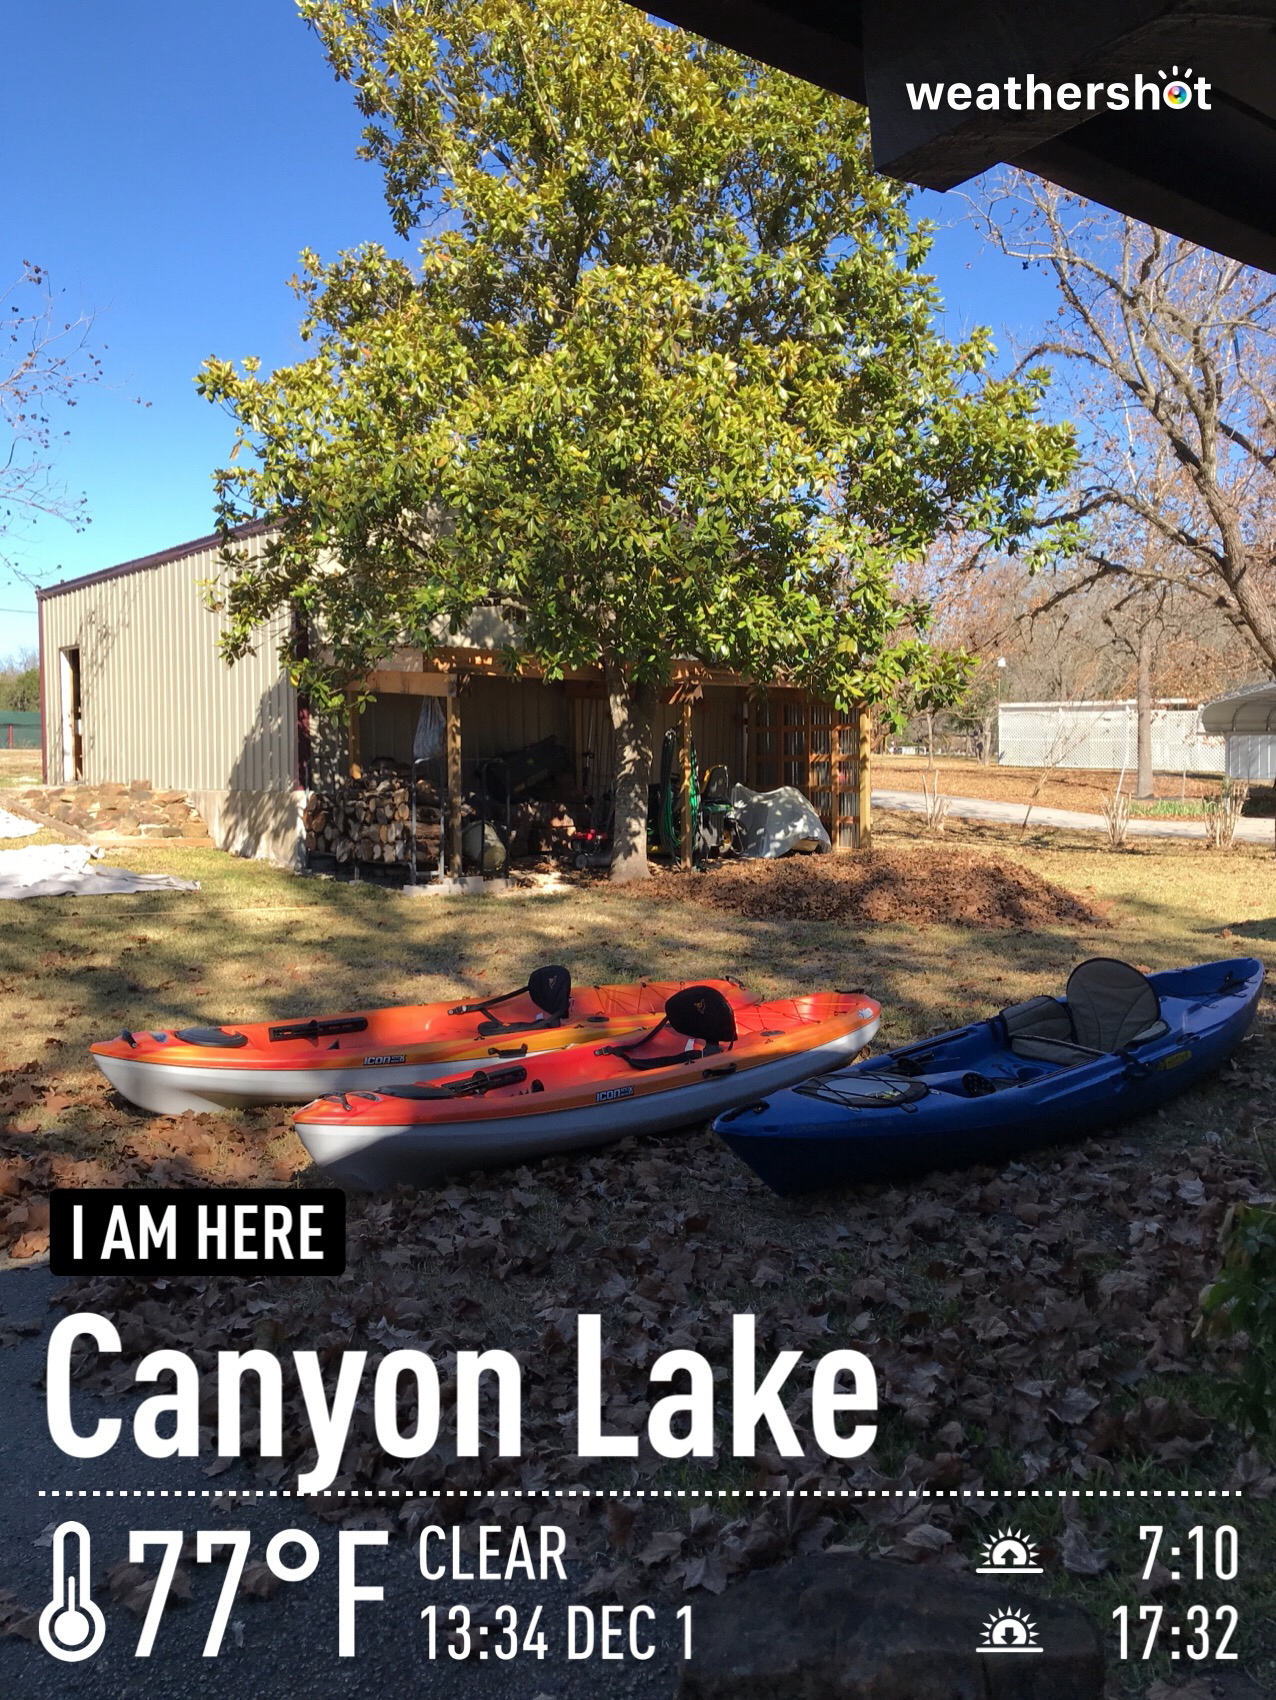
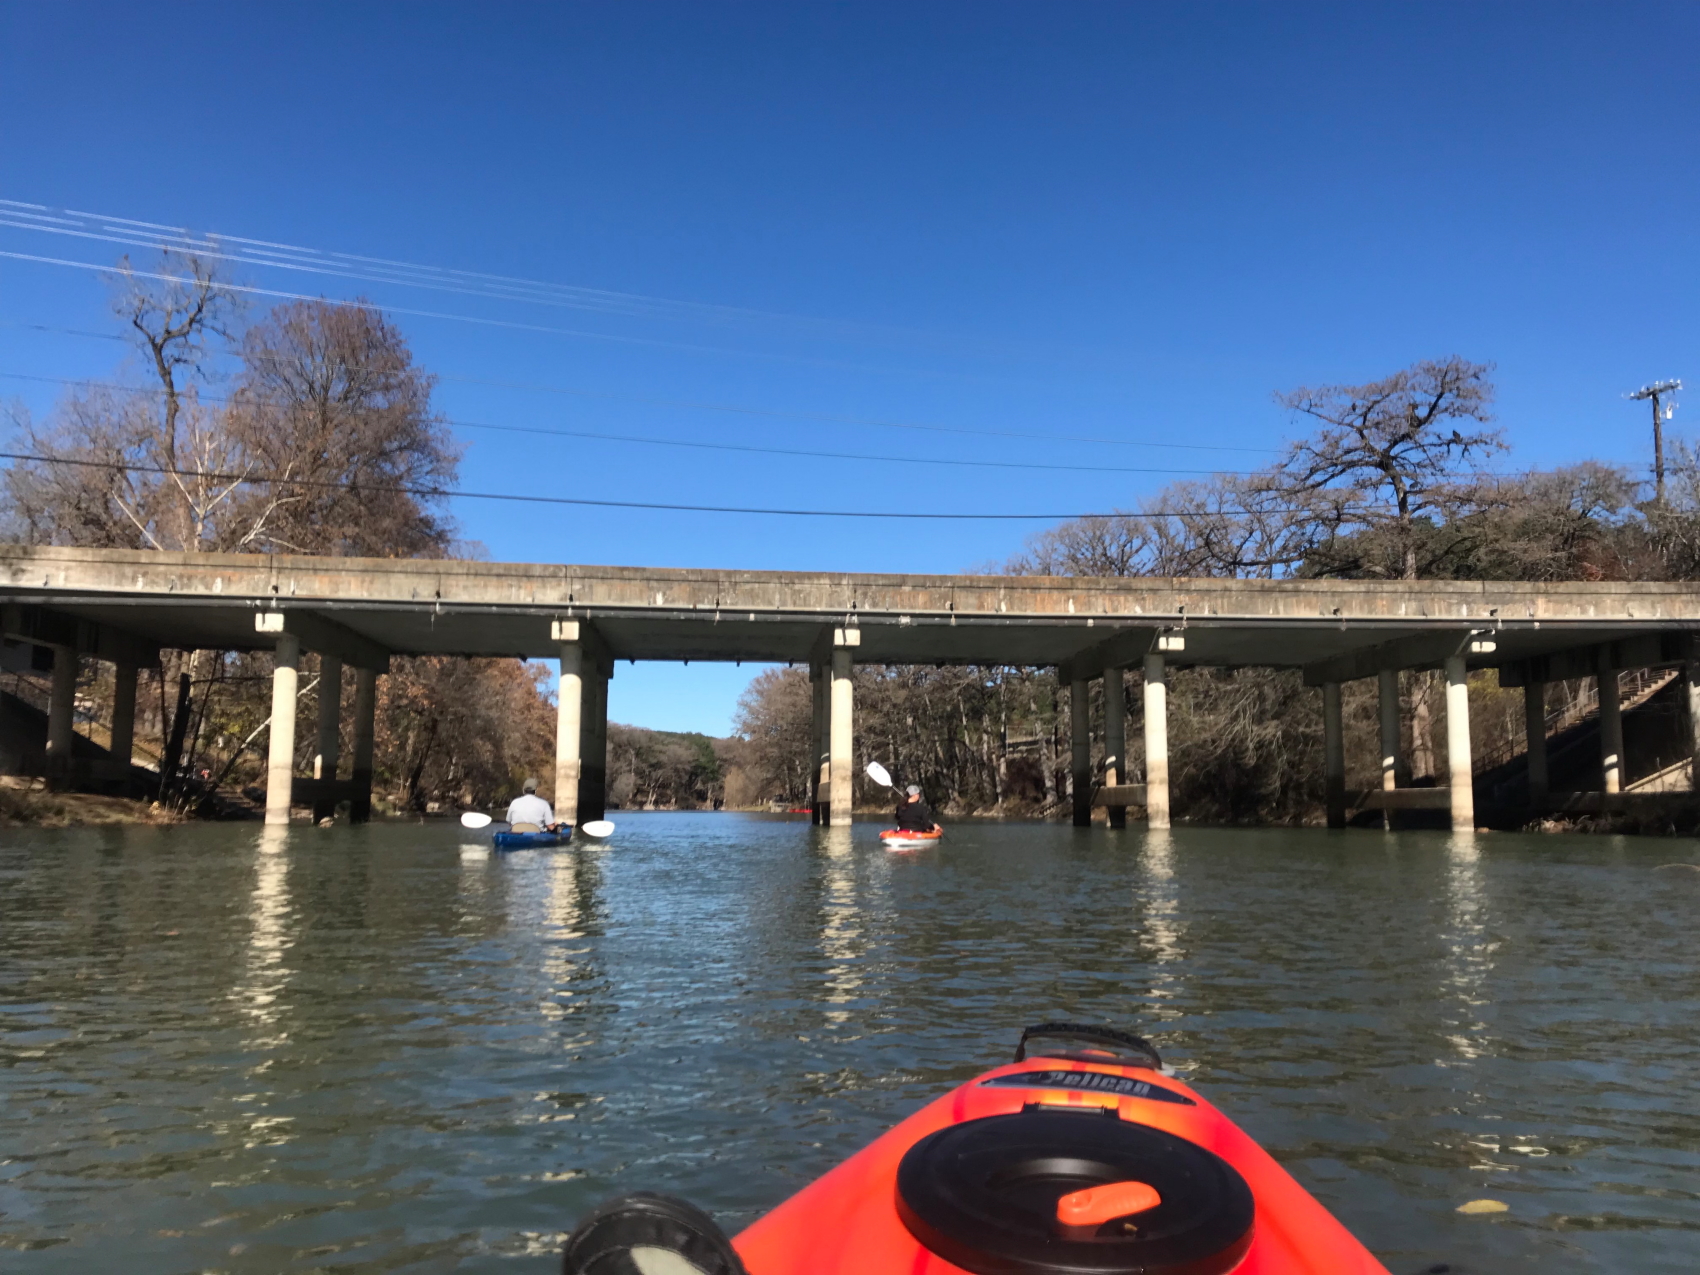
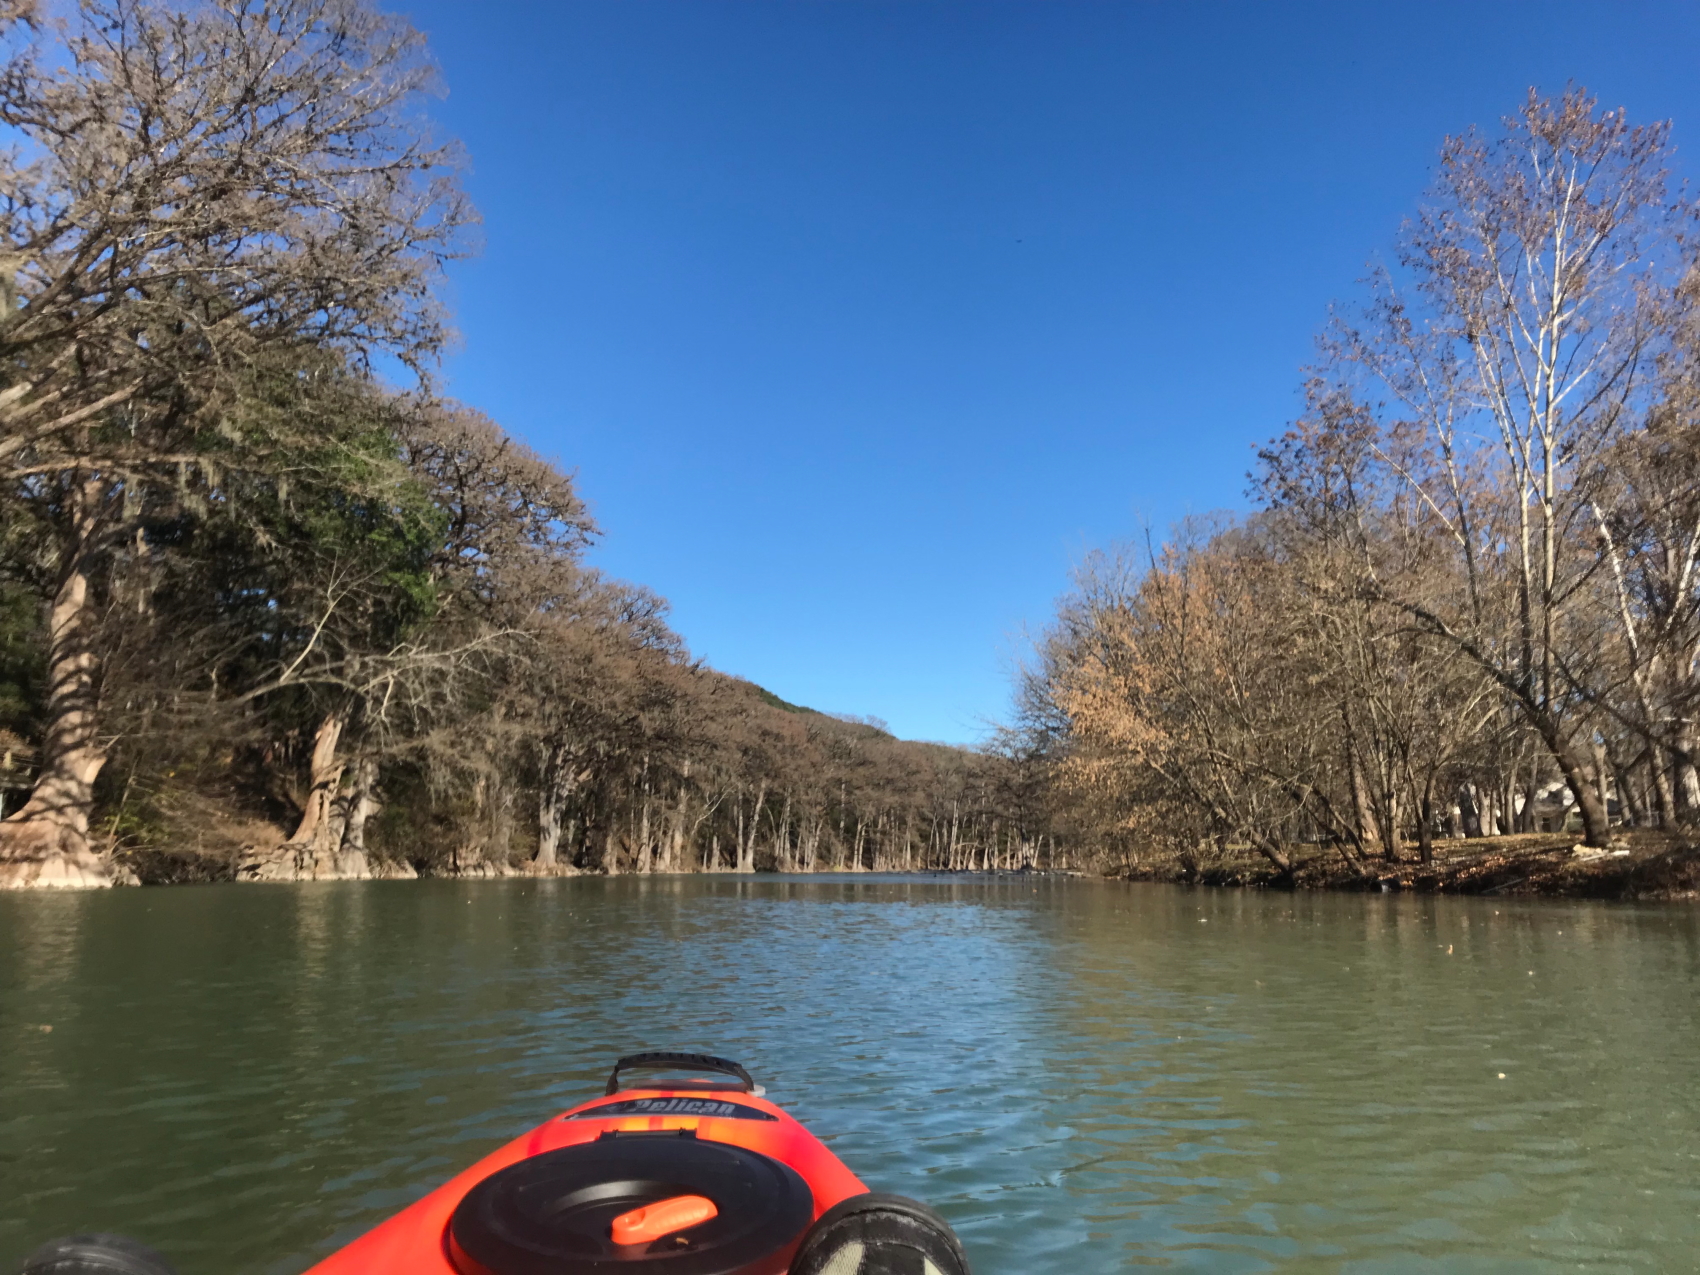
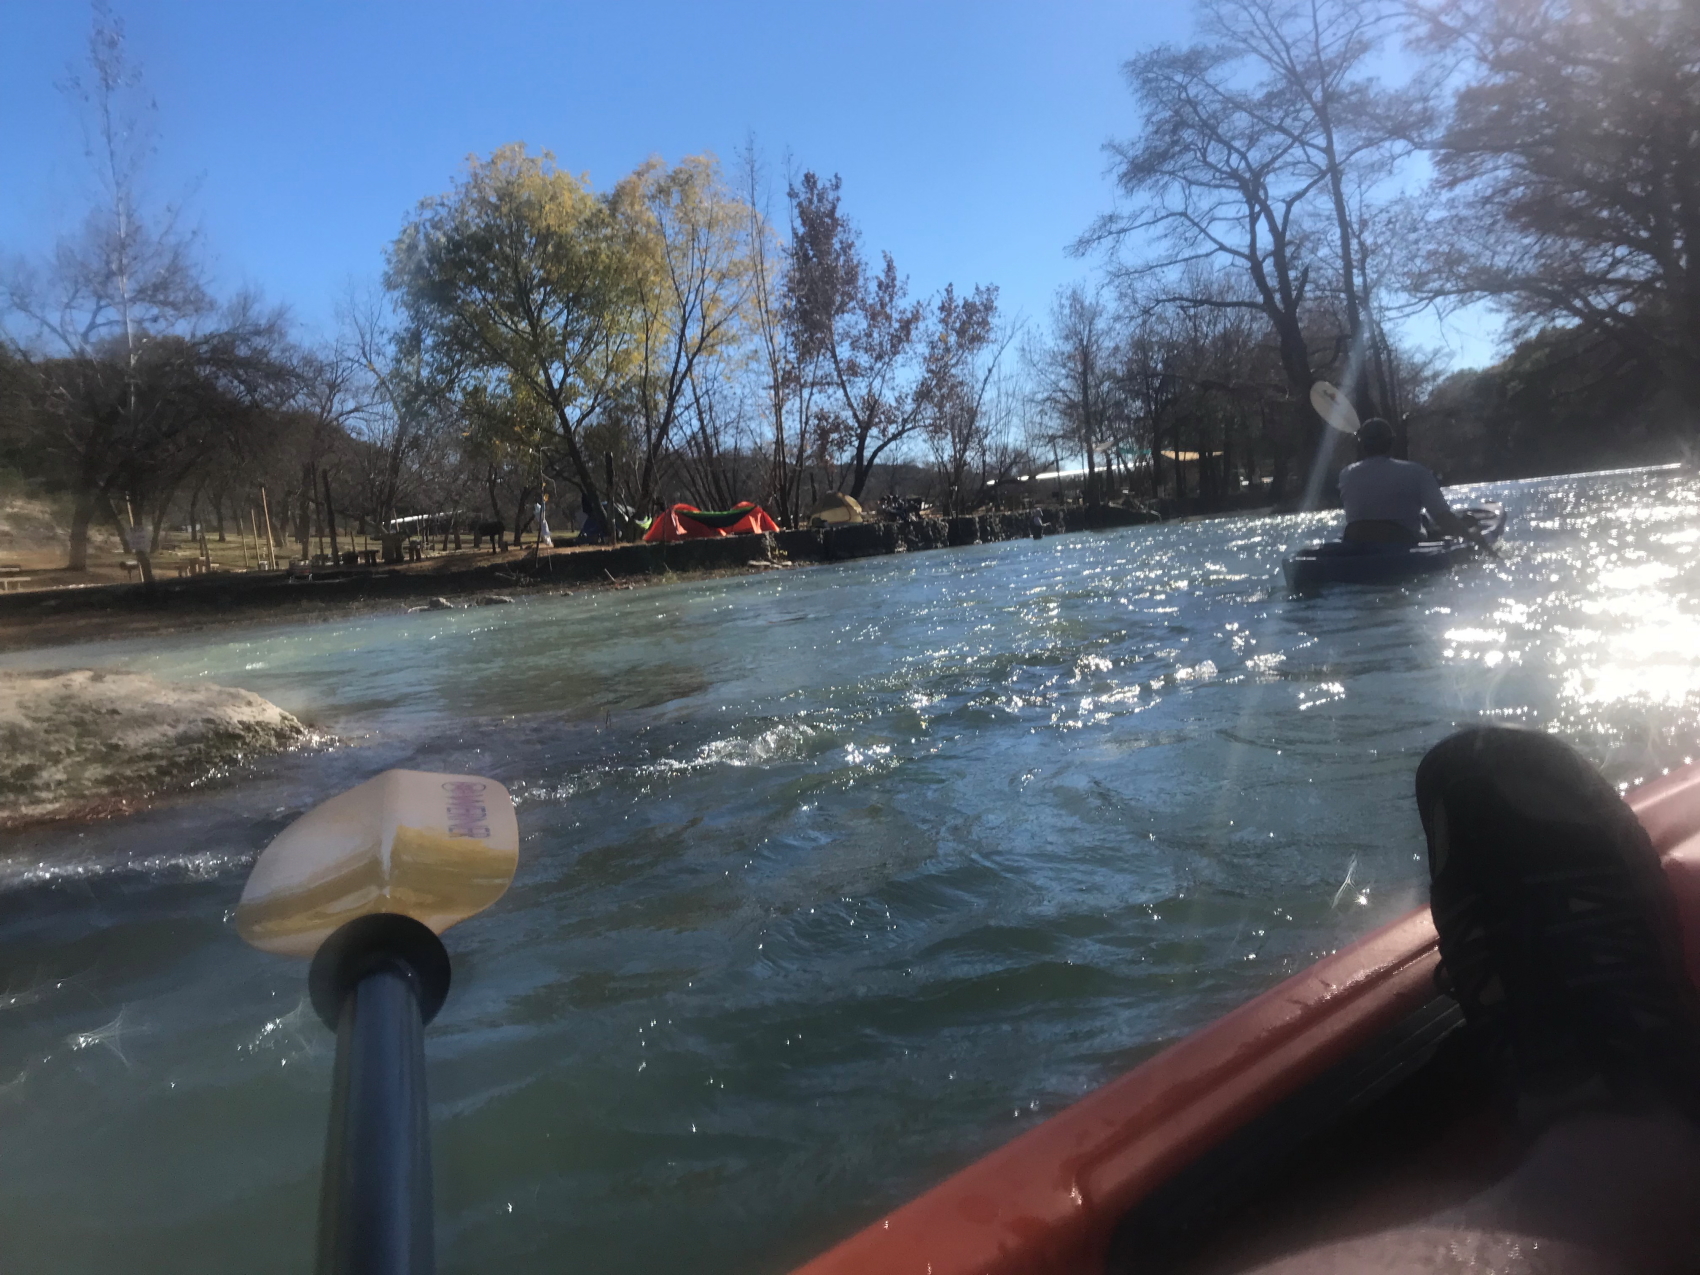
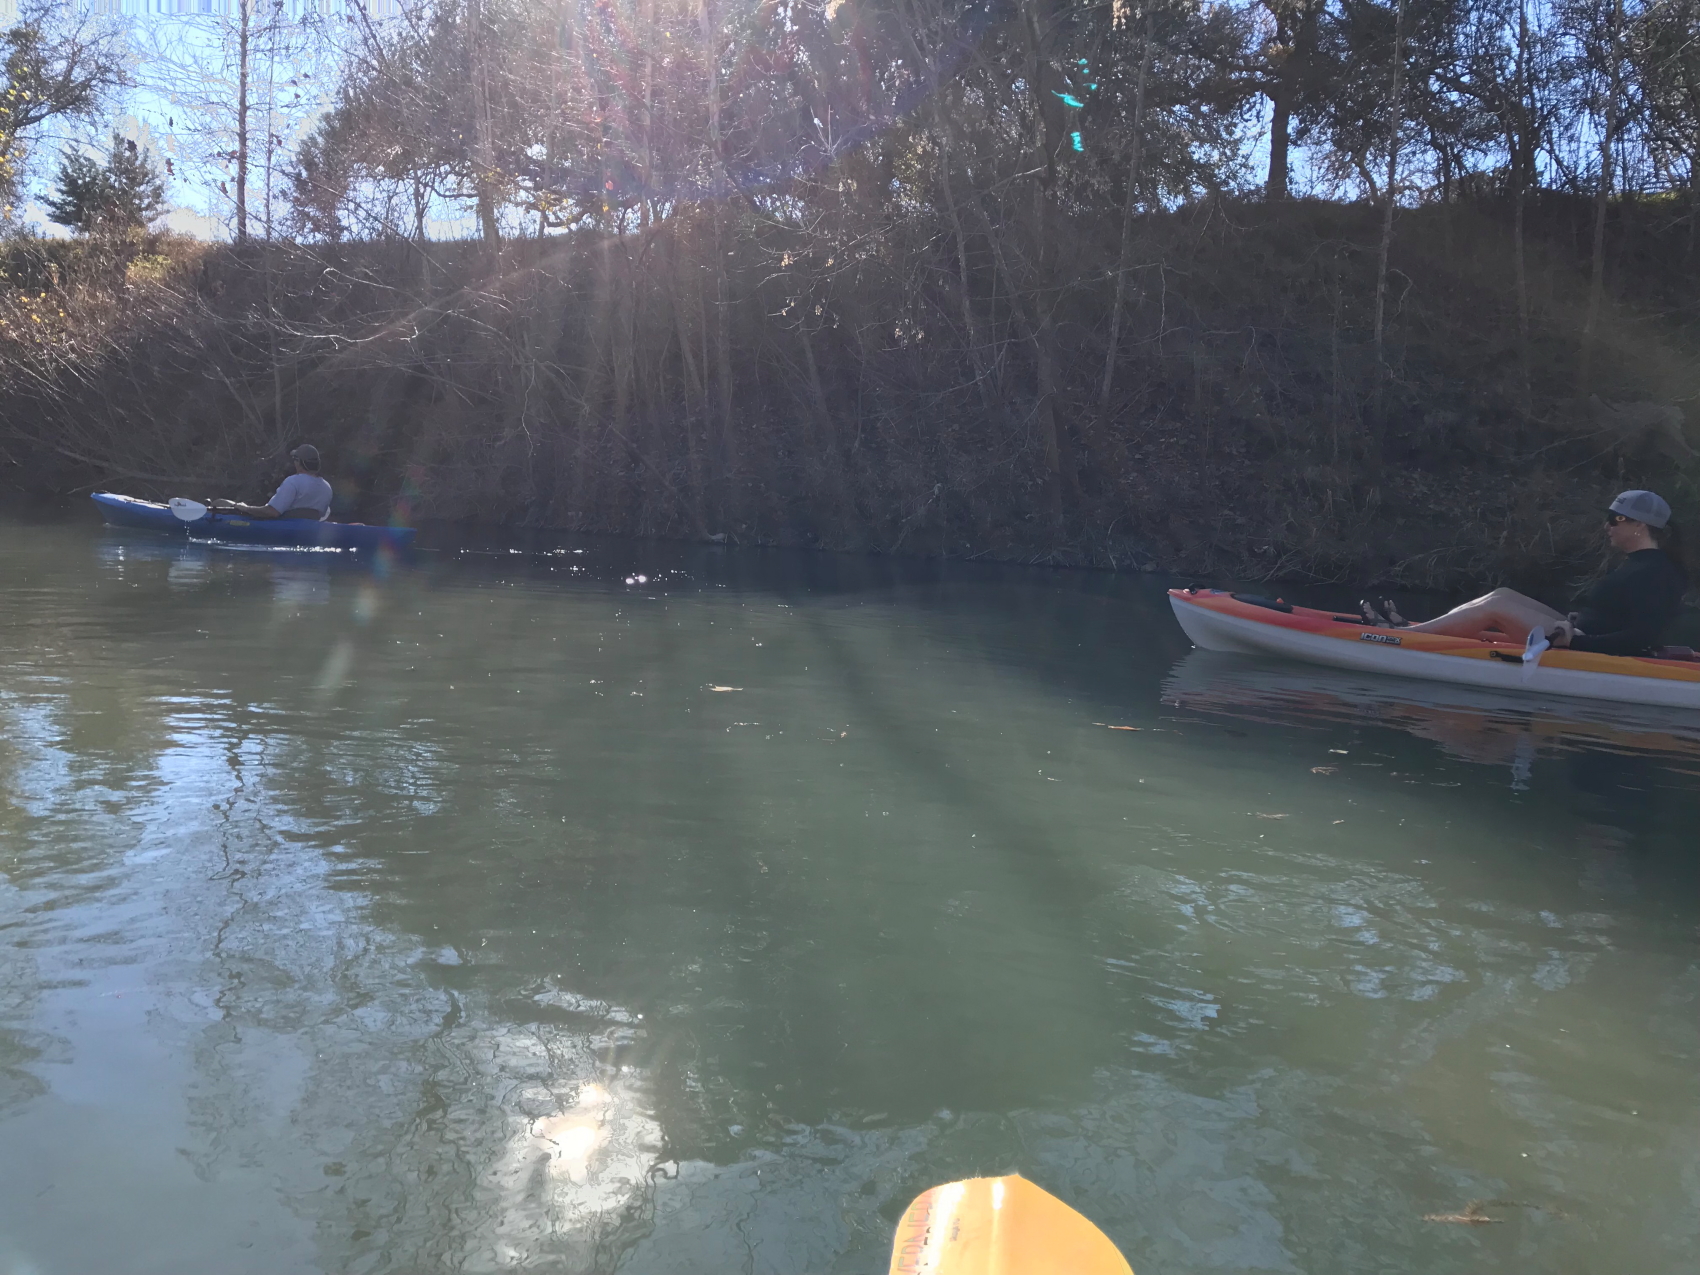
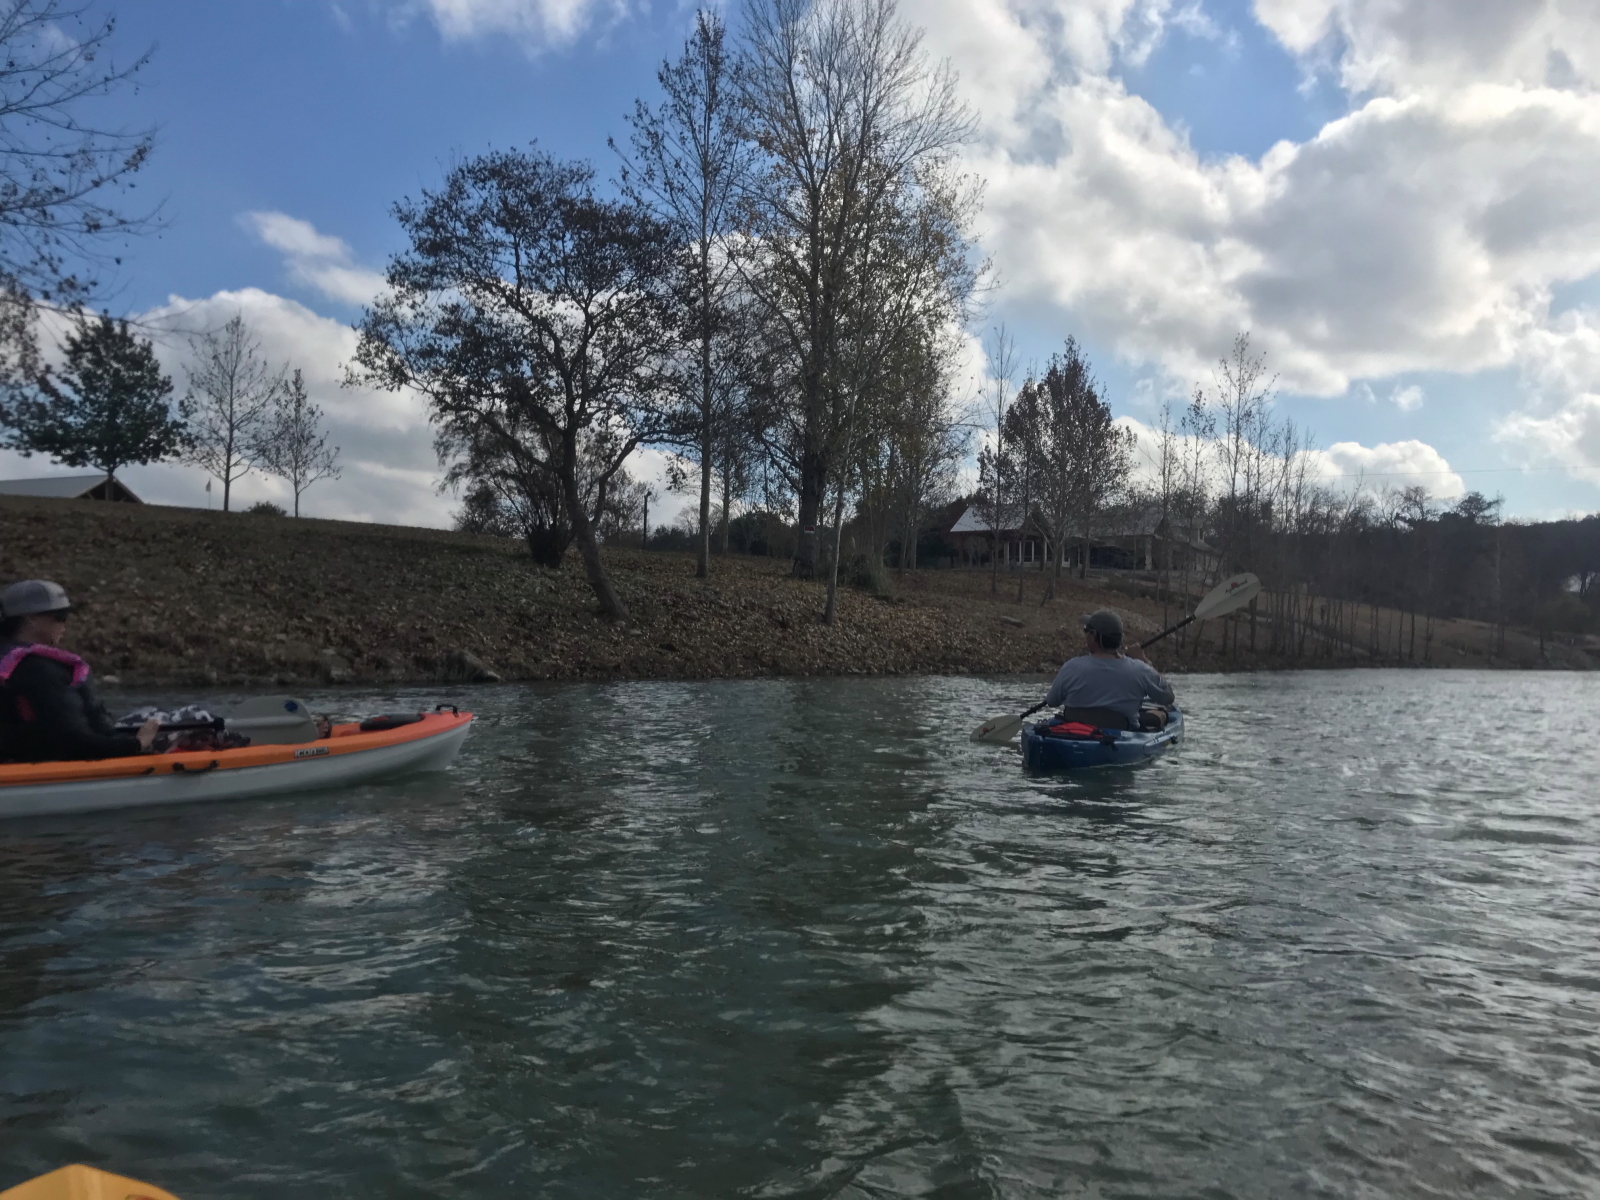
Following up on Friday’s shenanigans above The Horseshoe, we were at it again, this time we started at the River House and headed downstream on the Guadalupe River.
Weather was even nicer than Friday, with good temps and plenty of sunshine. What a great way to keep up the weekend rocking.
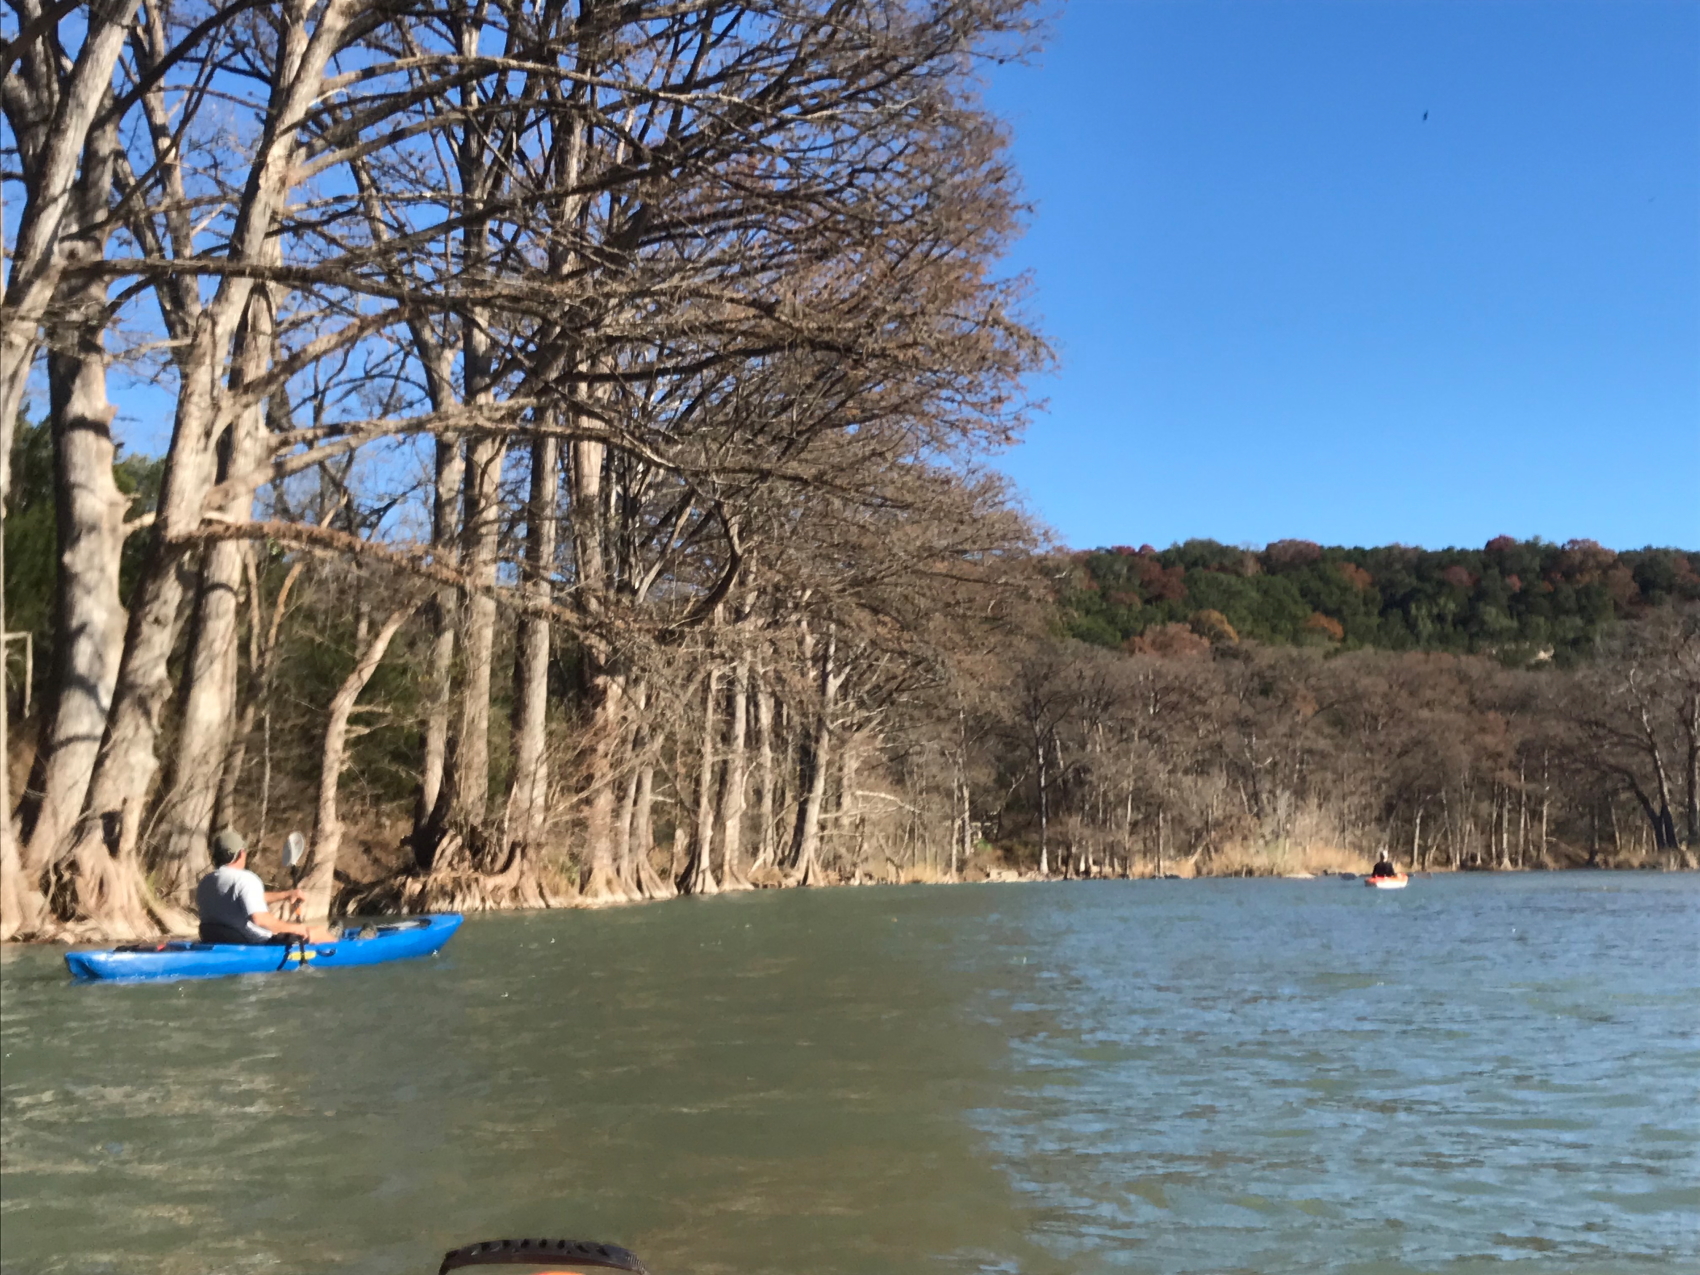
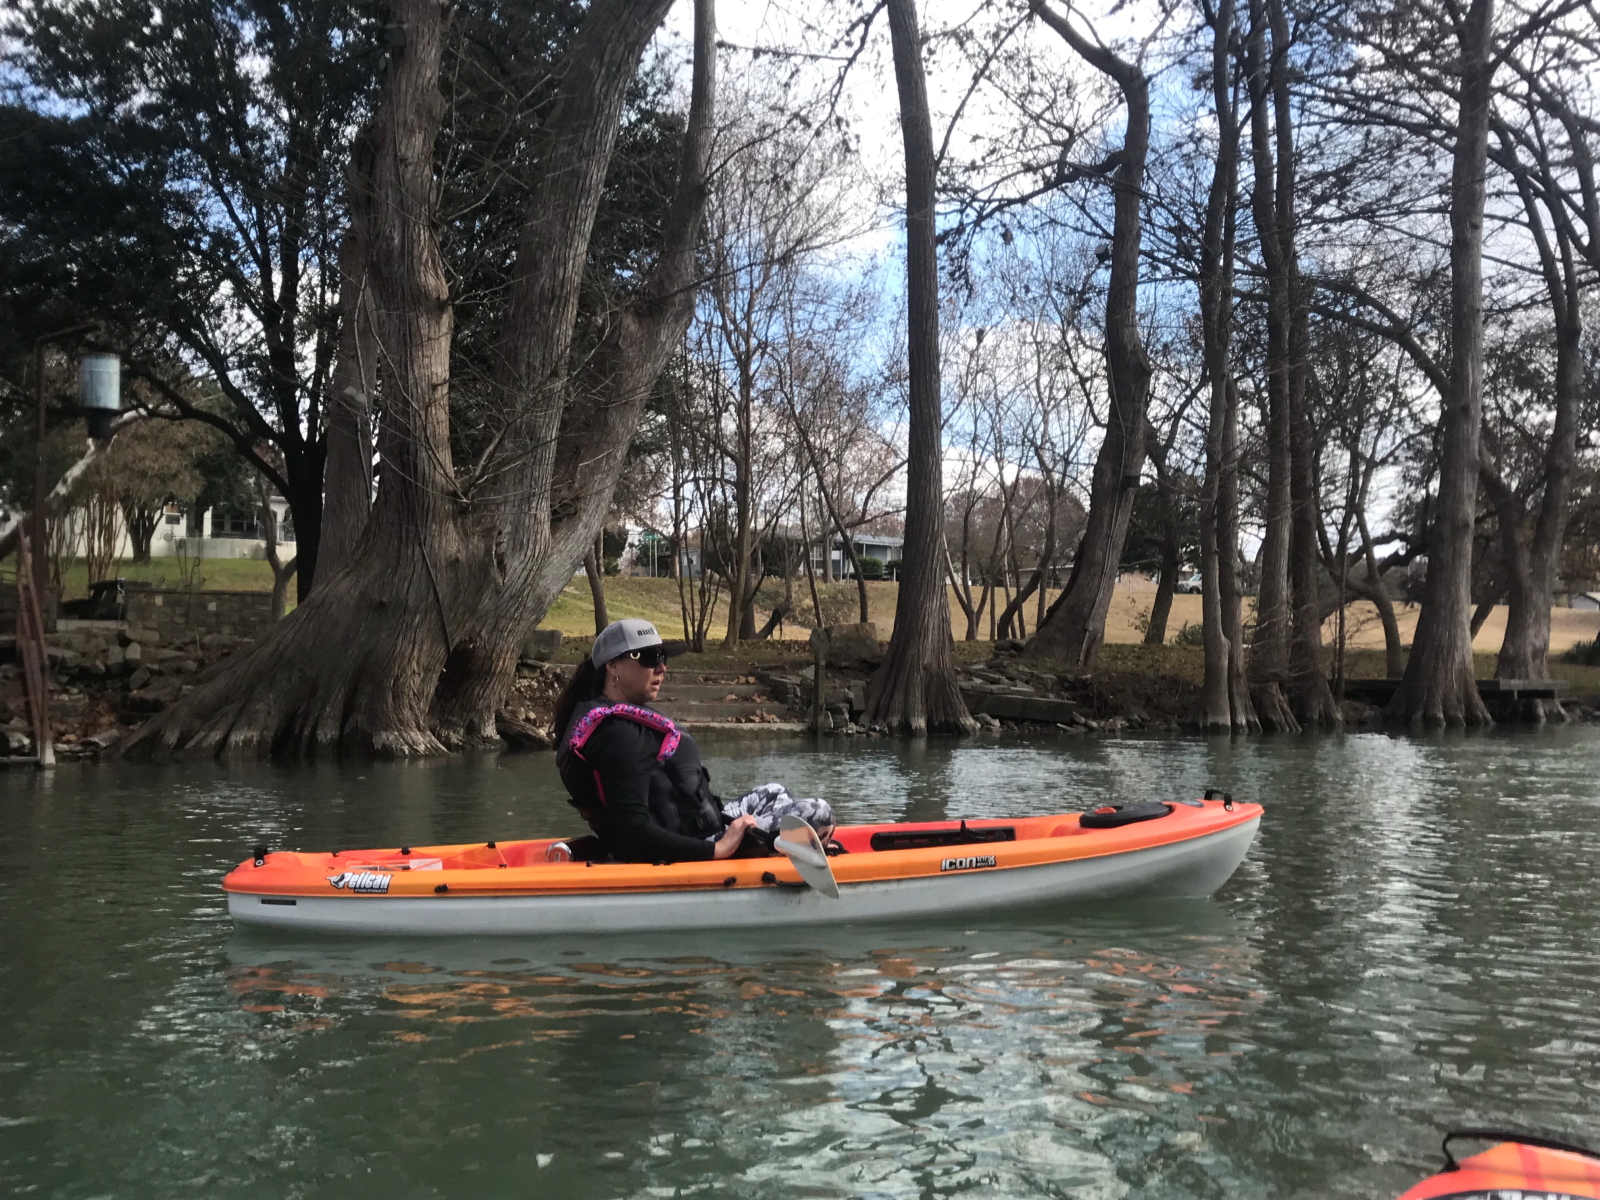
Heading into The Horseshoe is a nice easy paddle, providing plenty of time to get warmed up, acclimated and ready for the Class II+ challenges ahead. Piece of cake in a raft, but a bit of a challenge for someone that’s not been kayaking rivers for more than a few months (aka. me).
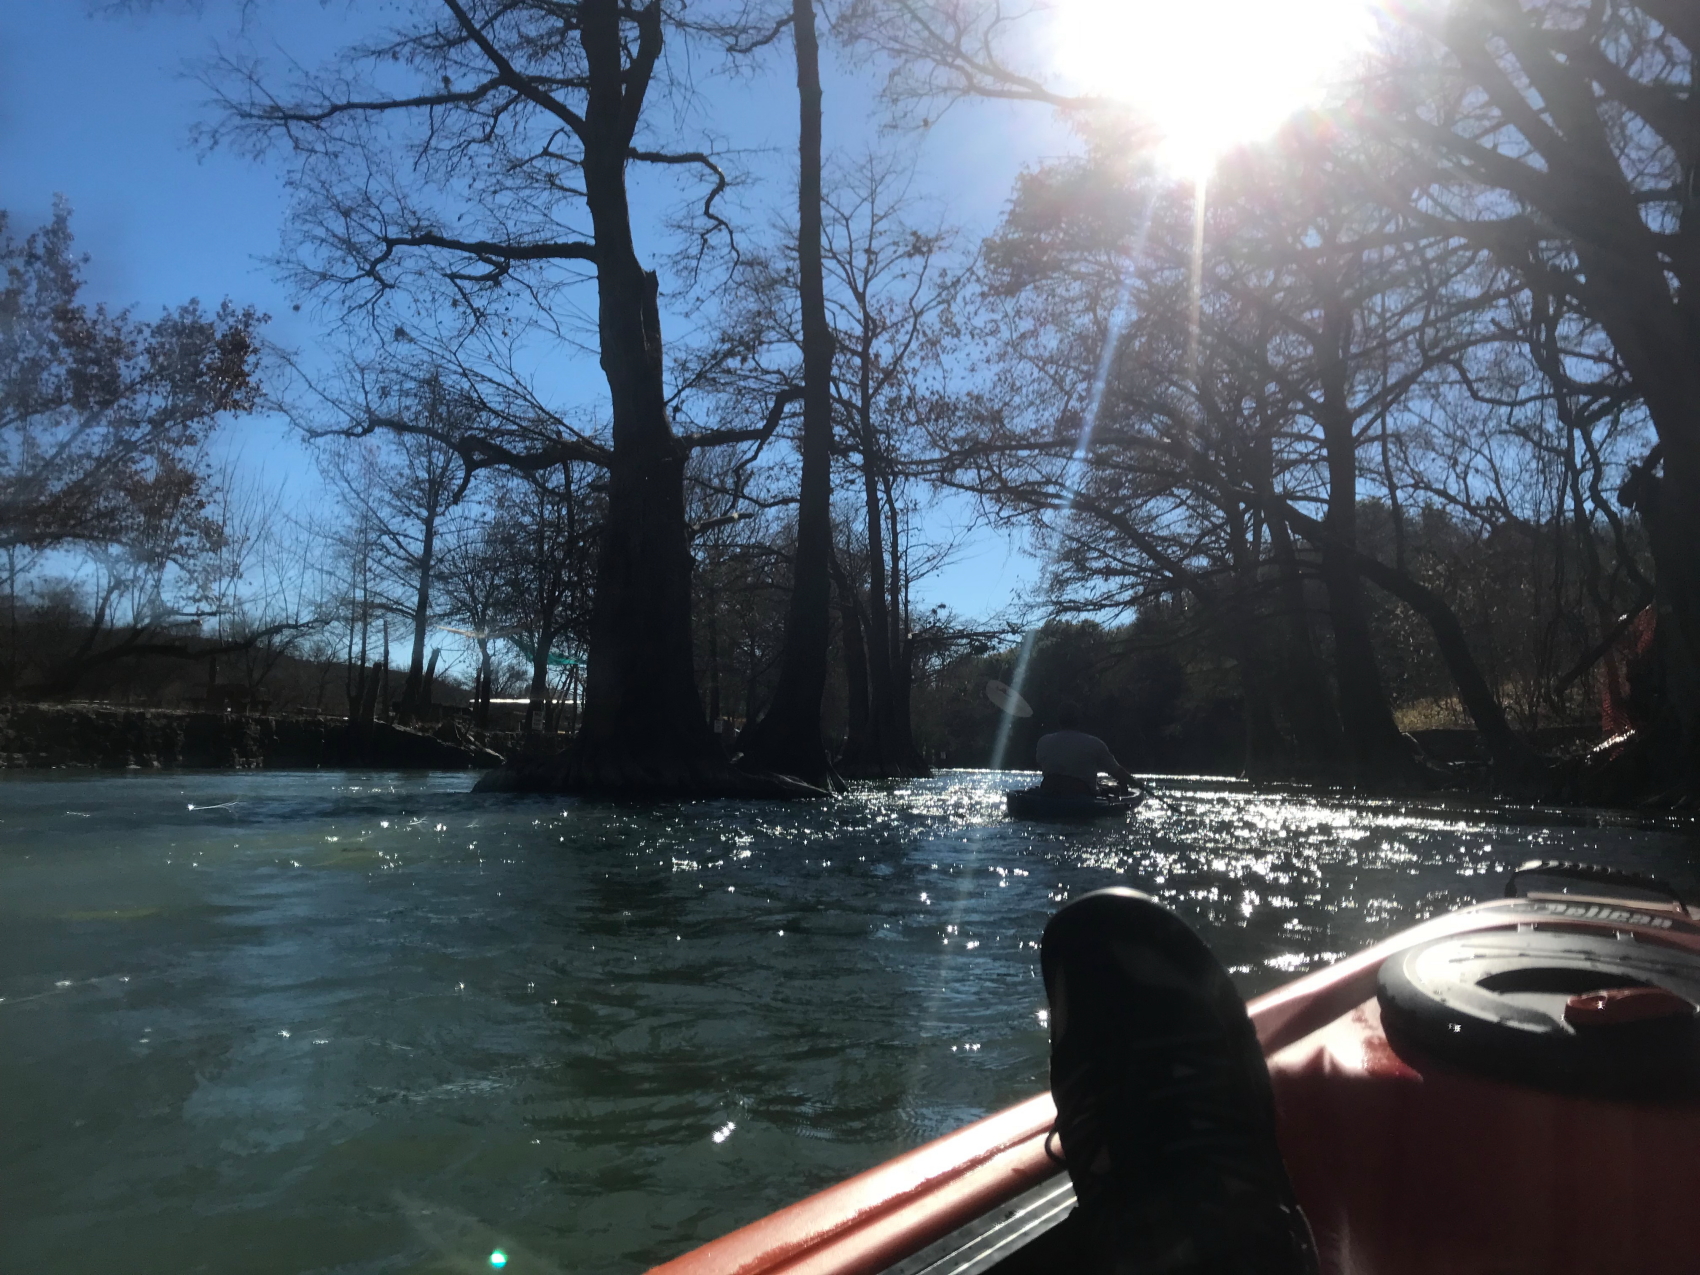
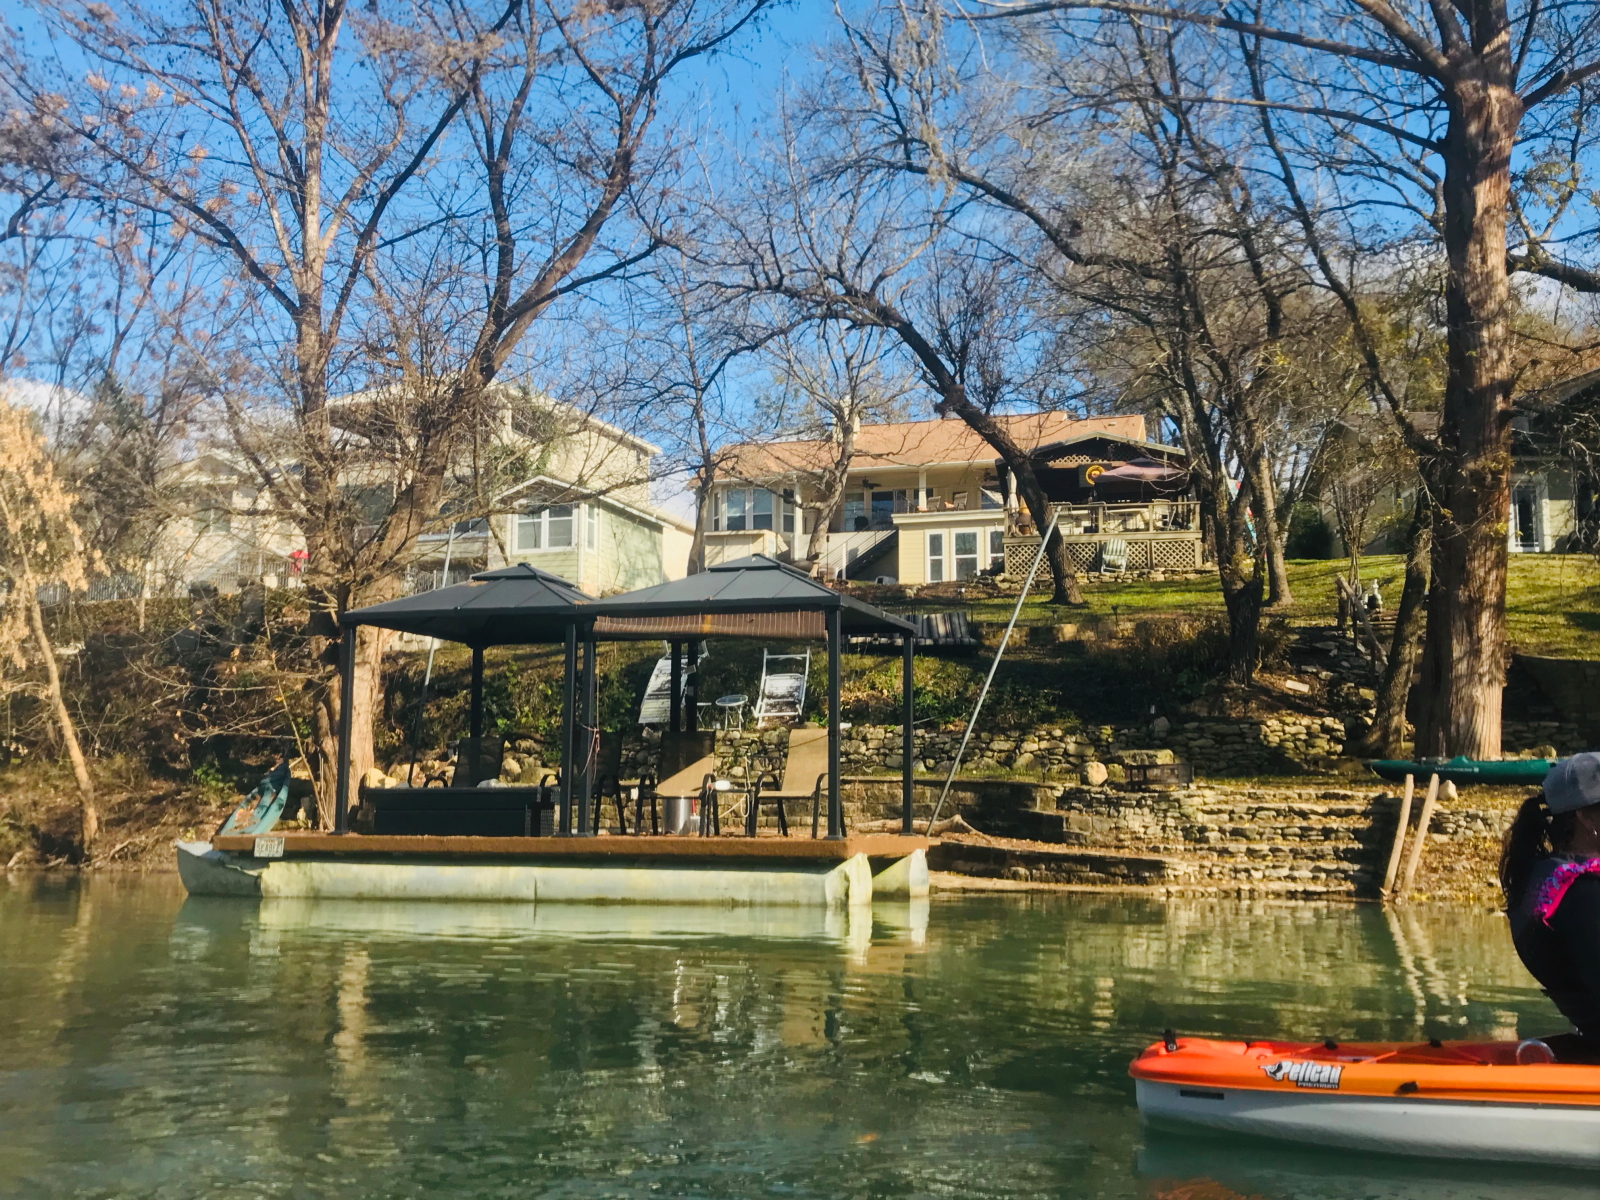
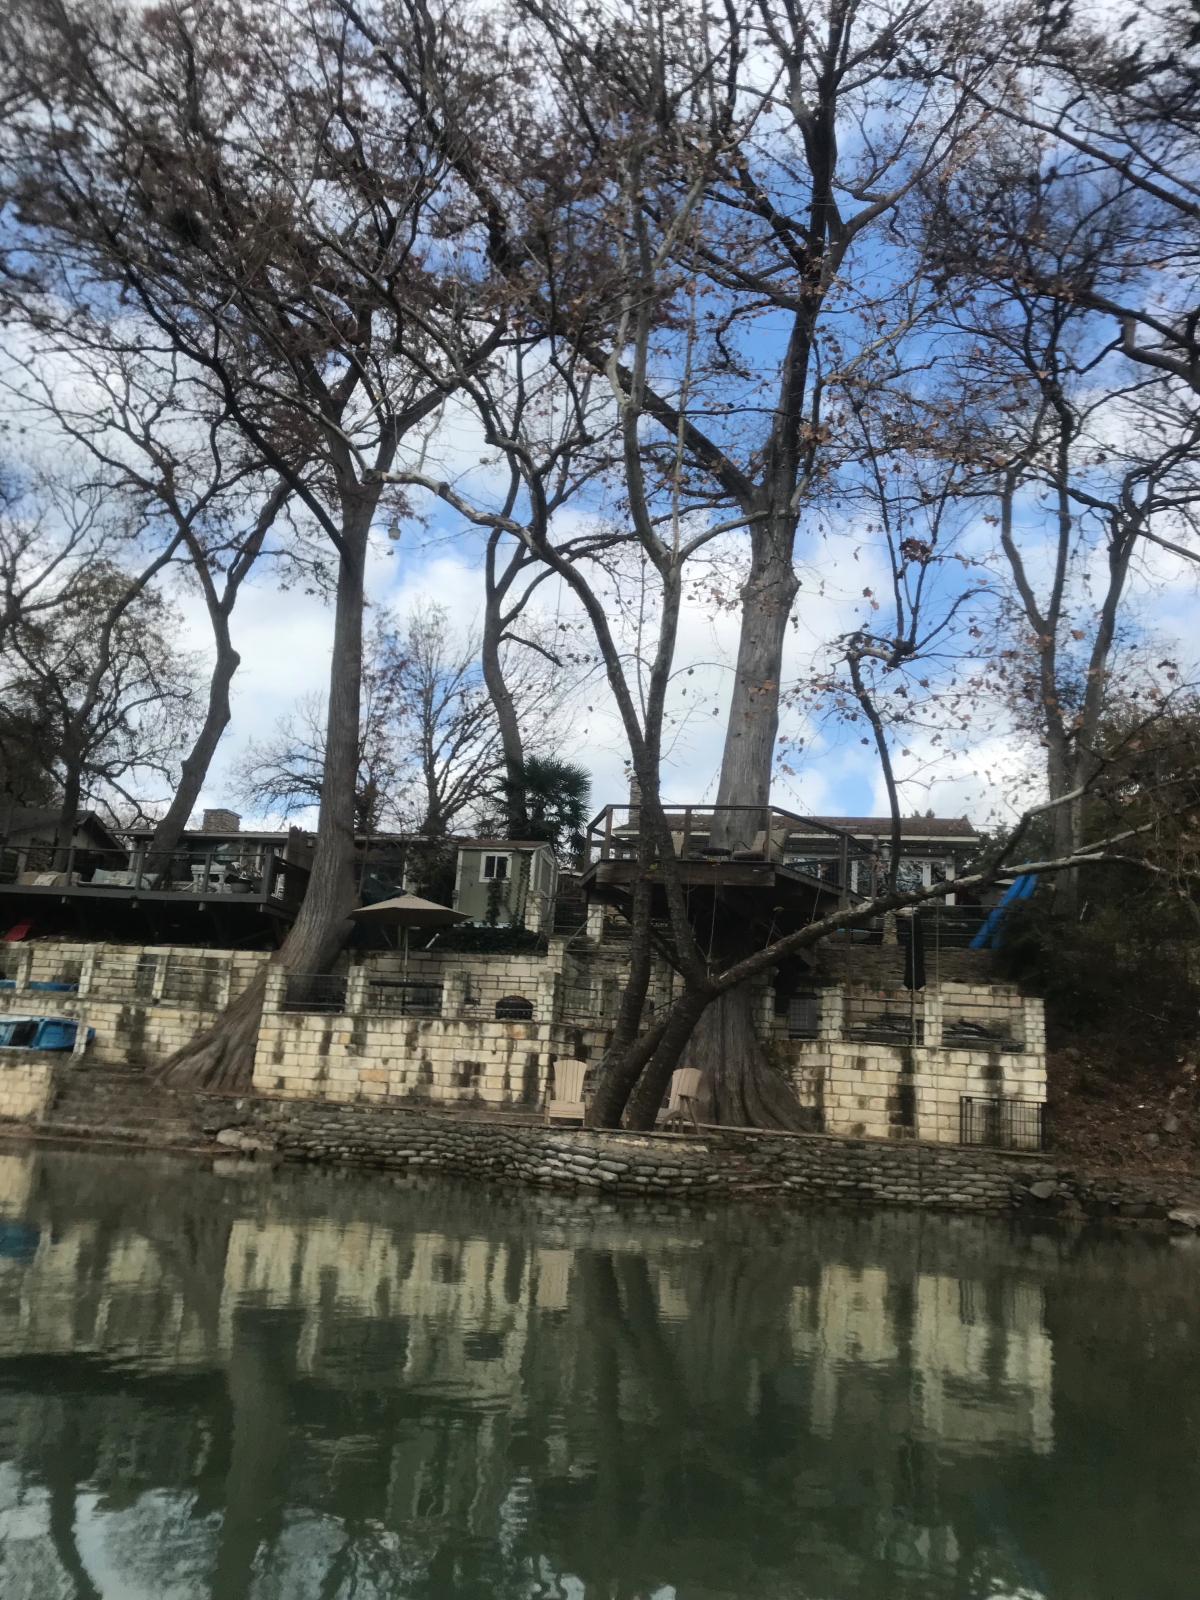
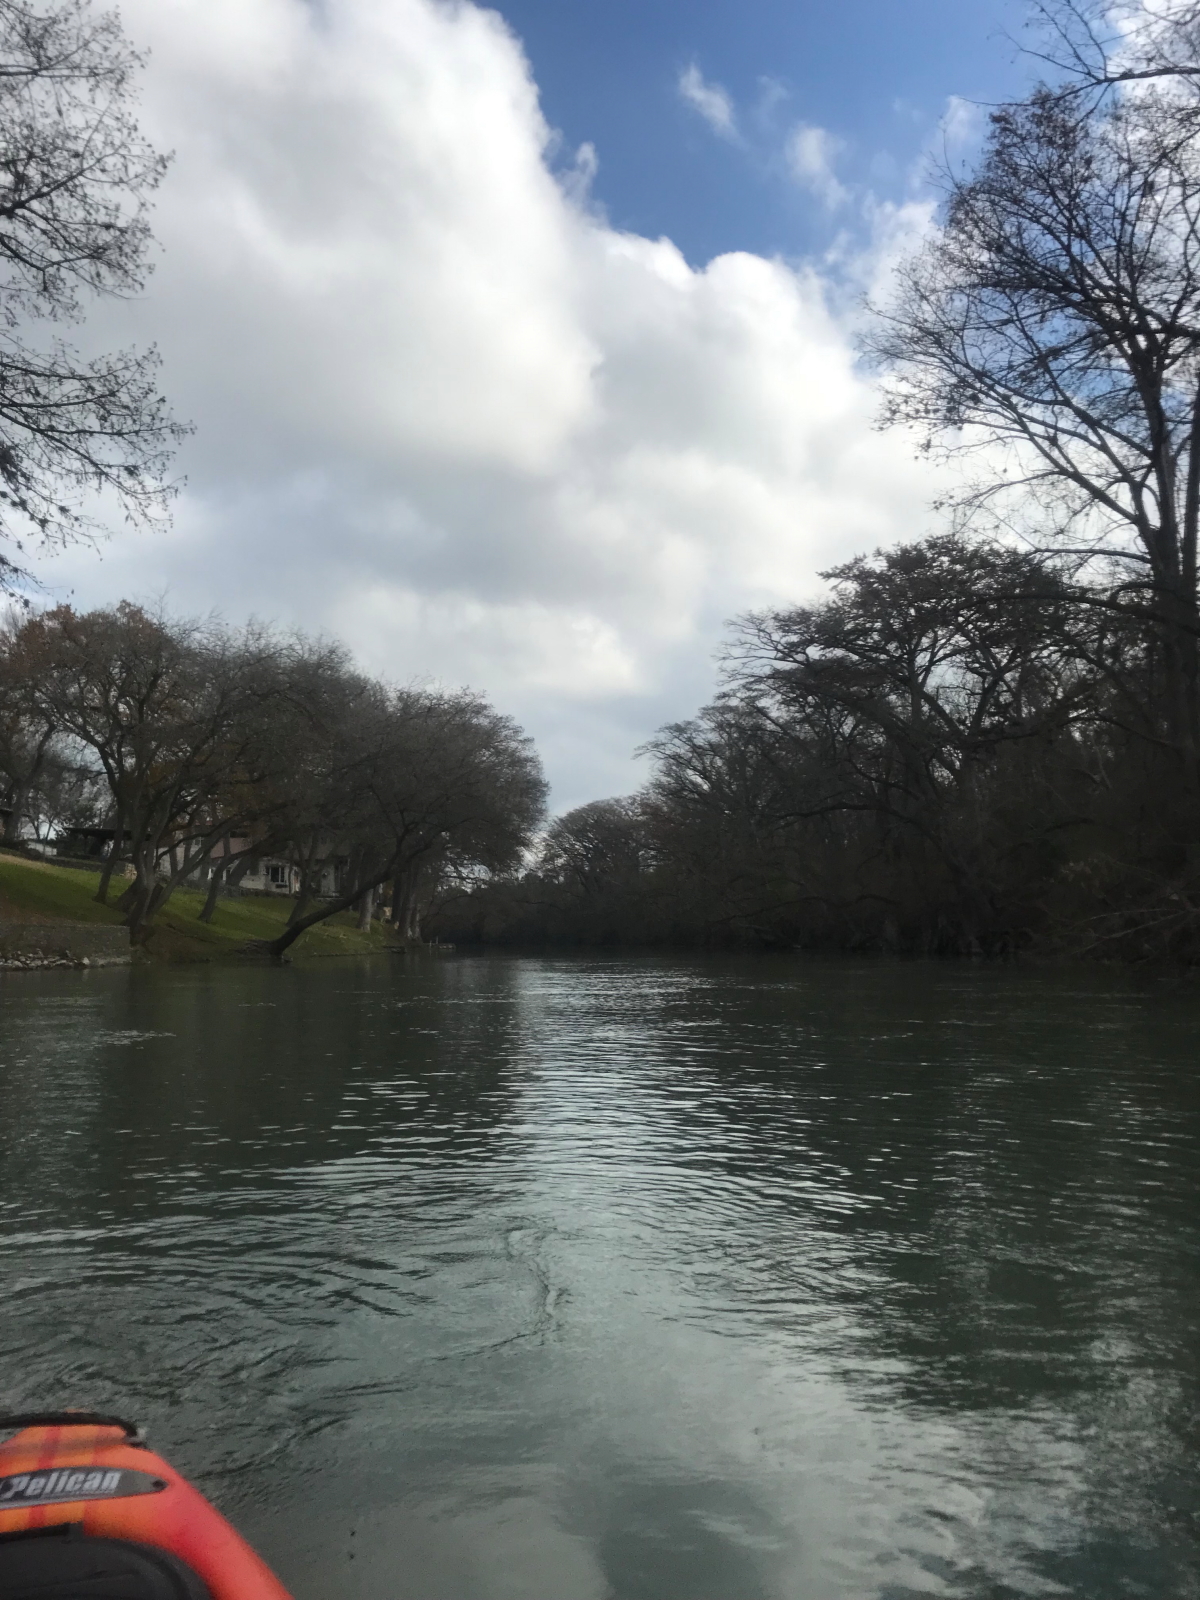
Even with the leaves mostly gone now, it’s still a great river to run. The terrain changes quite a bit along the river.. with some low-bank sections with homes and others lined with trees.
The banks get a little steeper and the river a little quicker as it narrows up, providing some nice warmup sections before hitting the remains of several dams paddle wheels along the river.
On the left side, are some campsites that are part of the Whitewater Amphitheater, which is right on the river. Check the schedule, the summer season kicks off with Wille Nelson shows.
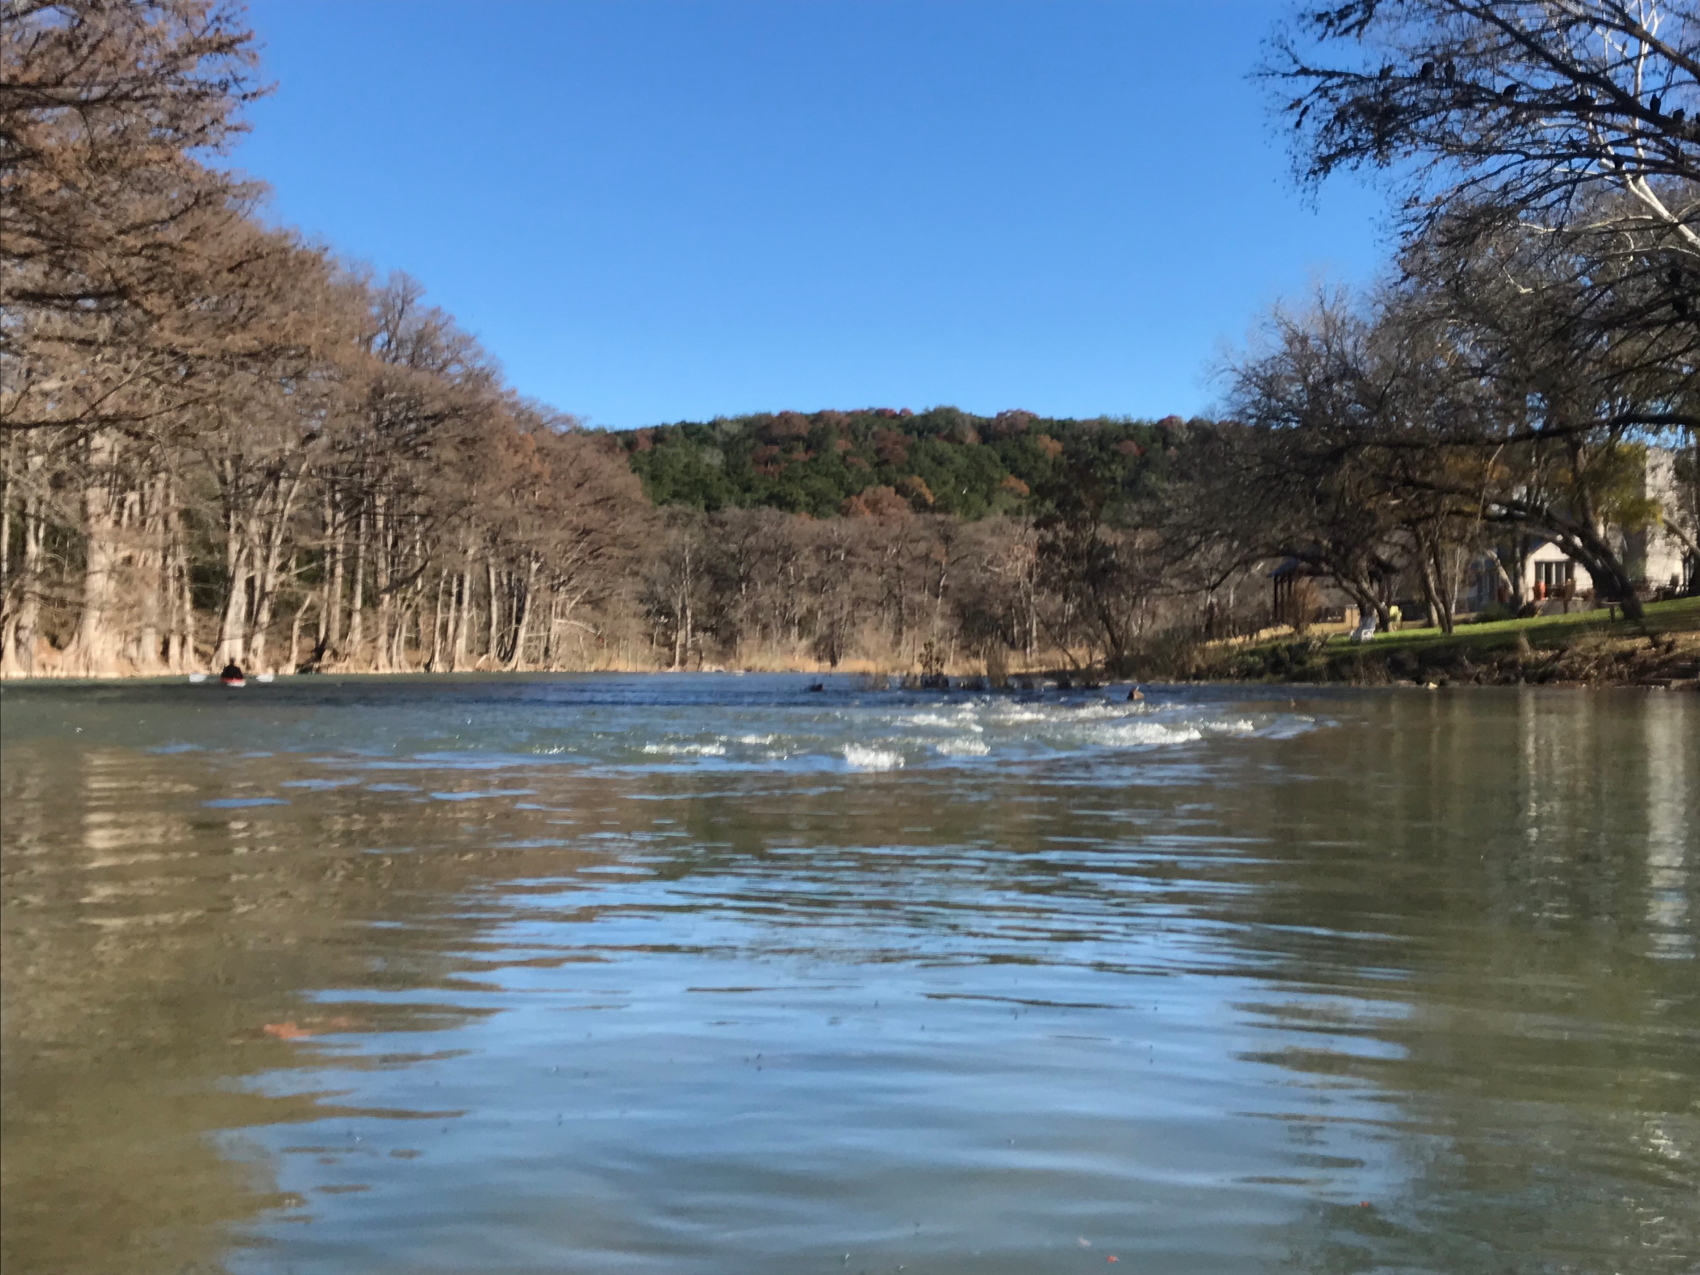
There are some fun little rapids where the river splits through a small grove of trees.
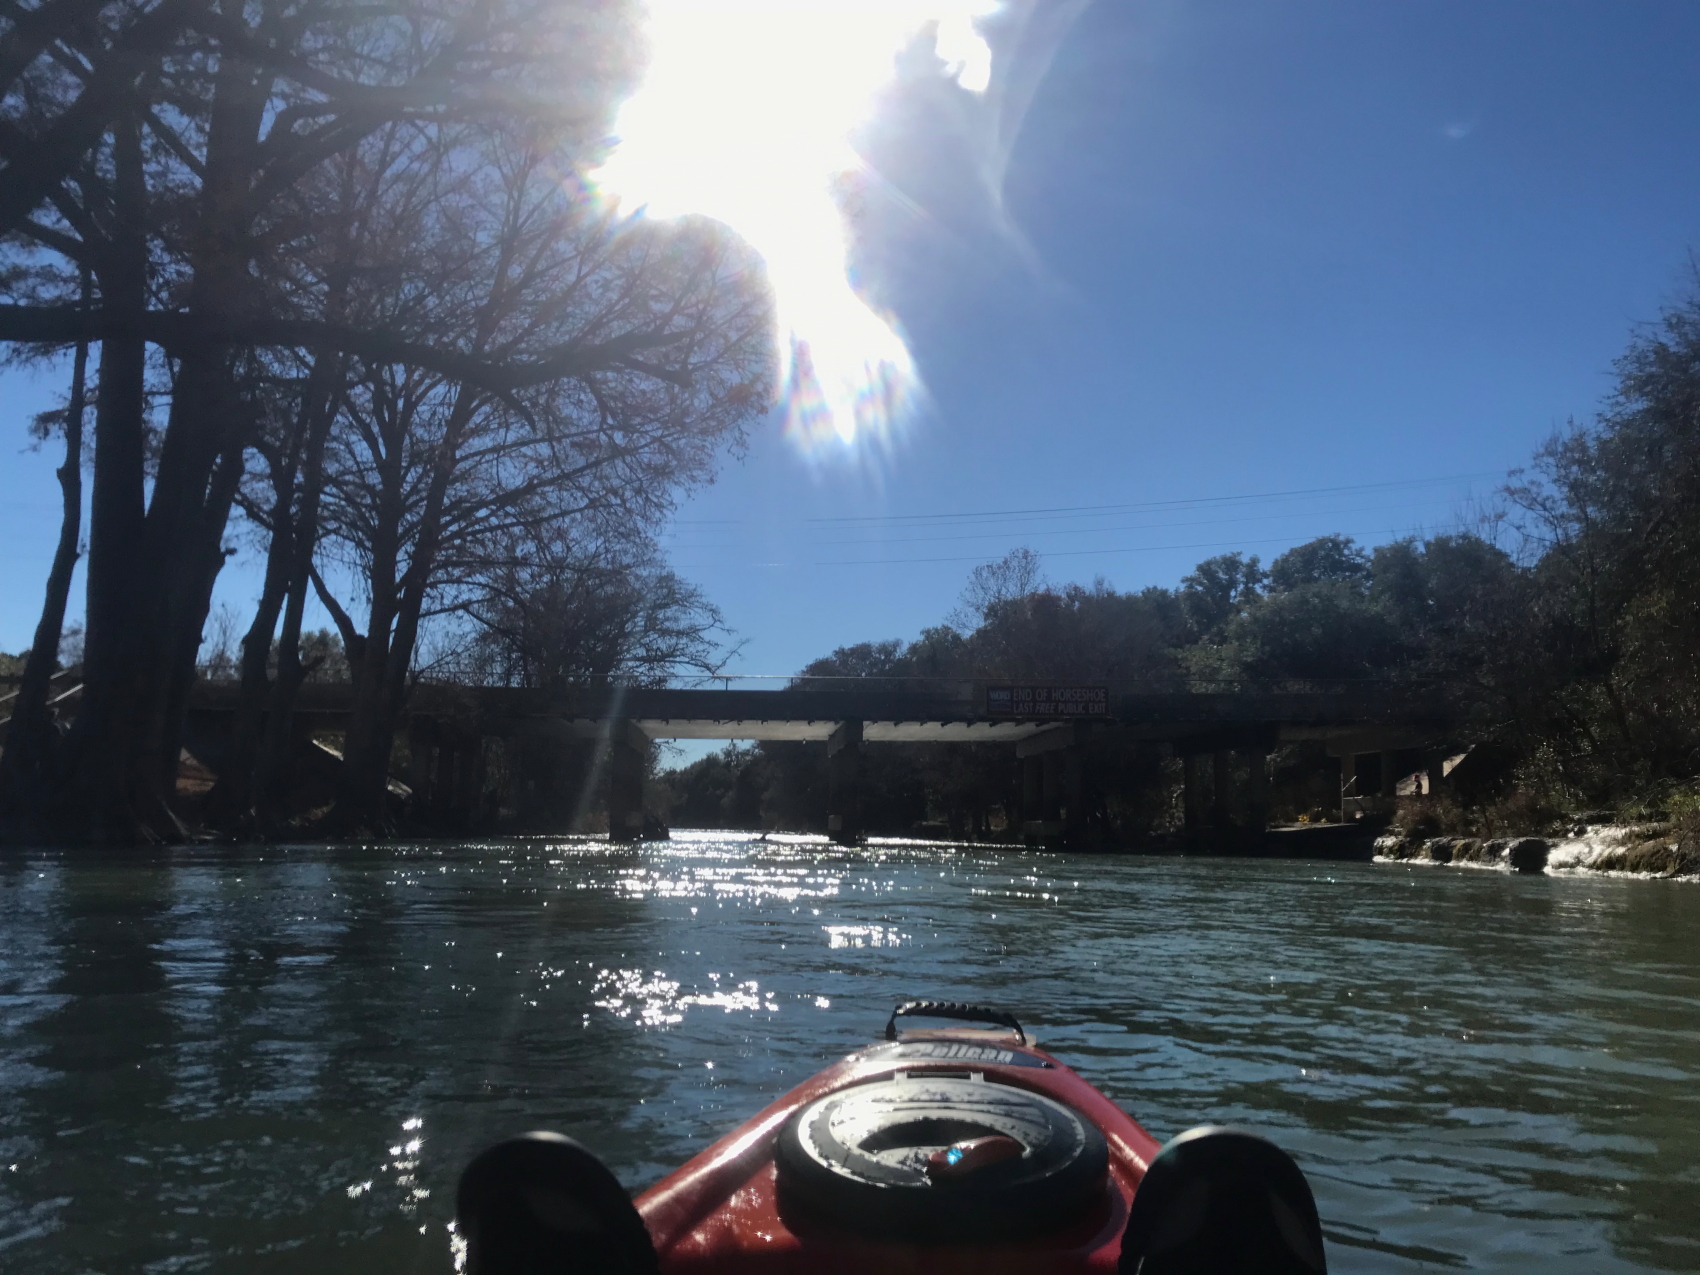
There are 6 places the roads cross the river, they have a numbering conventions, starting from the edge of New Braunfels (crossing #1 is right as you get into town). This here is crossing #4 and due to a minor mishap on the river, was the takeout point for our trip.
It was a fantastic day. As is the tradition, we cap off the day with a fire.
I’m going to look at some ways to take some better pictures, and probably some video next time out. I just hope the weather holds and the Army Corps of Engineers don’t cut the flow back too much more; having to drag boats and portage around exposed dams is a little less than idea.
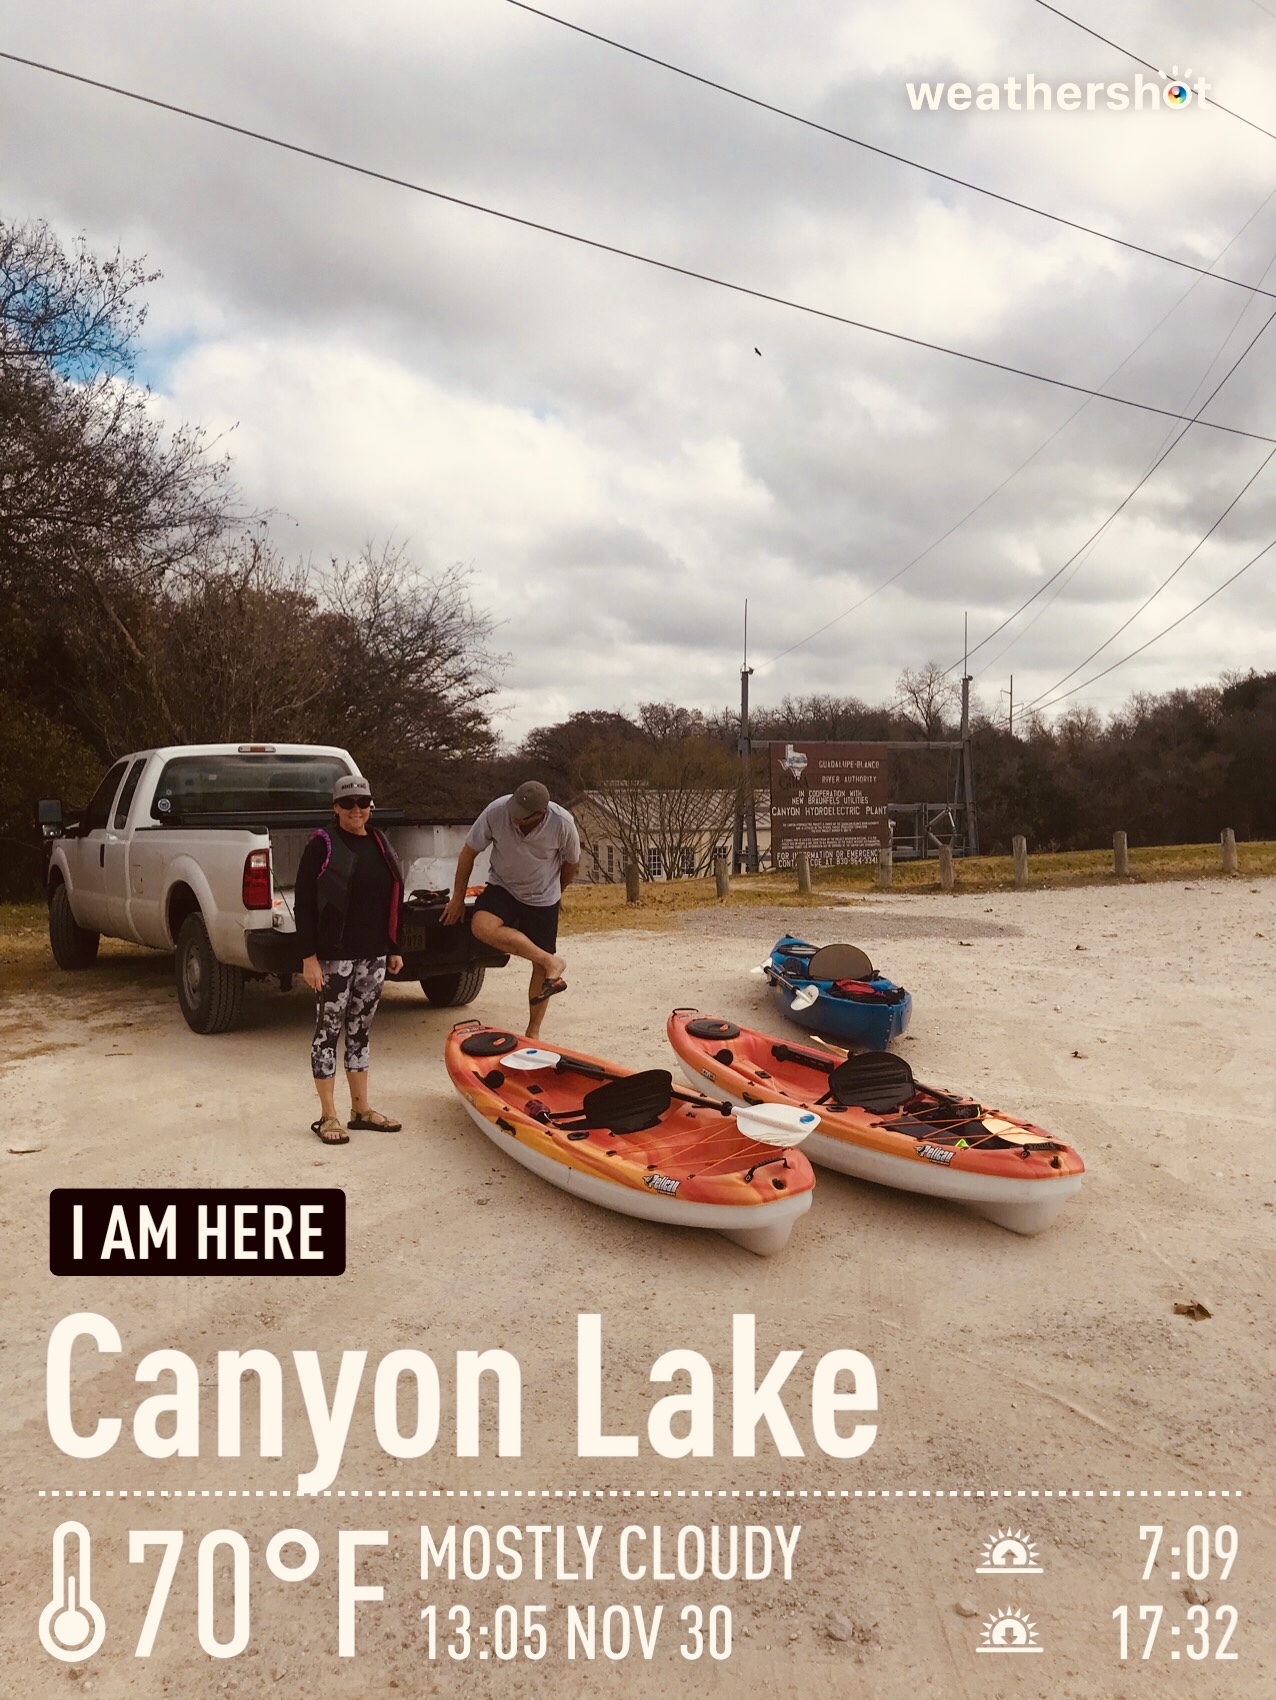
Sure it was a Friday, and yeah.. maybe I was supposed to be in Austin at the office.. .but.. with the temps coming back to normal, and the opportunity to go kayaking on the river while the flow is still up.. going INTO the office was just not going to happen.
After finishing up some work in the morning and dealing with the ever annoying Scrum Standup meeting, we packed up the truck and headed to the River House, where Uncle Senior Tim was waiting with the kayaks loaded and ready to go.
We reached the dam around 1:00, put in below the hydro plant and I immediately set to capsizing the kayak. I figure it’s best to get that sort of stuff out of the way first.
About 30min. into the trip, the sun came out, the temps jumped up and it turned into a glorious afternoon!!
Not far down the river, you hit Horseshoe Falls.
It’s not that tall, and when the river is up, rocks are a lot less of an issue, but the hydraulics of the upper damn and the falls itself would make for a fun rafting run.. but.. in sit-on kayaks.. eh.. we opted to portage around as the sign suggested.
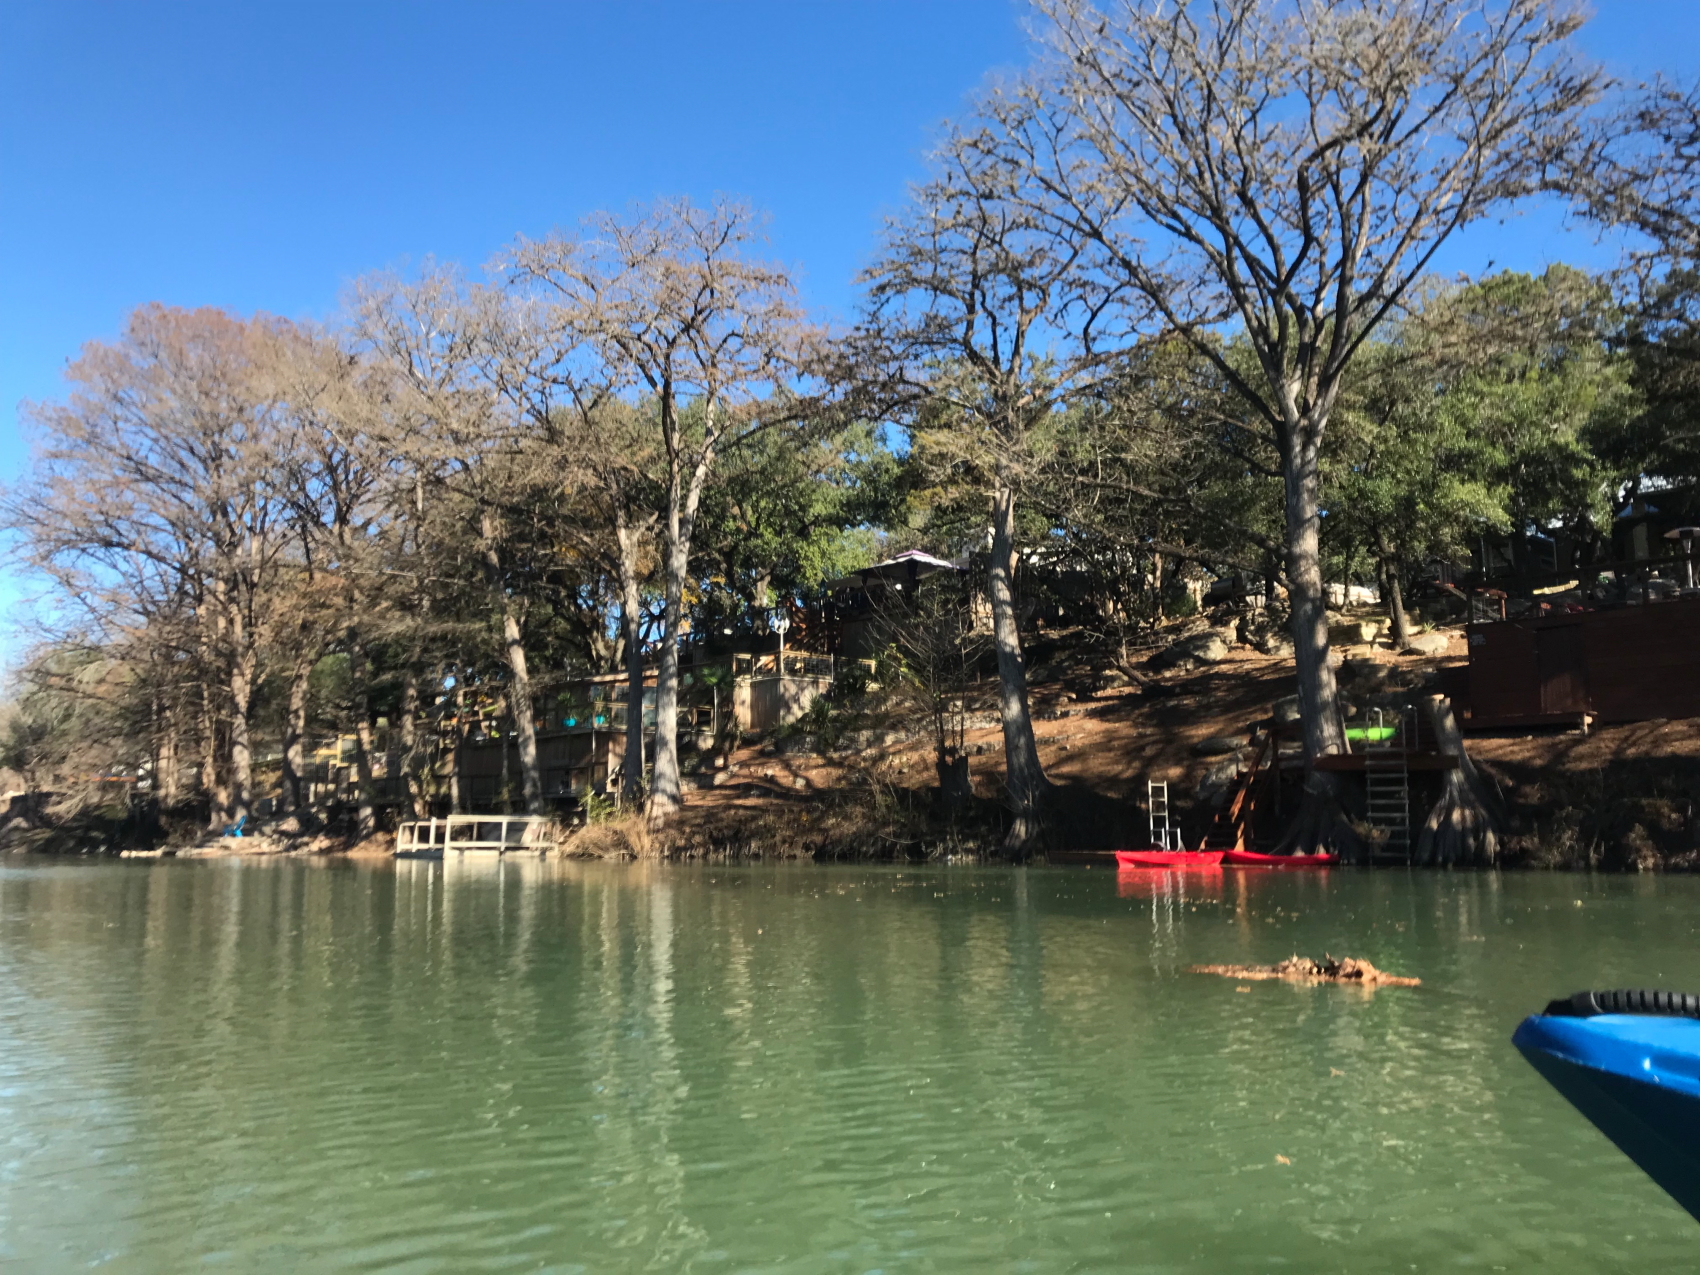
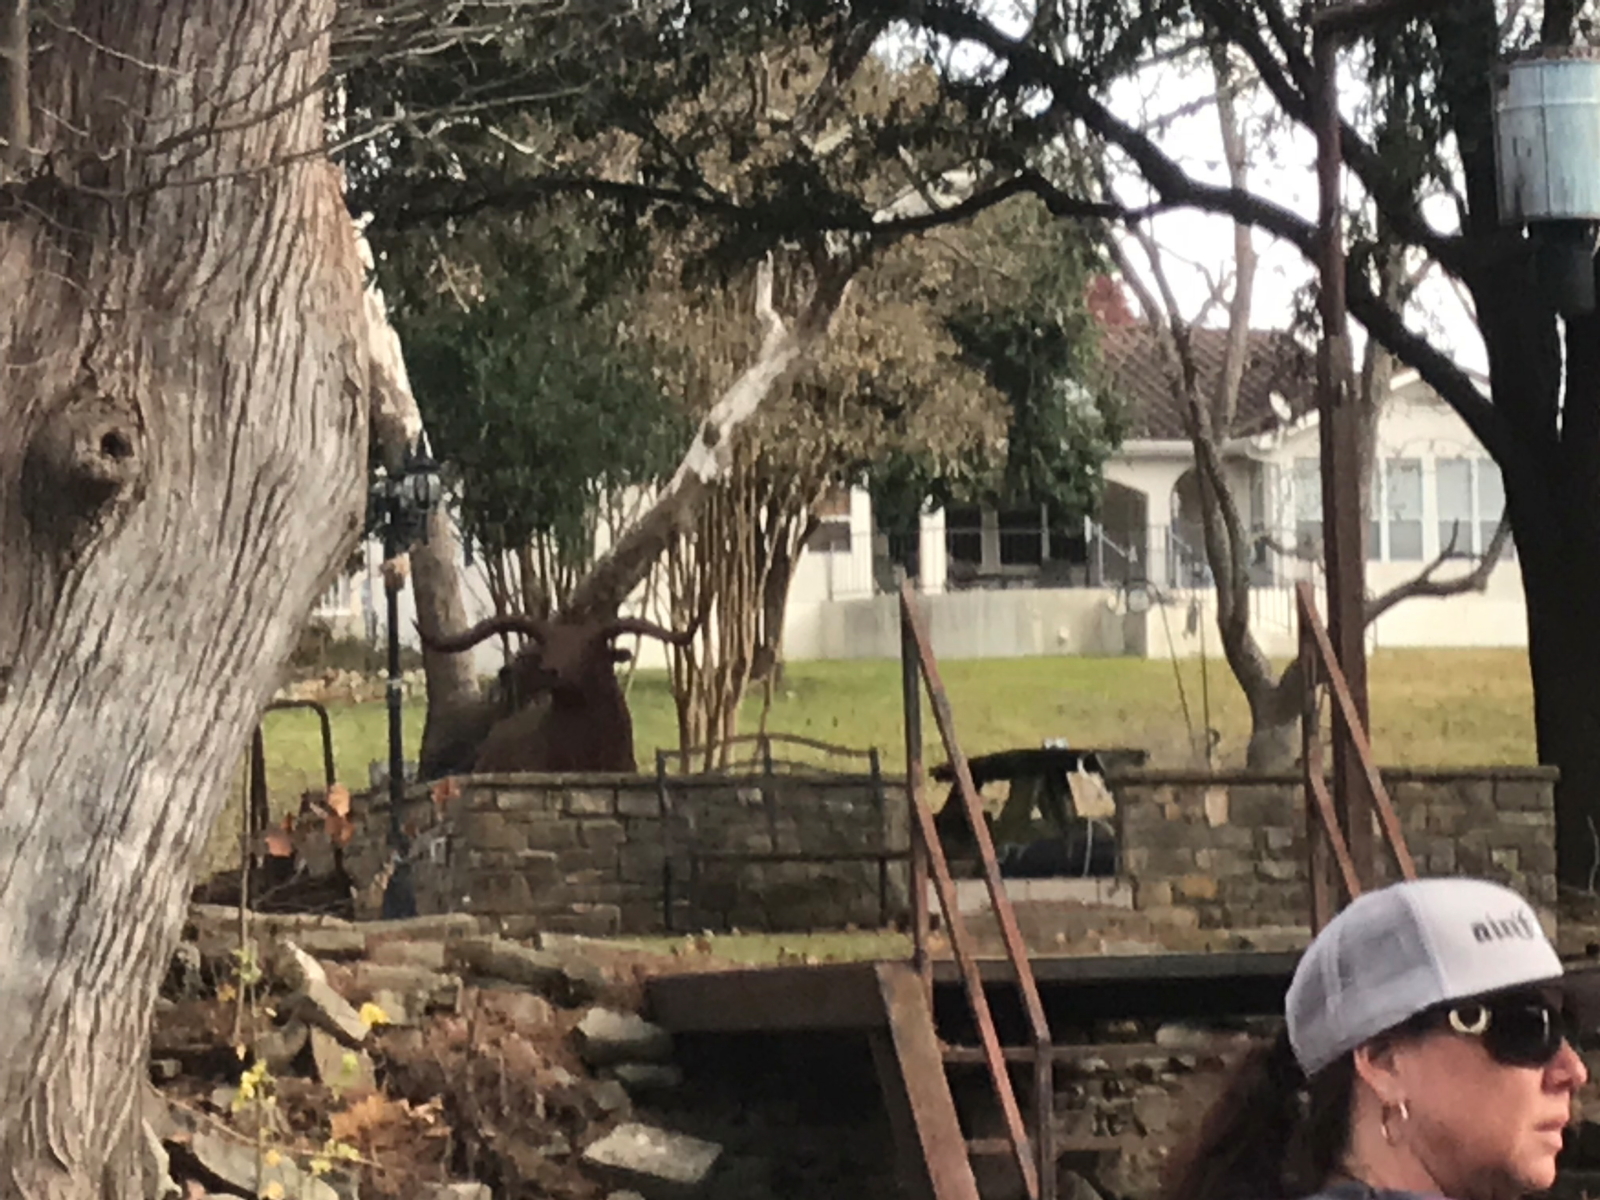
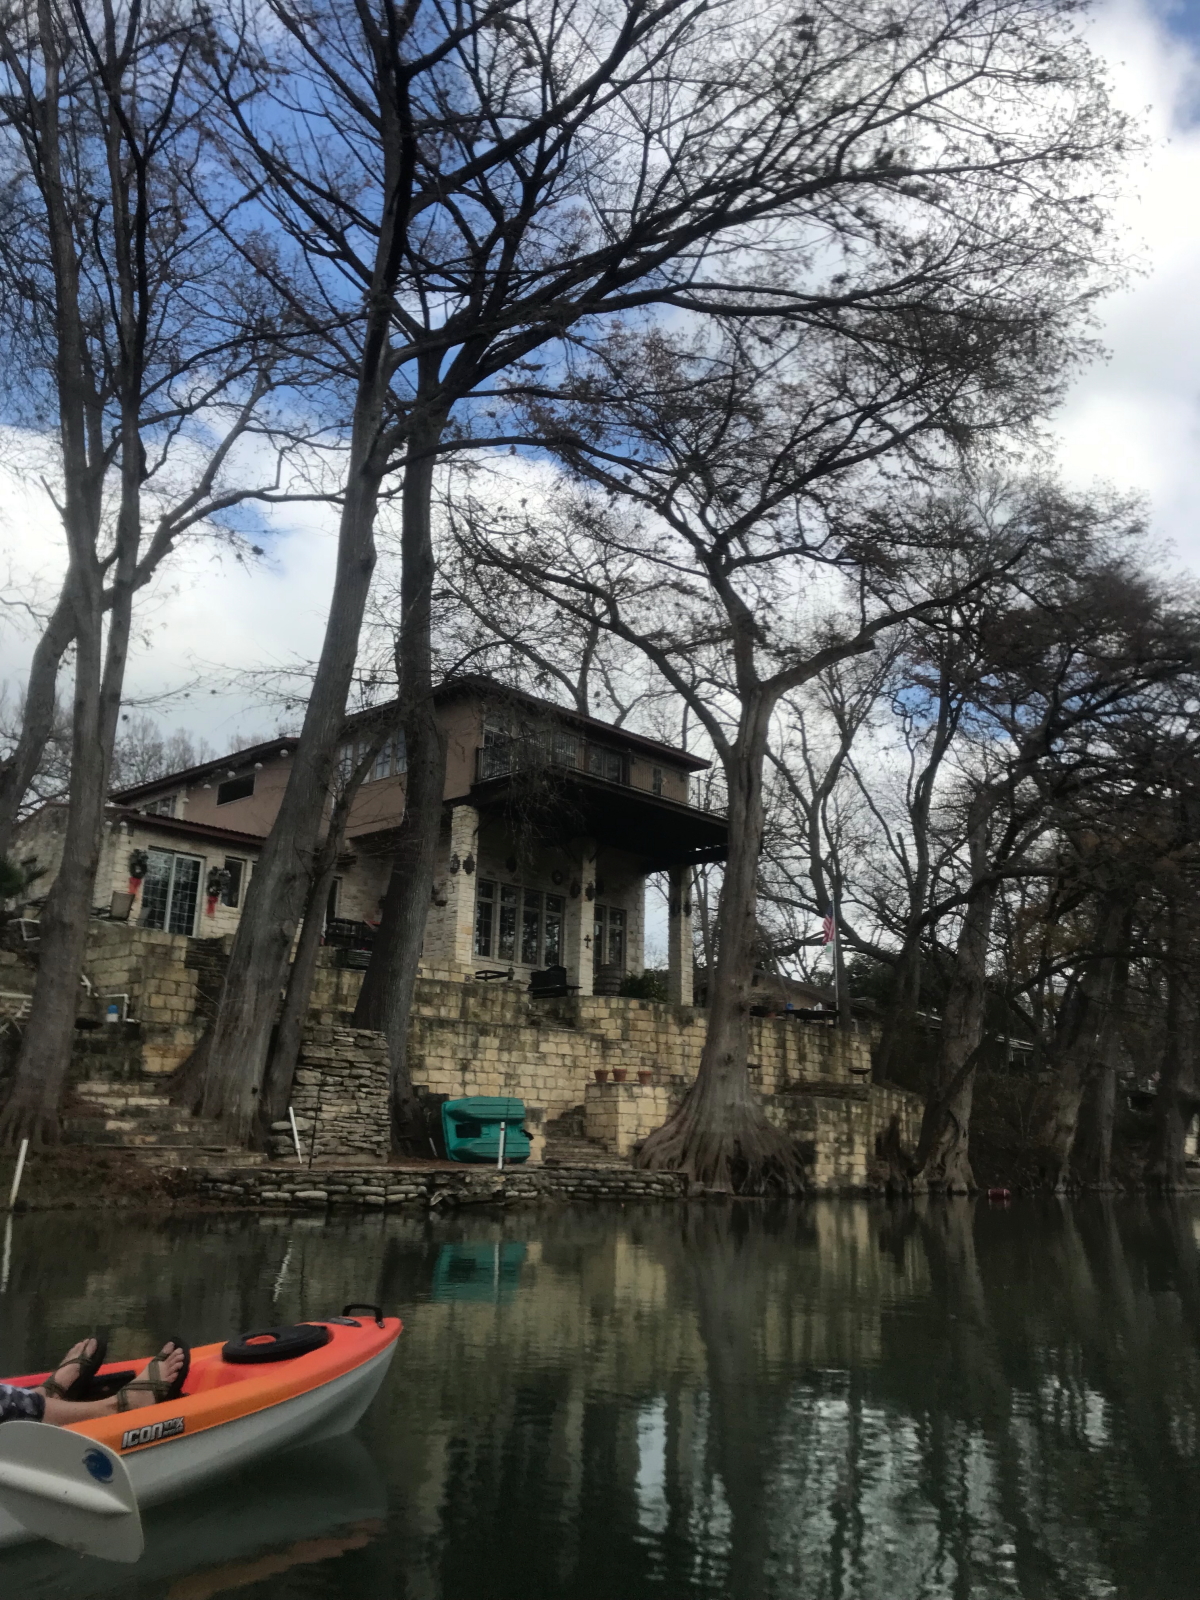
You can certainly see some great homes along the river.
You can also find some interesting art installations and other oddities, such as a caboose outbuilding or a 3/4 size longhorn bbq pit.
The weather was nice enough that the turtles were out on the logs and rocks sunning themselves all along the river.
The weather is supposed to be pretty decent again today so… I think we’ll do it all over again.
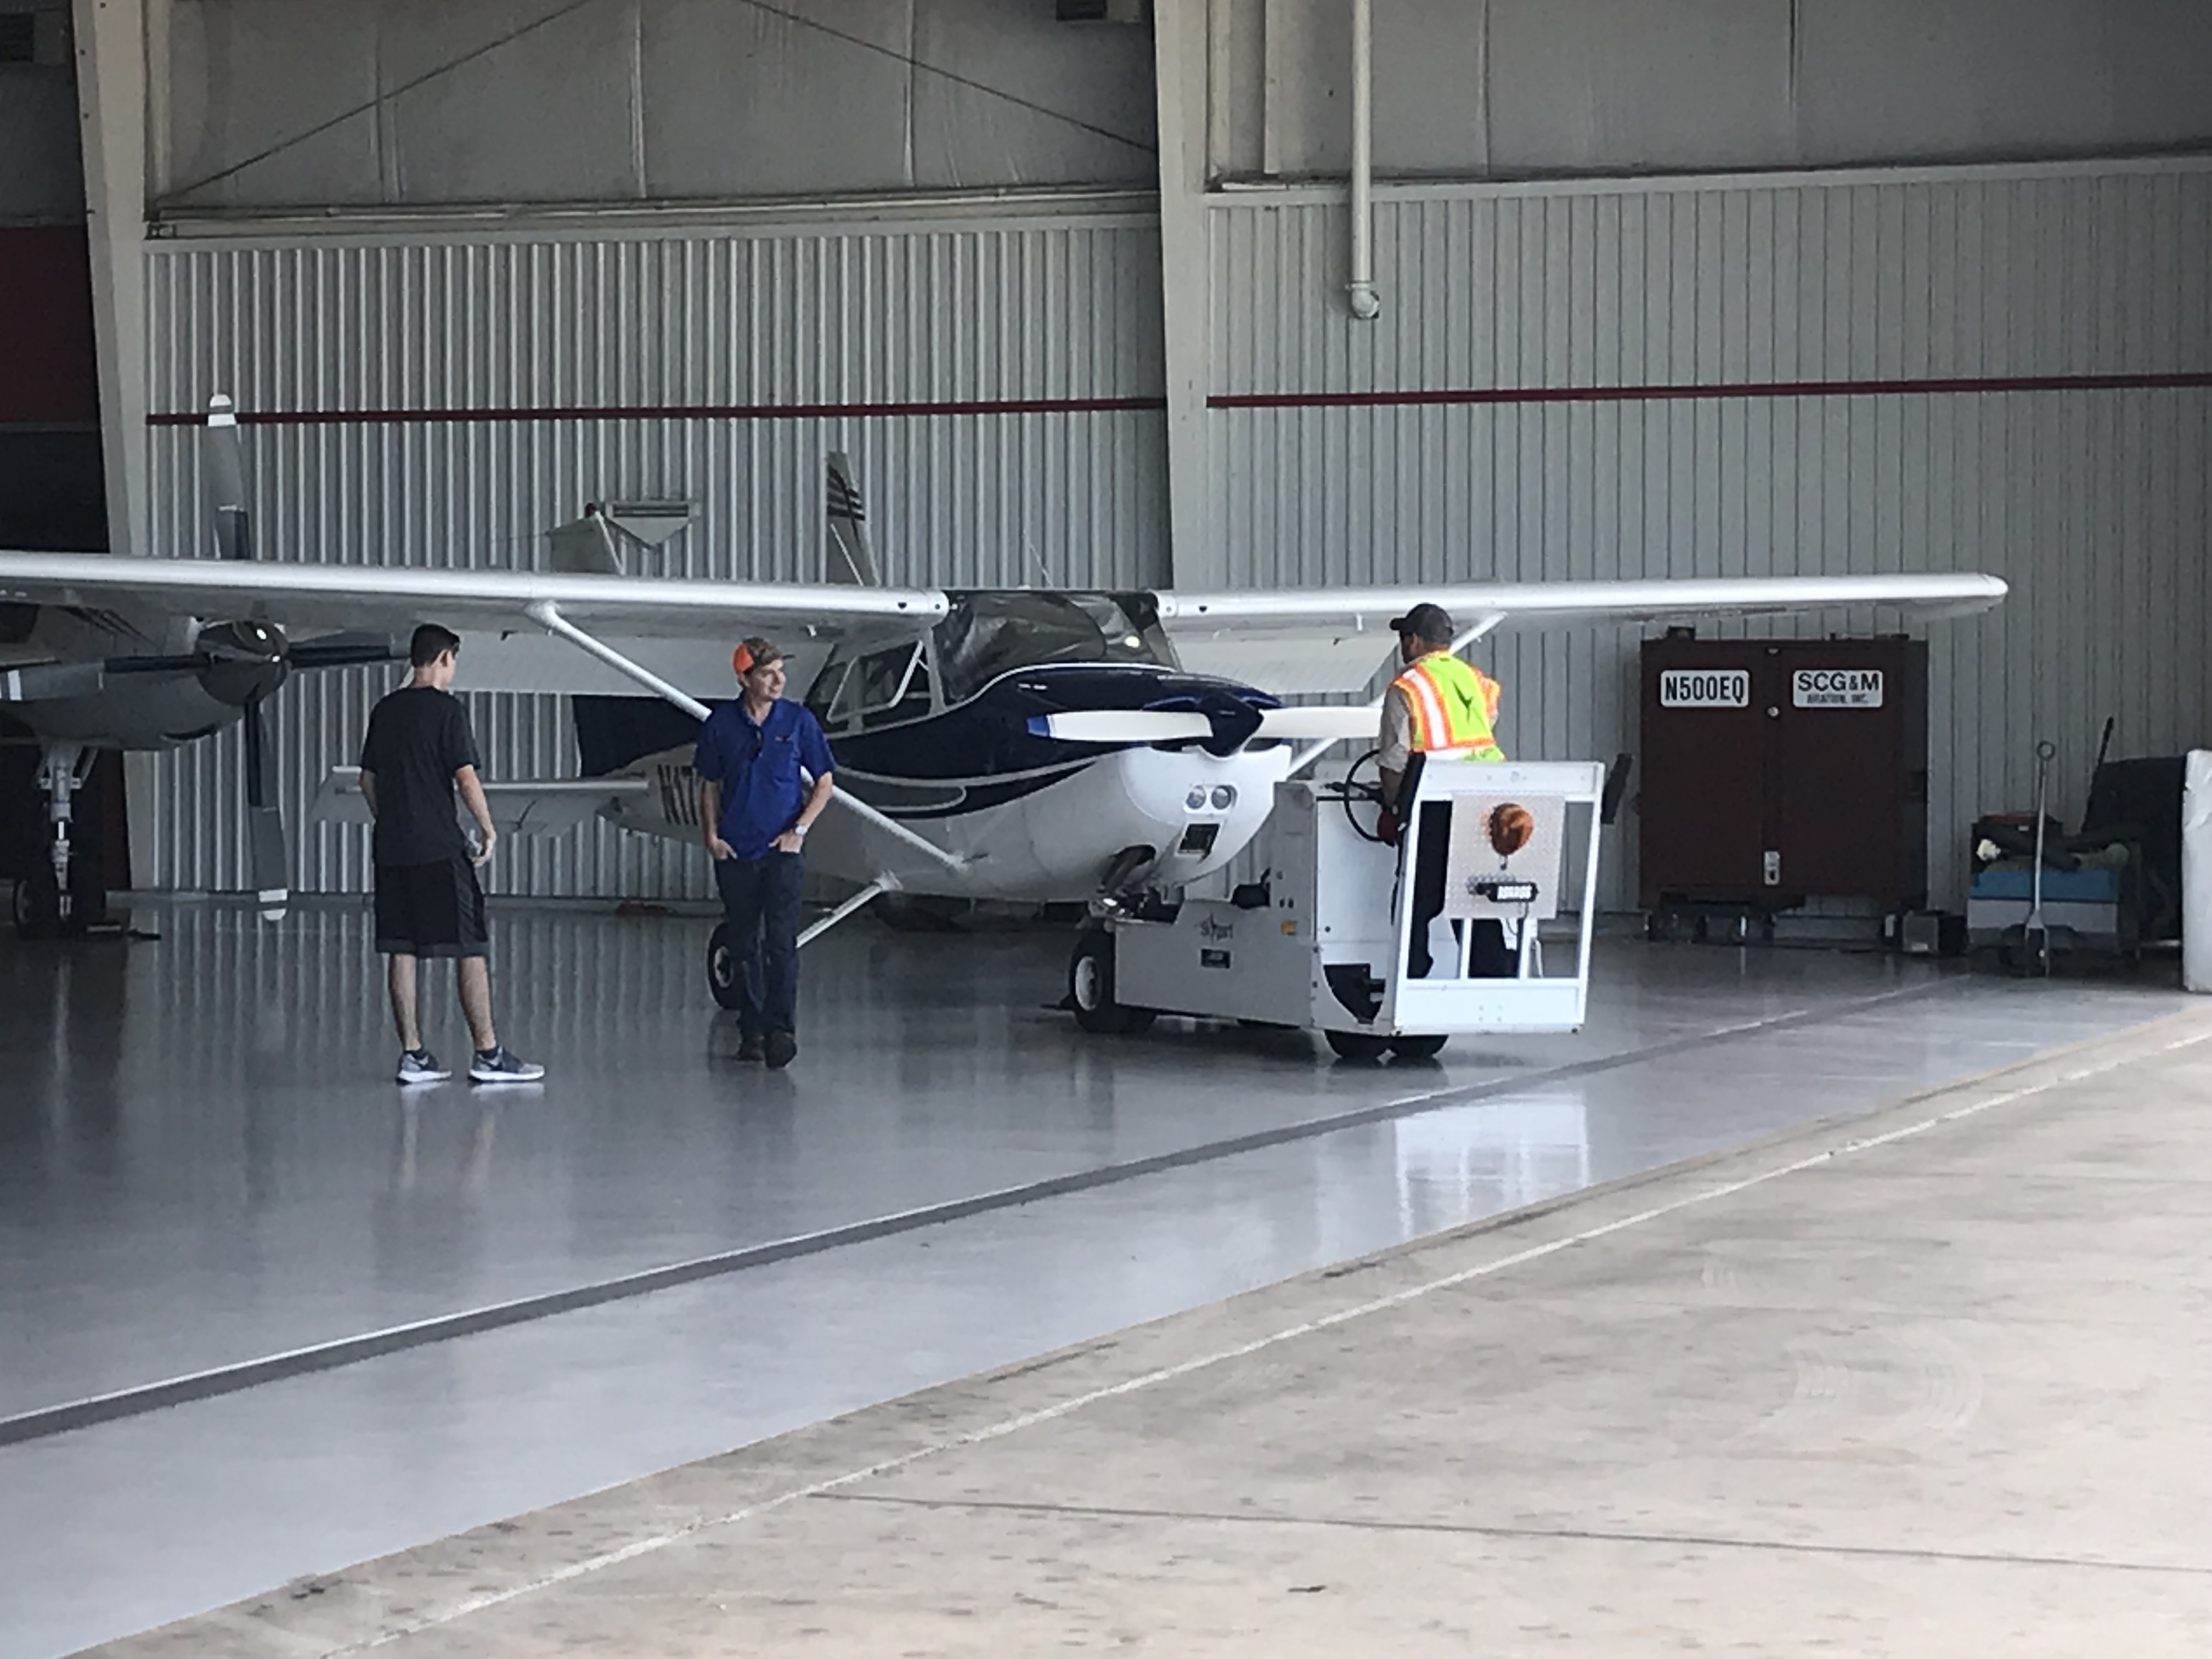
Weather finally improved over the last week in Central Texas, and that means “The Boy” is up and flying, working on his private pilot license. I often take my “good” camera to the airfield because you never know what sort of activity you will capture.
Here are some of the highlights:
Alan flying with Black Hound Aviation Flight School