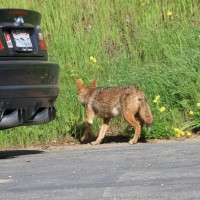
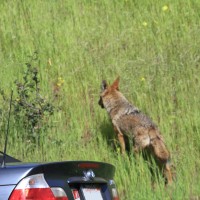
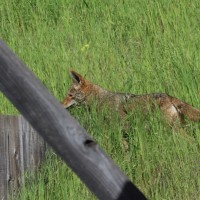
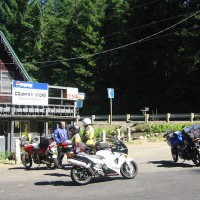
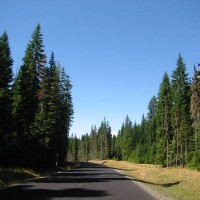
Snapped these three pics outside our home off Branciforte, at 10:45 AM.
Snapped these three pics outside our home off Branciforte, at 10:45 AM.
I like using the command line / shell to pass information to scripts and programs. Sure it has limitations but it’s generally pretty effective.
Each language seems to have it’s own method of handing them, and CasperJS does not seem to be any different. What I did find a little different from others, is how CapserJS splits out arguments from parameters (options in CapserJS speak).
Passing arguments is a fairly simple affair. His an example of passing some arguments on the command line to a screen capture utility I’m working on:
casperjs generic.screenshot.cjs http://www.someplace.com save_local
[
“http://www.someplace.com”,
“save_local”
]
They are placed into a list (integer indexed array), and can be addressed in the following way:
url = casper.cli.args[0];
mode = casper.cli.args[1];
This would result in ‘url’ = ‘http://www.someplace.com’ and ‘mode’ = ‘save_local’. Pretty straight forward. One major drawback, you must know the order of the parameters, add a new one, get one out of place and the entire house of cards collapses.
There is a better way!
Passing options is a fairly simple affair as well. His an example of passing some option on the command line:
casperjs generic.screenshot.cjs –url=http://www.someplace.com –mode=save_local
{
“casper-path”: “/opt/casperjs”,
“cli”: true,
“url”: “http://www.someplace.com”,
“mode”: “save_local”
}
Note: “casper-path” and “cli” are injected automatically
They are placed into an array, and can be addressed in the following way:
url = casper.cli.options[‘url’];
mode = casper.cli.options[‘mode’];
This would result in ‘url’ = ‘http://www.someplace.com’ and ‘mode’ = ‘save_local’. Now, you do not need to worry about ordering of options, and adding more options doesn’t mean that you’ll have to worry about re-coding the variable localization, ordering etc. It’s also CLEAR to any user how the cli is formatted.
Now, go forth and parse, screen capture and automate your testing until your heart is content!
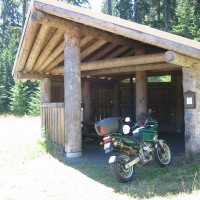
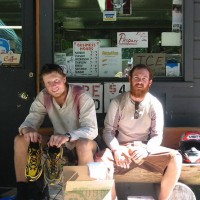
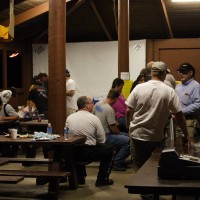
After watching the movie “Wild”, about a hiker on the PCT, I recalled meeting a pair of hikers in WA, who were picking up a shipment of shoes at one of the PCT outposts.
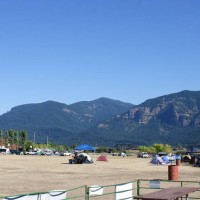
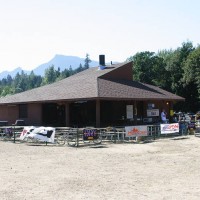
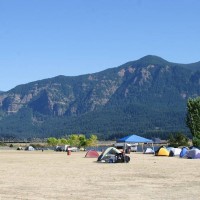
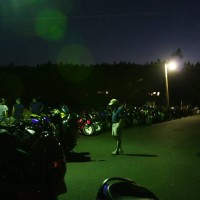
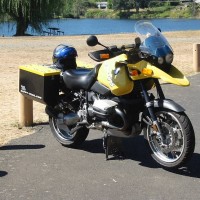
It was August 2005, and I’m pretty sure it was my first trip to a new motorcycle rally event in the Columbia Gorge, called Sportbike Northwest 2005.
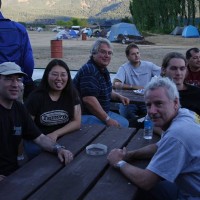
It was quite great time, spent with many friends from both the Pacific Northwest VFR and local ADV groups (I’d just purchased my 2nd Ducati powered machine, a Cagiva Gran Canyon). (Side note; in the PNW VFR group page, my yellow 2000 VFR800 is 5th bike from the left)
While looking up references for this post, I found that a few of the pictures that three of the photos I’ve taken at SBNW events are at the summary photos shown by Google.. sorta cool)

I know that I took MANY more photos from the event.. but these are the ones that I’d posted to my original blog (long dead), back in 2005.


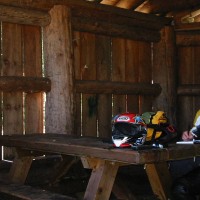


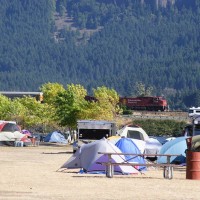

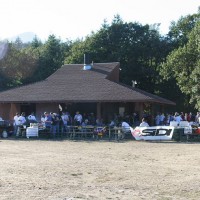
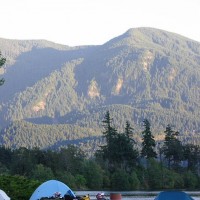

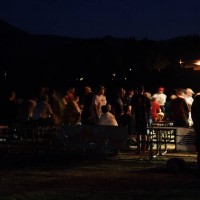
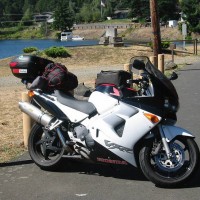


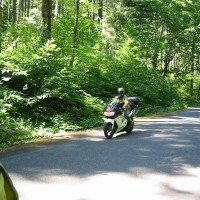


Many things on that Rally were not photographed, for a variety of reasons… Here are a few of the places that were enjoyed on the various rides/tours during SBNW.
Stonehenge
Yeap.. there is a Stonehenge in WA. Created by a visionary man named Sam Hill. [ More Info ]
Maryhill Loops Road
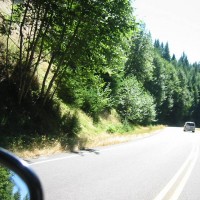
A private road opened just a few times a year to special Motorsports events. Maryhill Loops is an amazing ribbon of tarmac. During SBNW, the road is run one-way only, much like a race track. A similarly paced group of riders ascend; then when all have reached the top, the road is reversed and you descend. This is repeated many times for the small, limited group of people that purchase special tickets for this part of the rally. IMHO, a MUST DO!
Vista House
Vista House and the amazing section of road to (and from it), provides amazing views of The Gorge. I few years later I was fortunate enough to spend the day here riding with Reg Pridmore, his wife and my friend Mike. It was a great day of riding with a riding legend and a couple of good friends. Check out that road!.
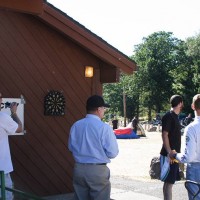
Route 30 Porsche Museum and Ice Cream
What a treat Route 30 is! Literally. :). As a 911 owner in the past, this was a great treat. It’s not very big, but the ice cream is a welcome respite from the often extream temps that time of year in The Gorge. I still have the Valentino Rossi jacket I bought there.
Yes.. this bridge is rather impressive (and also part of the PCT). Bridge of the Gods is a crossing point I used often to get from WA to OR during the rally. There is also a pretty good breakfast joint at the base of the bridge on the OR side. Give it try!
There are more things that I’ve forgotten, than remembered. Maybe I’ll update the blog if/when I do.
It sure was fun looking 11 years back at where I was, the things I did and the people I rode with. Times have changed, yet so many things remain the same. 😀
Installing CasperJS to work with PhantomJSs latest version 2.1.1
This is the current status of my test installation. My perviously hacked version of CaserpJS ( instructions are there: Helping CasperJS 1.1.0-beta3 play nice with PhantomJS 2.0.0 ), however it’s time to rev-up to the non-beta version of the code.
casperjs
CasperJS version 1.1.0-beta3 at /usr/lib/node_modules/casperjs, using phantomjs version 2.1.1
As of today:
Hopefully you already have Git installed, and you are ready to clone:
git clone git://github.com/n1k0/casperjs.git
Cloning into ‘casperjs’…
remote: Counting objects: 14392, done.
remote: Compressing objects: 100% (7/7), done.
remote: Total 14392 (delta 0), reused 0 (delta 0), pack-reused 14385
Receiving objects: 100% (14392/14392), 8.50 MiB | 0 bytes/s, done.
Resolving deltas: 100% (8648/8648), done.
Checking connectivity… done.
Using hints from the Instructions at CasperJS 1.1.0-DEV documentation, I first located my current casper image, moved it aside, then linked the new one into it’s location.
whereis casperjs
casperjs: /usr/bin/casperjs /usr/local/bin/casperjs /opt/n1k0-casperjs-e3a77d0/bin/casperjs /opt/casperjs/bin/casperjs /opt/casperjs/bin/casperjs.exemv /usr/bin/casperjs /usr/bin/casperjs.1.1.0-beta3
ln -sf `pwd`/bin/casperjs /usr/bin/casperjs
Running casper, I checked to ensure it’s on the latest version:
casperjs
CasperJS version 1.1.0-beta5 at /opt/casperjs, using phantomjs version 2.1.1
This looks like it’s good to go.. now CASPER AWAY!!
![]() It’s a gamble to do this, and according to the build script it’s going to take a long time to complete the compile / install of Phantom 2.1.1.
It’s a gamble to do this, and according to the build script it’s going to take a long time to complete the compile / install of Phantom 2.1.1.
Note: If you are looking for instructions on building for Ubuntu, the steps are different. I’ve documented that process in this post: Installing PhantomJS 2.1.1 on Ubuntu.
You may or may not have most of these on your AWS / CentOS system. I found that most of these were required to start the PhantomJS build.Here are the ones that I’ve confirmed I needed:
Installing the packages went smoothly:
sudo yum install autoconf pkgconfig.x86_64 python26-pyudev.noarch python26-twisted.noarch sip.x86_64 python27-pyudev.noarch python27-twisted.noarch gcc flex bison xorg-x11-server-Xorg.x86_64 xorg-x11-server-devel.x86_64 xorg-x11-utils.x86_64 xorg-x11-proto-devel.noarch sqlite-tcl.x86_64 sqlite-devel.x86_64 openssl.x86_64 crypto-utils.x86_64 openssl-devel.x86_64 libfontenc.x86_64 libfontenc-devel.x86_64 fontconfig.x86_64 fontconfig-devel.x86_64 libicu-devel.x86_64 freetype-devel.x86_64 libpng-devel.x86_64 libjpeg-turbo-devel.x86_64 libXext-devel.x86_64 libxcb-devel.x86_64 xcb-util.x86_64
git clone git://github.com/ariya/phantomjs.git
Cloning into ‘phantomjs’…
remote: Counting objects: 63695, done.
remote: Compressing objects: 100% (37/37), done.
remote: Total 63695 (delta 16), reused 0 (delta 0), pack-reused 63657
Receiving objects: 100% (63695/63695), 129.05 MiB | 4.08 MiB/s, done.
Resolving deltas: 100% (31013/31013), done.
Checking connectivity… done.cd phantomjs
git checkout 2.1.1
Note: checking out ‘2.1.1’.
[…]
HEAD is now at d9cda3d… Set version to “2.1.1”git submodule init
Submodule ‘3rdparty-win’ (https://github.com/Vitallium/phantomjs-3rdparty-win.git) registered for path ‘src/qt/3rdparty’
Submodule ‘qtbase’ (https://github.com/Vitallium/qtbase.git) registered for path ‘src/qt/qtbase’
Submodule ‘qtwebkit’ (https://github.com/Vitallium/qtwebkit.git) registered for path ‘src/qt/qtwebkit’git submodule update
Cloning into ‘src/qt/3rdparty’…
Cloning into ‘src/qt/qtbase’…
Cloning into ‘src/qt/qtwebkit’…
It seemed that I needed to set some different flags for the qtbase build. It was not clear to me if this could be done with the build.py options, so I hacked the qt/qtbase/configure script.
vi src/qt/qtbase/configure
First off, I changed the settings of these two values near the top of the config file:
Then commented out part of the section around Werror, so that the build would not treat warnings as errors. The C++ macro options in the code will generate A LOT of errors, most of them from the flags defined in build.py. I tried the route of disabling those flags and ended up with more errors and more issues.. so changing the flags in the config was my next option:
[…]
#CFG_WERROR=auto
CFG_WERROR=no
[…]
#CFG_DEV=no
CFG_DEV=yes
[…]
warnings-are-errors|Werror)
# if [ “$VAL” = “yes” ] || [ “$VAL” = “no” ]; then
# CFG_WERROR=”$VAL”
# else
UNKNOWN_OPT=yes
# fi
;;
[…]
python build.py
—————————————-
WARNING
—————————————-
Building PhantomJS from source takes a very long time, anywhere from 30 minutes
to several hours (depending on the machine configuration). It is recommended to
use the premade binary packages on supported operating systems.
For details, please go the the web site: http://phantomjs.org/download.html.
Do you want to continue (Y/n)? Y
Once the build has completed, you will find the binary to be built in the local directory bin/
ls -l bin/phantomjs
-rwxr-xr-x 1 root root 56736434 Feb 5 11:33 /usr/sbin/phantomjs
To complete the installation, you’ll need to replace the current phantomjs binary with the new one. To find the location if your current binary (if you have one), this should work:
whereis phantomjs
phantomjs: /usr/bin/phantomjs
Copy the new binary to that location and verify version:
cp bin/phantomjs /usr/bin/phantomjs
cp: overwrite ‘/usr/bin/phantomjs’? yphantomjs -v
2.1.1
![]() It’s a gamble to do this, and according to the build script it’s going to take a long time to complete the compile / install of Phantom 2.1.1.
It’s a gamble to do this, and according to the build script it’s going to take a long time to complete the compile / install of Phantom 2.1.1.
Note: If you run into build problems with some of the required components, such as the fonts, qtbase, etc., you will want to check my previous post Installing PhantomJS 2 on Ubuntu for some help.
You may or may not have most of these on your Ubuntu system. I found that most of these were required to start the PhantomJS build.Here are the ones that I’ve confirmed I needed:
Installing the packages went smoothly:
sudo apt-get install autoconf2.13 pkg-config build-essential qt5-qmake g++ python ruby perl sqlite flex bison gperf openssl fontconfig xorg xorg-dev xutils-dev xcb-proto libtool libsqlite0 libssl-dev libsqlite3-dev libfontconfig1-dev libicu-dev libfreetype6 libssl-dev libpng-dev libpng12-dev libjpeg-dev libx11-dev libxext-dev libxcb-xkb-dev x11proto-core-dev libxcb-render-util0 libqt5webkit5-dev
git clone git://github.com/ariya/phantomjs.git
Cloning into ‘phantomjs’…
remote: Counting objects: 63695, done.
remote: Compressing objects: 100% (37/37), done.
remote: Total 63695 (delta 16), reused 0 (delta 0), pack-reused 63657
Receiving objects: 100% (63695/63695), 129.05 MiB | 4.08 MiB/s, done.
Resolving deltas: 100% (31013/31013), done.
Checking connectivity… done.cd phantomjs
git checkout 2.1.1
Note: checking out ‘2.1.1’.
[…]
HEAD is now at d9cda3d… Set version to “2.1.1”git submodule init
Submodule ‘3rdparty-win’ (https://github.com/Vitallium/phantomjs-3rdparty-win.git) registered for path ‘src/qt/3rdparty’
Submodule ‘qtbase’ (https://github.com/Vitallium/qtbase.git) registered for path ‘src/qt/qtbase’
Submodule ‘qtwebkit’ (https://github.com/Vitallium/qtwebkit.git) registered for path ‘src/qt/qtwebkit’git submodule update
Cloning into ‘src/qt/3rdparty’…
Cloning into ‘src/qt/qtbase’…
Cloning into ‘src/qt/qtwebkit’…python build.py
—————————————-
WARNING
—————————————-Building PhantomJS from source takes a very long time, anywhere from 30 minutes
to several hours (depending on the machine configuration). It is recommended to
use the premade binary packages on supported operating systems.For details, please go the the web site: http://phantomjs.org/download.html.
Do you want to continue (Y/n)? Y
NOTE: If you want to suppress the warning regarding perils of the long compile, you an use the –confirm flag to bypass the question. This is really helpful if you want to background the process and write it to a log. Where I find this most beneficial is when I want to/need to close the terminal window before the compile completes.
Here is an optional method of running that will background the process, auto-reply to the warning and write to a log file:
nohup ./build.sh –confirm –jobs 1 > build.log &
You might carp about not being able to monitor progress now! Well sure you can.. just do a following tail on the file. Exact command varies with system, I’ll provide the one for typical LINUX and for typical OSX:
For typical LINUX:
tailf build.logFor typical OSX:
tail -f build.log
Once the build has completed, you will find the binary to be built in the local directory bin/
ls -l bin/phantomjs
-rwxr-xr-x 1 root root 56736434 Feb 5 11:33 /usr/sbin/phantomjs
To complete the installation, you’ll need to replace the current phantomjs binary with the new one. To find the location if your current binary (if you have one), this should work:
whereis phantomjs
phantomjs: /usr/bin/phantomjs
Copy the new binary to that location and verify version:
cp bin/phantomjs /usr/bin/phantomjs
cp: overwrite ‘/usr/bin/phantomjs’? yphantomjs -v
2.1.1
Woo.. I love *NIX, especially ‘sed’ (and awk too for that matter). Wonderful things you can do to automated your programming, speed up development and really REALLY cut down on cut-paste errors.
Today’s task, was to take this list of tables… and generate a single bit fat T-SQL command to truncate them all.. *however* these tables might not exist in a given environment so each Truncate is wrapped in a test to make sure the table is there. If it’s not there, nothing to do, not to mention avoid a potential fatal error trying to truncate a non-existent table.
Here is a snippet of the tables in question:
…
FCT_CRIMINOGENIC_NEED_TOP_DOMAINS
FCT_DETENTION_RISK_RESPONSE_DETAILS
FCT_DETENTION_RISK_RESPONSE_FULL
…
This is the desired T-SQL for these three tables
— Truncate table FCT_CRIMINOGENIC_NEED_TOP_DOMAINS
IF EXISTS (SELECT * FROM sys.objects WHERE NAME = ‘FCT_CRIMINOGENIC_NEED_TOP_DOMAINS’)
BEGIN
TRUNCATE TABLE FCT_CRIMINOGENIC_NEED_TOP_DOMAINS
END— Truncate table FCT_DETENTION_RISK_RESPONSE_DETAILS
IF EXISTS (SELECT * FROM sys.objects WHERE NAME = ‘FCT_DETENTION_RISK_RESPONSE_DETAILS’)
BEGIN
TRUNCATE TABLE FCT_DETENTION_RISK_RESPONSE_DETAILS
END— Truncate table FCT_DETENTION_RISK_RESPONSE_FULL
IF EXISTS (SELECT * FROM sys.objects WHERE NAME = ‘FCT_DETENTION_RISK_RESPONSE_FULL’)
BEGIN
TRUNCATE TABLE FCT_DETENTION_RISK_RESPONSE_FULL
END
sed ‘s#^\(.*\)#– Truncate table \1 \’$’\nIF EXISTS (SELECT * FROM sys.objects WHERE NAME = \’\\1\’) \\’$’\n BEGIN \\’$’\n TRUNCATE TABLE \\1 \\’$’\nEND \\’$’\n#g’ MY_INPUT_FILE
Setting up the string match. In this case it was simple.. I wanted the entire line which is represented with .*
\(.*\)
This loads the matching string into an internal register in ‘sed’ that can be references as ‘1’ within the output replacement expression. This is what it looks like in the command:
\1
Adding a newline in the output.. this was the big trick, and requires dropping into the shell to generate the desired output. The string in the command looks like this:
\’$’\n
You may notice after the first drop into the shell, the escaping has to be doubled for the substitution and the newline…
\\1 \\’$’\n
I cannot speak to the reason for this, but that is what I encountered and why the substitutions change in the latter part of the string. You may find that is not necessary, or might cause an issue in your environment. Adjust as necessary.