Category Archives: Raspberry Pi

STRATUX ADS-B Receiver – open ports inventory

While working on a service to read data published by the STRATUX open source ADS-B receiver, it became a big of a guessing game regarding which ports where open and what protocol they might support.

In the event others are interested, there is the the port inventory from a STRATUX v1.6r1 device built on 03-MAR-2021

PortProtocolServiceAnalysis
80tcphttp Golang net/http server AngularJS web interfae
8080tcphttp-proxy says Dump1090 but always returns 404 error
9977tcphttpJson Pi System Info – temp, memory, etc.
30001tcppago-services ?-TBD-
30002tcppago-services ?appears to be a string of hashstrings (e.g.: *8DAB1D28990C37BB78042B8E5676; )
30003tcpbasestationannounced as “ADS-B flight data”
30004tcplistenerThis is a binary “Beast” input port
30005tcpunknown-TBD- possibly some binary data stream (e.g.: ‘JXf#<' )
30006tcpADS JsonJson of partial ADS-B data – always seems to be missing loation and speed info
example:
{
  "Icao_addr": 11403422,
  "DF": 17,
  "CA": 5,
  "TypeCode": 4,
  "SubtypeCode": 6,
  "SBS_MsgType": 1,
  "SignalLevel": 0.000344,
  "Tail": "LEXUS05 ",
  "Squawk": null,
  "Emitter_category": 6,
  "OnGround": false,
  "Lat": null,
  "Lng": null,
  "Position_valid": false,
  "NACp": null,
  "Alt": null,
  "AltIsGNSS": false,
  "GnssDiffFromBaroAlt": null,
  "Vvel": null,
  "Speed_valid": false,
  "Speed": null,
  "Track": null,
  "Timestamp": "2021-03-05T17:16:47.203Z"
}
30104tcpunknown -TBD- possibly raw dump1090 data stream

Diving into the Port Data


Port 30002

Text stream of data, available via a tcp connection. Each message is a hash of some sort, value of which is undetermined at this point.

Here is an example of the message stream

*5DA8C3EA379B4F;
*02E195B70936B4;
*5DA21603EB2A06;
*02C60BB129C2D0;
*02C60BB129C2D0;
*8DAD21C1592DD7EF9896504E8E50;
*02E19718EEFD09;
*8DA1B52B596233C53D9901456D9D;
*8DA216035913378FE2327C198F8A;
*8DA2160399104987B8340BFCE929;
*8DA9942E585F100DBA20C5712D44;
*8DA9942E9908212C509814A6DF7A;

Port 30003

Text stream of data, available via a tcp connection. Each message is comma delimited, and appears to the the ICAO integer converted to Base16 hex.

Here is an example of the message stream

MSG,3,111,11111,A4AB64,111111,2021/03/06,17:16:35.554,2021/03/06,17:16:35.573,,8900,,,30.41666,-98.63536,,,,,,0 MSG,4,111,11111,A4AB64,111111,2021/03/06,17:16:35.554,2021/03/06,17:16:35.574,,,159,93,,,-448,,,,,0 MSG,3,111,11111,A313BF,111111,2021/03/06,17:16:35.587,2021/03/06,17:16:35.626,,36000,,,29.68039,-98.32875,,,,,,0 MSG,7,111,11111,A8DB58,111111,2021/03/06,17:16:35.602,2021/03/06,17:16:35.627,,5900,,,,,,,,,,0 MSG,3,111,11111,A2A18A,111111,2021/03/06,17:16:35.607,2021/03/06,17:16:35.627,,5625,,,29.66141,-98.47789,,,,,,0 MSG,4,111,11111,A2A18A,111111,2021/03/06,17:16:35.607,2021/03/06,17:16:35.628,,,221,248,,,128,,,,,0 MSG,7,111,11111,A8DB58,111111,2021/03/06,17:16:35.608,2021/03/06,17:16:35.628,,5900,,,,,,,,,,0 MSG,3,111,11111,A417D6,111111,2021/03/06,17:16:35.609,2021/03/06,17:16:35.628,,24000,,,30.09300,-97.62418,,,,,,0

Port 30005

Binary stream of data, available via a tcp connection.

Here is an example of the message stream

y# ??2??)k?????3]?Sx?l3??.?@?????B?xf~3??.??yRX??L?ma??3??/?8 q?!I????3??1Q???? Z?O??3??69???+(X??????-N2??6??”ᕸ?eP3??7??#??o???,???3??;W#??o#?t?l??Zg3??>?&???Y}?o? ???I3??C k??+(???P,2N?3??D????yR? ??-3?3??F,???Y??x?_??2??F6? ?8\`3??Hg???+?ȱ?/?2??I????p2??Ke`#ᕸ?eP2??P?]?+(??A2??U^ ?8\`2??Un<ᕸ???3??XWW???.X?????_?3??X????Y???{?+3??X?h%??o?B?`_?_b?2??Z?f???~?2??Z?j??p2??]- ??|+?3??_e? ??SxX??56S?J?3??_?????.@ ???2??`????2??e?F%]?o7C?3??jt??Sx?y%?`2??l/???? 3??n??????? ??-??3??q?U q? ?-0?Jc3??q?)???Y??)? T??2????7?8?}?2???γ 8إ?2????H ?FU3????|????Y??1??2???L?]?\g??2????E]??.???3??|?{??????>?0 2????]?\g??3????????!;

Port 30006

High volume text stream, available via tcp connection. Messages are in a Json format. Observation is that these always seem to lack geo-location, speed and altitude data.

Here is an example of the message stream

{“Icao_addr”:10627880,”DF”:11,”CA”:5,”TypeCode”:0,”SubtypeCode”:0,”SBS_MsgType”:8,”SignalLevel”:0.000816,”Tail”:null,”Squawk”:null,”Emitter_category”:null,”OnGround”:false,”Lat”:null,”Lng”:null,”Position_valid”:false,”NACp”:null,”Alt”:null,”AltIsGNSS”:false,”GnssDiffFromBaroAlt”:null,”Vvel”:null,”Speed_valid”:false,”Speed”:null,”Track”:null,”Timestamp”:”2021-03-06T17:34:12.129Z”} {“Icao_addr”:10645249,”DF”:11,”CA”:5,”TypeCode”:0,”SubtypeCode”:0,”SBS_MsgType”:8,”SignalLevel”:0.000846,”Tail”:null,”Squawk”:null,”Emitter_category”:null,”OnGround”:false,”Lat”:null,”Lng”:null,”Position_valid”:false,”NACp”:null,”Alt”:null,”AltIsGNSS”:false,”GnssDiffFromBaroAlt”:null,”Vvel”:null,”Speed_valid”:false,”Speed”:null,”Track”:null,”Timestamp”:”2021-03-06T17:34:12.139Z”} {“Icao_addr”:11402414,”DF”:4,”CA”:0,”TypeCode”:0,”SubtypeCode”:0,”SBS_MsgType”:5,”SignalLevel”:0.001636,”Tail”:null,”Squawk”:null,”Emitter_category”:null,”OnGround”:false,”Lat”:null,”Lng”:null,”Position_valid”:false,”NACp”:null,”Alt”:6075,”AltIsGNSS”:false,”GnssDiffFromBaroAlt”:null,”Vvel”:null,”Speed_valid”:false,”Speed”:null,”Track”:null,”Timestamp”:”2021-03-06T17:34:12.142Z”} {“Icao_addr”:10645249,”DF”:11,”CA”:5,”TypeCode”:28,”SubtypeCode”:1,”SBS_MsgType”:8,”SignalLevel”:0.000837,”Tail”:null,”Squawk”:null,”Emitter_category”:null,”OnGround”:false,”Lat”:null,”Lng”:null,”Position_valid”:false,”NACp”:null,”Alt”:null,”AltIsGNSS”:false,”GnssDiffFromBaroAlt”:null,”Vvel”:null,”Speed_valid”:false,”Speed”:null,”Track”:null,”Timestamp”:”2021-03-06T17:34:12.158Z”}
Stratux – repartition to use entire sd card

The issue..

It’s been an ongoing tail of woe, when it comes to installing a new version of STRATUX on a new card; out of the box, at least in all the installs I’ve done, it fails to make use of the entire card. With any sort of logging enabled to measure performance, run tests or just keep even a short history of contacts received.. you’re out of disc space… FAST:

Here is the ‘df’ dump of a STRATUX fixed position station running the latest version (released September 2019). As you can see, it’s only allocated 2GB of the 32GB card’s total available space. That is a lot of wasted space on the card.

Filesystem      Size  Used Avail Use% Mounted on
/dev/root       1.8G  1.6G  110M  94% /
/dev/mmcblk0p1   60M   20M   41M  34% /boot

Get total device size:

fdisk -l | grep Disk

Disk /dev/ram0: 4 MiB, 4194304 bytes, 8192 sectors
...
Disk /dev/mmcblk0: 29.7 GiB, 31914983424 bytes, 62333952 sectors

Disklabel type: dos
Disk identifier: 0xe6a544c8

Repartitioning the Device

With the physical partition located.. start fdisk:
fdisk -u /dev/mmcblk0

I like to increase the size of the main partition to 6G to leave room for installing more system updates and tools.

To do this you will need to know the starting and ending blocks of the partition. That is available with the ‘print’ command:

Command (m for help): p

Results:

Disk /dev/mmcblk0: 29.7 GiB, 31914983424 bytes, 62333952 sectors
Units: sectors of 1 * 512 = 512 bytes
Disk identifier: 0xe6a544c8

Device         Boot  Start     End Sectors  Size Id Type
/dev/mmcblk0p1        8192  131071  122880   60M  c W95 FAT32 (LBA)
/dev/mmcblk0p2      131072 3887103 3756032  1.8G 83 Linux

To increase the size, the partition must first be deleted, then re-create at the exact same starting block, or the filesystem will become corrupted.

First, delete the partition with the ‘d’ command, selecting partition #2.

Next, re-create the partition with the same starting block, but now with increased filesystem size:

Command (m for help): d 

  Partition number (1,2, default 2): 2

  Partition 2 has been deleted.

Command (m for help): p
 
  Device         Boot Start    End Sectors Size Id Type
  /dev/mmcblk0p1       8192 131071  122880  60M  c W95 FAT32 (LBA)


Command (m for help): n

  Partition type
     p   primary (1 primary, 0 extended, 3 free)
     e   extended (container for logical partitions)
  Select (default p): p
  Partition number (2-4, default 2): 2

First sector (2048-62333951, default 2048): 131072

Last sector, +sectors or +size{K,M,G,T,P} (131072-62333951, default 62333951): +6G

  Created a new partition 2 of type 'Linux' and of size 6 GiB.

Command (m for help): w
  
  The partition table has been altered.
  Calling ioctl() to re-read partition table.
  Re-reading the partition table failed.: Device or resource busy

  The kernel still uses the old table. The new table will be used
  at the next reboot or after you run partprobe(8) or kpartx(8).

The partition table will have been modified but the kernel will not be able to take that into account as some partitions are mounted.

In theory, the command ‘partx /dev/mmcblk0’ is all that is required.. however I’ve found that rebooting is the only way to really reload the partition, so that the filespace can be increased.

reboot

Once system comes back up, run ‘resize2fs‘ to expand the filesystem.

Fill up drive with current filesystem

Execute `resize2fs` and run an on-line expansion of the filesystem, and finally verify it again with ‘df -h’

resize2fs /dev/mmcblk0p2

  resize2fs 1.43.3 (04-Sep-2016)
  Filesystem at /dev/mmcblk0p2 is mounted on /; on-line resizing
  required
  old_desc_blocks = 1, new_desc_blocks = 1
  The filesystem on /dev/mmcblk0p2 is now 1572864 (4k) blocks long.

Running df shows that it has in fact resized. STEP 1 COMPLETED

root@STRATUX-FIXED:~# df -h
Filesystem      Size  Used Avail Use% Mounted on
/dev/root       5.9G  1.6G  4.2G  28% /
devtmpfs        459M     0  459M   0% /dev
tmpfs           463M     0  463M   0% /dev/shm
tmpfs           463M  6.2M  457M   2% /run
tmpfs           5.0M  4.0K  5.0M   1% /run/lock
tmpfs           463M     0  463M   0% /sys/fs/cgroup
/dev/mmcblk0p1   60M   20M   41M  34% /boot

Creating a Personalized Recreation Dashboard – Installing Software (Part 2)

Rasperian Buster has a working desktop out of the box, but to run NodeJS Roosevelt and Java, some installations will need to be done first.

INSTALLING JAVA JDK / JRE

This is pretty simple. I like to install both the Dev Kit (JDK) and the Runtime (JRE) elements. To do so on Buster, simply request the default packages:

sudo apt install default-jdk default-jre

Let Apt do it’s work. Once done you should be able to verify java is installed and available:

java --version

My installed version reported openjdk 11.0.7 2020-04-14

INSTALLING NodeJS and NVM

Next, NodeJS will be installed and built from git

curl -sL https://deb.nodesource.com/setup_10.x | sudo bash -

Installing NVM follows a similar process

curl -o- https://raw.githubusercontent.com/nvm-sh/nvm/v0.34.0/install.sh | bash

Now the Pi is setup and ready to install other helper applications.

INSTALLING ROOSEVELT SCAFFOLDING

For this project, I selected Roosevelt based on successful prior experience with a complex NodeJS / Java web application built on Roosevelt. Follow the prompts to create the basic application.

I selected a directory called lakedash and an app named app .

npx mkroosevelt

SETTING UP THE BASIC APP FRAMEWORK

Change directories to the path lakedash/app (or whatever you picked).

cd  lakedash/app

Now, run the node install process to download and localize the packages used by Roosevelt. It’s easy.. just do it.

npm i

Starting up the simple little app in development mode.

npm run dev

Next phase will be setting up some swap space by re-partitioning the little Pi’s SD card.

Creating A Personalized Recreation Dashboard – Setting up the Pi – Part 1

With the impending move to one of the state’s premier recreation areas, I’m embarking upon setting up a customized data systems based on the Raspberry Pi, that will collect and display recreation related data. Some of the goals of this project are:

THE PLAN

  • River flow rate — knowing what the current river flow helps decided if it will be a weekend of tubing, kayaking or finding something else to do. River flow is managed by the Army Corps of Engineers and can vary greatly. Knowing the current flow helps plan the day.
  • Lake Level — certain boat ramps, beaches and parks are better at near-full level than not. Having a good idea of what the beaches and marinas might be like before heading down the hill to the lake can be helpful.
  • Area Traffic — this one will be tricky, but the plan is to leverage TXDOT traffic APIs to find out what the traffic might be like heading into the major cities (ex. Austin or San Antonio) should there be a need to do so. There are a lot of existing resources but having it all in a dashboard would be nice to have.
  • WX — of course.. some sort of simple weather forecast dash to show the day’s expected temps, if lightning is in the forecast (you don’t want to be on the river/lake when the heavens open up), etc.

THE RECREATION DEVICE

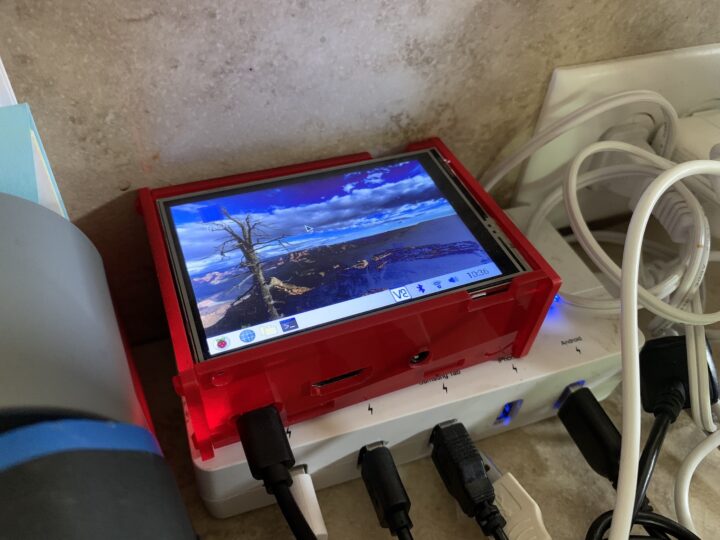
The plan is to use a Raspberry Pi 3b as the data harvesting and webapp platform. In addition to the standard Pi, I’ve added a 3.5″ touchscreen to display the data in a stand-alone format.

Raspberry Pi 3b with 3.5″ touchscreen

The full plan for the webapp will support both the micro 3.5″ display as well as interface versions for larger displays such as a table or desktop.

CONFIGURING THE PI

Once you have downloaded the Pi Image you want to run, have it burned to the micro SD card and the system booted up, you’ll need to have it either plugged into your network on an ethernet cable, or attached via HDMI to a monitor.

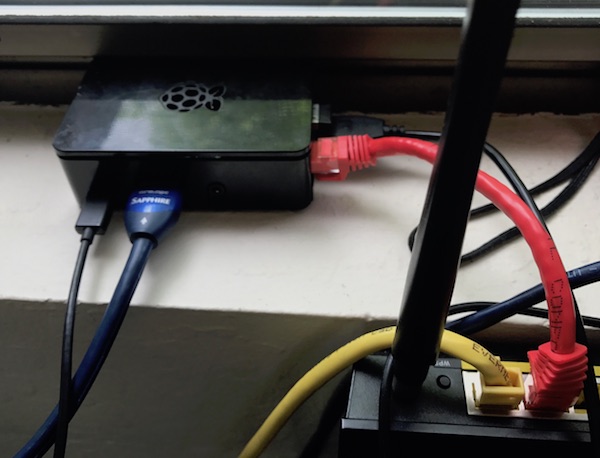
I plugged the stripped down device into the router with short cable:

This image has an empty alt attribute; its file name is stratux-pi-initial.jpg

Once it was powered on, checked the router to locate it’s DHCP IP address, in this case it’s 192.168.1.220

Using the terminal window on my, I ssh’d into the device as the user ‘pi’ using default password ‘raspberry’ . Once connected, I set about updating the PI.

sudo apt-get upgrade

If you face a dpkg error.. this command will resolve it, and you can re-run the command above.

sudo dpkg --configure -a

sudo apt-get upgrade

SETTING UP WIFI

To untether the device from my LAN, you’ll need to configure the Pi to connect to your WiFi. If you are running the desktop version of Raspberian, you can do this with the networking setup dialogs. If you do not, here are the steps for setting up your networking, including defining your network and password.

Locate the wifi network configuration file and add the following data. You can of course use tools to encrypt the password in this file, but I’m not super-concerned about an exploit on my LAN so I’ve let this in plain text.

sudo vi /etc/wpa_supplicant/wpa_supplicant.conf

Add the following block, with your network specifics

ctrl_interface=DIR=/var/run/wpa_supplicant GROUP=netdev
update_config=1

country=USnetwork={
  ssid="YOUR-NETWORK-SSID"
  psk="your-super-secret-password-goes-here"
  key_mgmt=WPA-PSK
}

Now setup the wlan with a static IP address. You could configure a DNS service to automagically detect the IP address of the system, but for me it was easier for me to pick a static IP and configure the Pi’s network accordingly.

Edit the network/interfaces file:

sudo vi /etc/network/interfaces

Add the following block. This will set a static IP (make sure it’s in a range not managed by your DHCP to avoid future conflicts).

auto wlan0

iface wlan0 inet static
  metric 0
  wireless-power off
  hostname recserver
  wpa-conf /etc/wpa_supplicant/wpa_supplicant.conf
  address 192.168.1.100
  netmask 255.255.255.0
  gateway 192.168.1.1
  network 192.167.1.0
  broadcast 192.168.1.255
  dns-nameservers 192.168.1.1 8.8.8.8

SETTING UP THE DISPLAY

The display that I have installed in the Pi’s case is the MHS-3.5 display. Installing the drivers requires only a few commands. While logged in as the user ‘pi’ download the LCD-show package from git and configure execute the display configuration script.

git clone https://github.com/Lcdwiki/LCD-show.git

Move to the cloned directory and run the setup script

cd LCD-show
sudo ./MHS35-show

This will download and install packages required to use the display. Once it completes, you’ll want to reboot the Pi to verify that it is working properly.

sudo init 6

Upon reboot, the screen should become visible and operable.

In Part 2, I’ll cover installing Node, Maven and Node Package Manager.

Stratux Active Ports

Dictionary of active ports found on a typical STRATUX ADS-B device.

Running nmap, between ports 100 and 48000, the following ports were found to be open on my STRAUX receiver:


Nmap scan report for 192.168.1.200
Host is up (0.0037s latency).
Not shown: 47892 closed ports
PORT STATE SERVICE
8080/tcp open http-proxy
9977/tcp open unknown
30001/tcp open pago-services1
30002/tcp open unknown
30003/tcp open unknown
30004/tcp open unknown
30005/tcp open unknown
30006/tcp open unknown
30104/tcp open unknown

STRATUX Port Mapping

Port Protocol Detected As Data Stream Contents
8080 tcp http-proxy HTTP 400 response
9977 tcp unknown JSON – Pi hardware data
30001 tcp pago-services1 no data seen on port
30002 tcp unknown TEXT – stream of hash/id strings

*20000FBF8811DA;
*8DA8B395E1160600000000E15133;
*8DAAF471591DA3F06975FD4FF289;
 
30003 tcp unknown TEXT – stream of ICAO ids in a message with timestamp and some Lat/Lon data

MSG,3,111,11111,A21F2F,...,10450,,,29.68991,-98.40042,,,,,,0
MSG,7,111,11111,A17D1A,...,3050,,,,,,,,,,0
30004 tcp unknown no data seen on port
30005 tcp unknown BINARY – unknown stream type
30006 tcp unknown JSON – stream of contact informtion with tail, squawk, Lat/Lon etc.

{“Icao_addr”:11064874,”DF”:0,”CA”:0,”TypeCode”:19,”SubtypeCode”:1,”SBS_MsgType”:7,”SignalLevel”:0.000378,”Tail”:null,”Squawk”:null,”Emitter_category”:null,”OnGround”:false,”Lat”:null,”Lng”:null,”Position_valid”:false,”NACp”:null,”Alt”:35000,”AltIsGNSS”:false,”GnssDiffFromBaroAlt”:null,”Vvel”:null,”Speed_valid”:false,”Speed”:null,”Track”:null,”Timestamp”:”2020-10-08T14:07:01.547Z”}
{“Icao_addr”:11425751,”DF”:17,”CA”:5,”TypeCode”:11,”SubtypeCode”:0,”SBS_MsgType”:3,”SignalLevel”:0.000388,”Tail”:null,”Squawk”:null,”Emitter_category”:null,”OnGround”:false,”Lat”:29.654480,”Lng”:-97.743935,”Position_valid”:true,”NACp”:null,”Alt”:17025,”AltIsGNSS”:false,”GnssDiffFromBaroAlt”:null,”Vvel”:null,”Speed_valid”:false,”Speed”:null,”Track”:null,”Timestamp”:”2020-10-08T14:07:02.319Z”}

30104 tcp unknown no data seen on port