Looking back at 12 years of blog posts, photographs and tech articles, today I’m pulling up some of my favorite photos from years past.
Photo descriptions include a link to the story where it originally appeared.


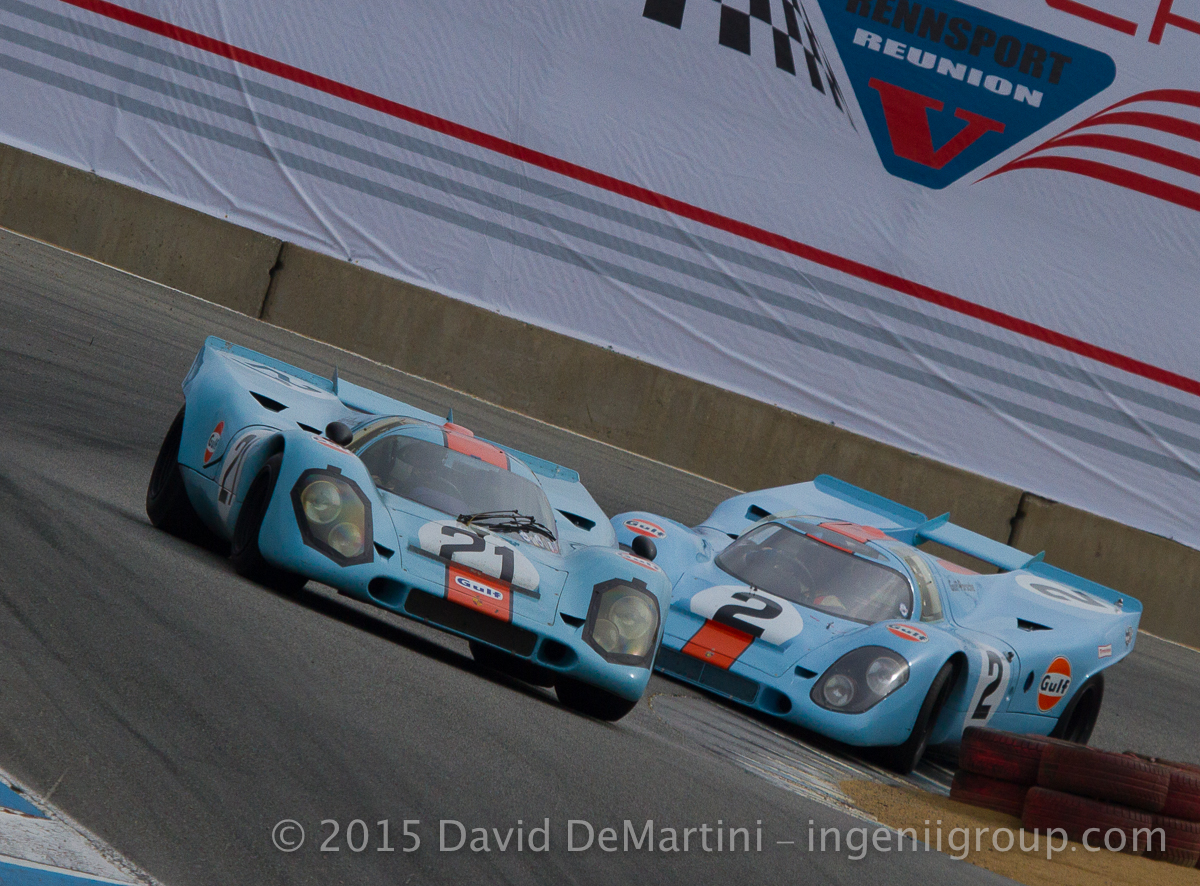


Looking back at 12 years of blog posts, photographs and tech articles, today I’m pulling up some of my favorite photos from years past.
Photo descriptions include a link to the story where it originally appeared.
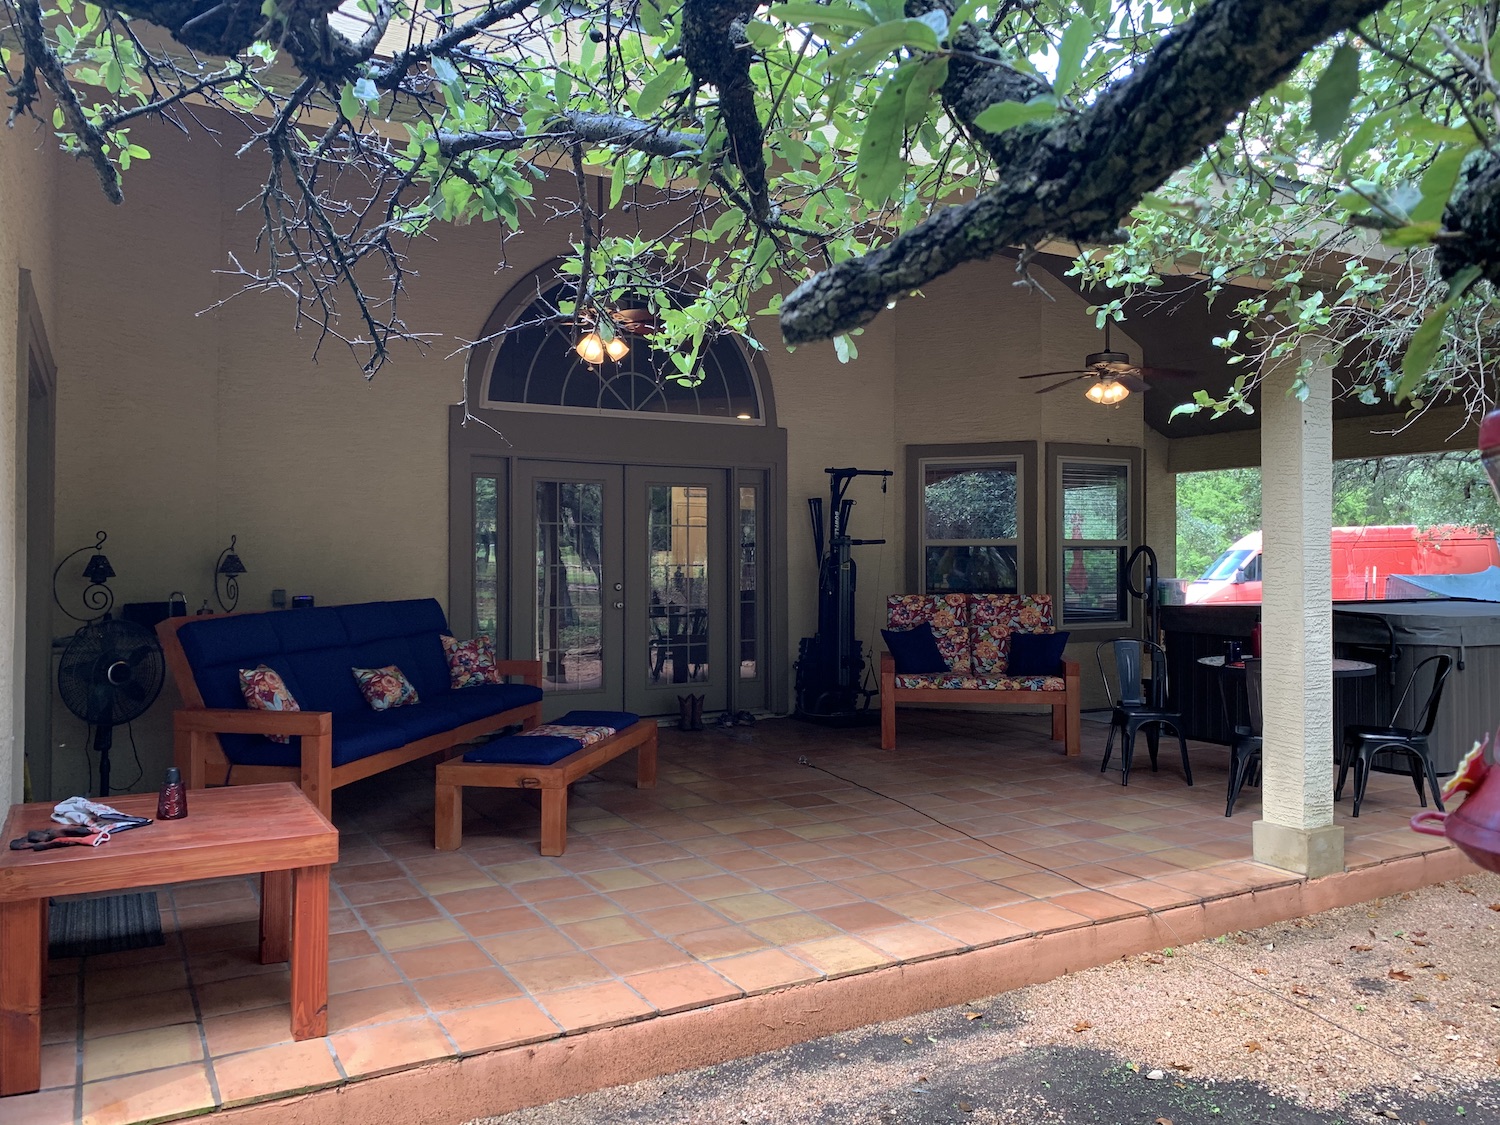
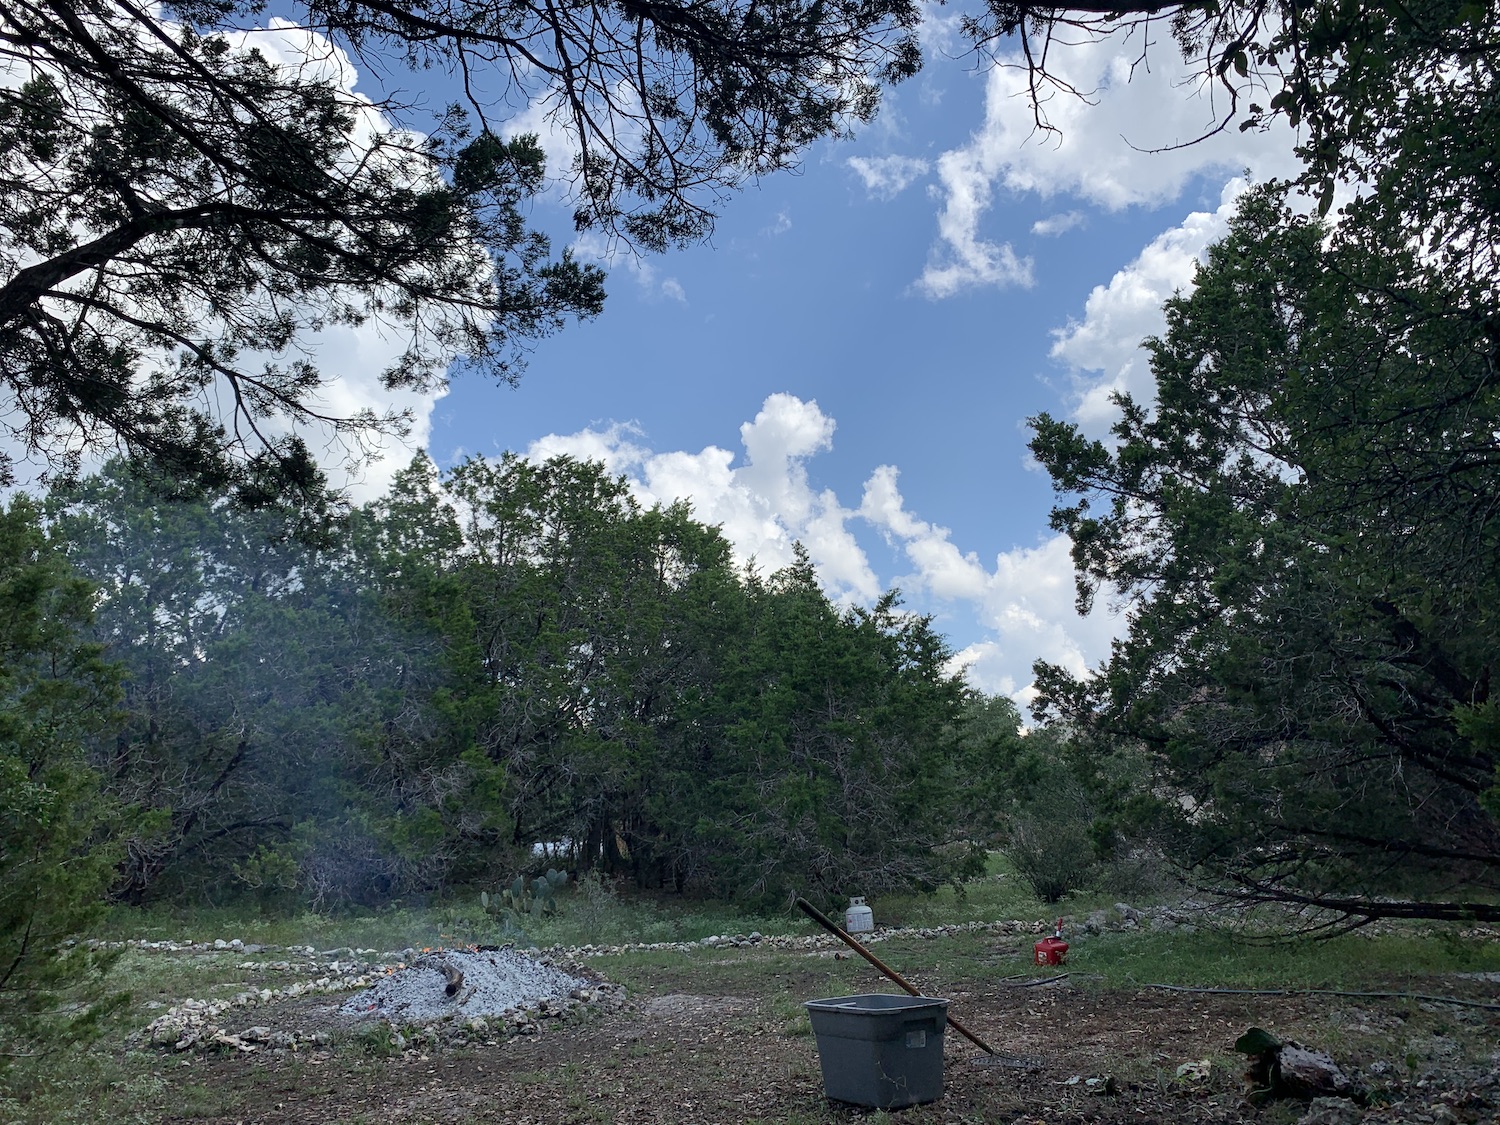
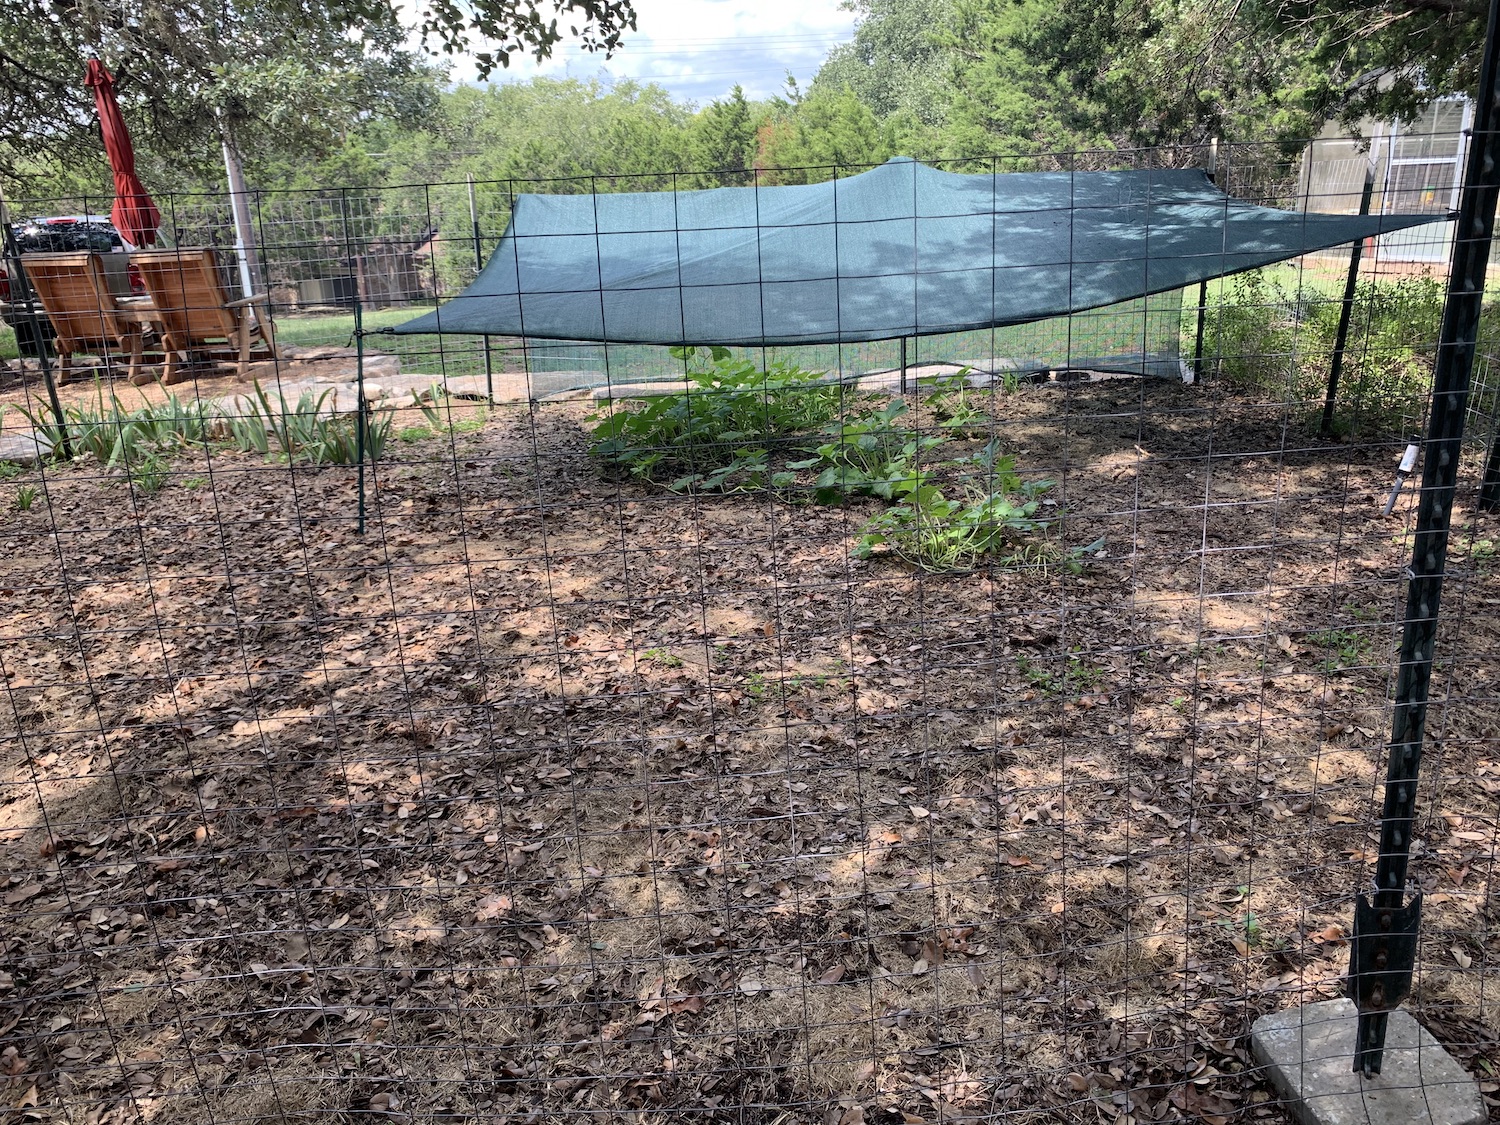
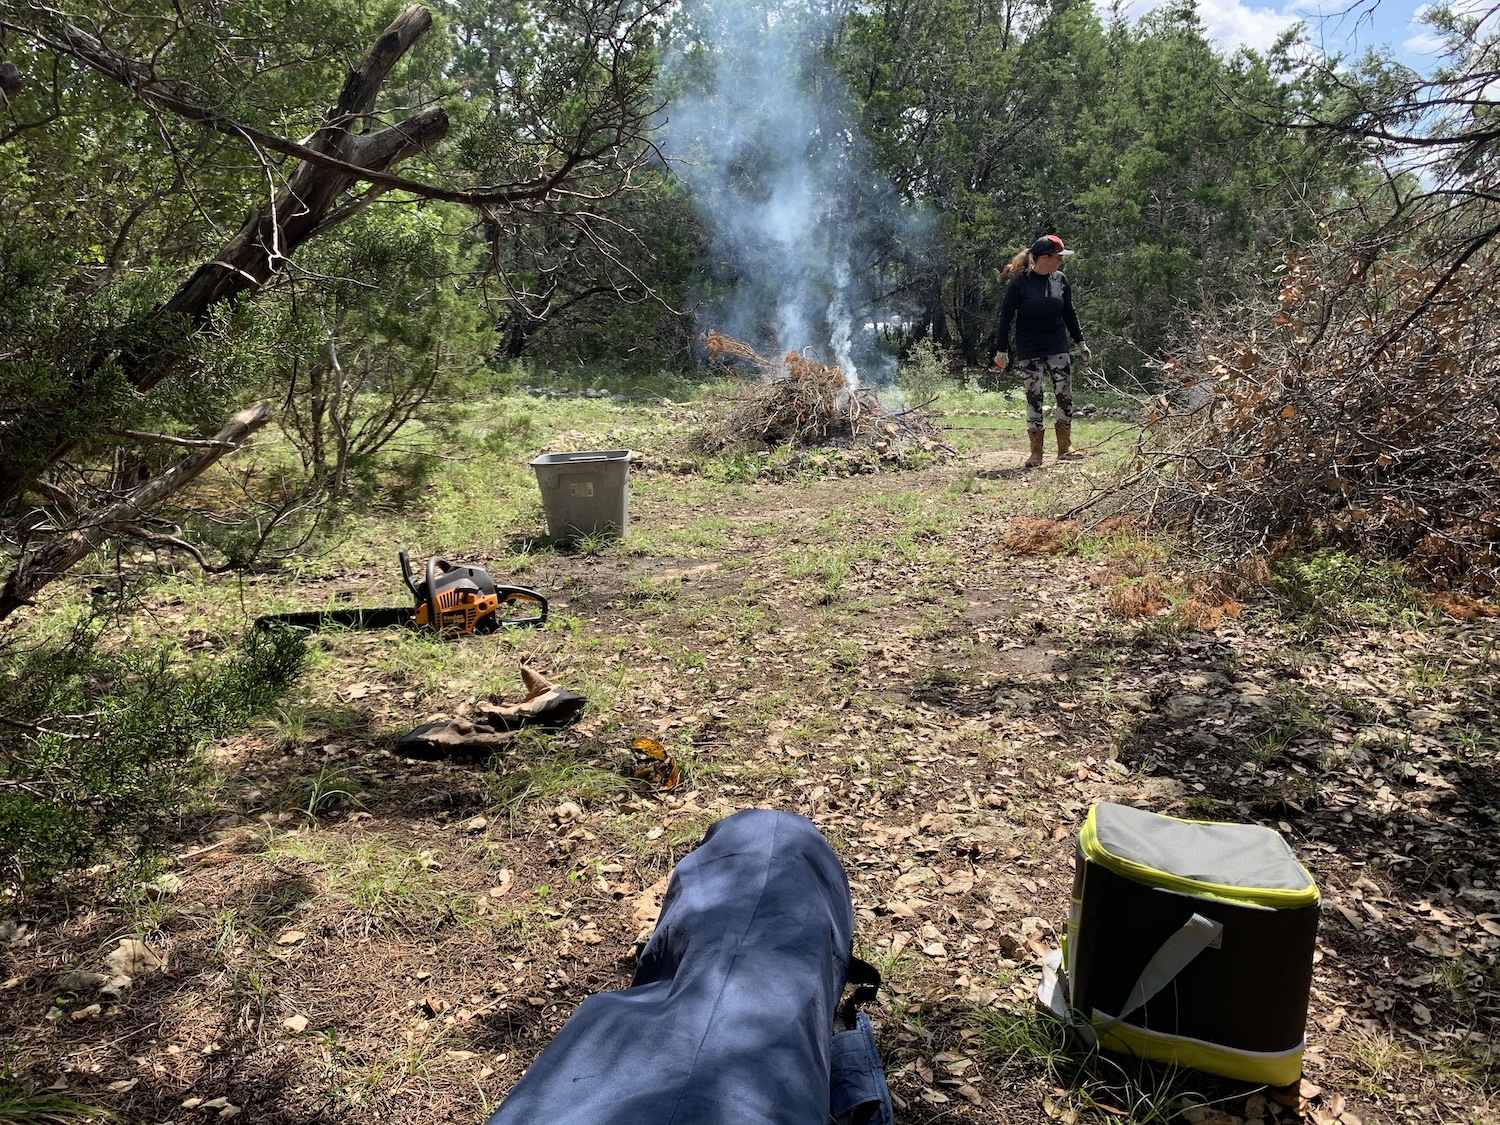
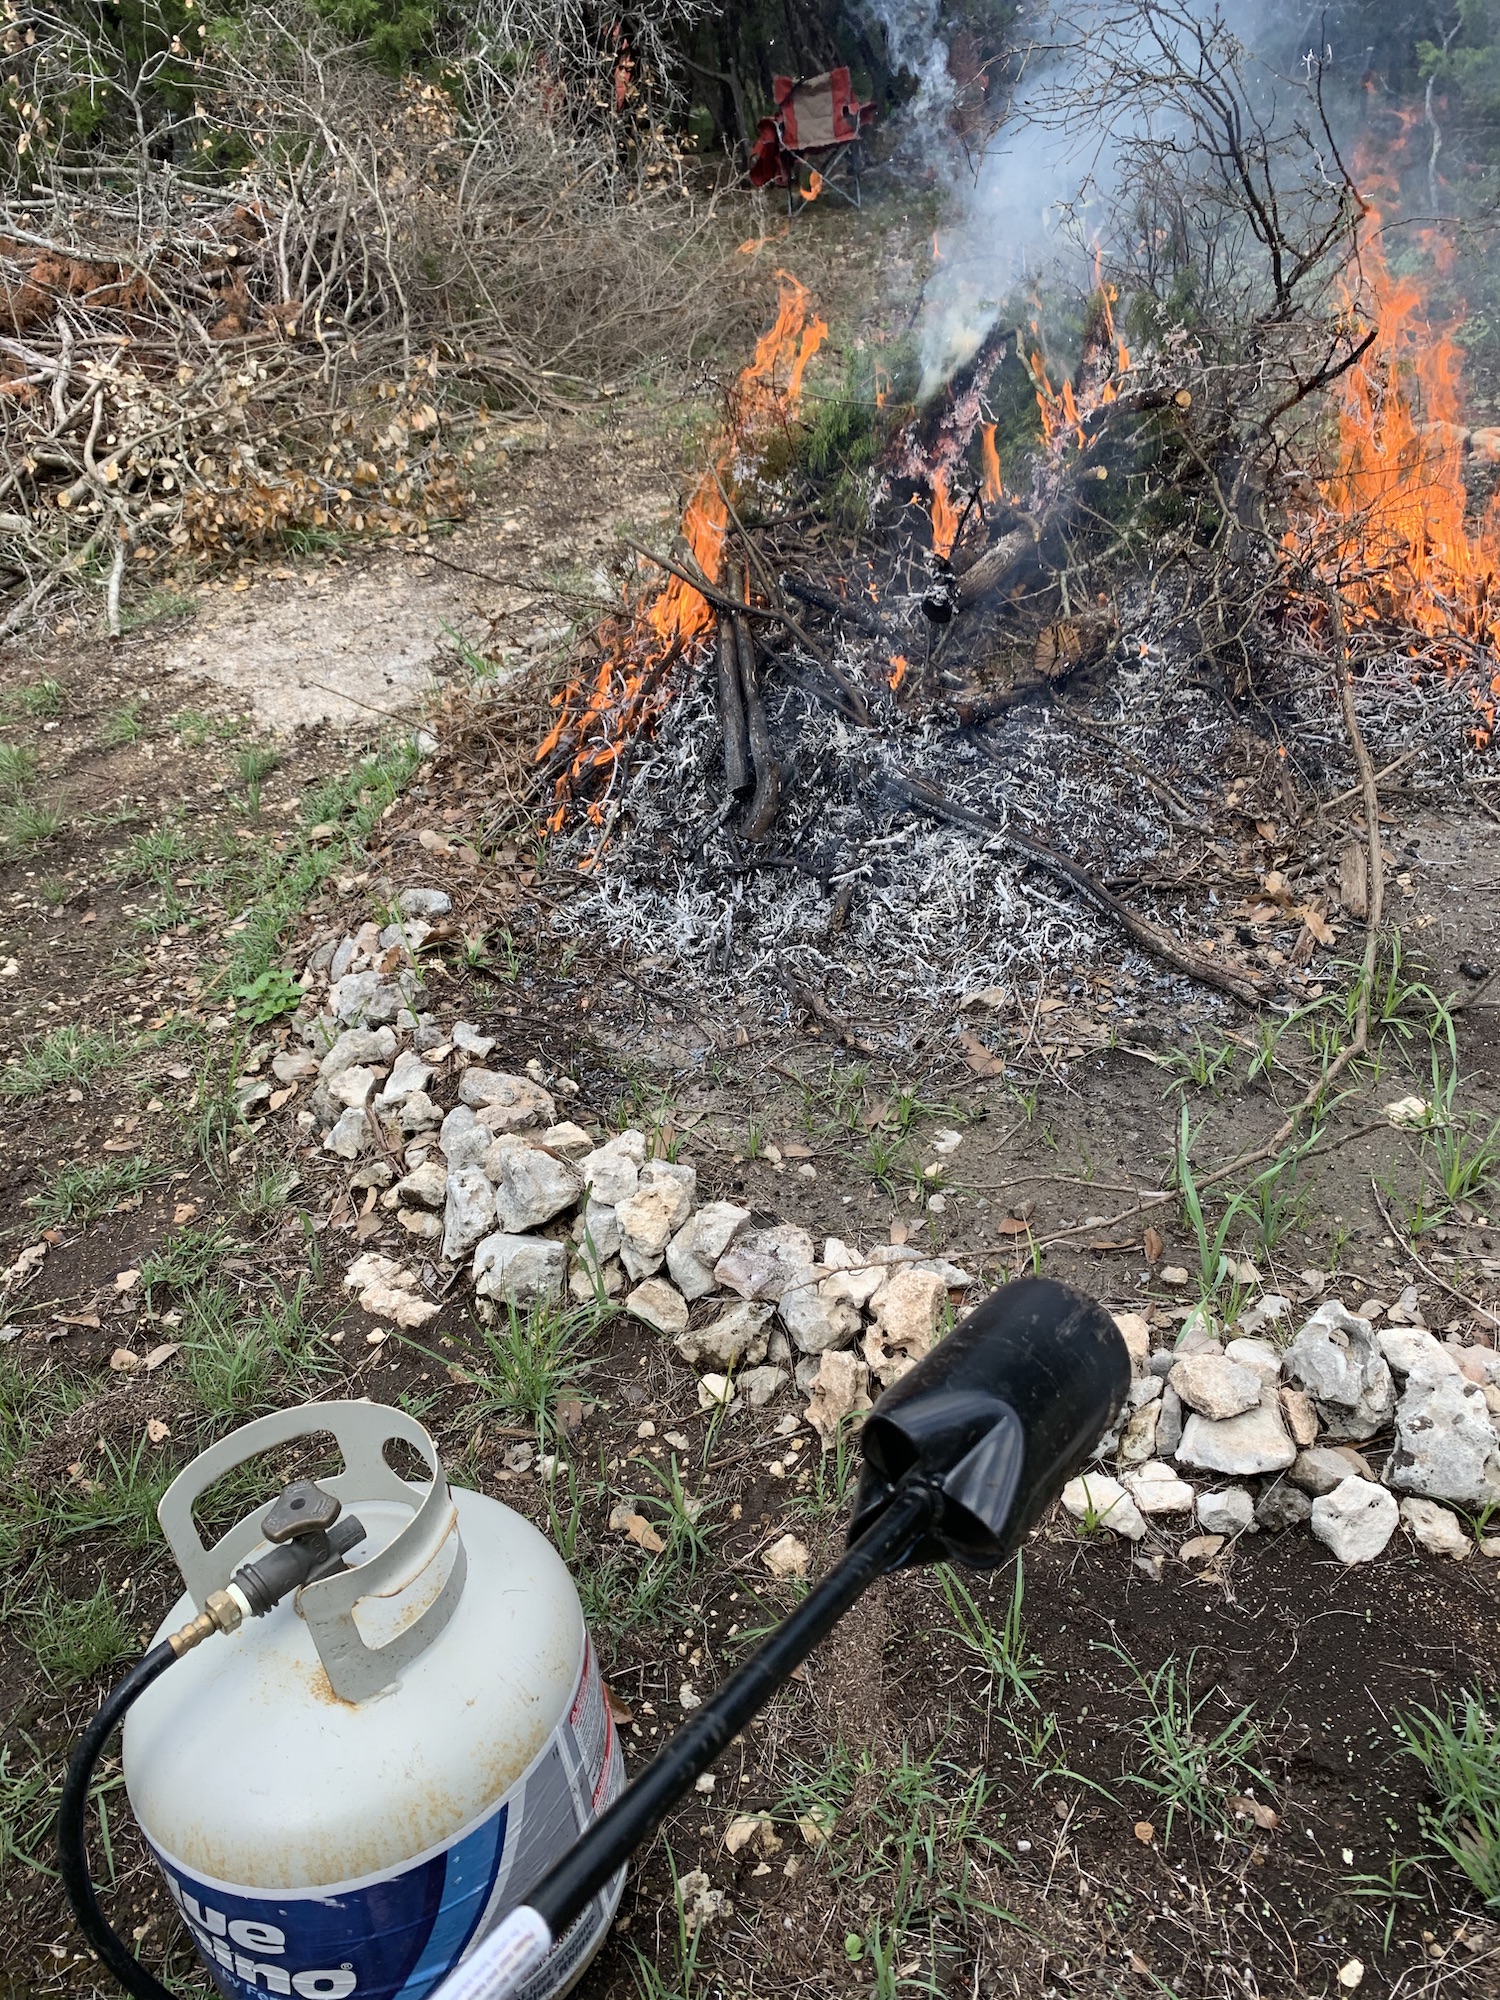
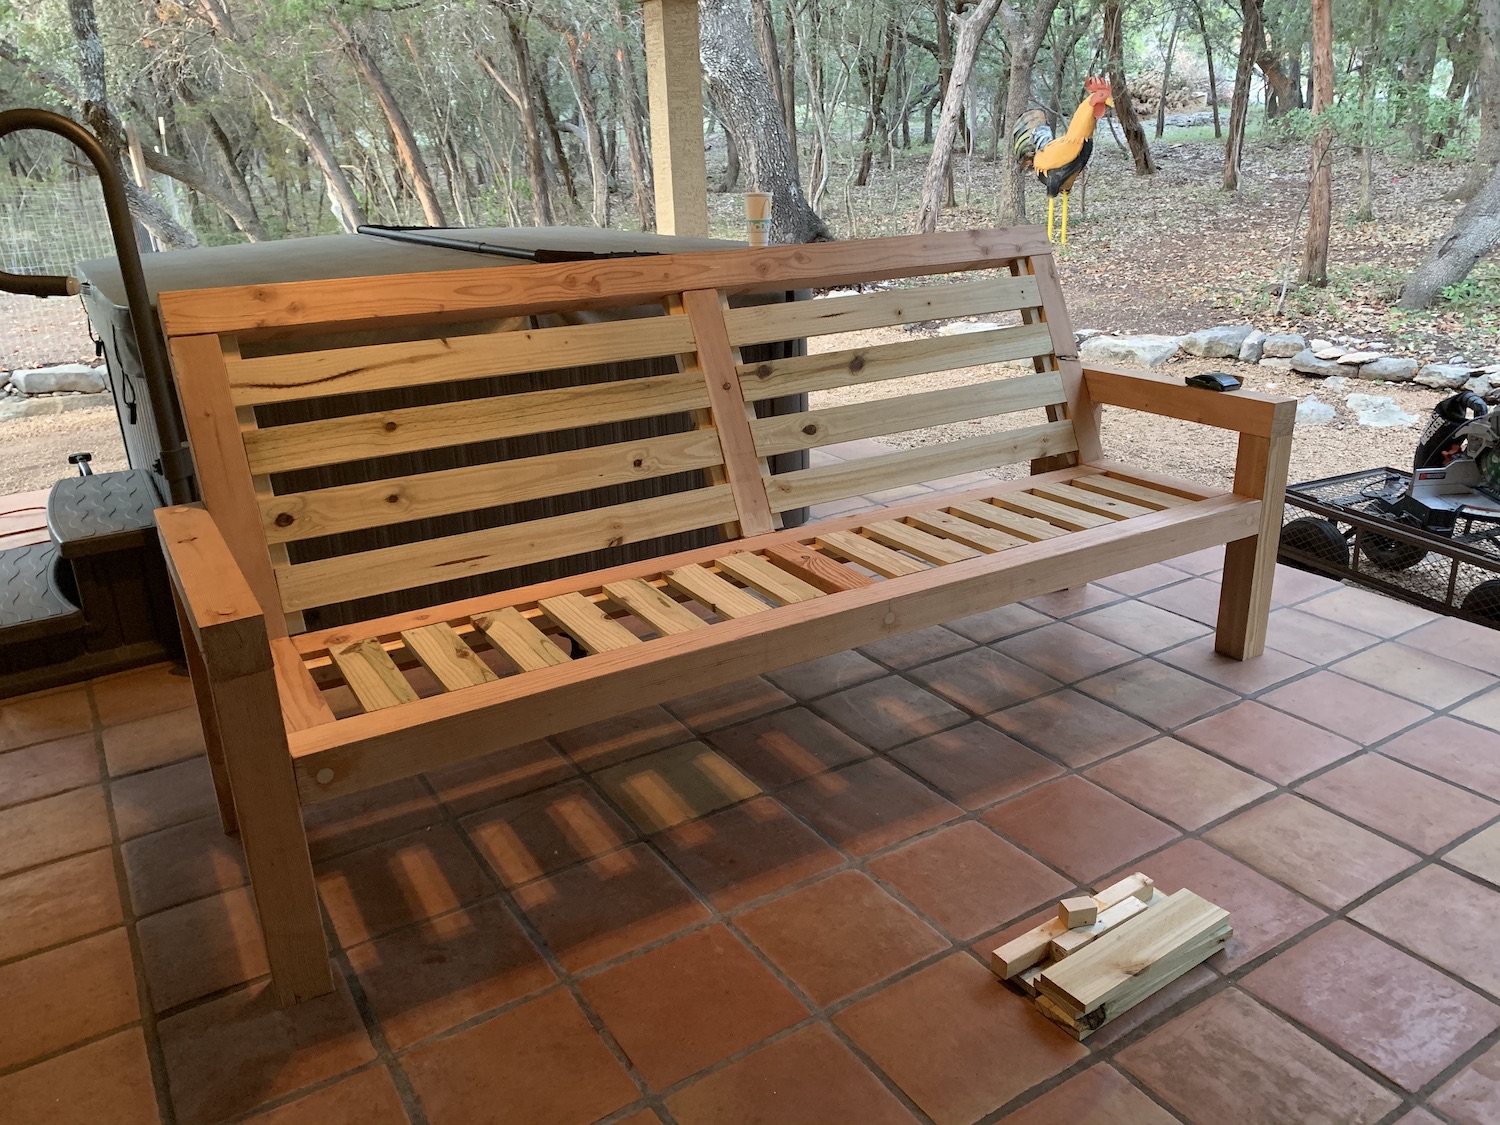
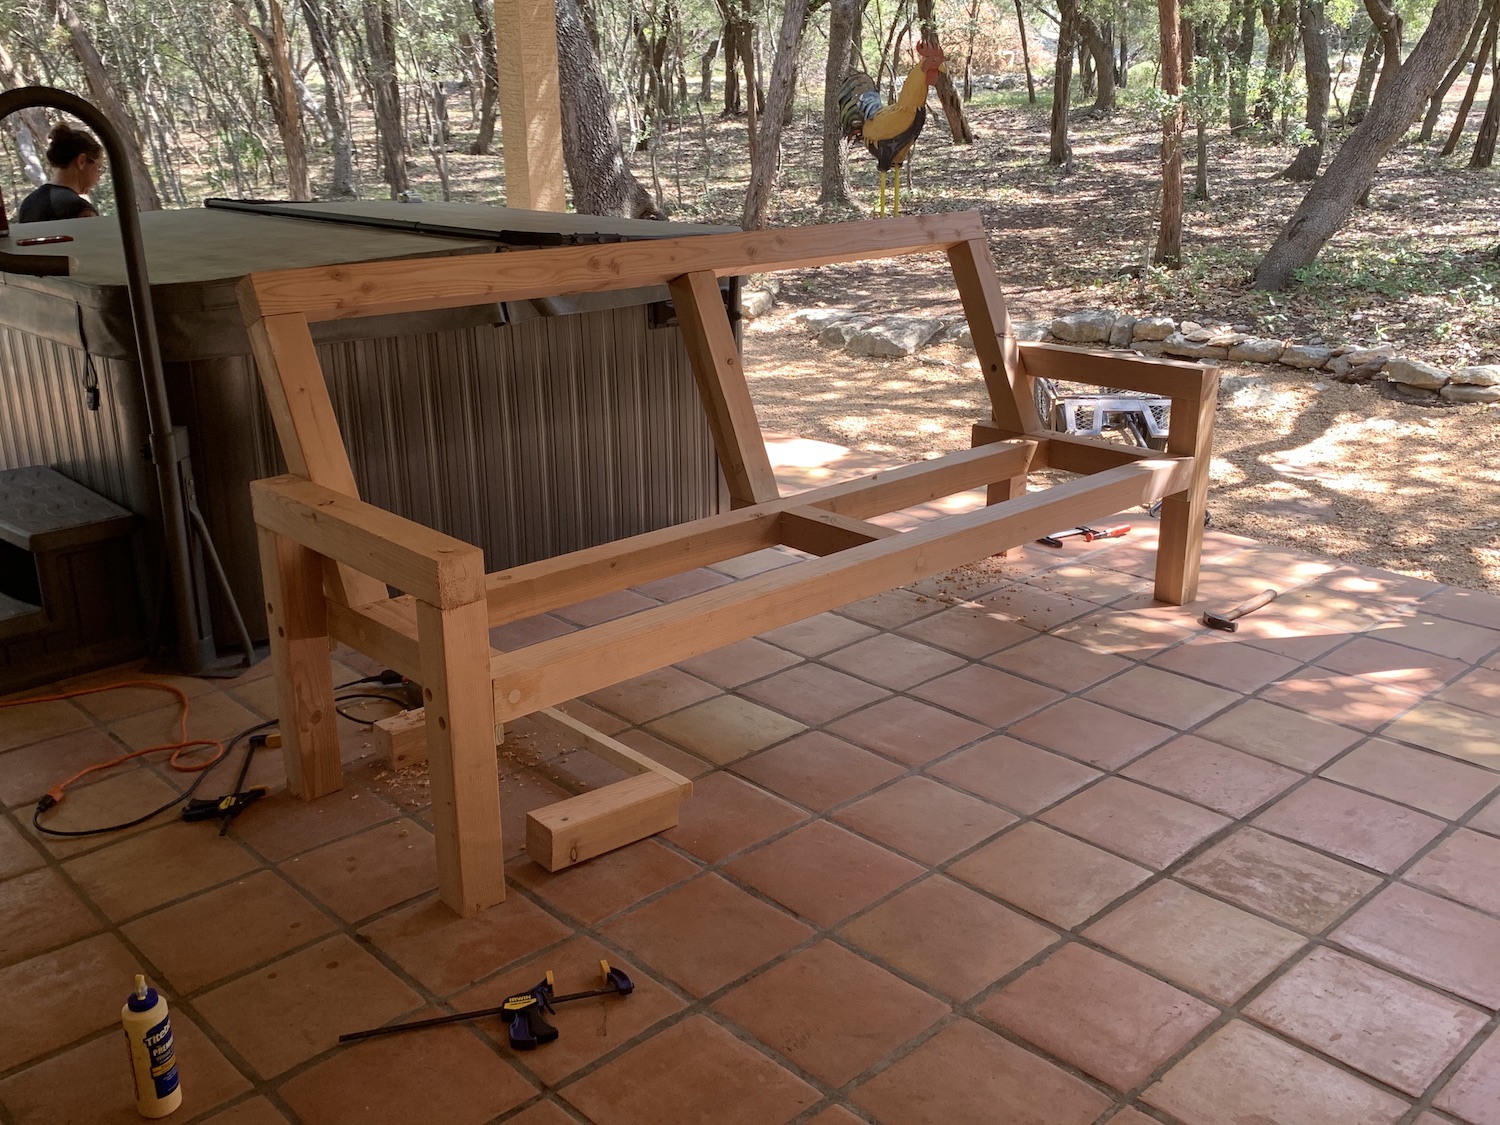
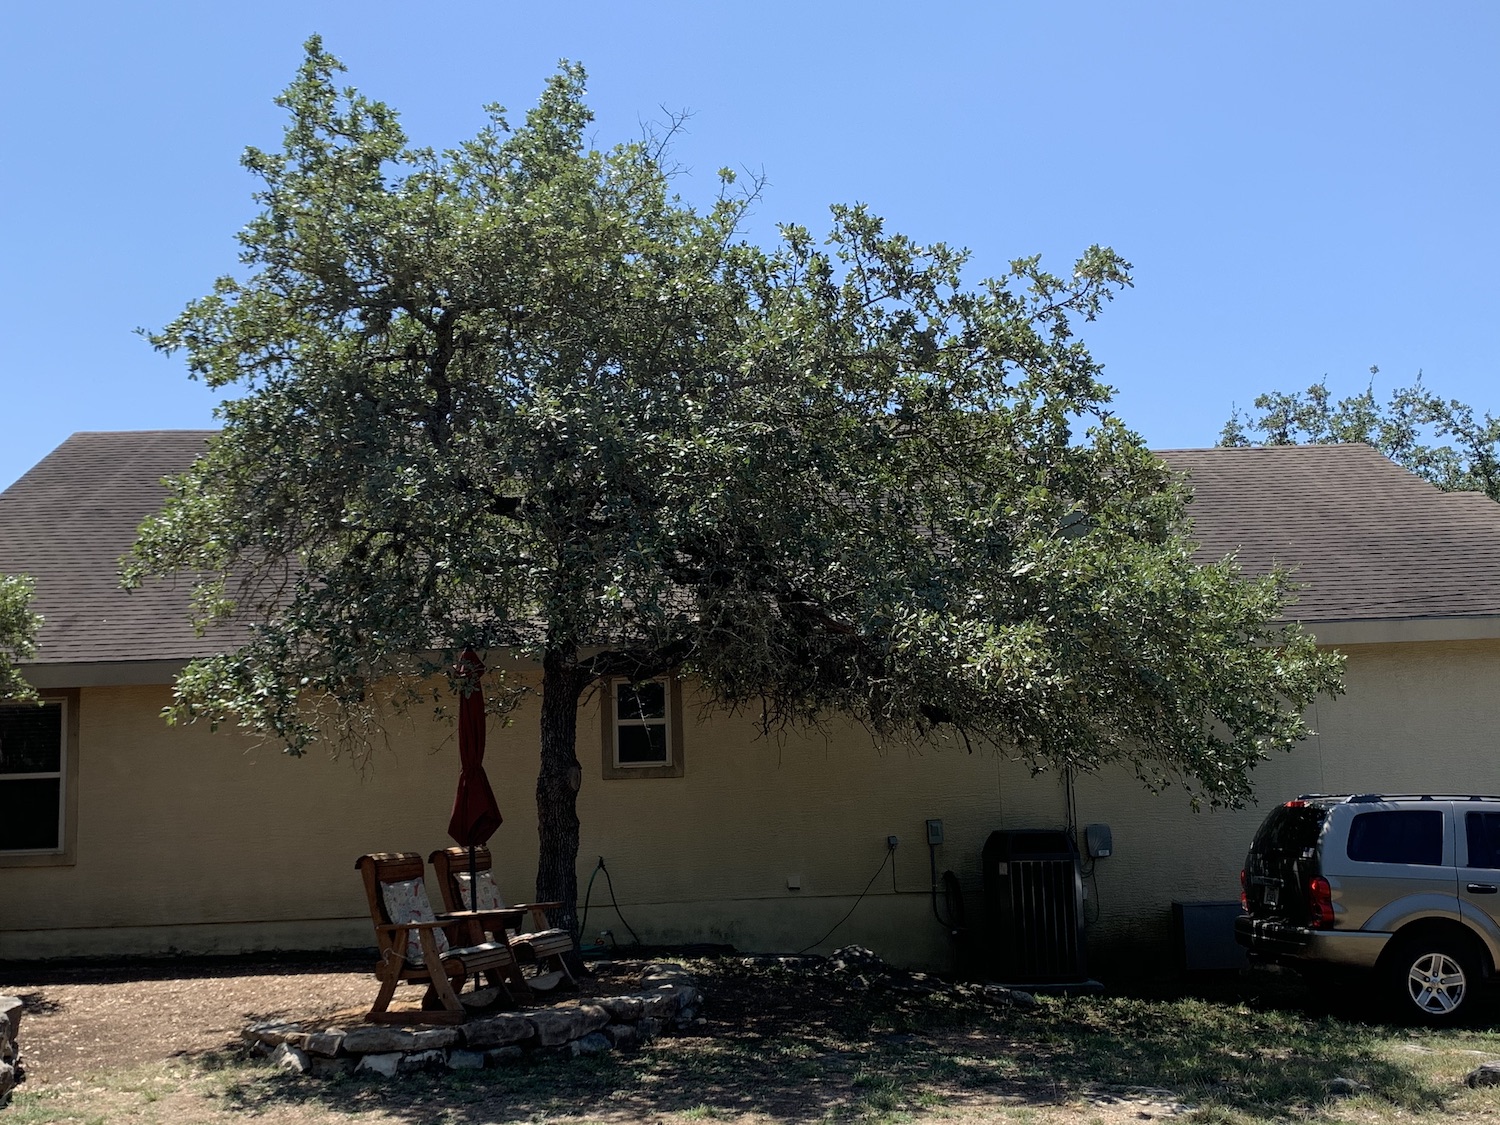
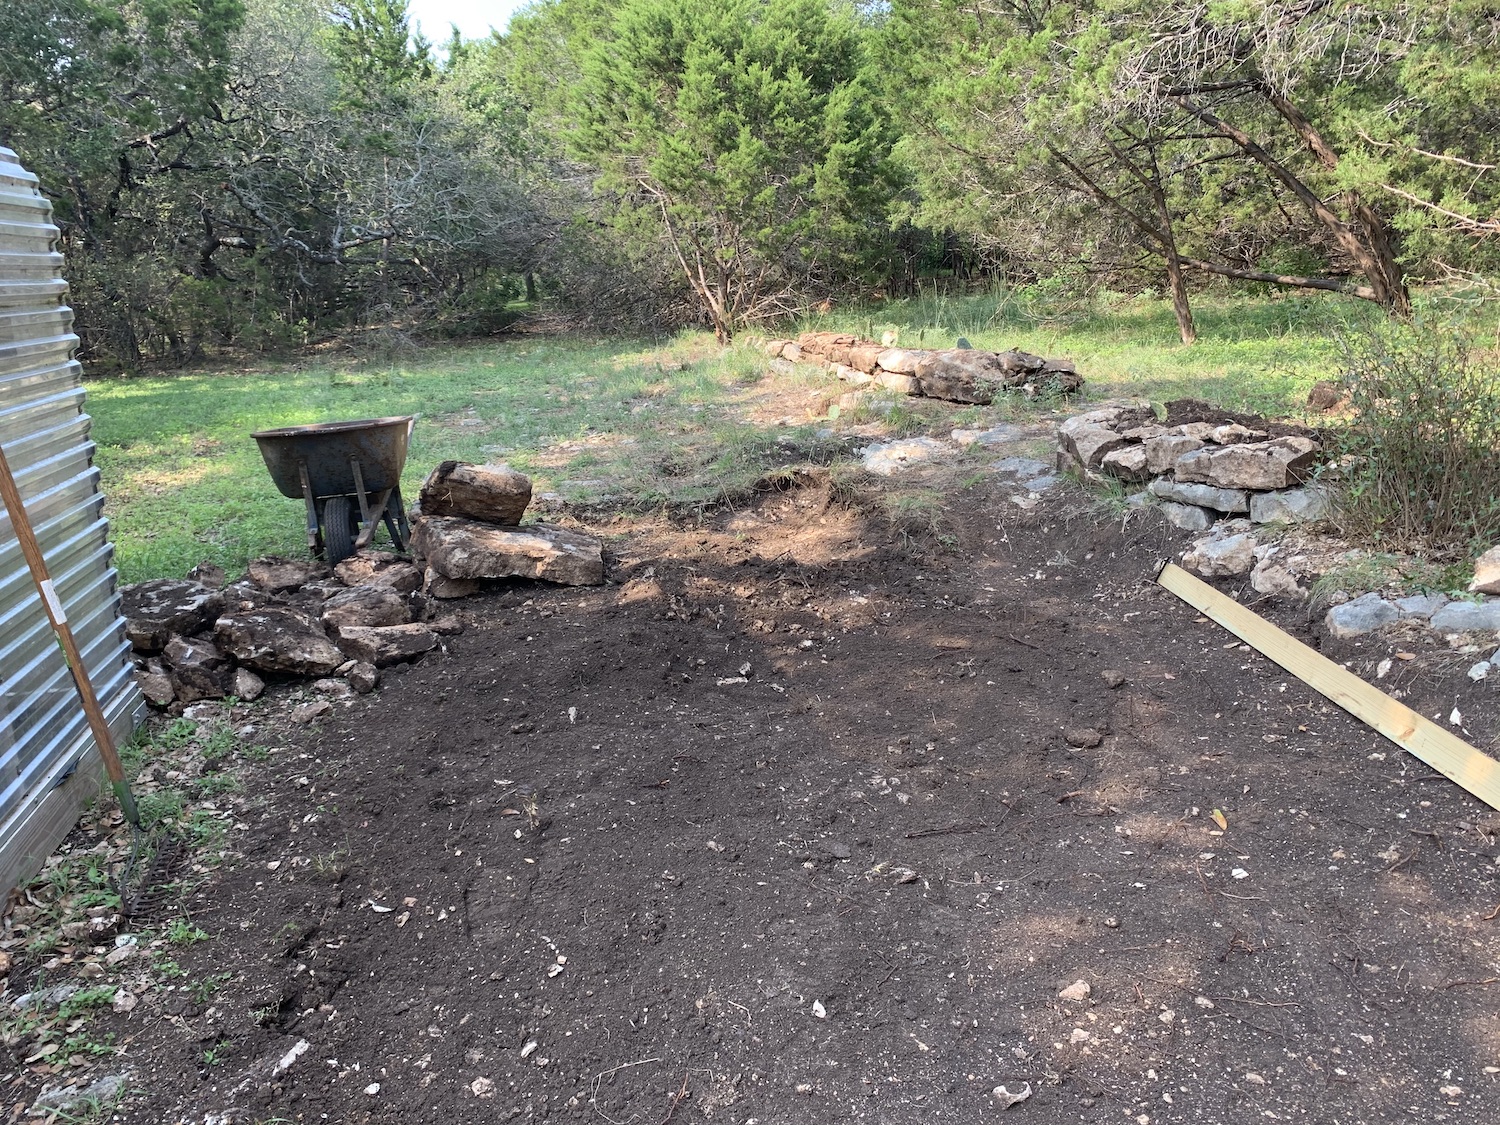
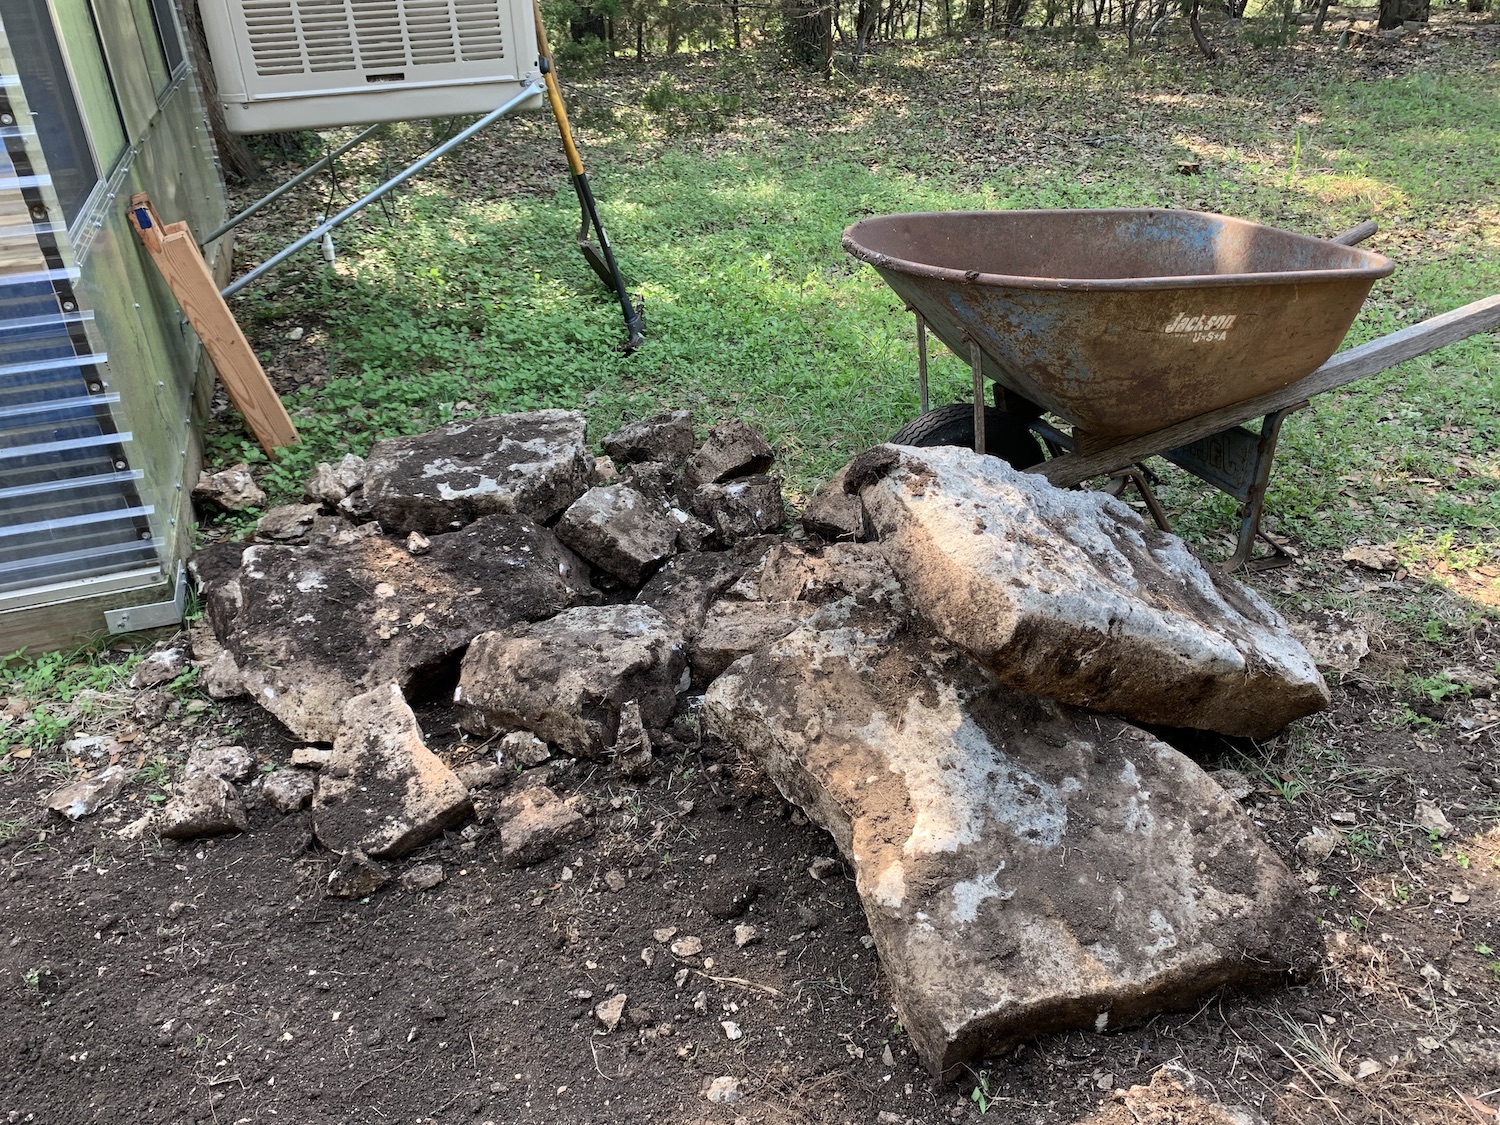
Some pictures of recent projects around the compound over the last few weeks.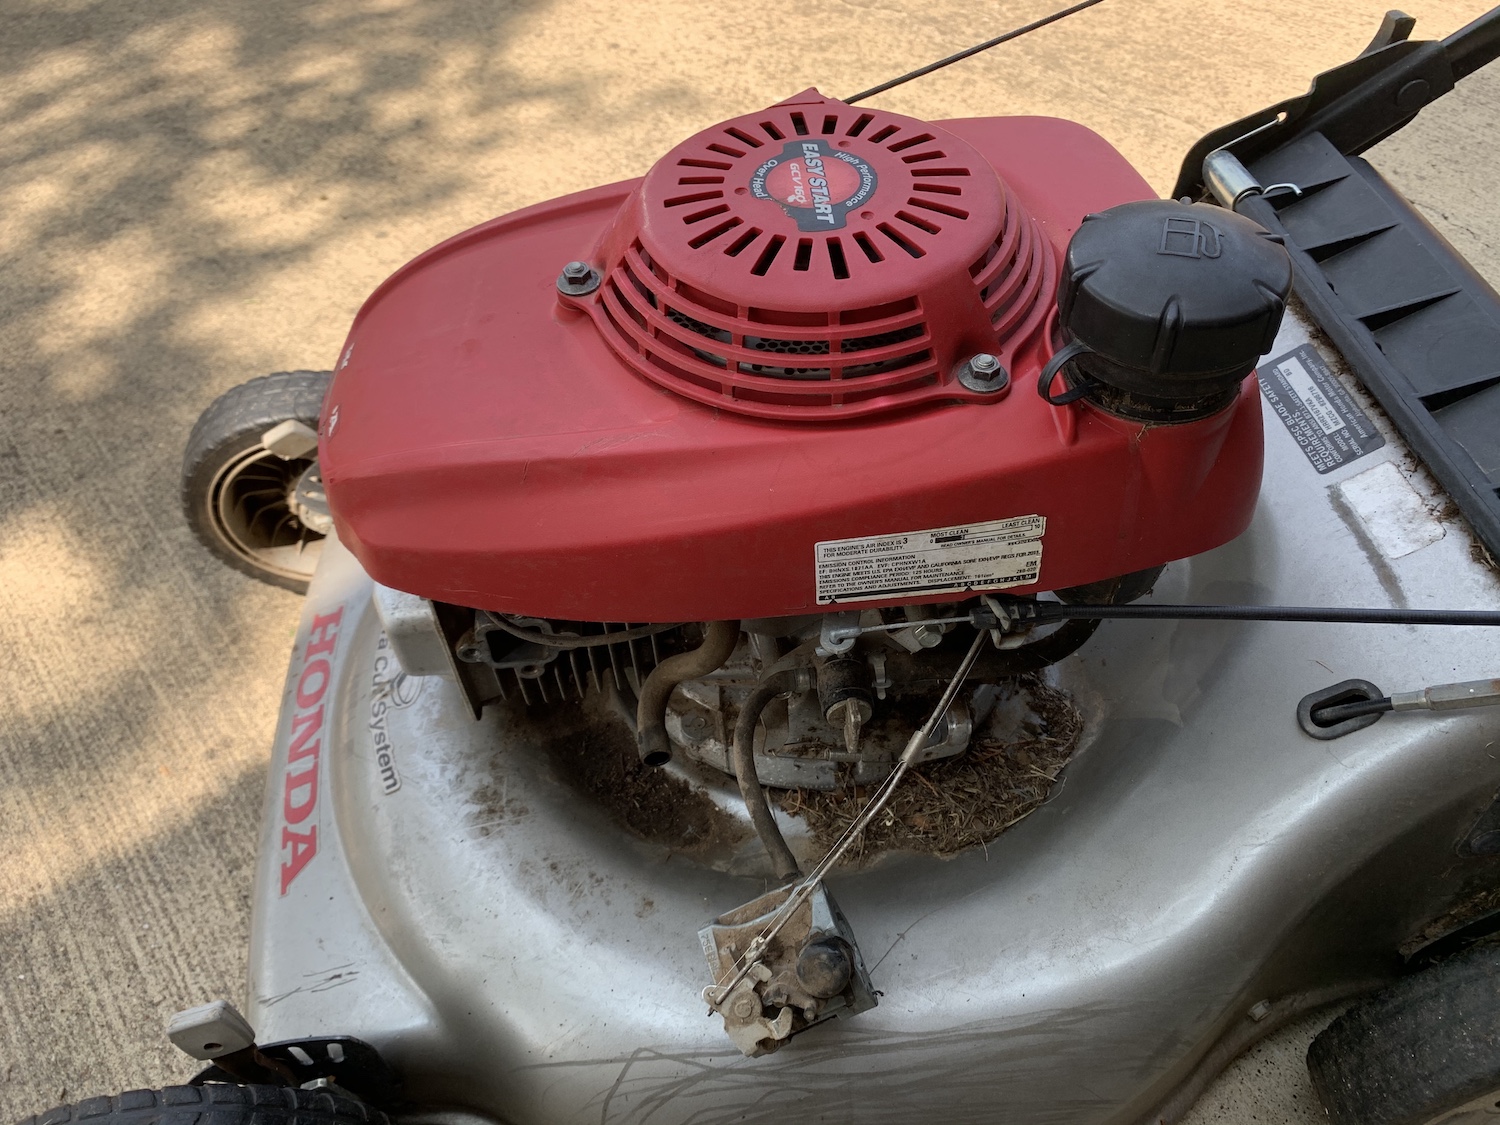


I’m not sure if this is a Southern thing, but in the non-owner neighborhood we live in, when people move out they seem to leave a lot of old junk on the curb in the hopes someone else will repurpose it. Perhaps they just don’t want to pay the feeds to have the junk hauled off. But not all of this is a bad thing, and that’s how I came to own my first Subaru.
A few weeks hence, while drinking a dram of some of Scotland’s finest Water of Life, I spied some boxy looking thing a couple of doors down the street, where a couple (or what was actually left of a couple) was moving out. Whatever it was, it looked like it had caught fire and was ready for an unceremonial dumping into the trash.
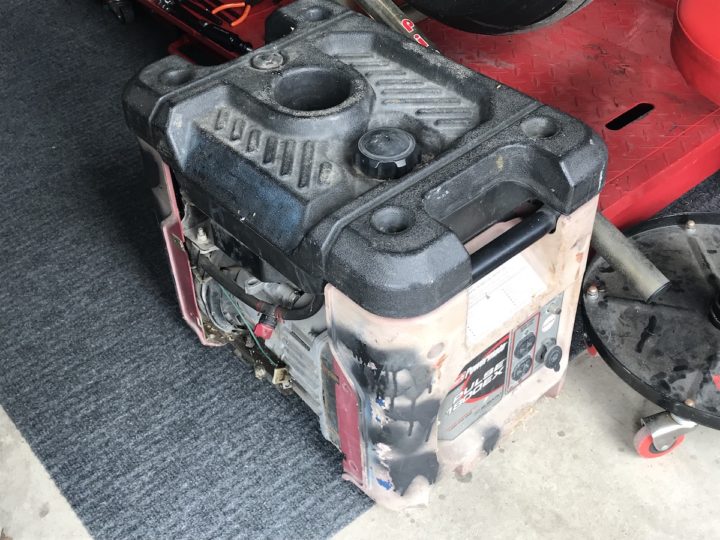
The thing languished on the curb for some time, and curiosity got the best of me. Upon inspection of this trash, I discovered that it was a generator, exactly the type of generator and capacity for a good day at the race track.
With the pull-cable hanging out, spots of black spray paint adorning the faded plastic ends, panels hanging off, and parts clearly missing, it was no prize. But grab it I did. Having recently watched some YouTube videos on restoring generators to working order I felt emboldened to take on a project. Besides, my daily work is in the cyber world and tasking myself with tangible project was a nice respite. Grunting and groaning at 3:00 AM, I hauled the wreck back to my garage and closed the door on my new project until the next morning.
Upon completion of my weekly day-job obligations, I changed clothes and set to examining this pile of junk that more assuredly would end up out on my curb by week’s end.
It was quickly appearant that the primary issue with the pull cable was the faded plastic end housing had cracked around the opening where the cable existed and was holding it fast. After some effort, the cable was freed from the housing, and with a pull I heard the sweet sweet sound of a small engine trying to puff to life. It wasn’t seized, it had compression and the pull start mechanism as in tact. At this point some excitement began to emerge… this just might be salvageable!
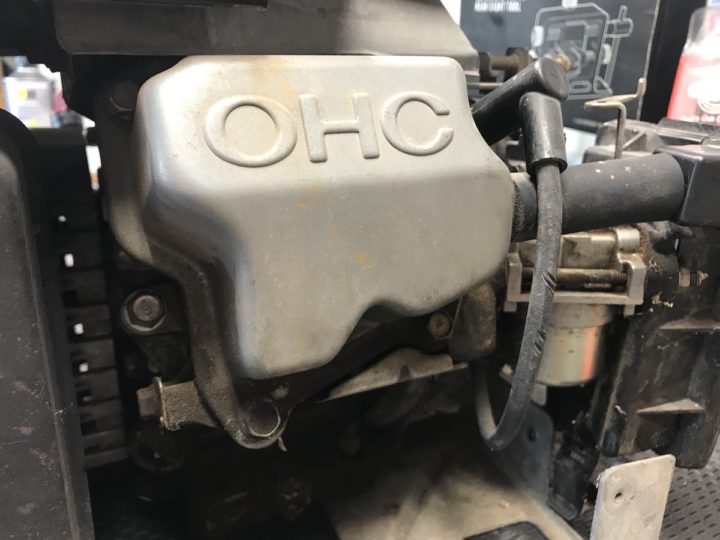
The next couple of hours involved removing many semi-fixed and rusted screws, panels and the plastic gas tank. Thank goodness it was plastic and not metal, I had no worries about rust! Once I had the remaining panels removed, it was then that I discovered that this was not some typical Chinese junk-pile motor in the generator. Instead it was clearly marked as an OHC (overhead camshaft) engine made by Subaru. This was a choice acquisition in deed! Even if I could not resurrect the electronics, this engine had value that far exceeded the appropriation cost of a short walk down the street.
Next order of business was to pull the spark plug and check for spark. After some fiddling around in the old tool box for the right spark plug removal tools, I had removed it to find the plug clean and free of rust. Things were looking better and better!
Placing the plug against the cylinder head and pulling the now freed pull start cable, a weak but detectable spark was seen. Yes.. this is going swimmingly. Two of three basic engine requirements satisfied. This seemed to have good compression and it makes spark. All I needed to do now was feed it some fuel and see if there was anything home! Just a quick shot of starting fluid answered that question too, as it briefly sputtered to life. Time to invest a little money in this project.
Over the next couple of days, I washed out, drained and dried the fuel tank, which was full of what looked like rocks. How or why those got in there is still a mystery to me, but I had some success in clearing them and the water out. While that progressed I spent $5 on a can of red paint, $4 on a can of TruFuel and another $5 on a fuel filter to prevent damage to the carburetor from anything I failed to remove from the gas tank.
After improving the aesthetics with some paint, and cleaning out all the nooks and crannies with the trusty air compressor, my first Subaru was ready for re-assembly.
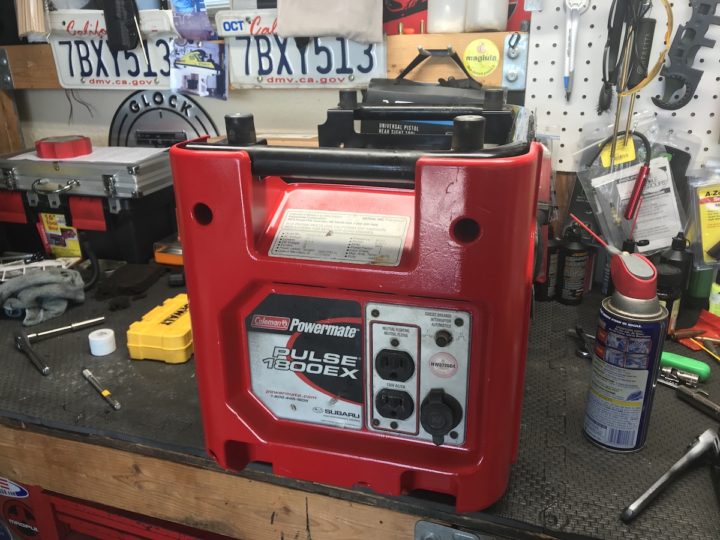
With some pride and a solid sense of accomplishment, I summed the family to observe what I hoped would be a successful startup. With a single pull the generator sprang to life, and I’d further cemented my reputation as the fix-it-dad.
The little red Subaru now lives in the garage next to my other generator, waiting for a new job to do.
Upon arriving in Texas, one of the first things I had to get used to was the difference in highway design philosophy compared to other states I’ve driven in. Personally, I think it’s a brilliant idea. It even works in the city cores, which is where I clipped this short video from yesterday.
Part of that design, is ability to implement these easy turn-around lanes, and I use these all daily. I like the way the turnarounds (generally, there are a few that do) do not require traffic controls, which improves the overall flow of traffic. Typically, if I needed to change direction on a freeway, you’d have to exit, wait for the right of way to make 2 left turns, and then re-enter the freeway.
You might be able to see, in this street map, there is a loopback lane that connects the opposing directions of the frontage roads.

These little turn-arounds are dedicated lanes that let you zip under (and sometimes over) the main roadway to return the other direction, either on the frontage road or the main road via a separate onramp. This is what the sat view of this intersection looks like:

This is basically how it works:
OH… oh my.. this is not what we want to be doing. I guess the odds might eventually catch up. I never buy new cars, ever; just don’t have any interest in taking that hard of a depreciation hit. So… used it always is…. and generally well used. So, we’ve bought.. 20+ used cars over the years and this is the first to suffer a major failure (in this case, engine has eaten itself).
Article Sections
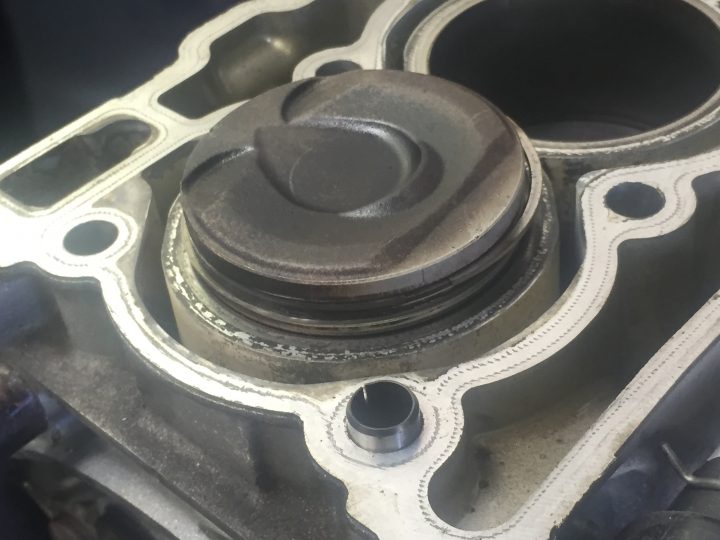
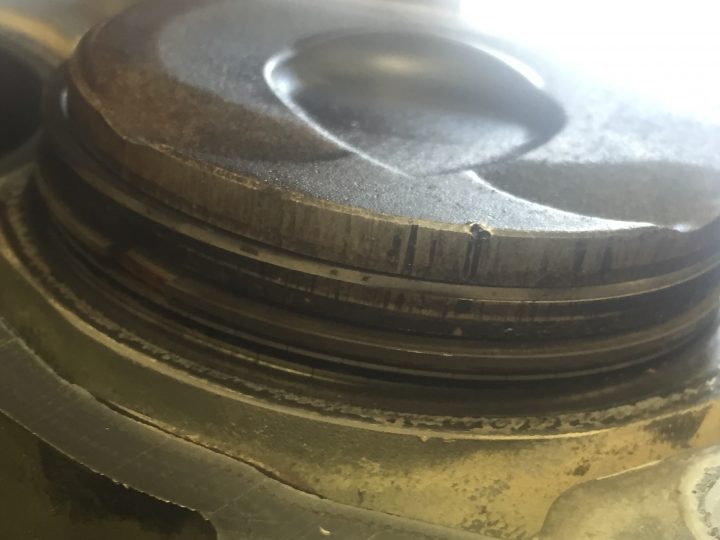
As you can see.. it’s in pretty bad shape. Cylinder #4 was down 50% on compression, starting to throw warning lights…. but.. honestly.. they car gave no external indication anything was wrong. Ran very strong, sounded fine… but internally is was in seriously bad shape:
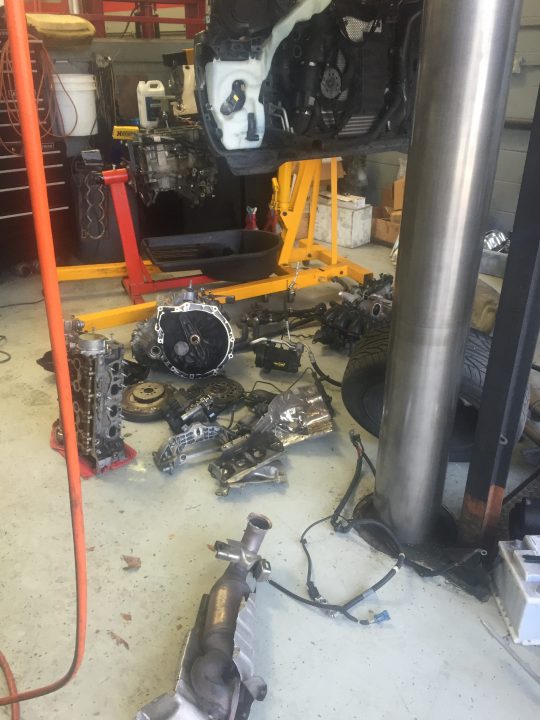
So now.. what are our options? We did have an aftermarket warranty that covered up to $3000 for powertrain. This is going to cost A LOT more than that… but I’m trying to minimize the financial damage. So.. some research is in order to try to figure out what we’re going to do.
I did find 1 replacement short blocks on the interwebs:
| Source | Price | Notes |
|---|---|---|
| MiniMania | $2925.00 | Factory replacement Engine Block with Crank Gear for the N14B16A engine in the Turbocharged Cooper S. |
Mini Mania returned my e-mail this morning with the following information.. so.. this is sounding more and more like what we are considering doing, provided the cylinder head is not junked out:
Thank you for your interest with Mini Mania and our products.
Sorry to hear of your situation with your 2007 Mini Cooper S and I will try to answer your questions accurately as possible.
The replacement engine short block that we offer are units from MINI and includes everything ‘below’ the cylinder head and ‘above’ the oil pan.
Basically, it is the block with the crank and pistons installed. It does not include anything that gets attached to the exterior of the block.
Replacement pistons are available individually from MINI, but only at standard bore. Depending on the condition and mileage of the block, it may be advisable to replace all 4, especially if you plan to keep the car for a while. There are some oversized pistons available from CP Pistons, but only in sets of 4. Mahle offers replacement pistons but only in standard bore.
Main bearings and rod bearings are also available, but the prices will add up quickly if you replace all of them.
If your budget allows, the short block is probably the best way to go as a ‘simpler’ solution and perhaps for longevity.
I hope this helps.
Best regards,
—-
More to come….

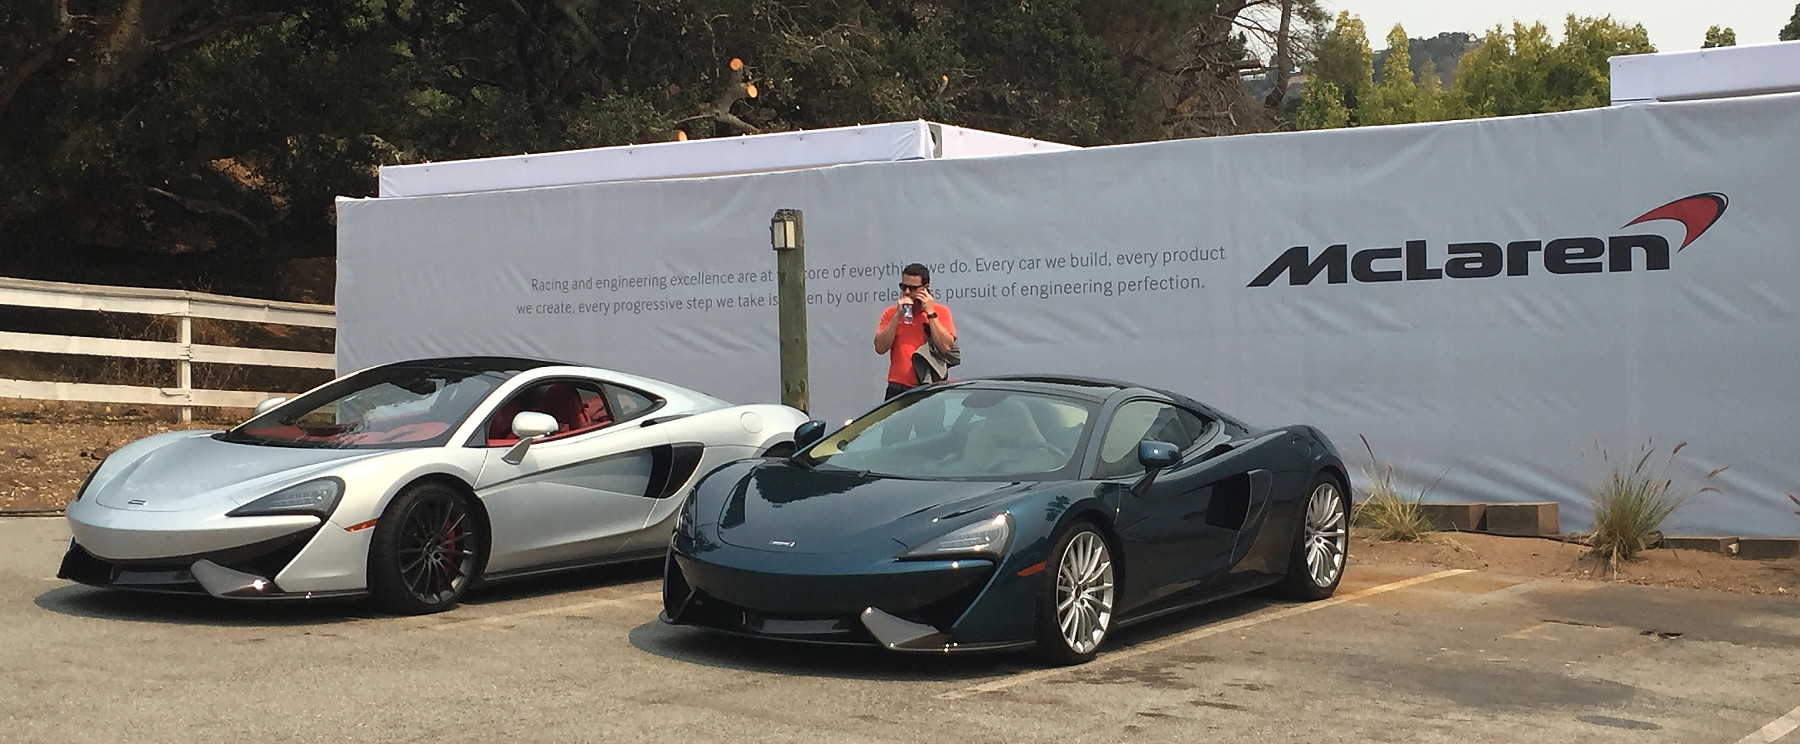
What can I say, McLaren knows how to build a car, put on a show and a party. In the past it’s been the 650S and P1 car launches, special events etc; but few things are as fantastic as test driving a McLaren!
Having spent a few days in the amazing MP4-12c (I even rented one for my 50th birthday), then test driving the then brand new 650S around Pebble Beach in 2014, I of course leapt at the chance to get behind the wheel of their latest car, the Sport Series (aka 570).

With an amazing test route loop on the infamous Laurels Grade before me, with great excitement I slipped behind the wheel of the above beauty!
After a quick overview of the vehicle operation, I was off! The first thing I noticed was the steering felt a little more connected to the ground than the MP4-12c, the car was really feeding back information on what was going on. Lucky for me traffic was mostly non-existent as the car rapidly announced that I’d exceeded the road’s speed limit (interesting feature… could really come in handy for those times you sort of get lost in the throttle and didn’t notice a change in the speed limit… for those that care about such things).
It was a spirited ride for certain. On the return leg of the test, I popped the car into auto-mode, and mashed the throttle. I was surprised to watch the tac blast past 8000 RPM as the twin-turbo V8 snarled behind me.. tires complaining… traffic rapidly disappearing behind… I LOVE IT!!
Although the entry-level McLaren.. the 570 is a satisfying drive. And dare I say it.. I think it looks better than it’s “bigger” MP4-12c and 650S family members. I wish I’d had a GoPro with me to capture the experience… but it’s one I won’t soon forget!
If you’re in the market for quarter-million dollar sports cars, give the McLaren Sport Series a drive. With two models (GT and S), you should be able to find what you’re looking for.
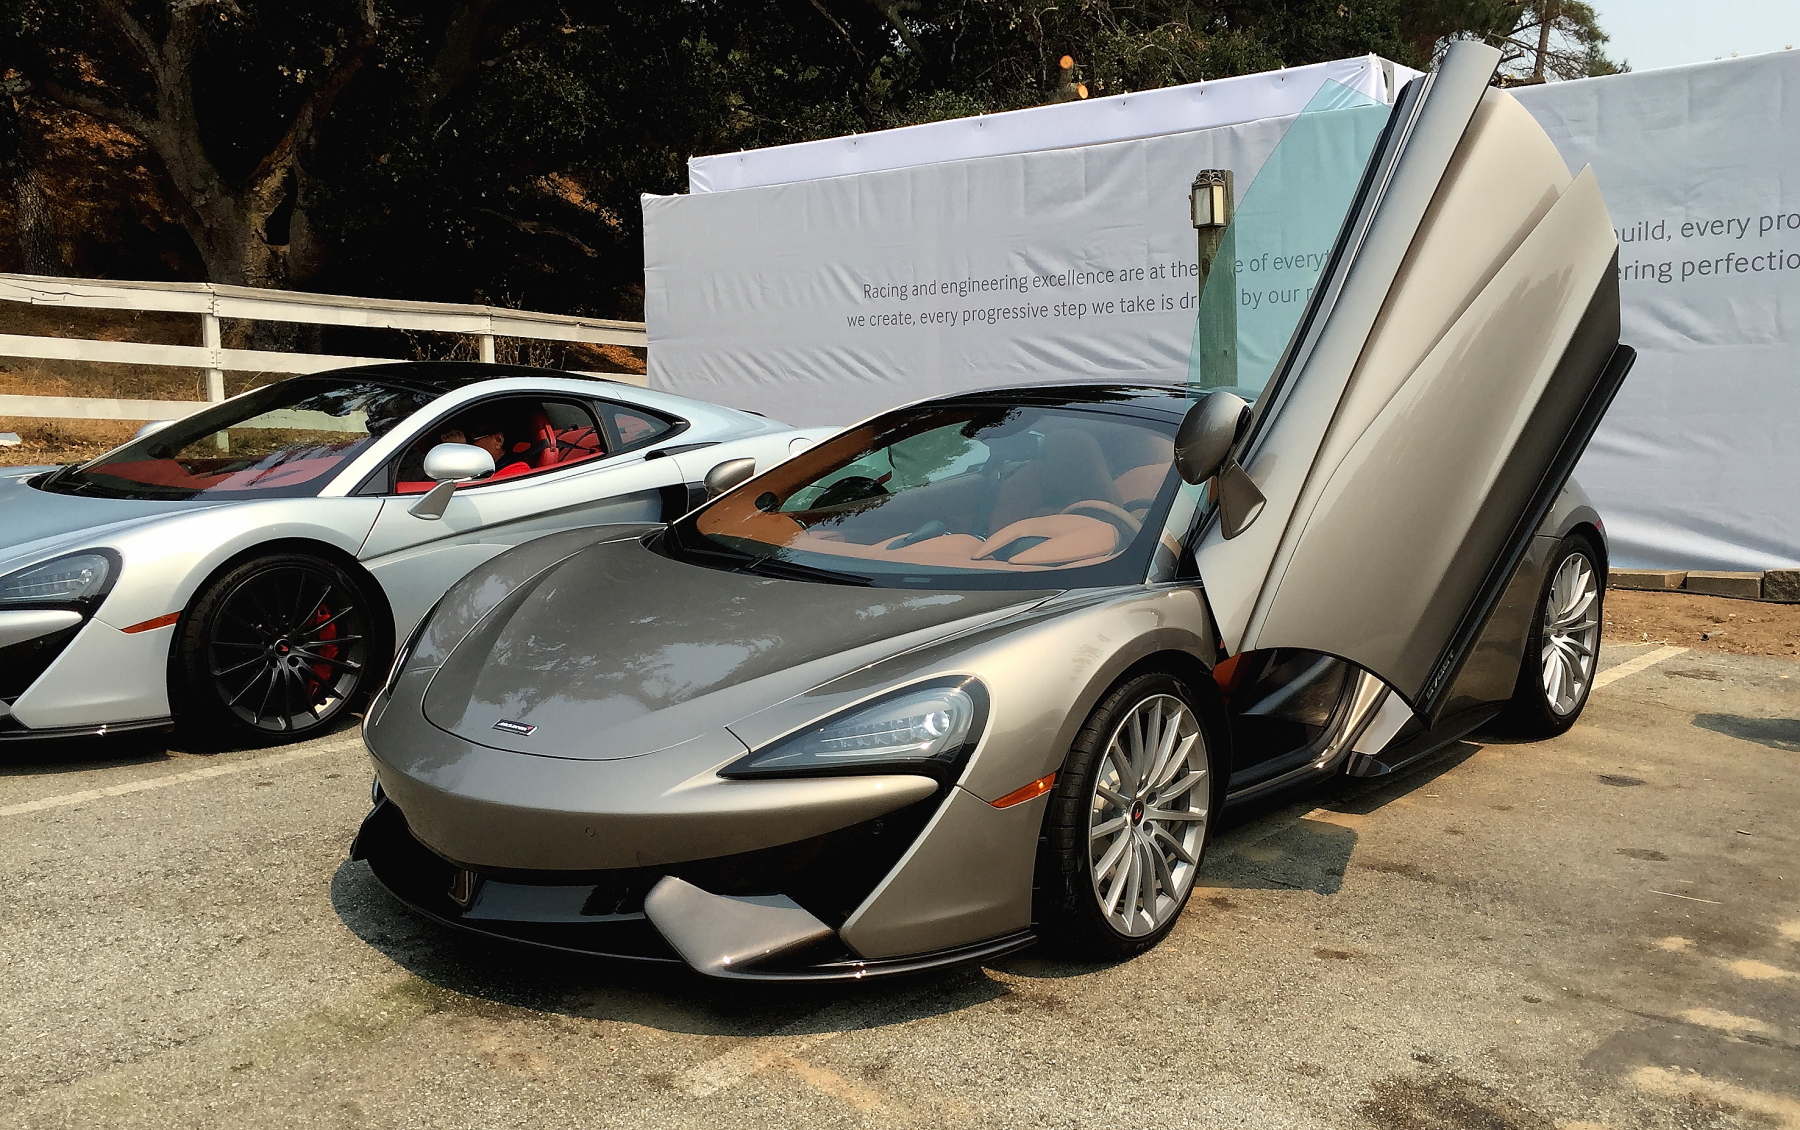
Here are 2 more Sport Series, waiting for the next test drivers to take the wheel. I think you can see a little more of an Italian flare in the front design, and I like it!

Quite a lineup here… almost the full family was represented here (I did find an F1 the next day at Laguna Seca).

I’m not much for white cars (which you might get looking at my fleet).. but I think the Sport Series looks pretty good in white. Now.. if one could only graft the GT front end onto the now (relatively) inexpensive MP4-12cs.. it would be a match made in heaven!!
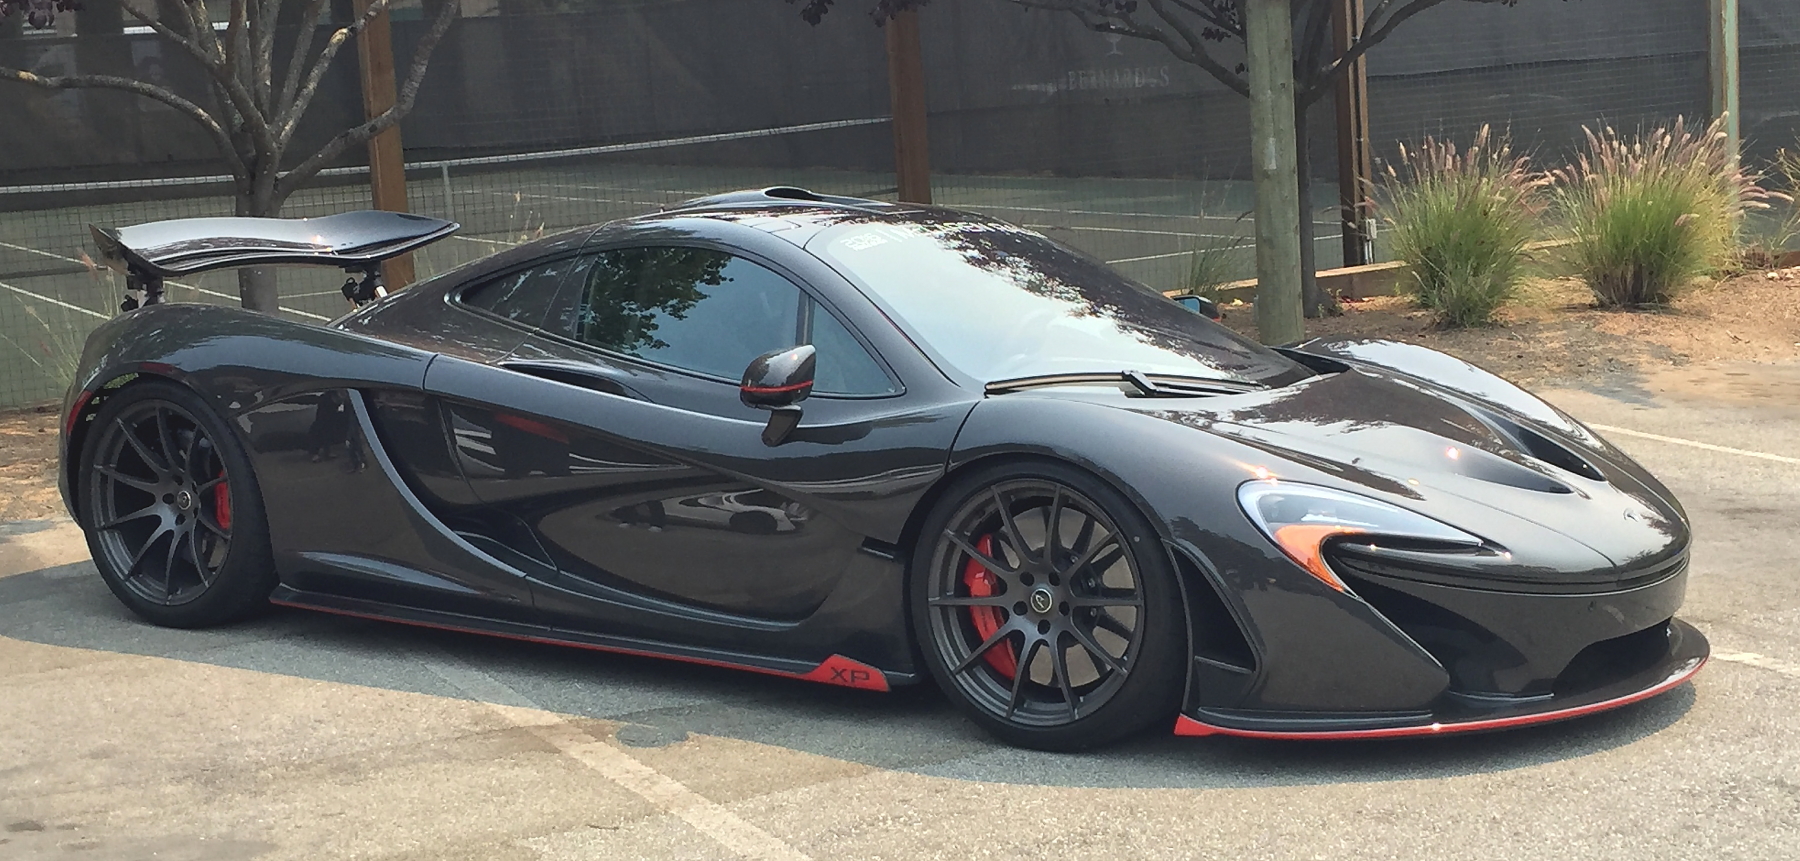
Now.. no experience is complete without the fully off-hook full-tilt boogey P1. Here is one showing off it’s full carbon fiber construction. Just an amazing looking and sounding car. For the limited and fortunate few that were able to purchase one… I can only guess how getting behind the wheel must be akin to driving at ’11’.
The test-drive mule I got to flog.. even in that color I LOVE IT.
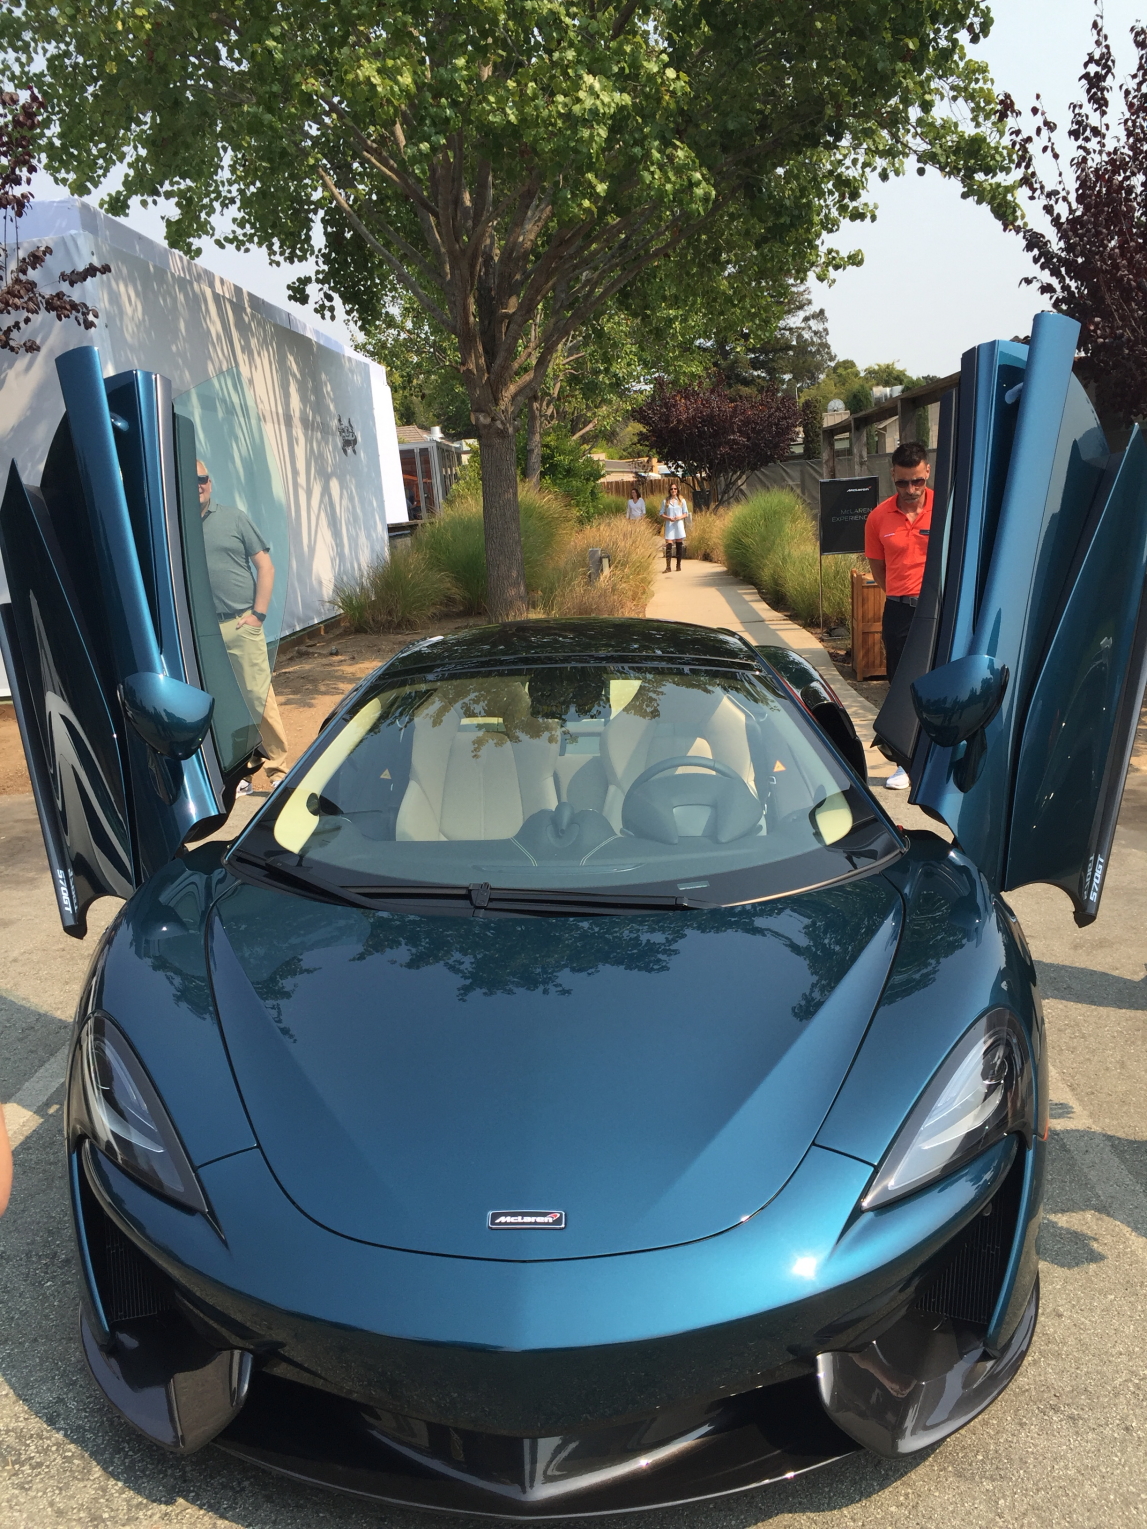
Another really interesting color on a 570. Here the nose clip looks vaguely La Ferrarish; which is what make me feel like this model has a little bit of an Italian flare.
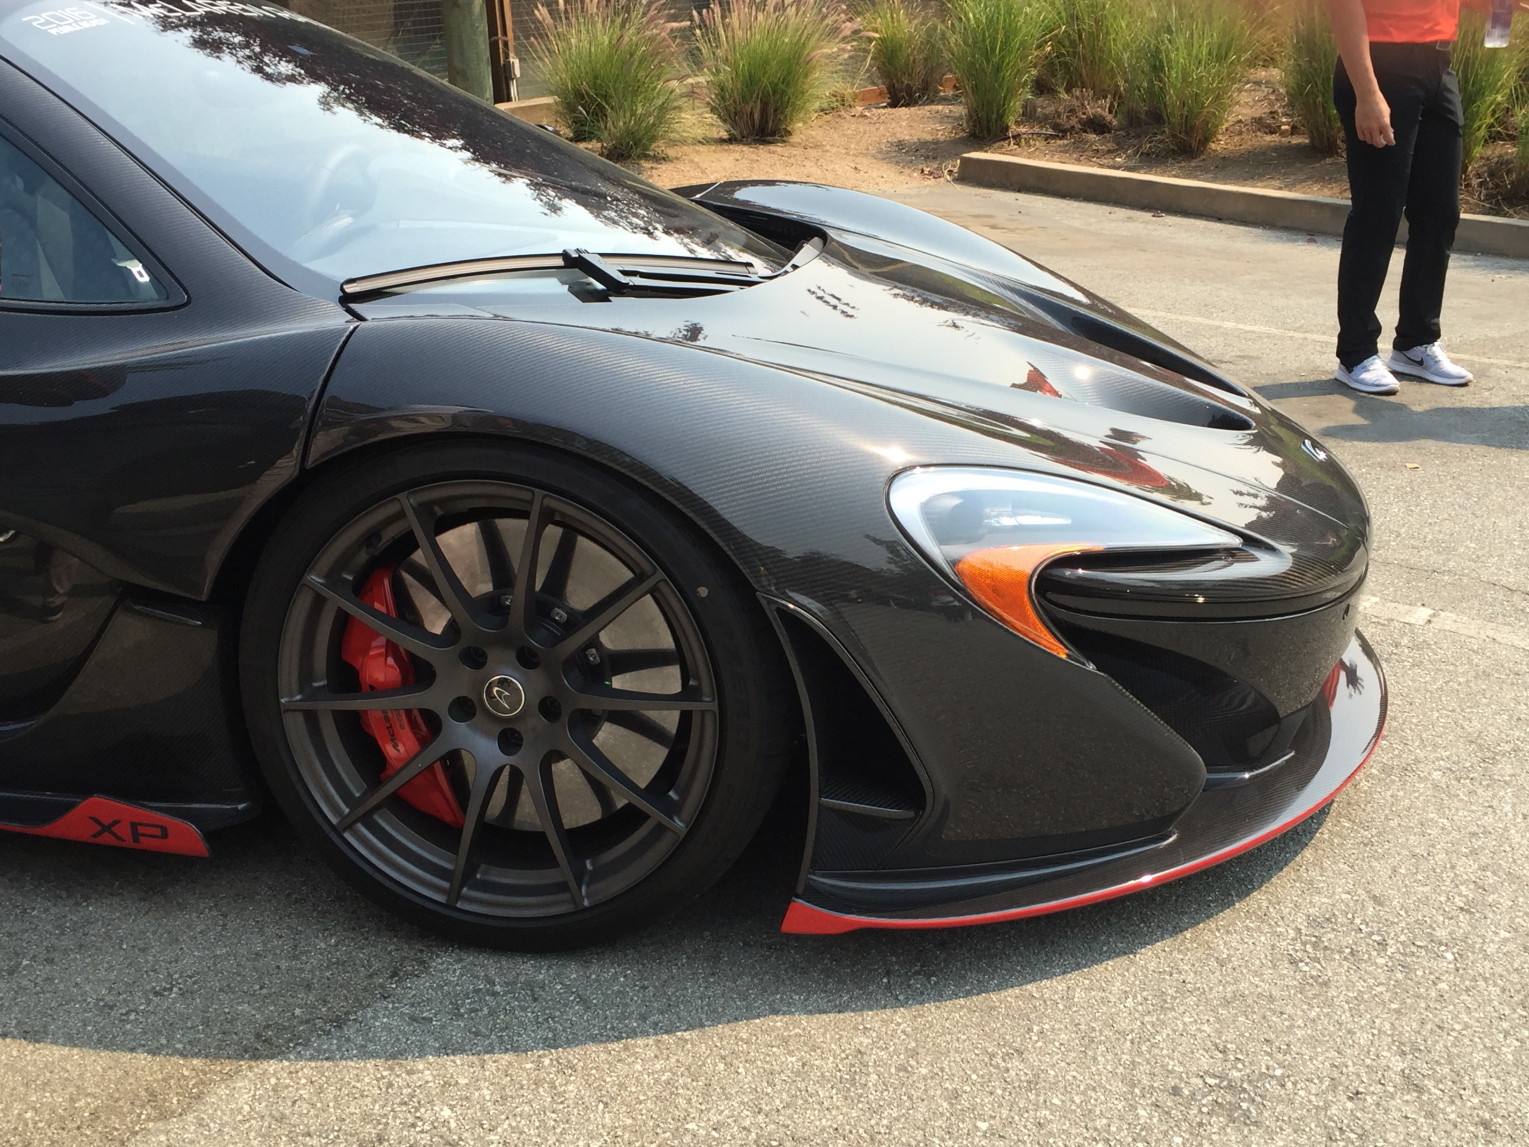
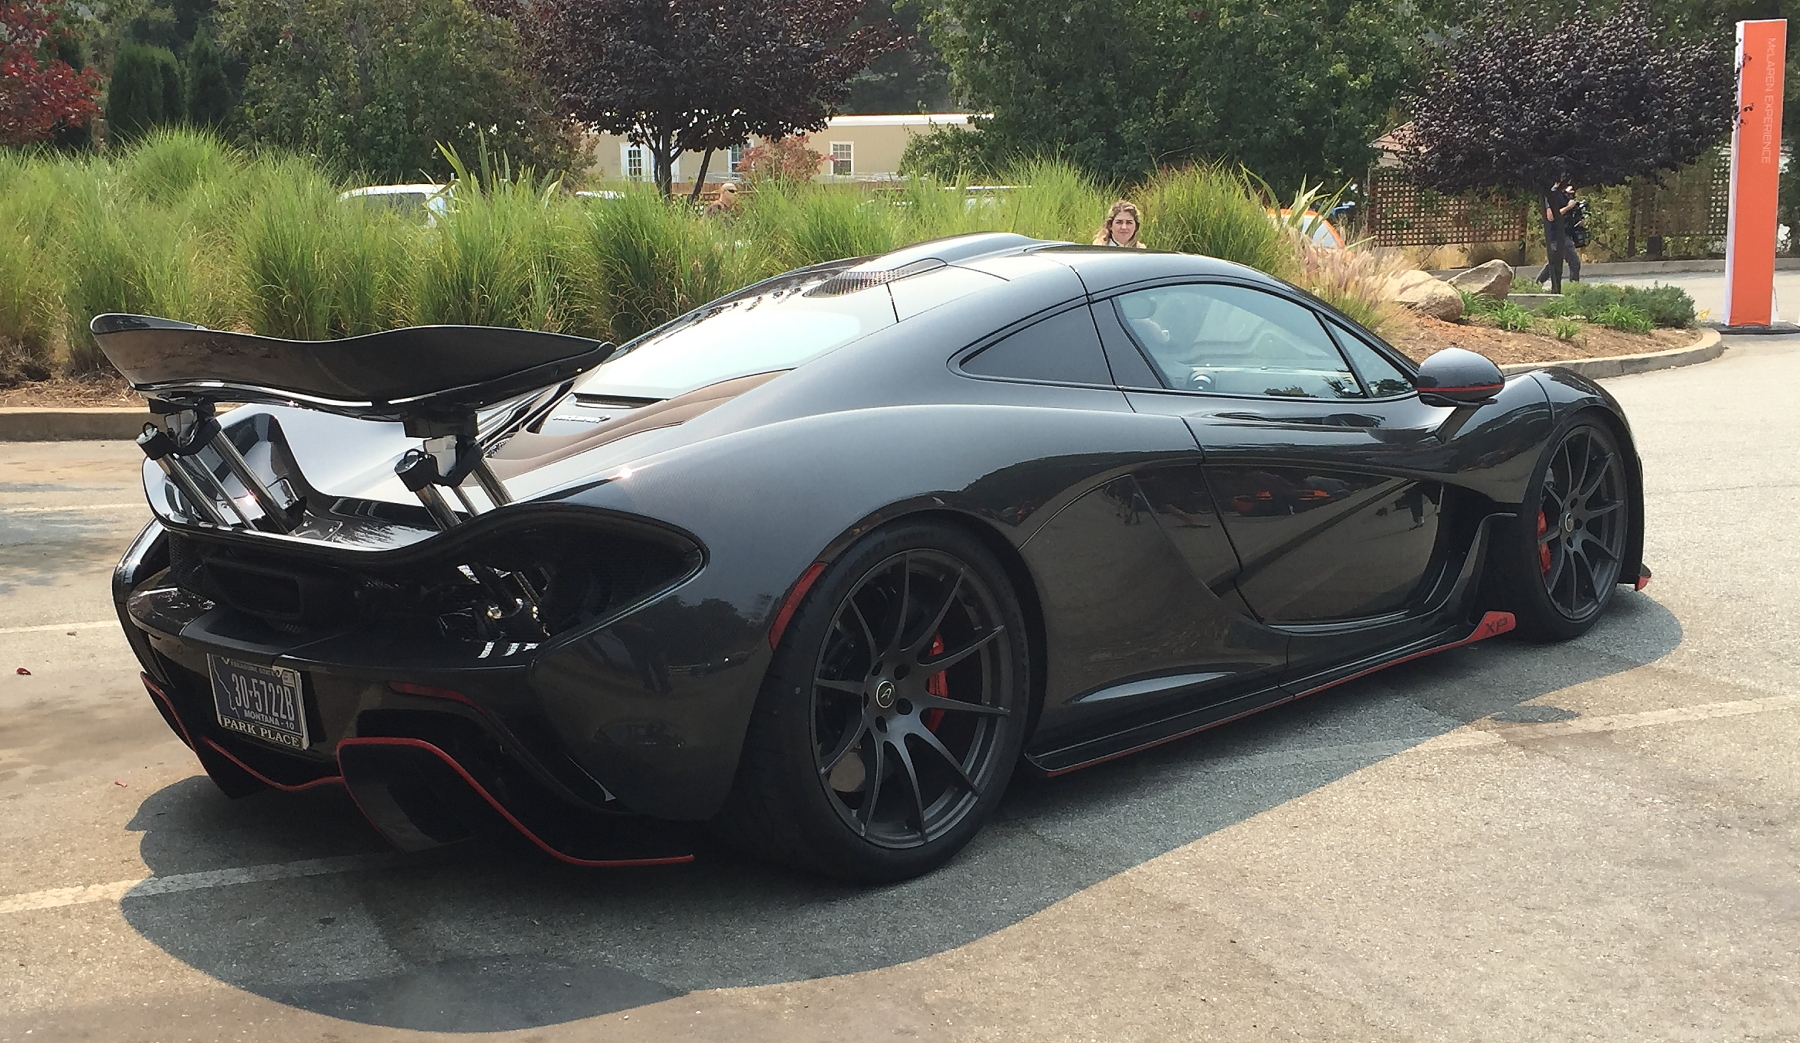
Again, the P1. All carbon, all the time.
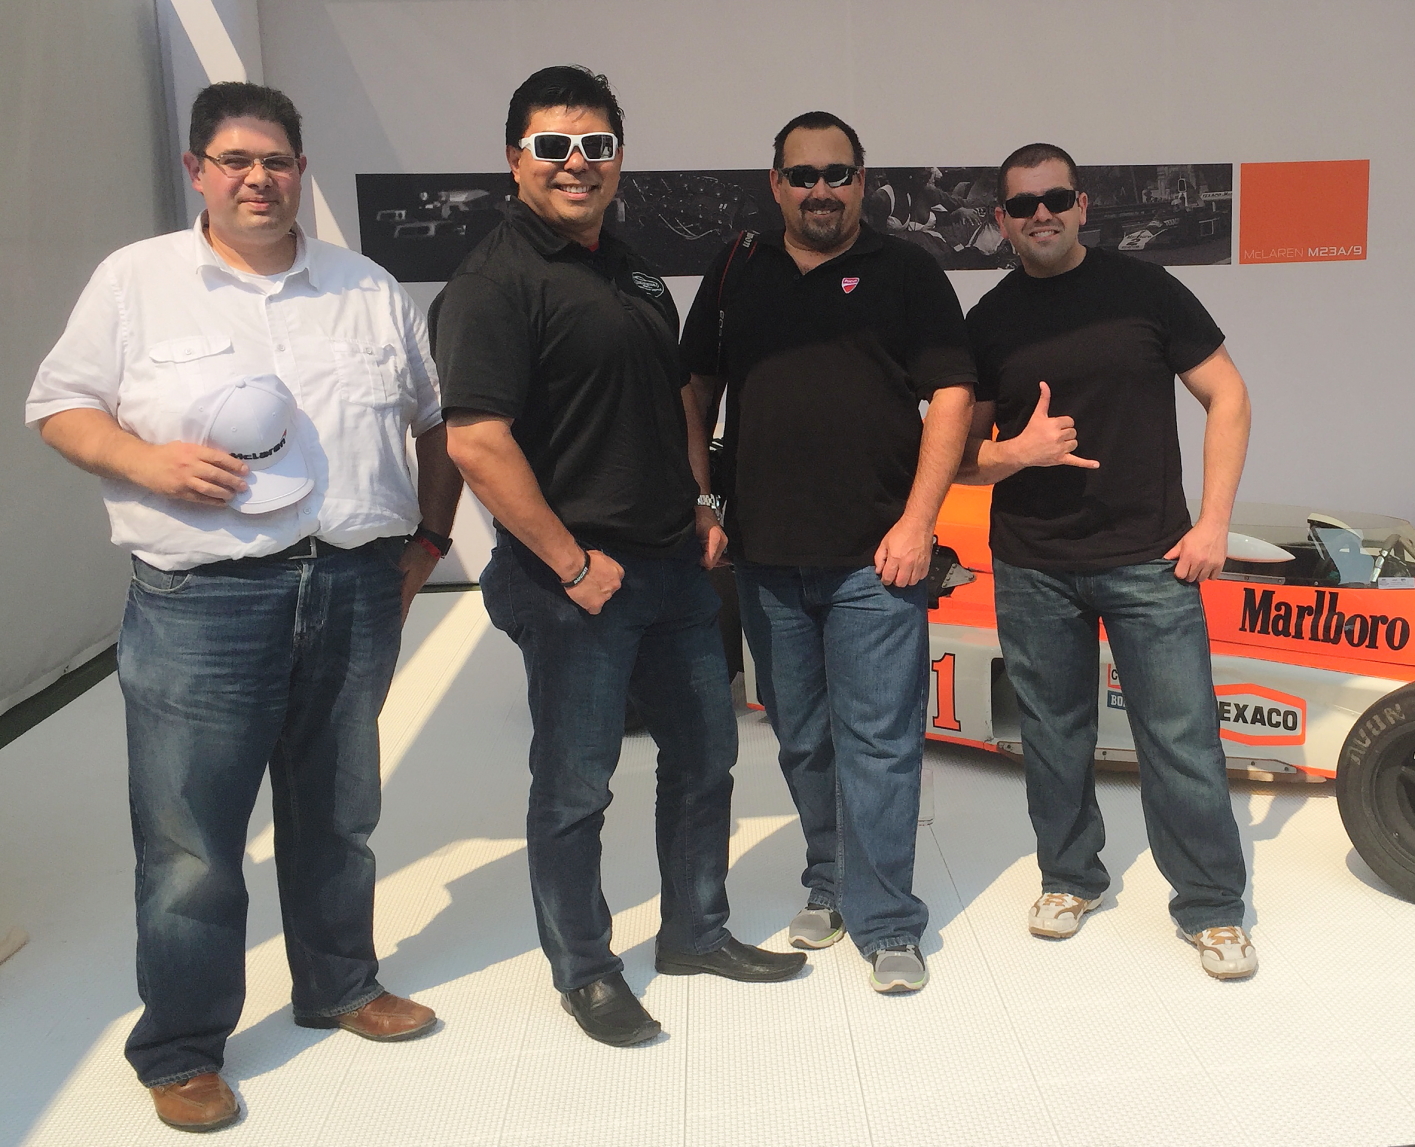
“The Crew” (most missing Beth, she was busying being part of a documentary McLaren was making that day). Carsten, Shawn, me, Moh. Yeap, we were all having fun driving cars and enjoying the hospitality.

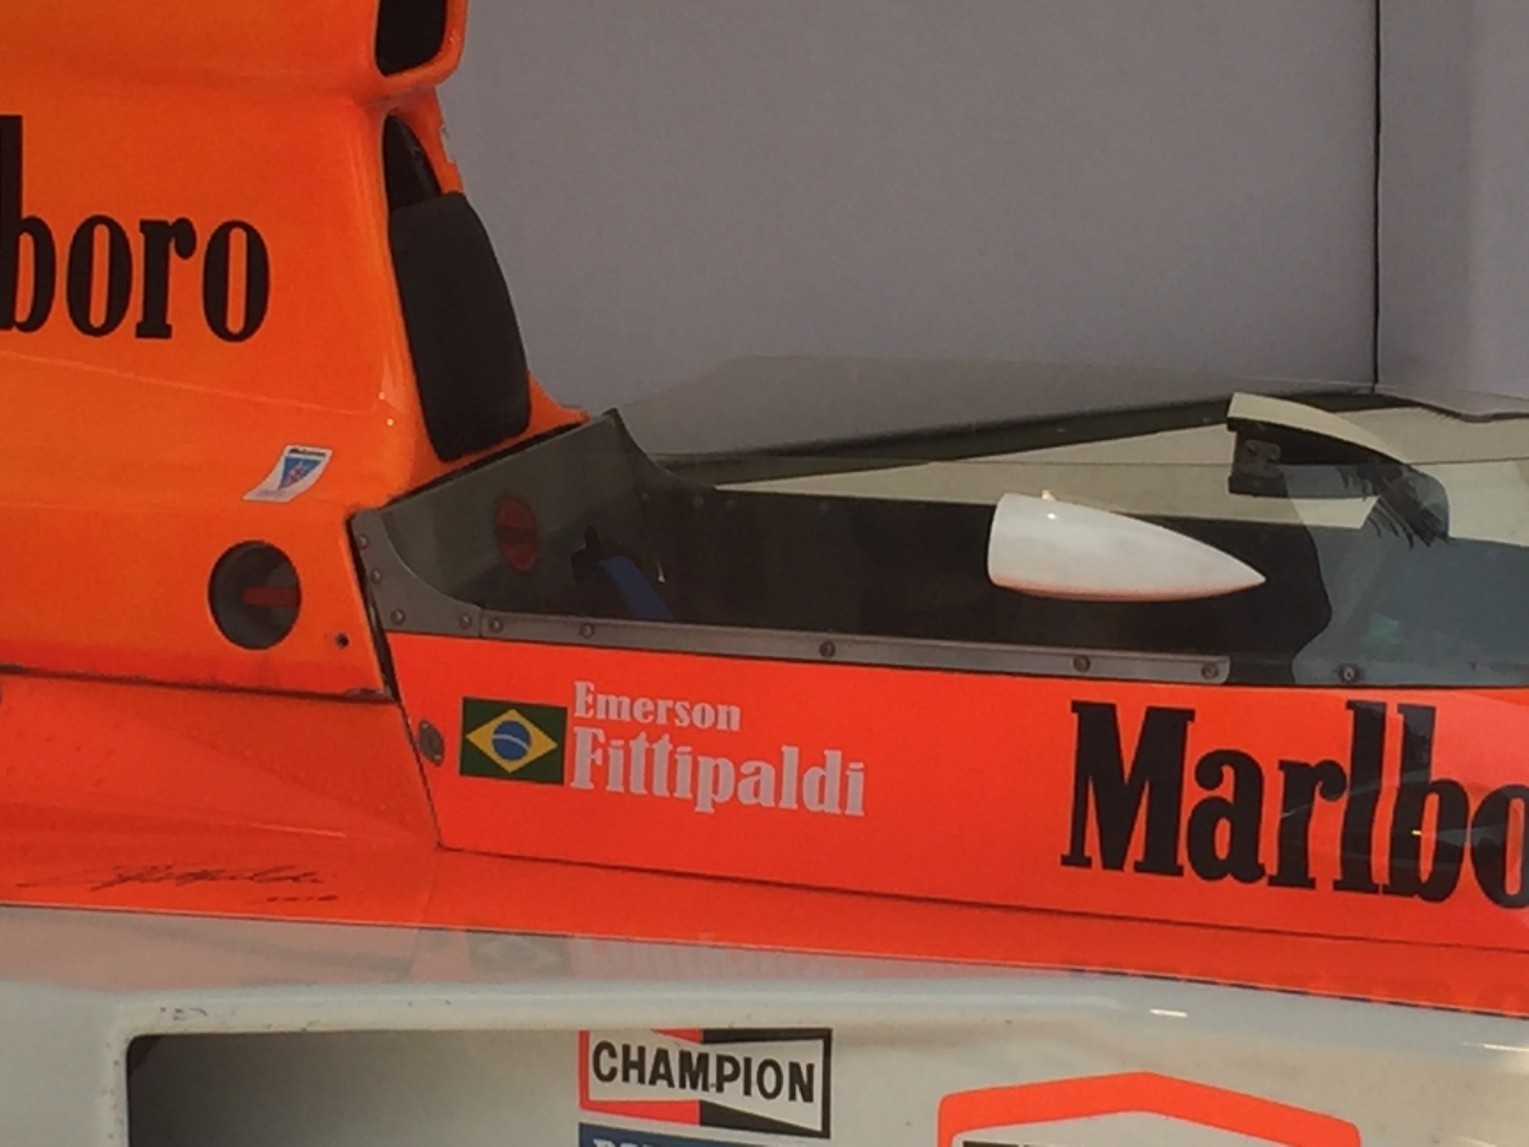
One of Emerson Fittipaldi’s M23A/9 F1 car from the 1980s. Despite being 30 years old.. it still looks the business, and more car than my basic skills could manage.
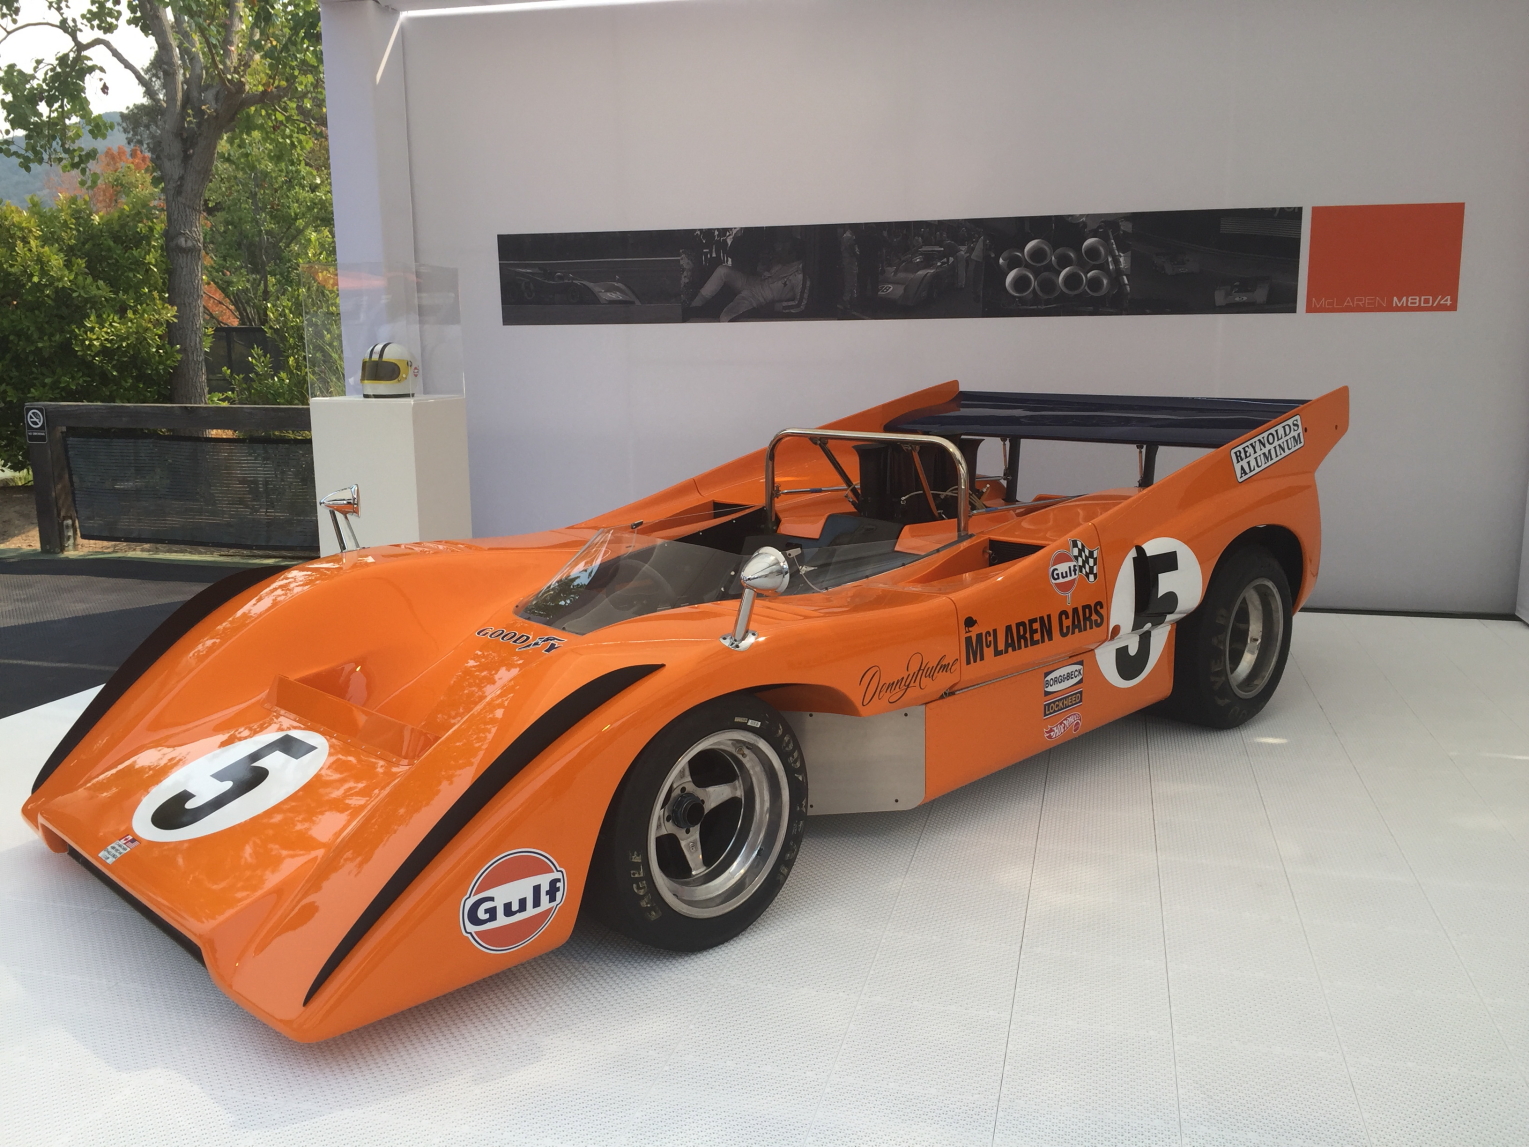
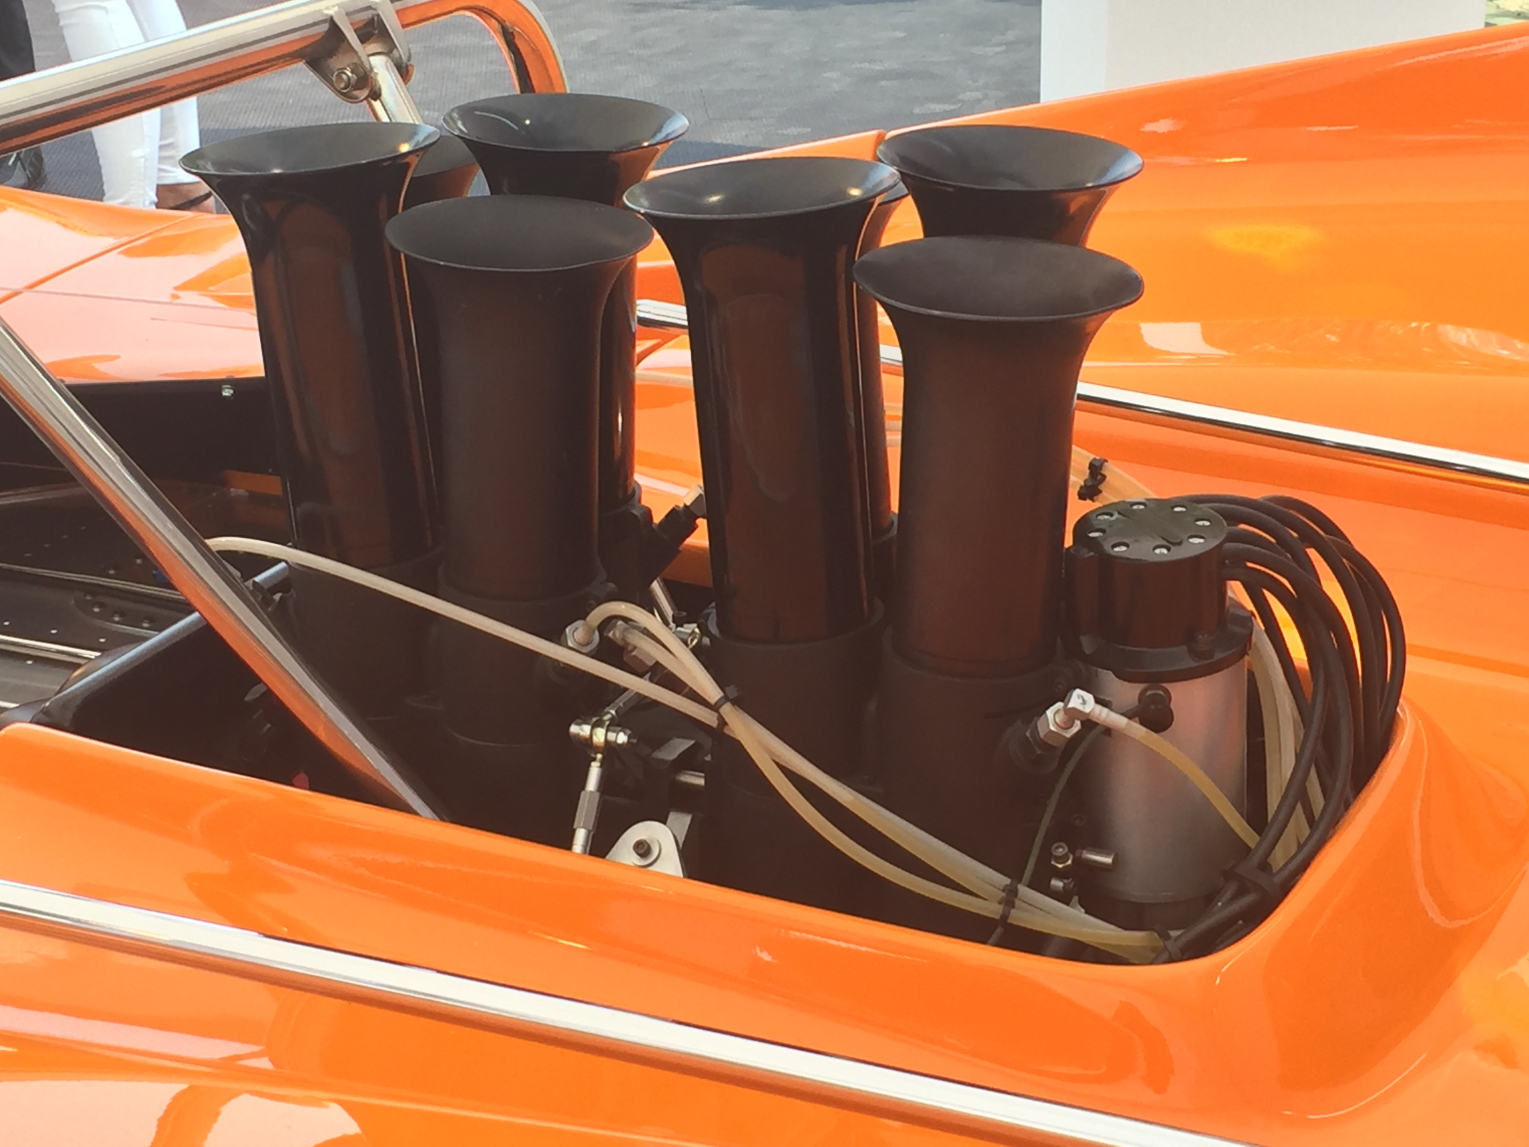
This M80/4 CanAm car looked like a beast! The velocity stacks on that V8 look like they could swallow a small dog. What a rush it must be to drive something like that… open cockpit, raging V8 right behind you.. mega down force and all the balls you can manage to jam in your driving suit.

Here is “The Gang” again (Beth decided to take a break from being a film star to say hello) in front of Niki Lauda’s MP4-2/2 F1 machine. His teammate that year was Alain Prost, whom lost the championship to Lauda by mere points that year; which of secured McLaren a solid manufactures title as well.
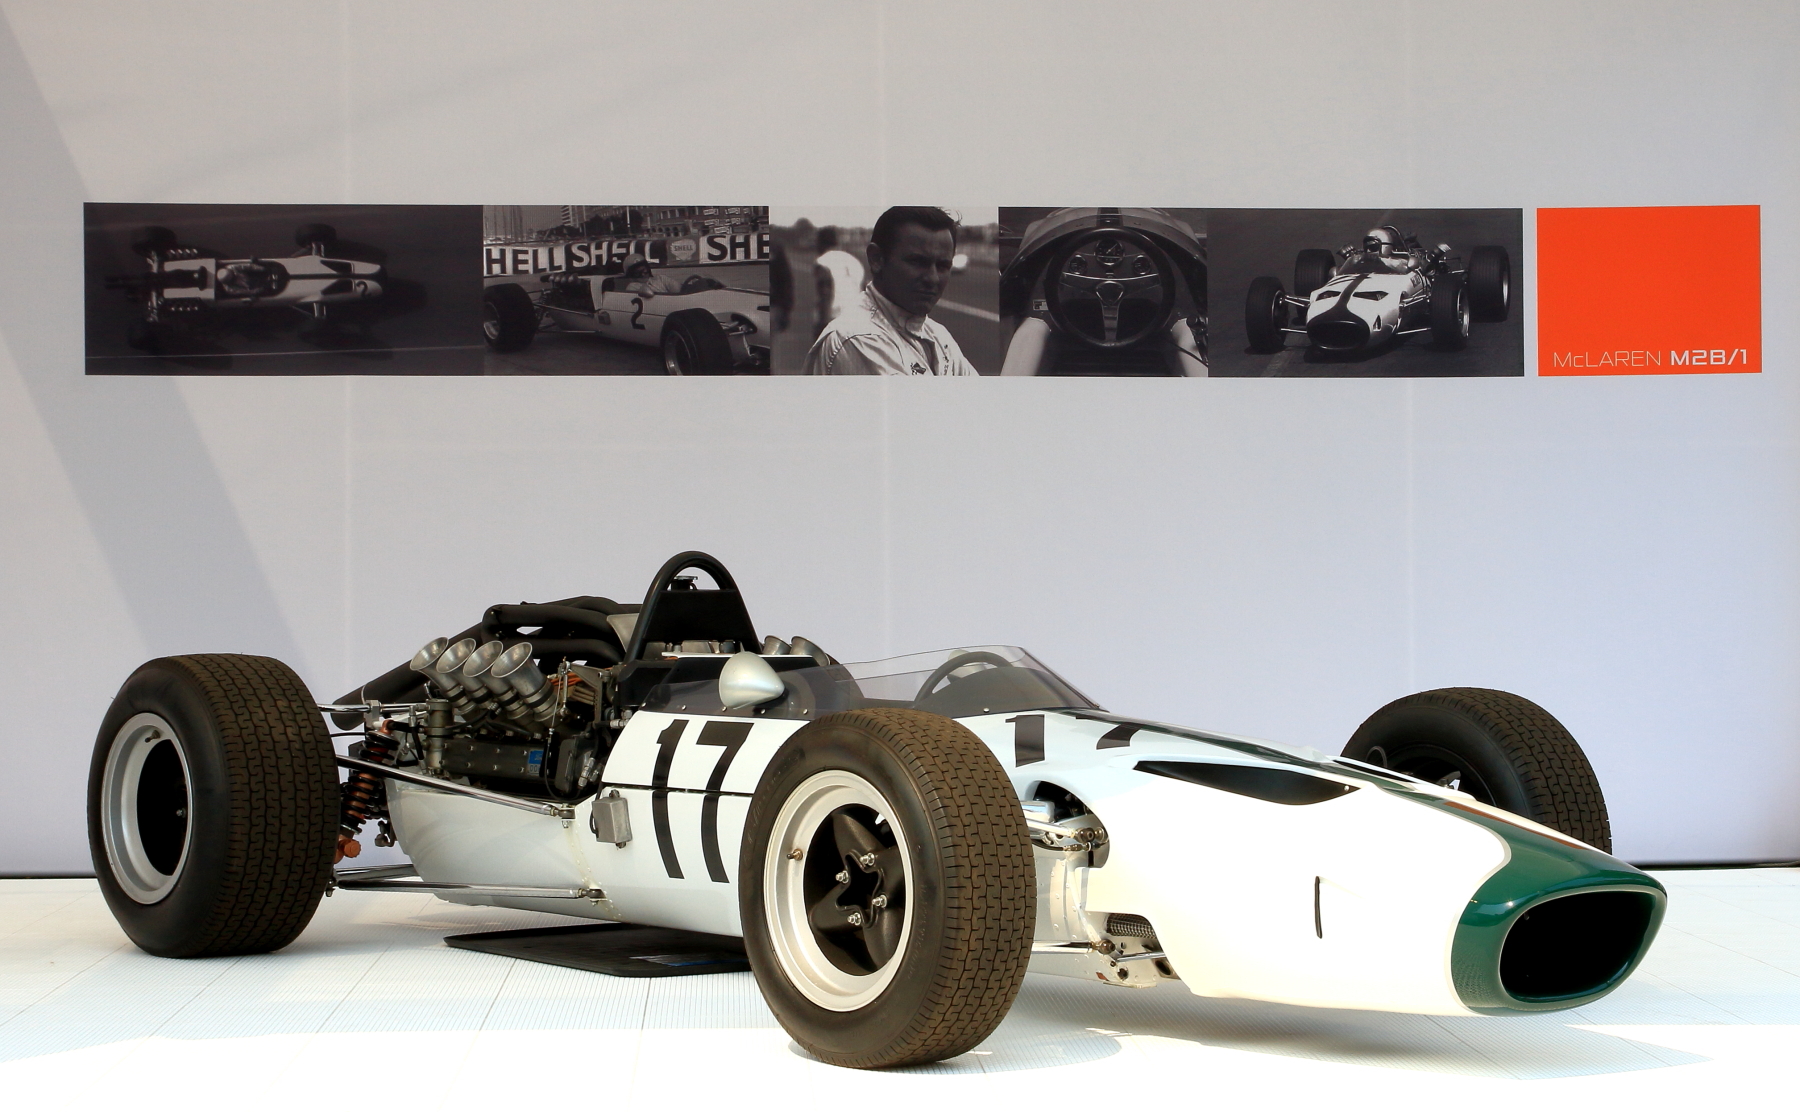
For me, there is just something about a 60’s era open-wheeled car like this M28. It’s like a work of art. 🙂

Unobstructed view of Lauda’s MP4-2/2 F1 machine.

And one more look at the 570. I would be thrilled to put one of these in my garage.
HUGE Thanks to McLaren and Bernardus Lodge and Spa for hosting us for this event during Car Week 2016!!!
The number 1 suspected cause of the alternator failures, according to the Sprinter People I’ve queried, is a leaking high pressure fuel pump. So, even though I’m not identifying a clear indicator of a problem, it just seemed prudent to take the time to investigate it while everything else was apart.
There were a lot of steps not shown to get to this point. They all seem pretty straight forward, so I’ve skipped ahead to the part where I actually remove the pump.
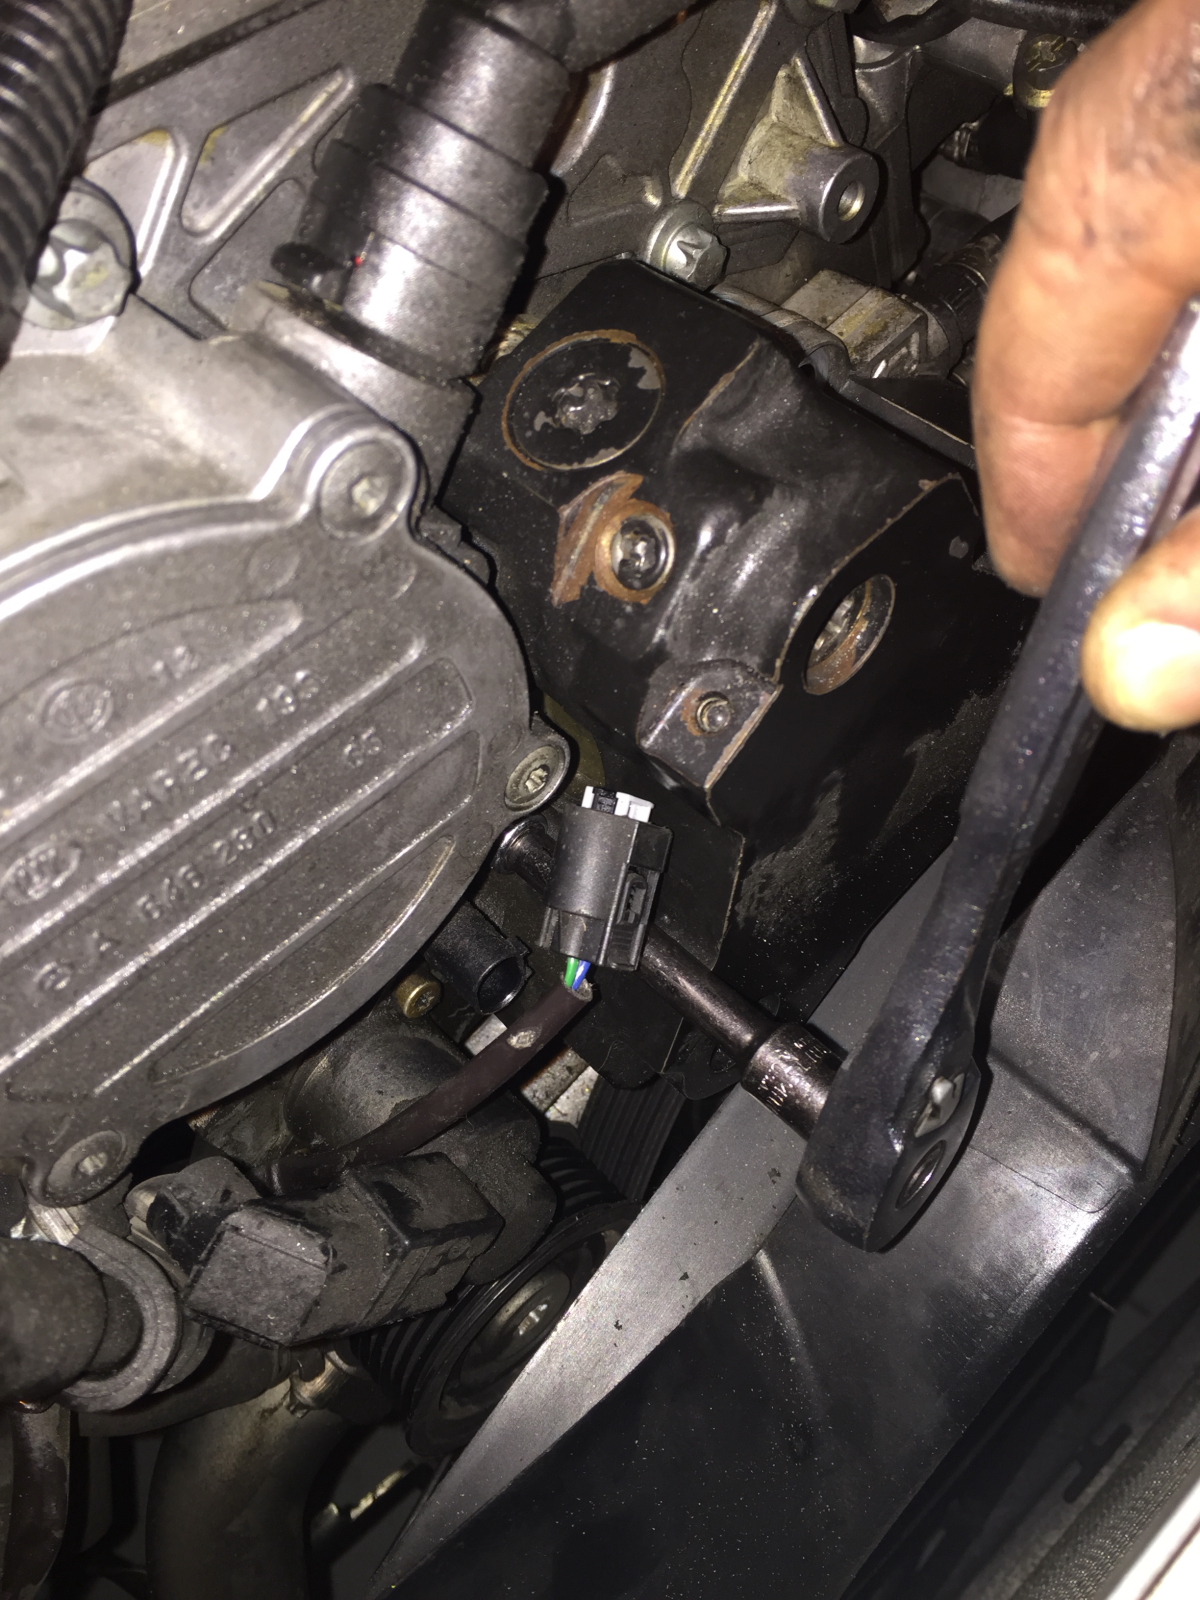
There are three E10 torx head bolts that secure the pump to the engine block. Two are fairly easy to access and are located on the upper half of the pump assembly.
Here is one of the bolts being removed.
The next bolt is located to the left, about mid-pump, very close to the connector you see removed in this photo.

Here is a slightly better angle showing where the bolt is located.
There are two electrical plugs that need to be removed. The one on the right slides out forward. The one on the left slides upwards. The left one is a bit of a pain to removed. I used some channel lock pliers to get an even pressure on the rear clips and gently wiggle it upwards until it came off. Take your time, breaking more parts while doing a repair is not a good plan.
Plugs disconnected and ready to move onto the last steps. NOTE: The high pressure outlet has already been disconnected (top of pump). You can see the threads of the connector at top of photo. To removed these I needed an 18mm open wrench to hold the lower fitting in the pump, and a 14mm flare nut wrench to remove the coupling on the high pressure line feeding the injectors. That’s an important step. You won’t be able to remove the pump with them connected. What I didn’t remove when I was working on mine (maybe a bad choice) were the two lower pressure feed and return lines about mid-pump on the right (not seen here).
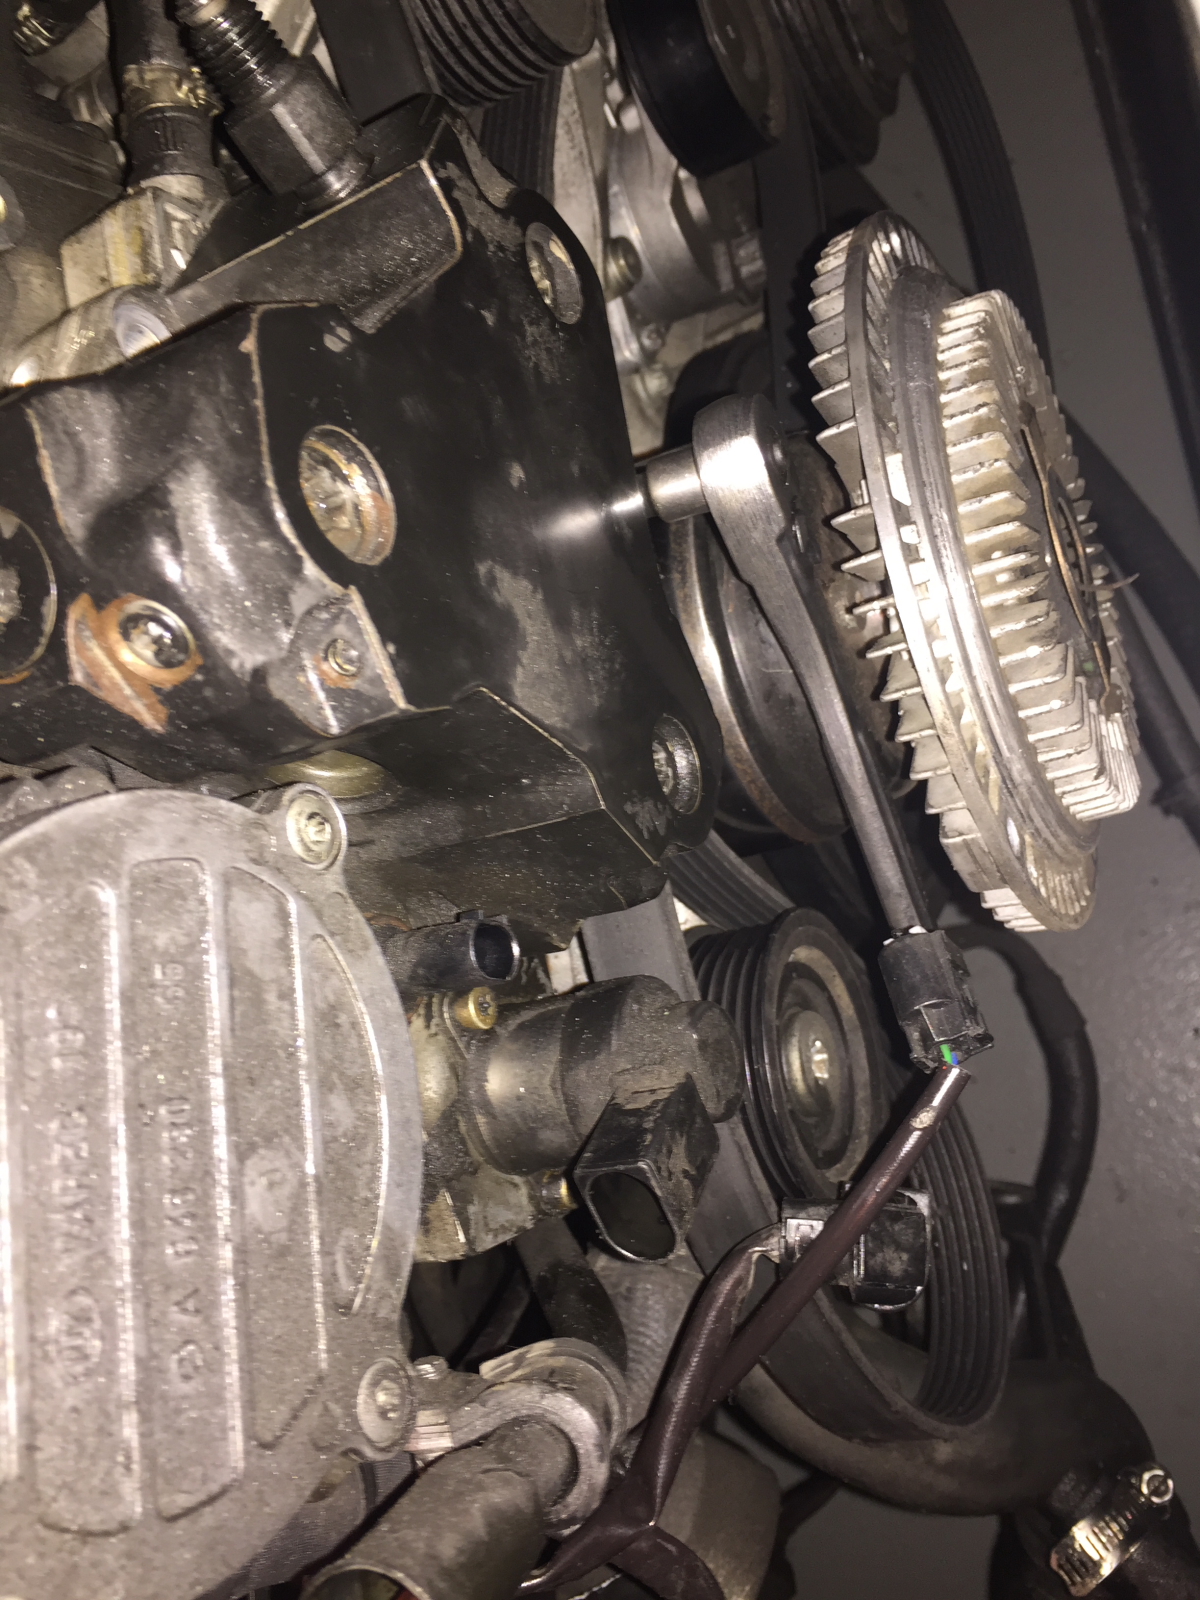
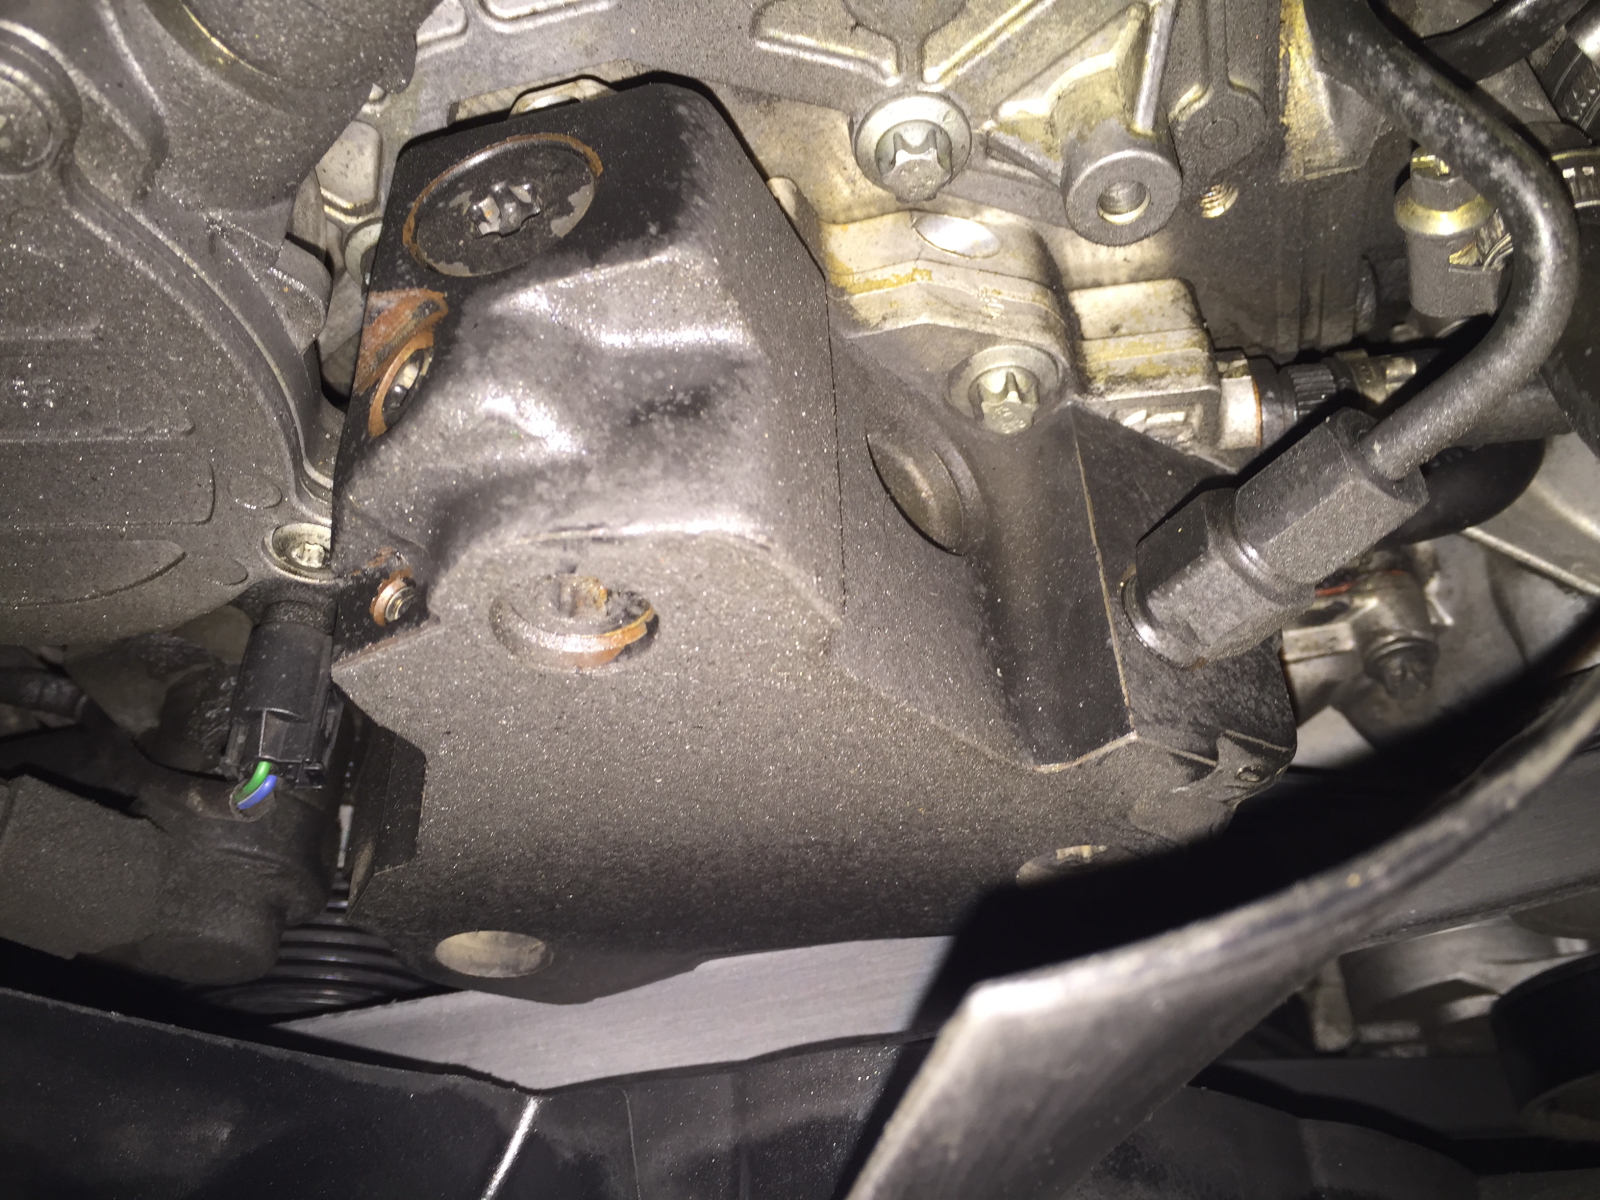
Last of the three bolts is bottom center. As much as I’d like to do as little removal of parts as possible, I don’t really see a practical way to get at this bolt without removing the fan blades from the clutch. You just have to do it. I found the 3 bolts on the fan to be 5mm HEX socket (not torx). They were torqued pretty tight. They are a normal right-hand thread, nothing tricky there.
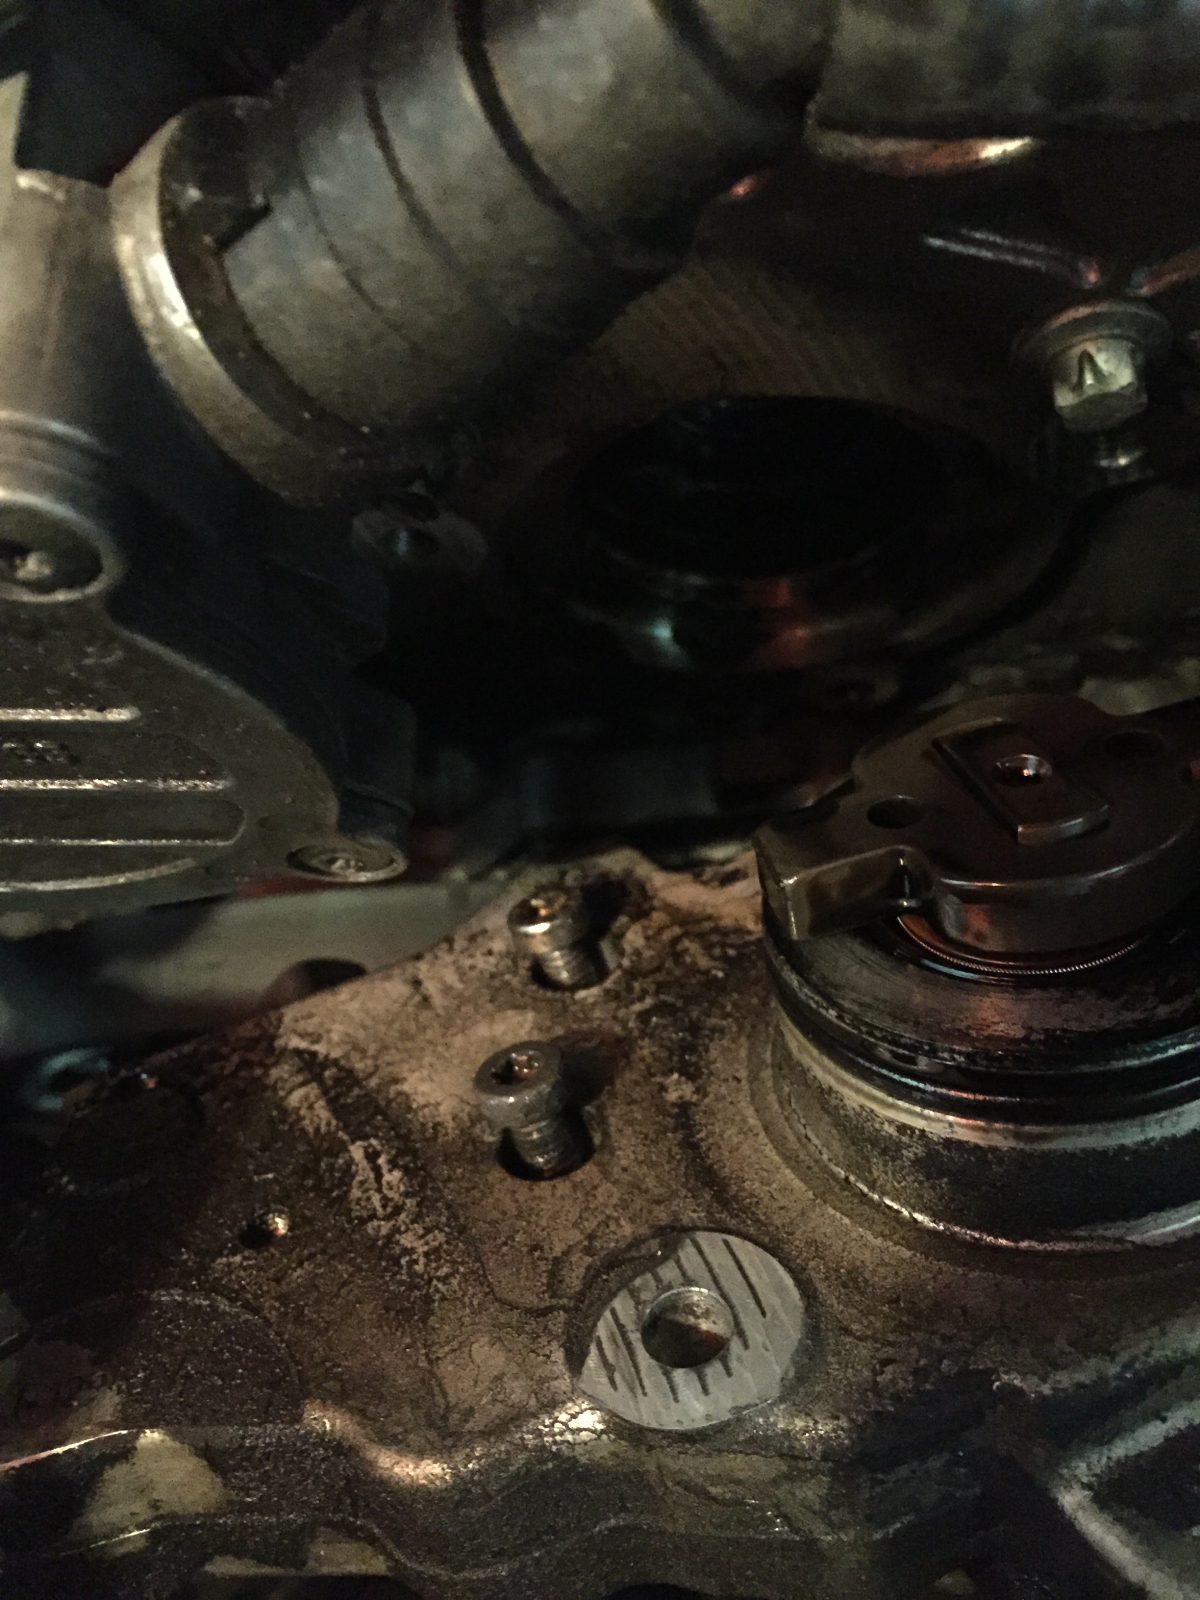
And what did I find on the back of the pump? 2 of the 6 bolts had completely backed out. You can also see that there is diesel fuel on the back of the pump. This matches up with the failure mode described by others, and is the smoking gun (along with the turbo resonator) that I believe was killing my alternators.
All 6 bolts were thread-locked with blue and re-torqued, and pump re-installed.
With the pump re-installed, next step is to re-install the alternator, turbo resonator, intake charge system and get a volt meter installed for diagnostics.
Progress is being made!
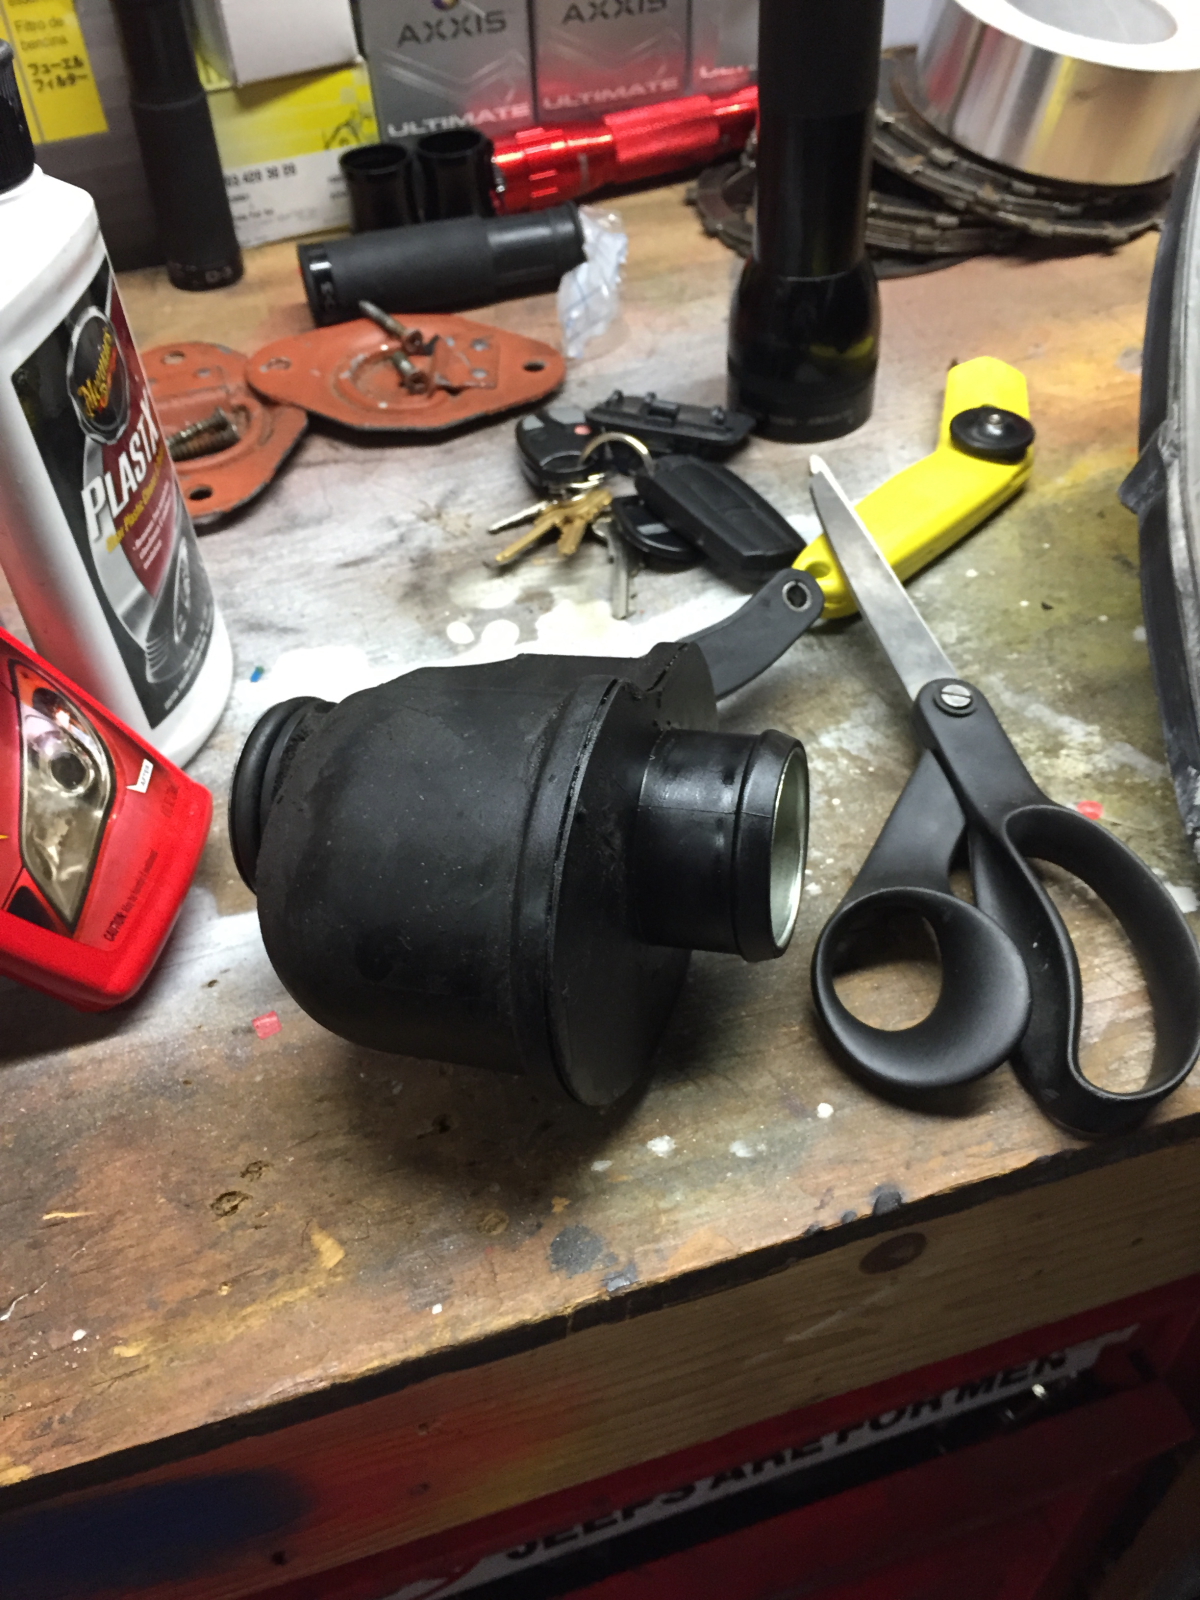
It’s a common problem, when the T1N Sprinters get a little long in the tooth. The turbo resonator (pressure side) can start to split, causing loss of boost and the dreaded Limp Home Mode.
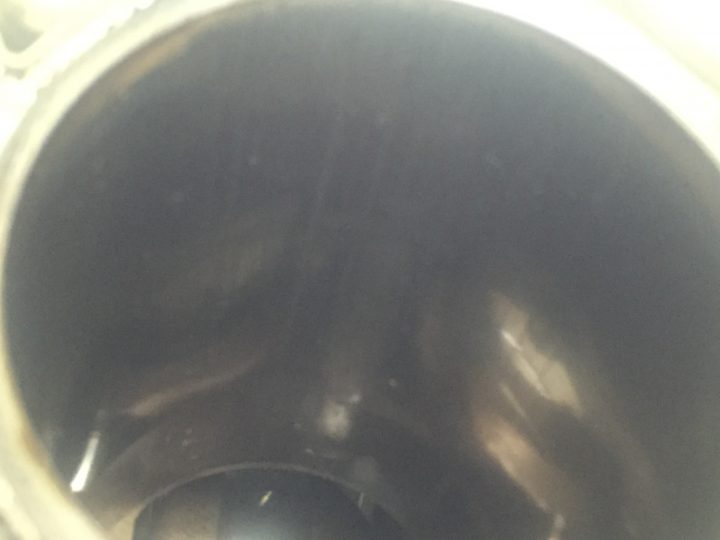
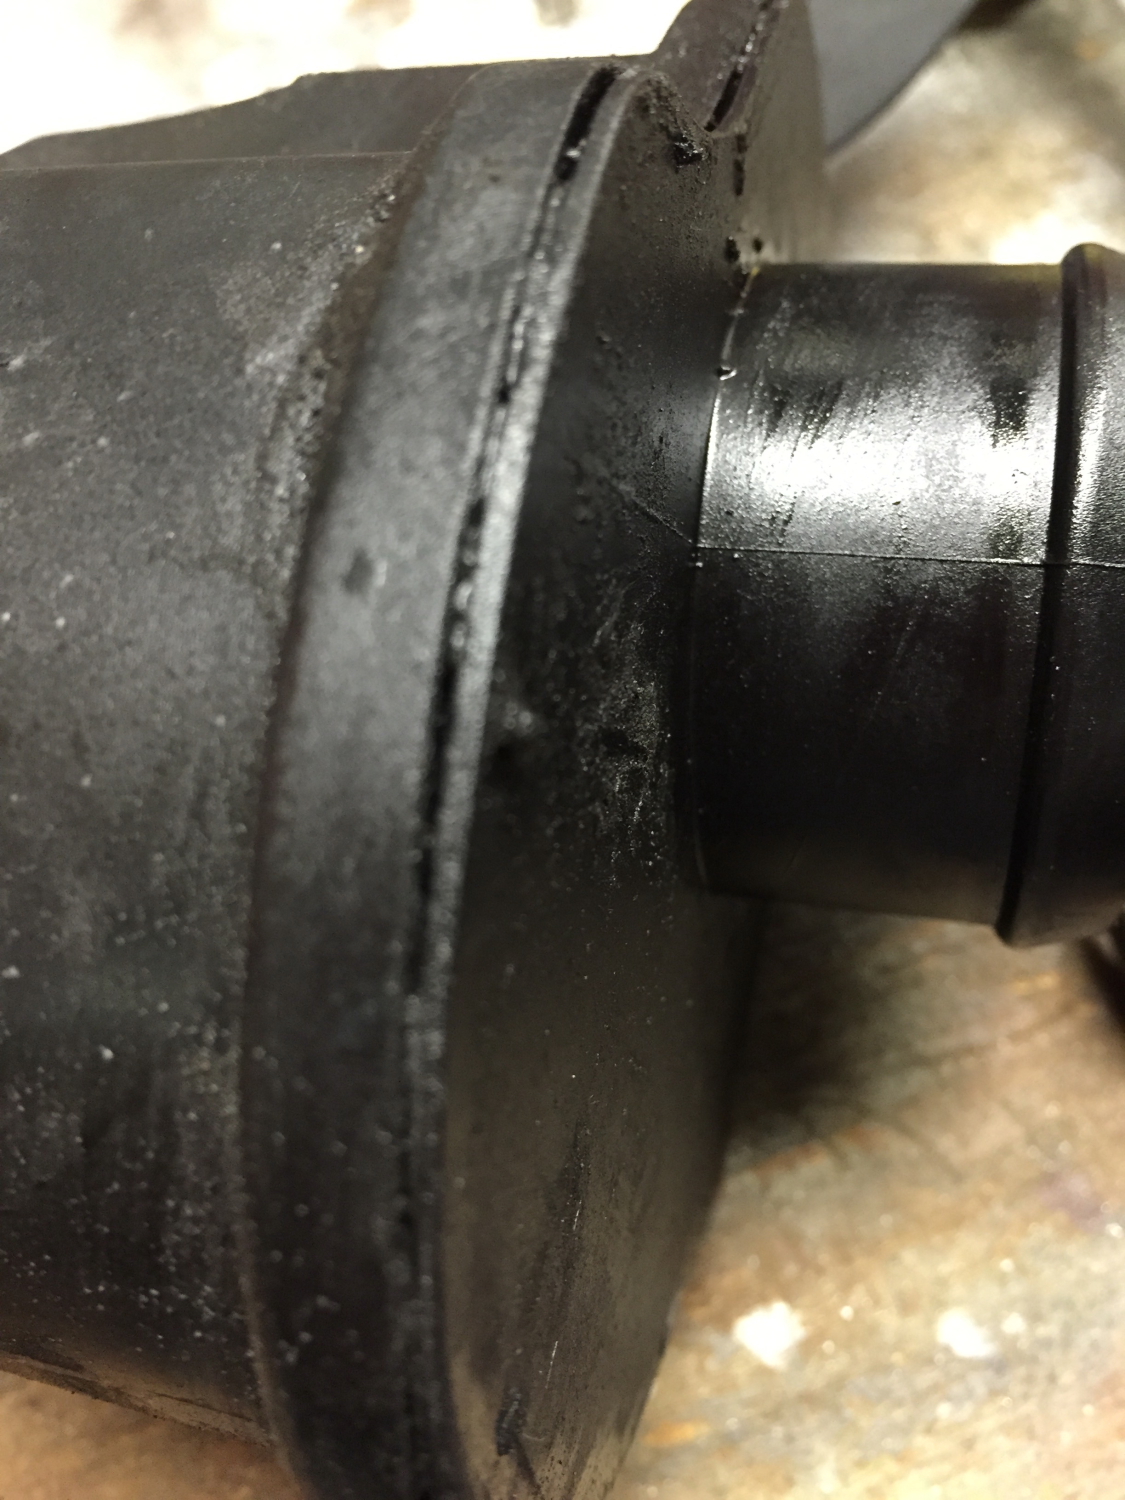
Mine was not exempt from this plight. Below are some example photos of what the Turbo Resonator looks like when failing. This example shows the common separation of along the bonding lines. During high boost this can open and cause the loss of pressure, power and then a CEL fault which the trucks ECU detects as a dangerous condition for the engine and cuts severely reduces power.
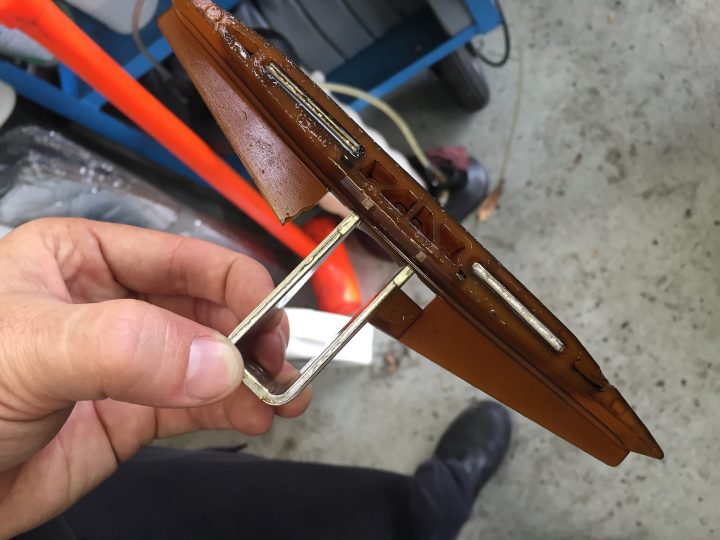
This is what the part looks like. It is connected directly to the outlet side of the boost section of turbocharger. The rubber o-ring seals to the turbos (pressue side, not exhaust / impeller side).

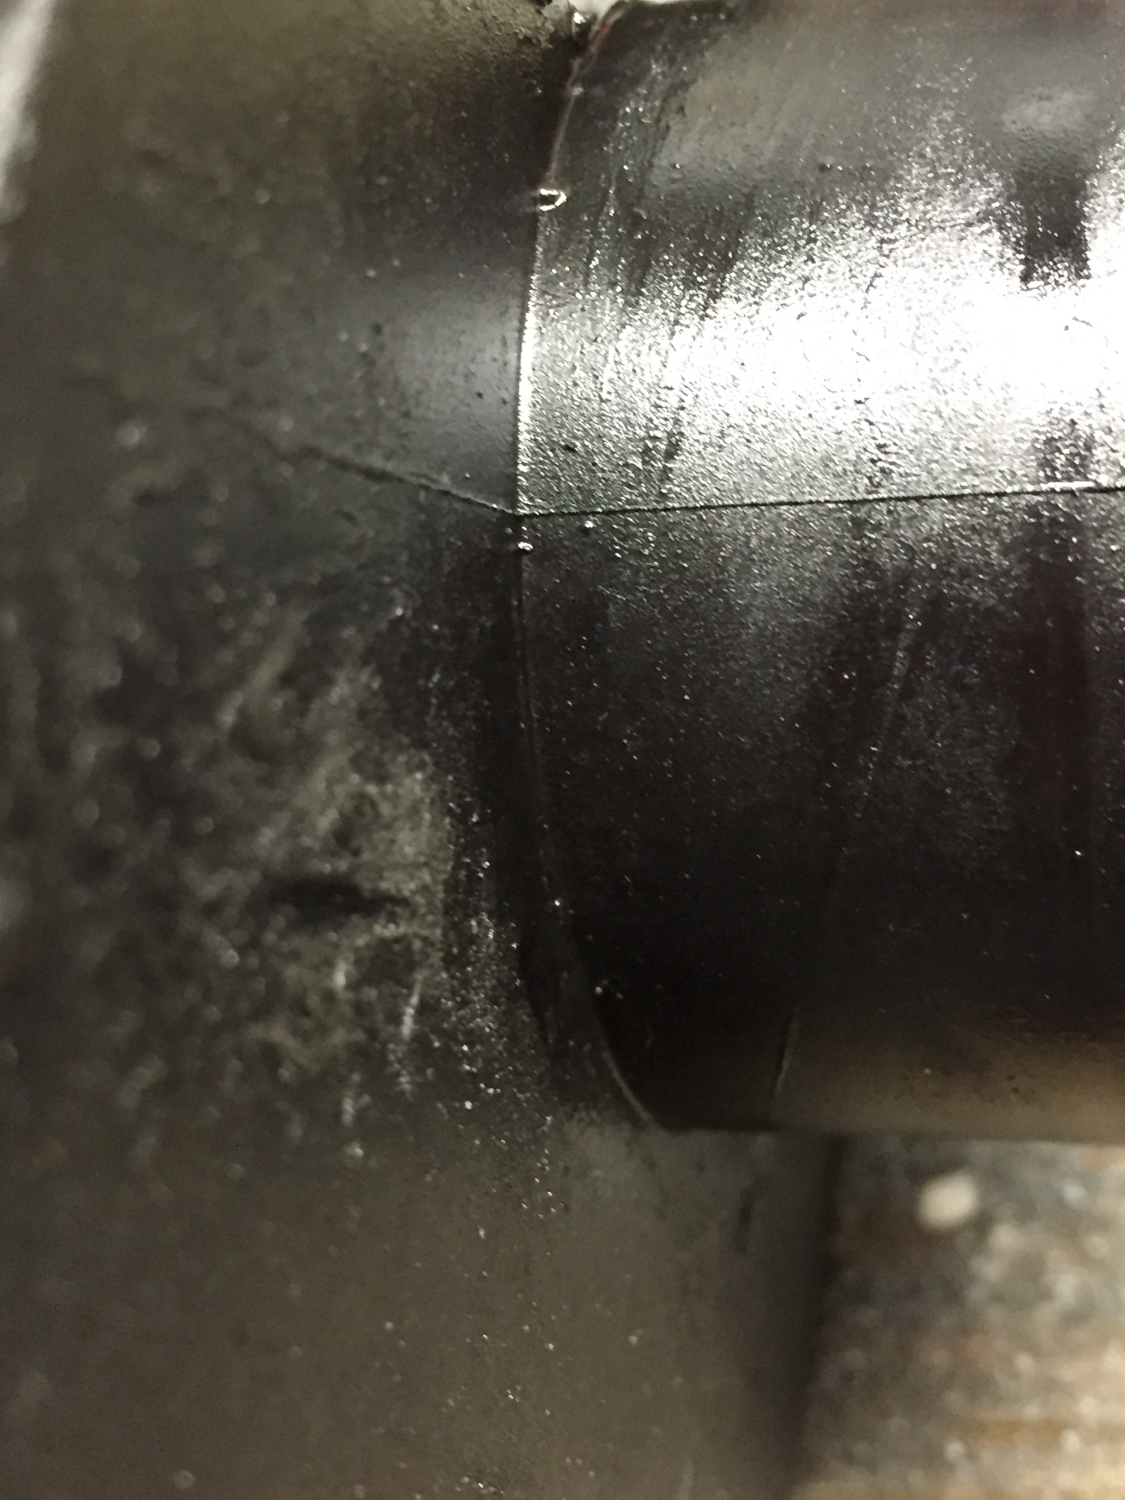
Closeup of the gap formed at the bonding point. I’m told this is the typical failure point. In a lot of case you wont’ be able to see this unless the motor is under boost. In my case, it looks like it’s been failing for some time, it probably why the seller unloaded the truck $2500 under asking price.
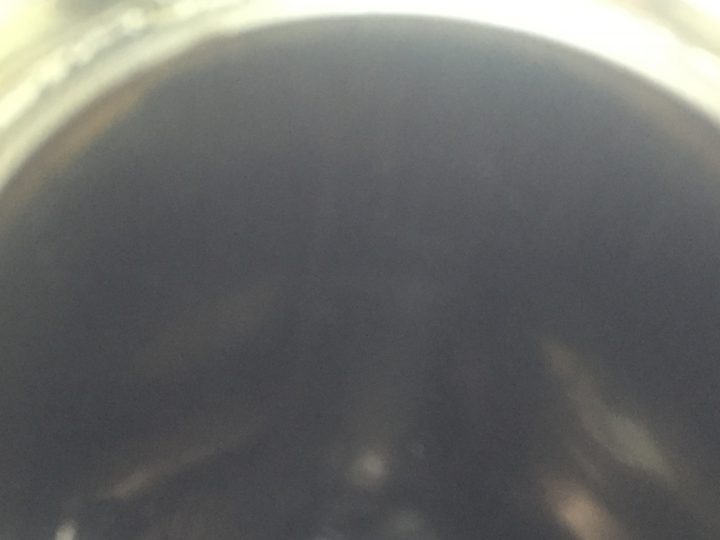
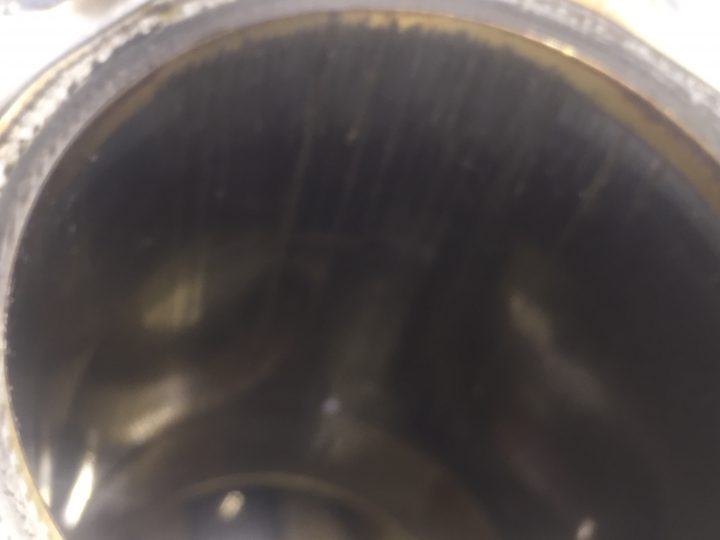
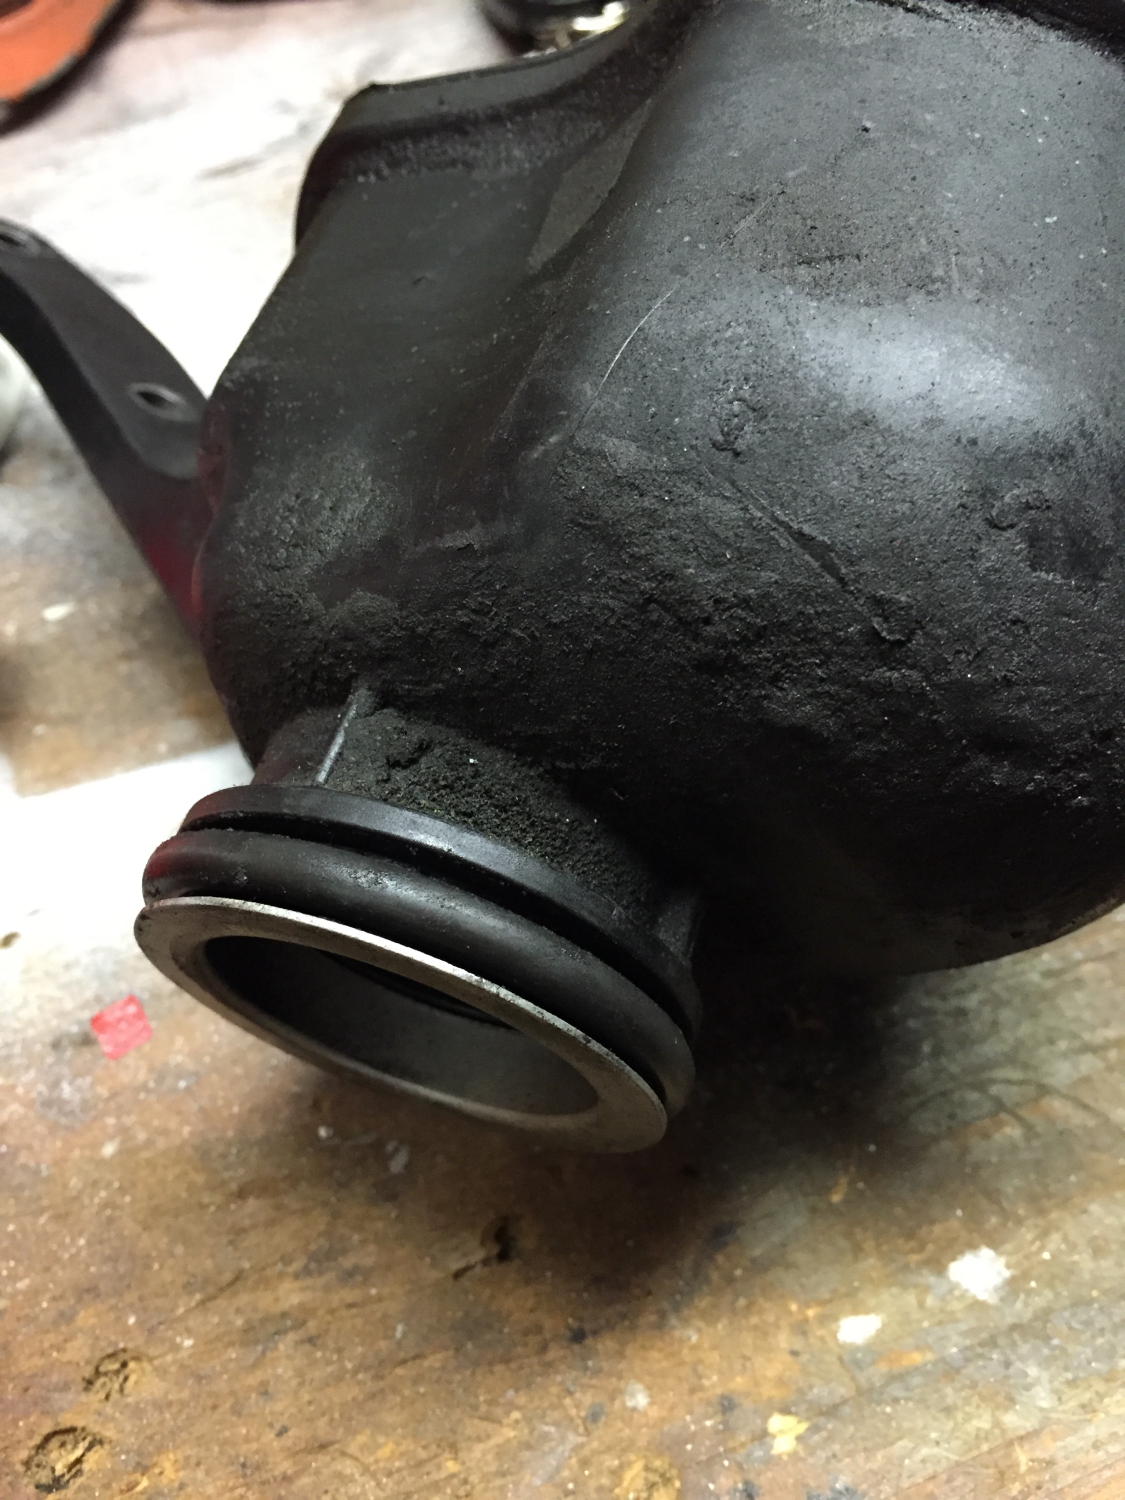
Another area that I’m told is possibly suspect fails is the outlet side. I didn’t see any signs of a failure here, but it’s something to check if you suspect you have this issue.
Another thing to look for is leakage around the o-ring. In this case there is crud around the area, but the ring appears in tact and no signs of blow-by. It turns out the crud was from the primary cause of my reliability issues, from a totally separate part.
Fortunately, this part is not really difficult to remove. A 1/4″ wrench or an E8 female Torx socket (later bring the correct tool) and remove too small bolts when it attaches to the alternator bracket and it’s removed.
Also of good news is that a good, reported very reliable by the Sprinter community replacement, is available on Amazon.com for less than $30.
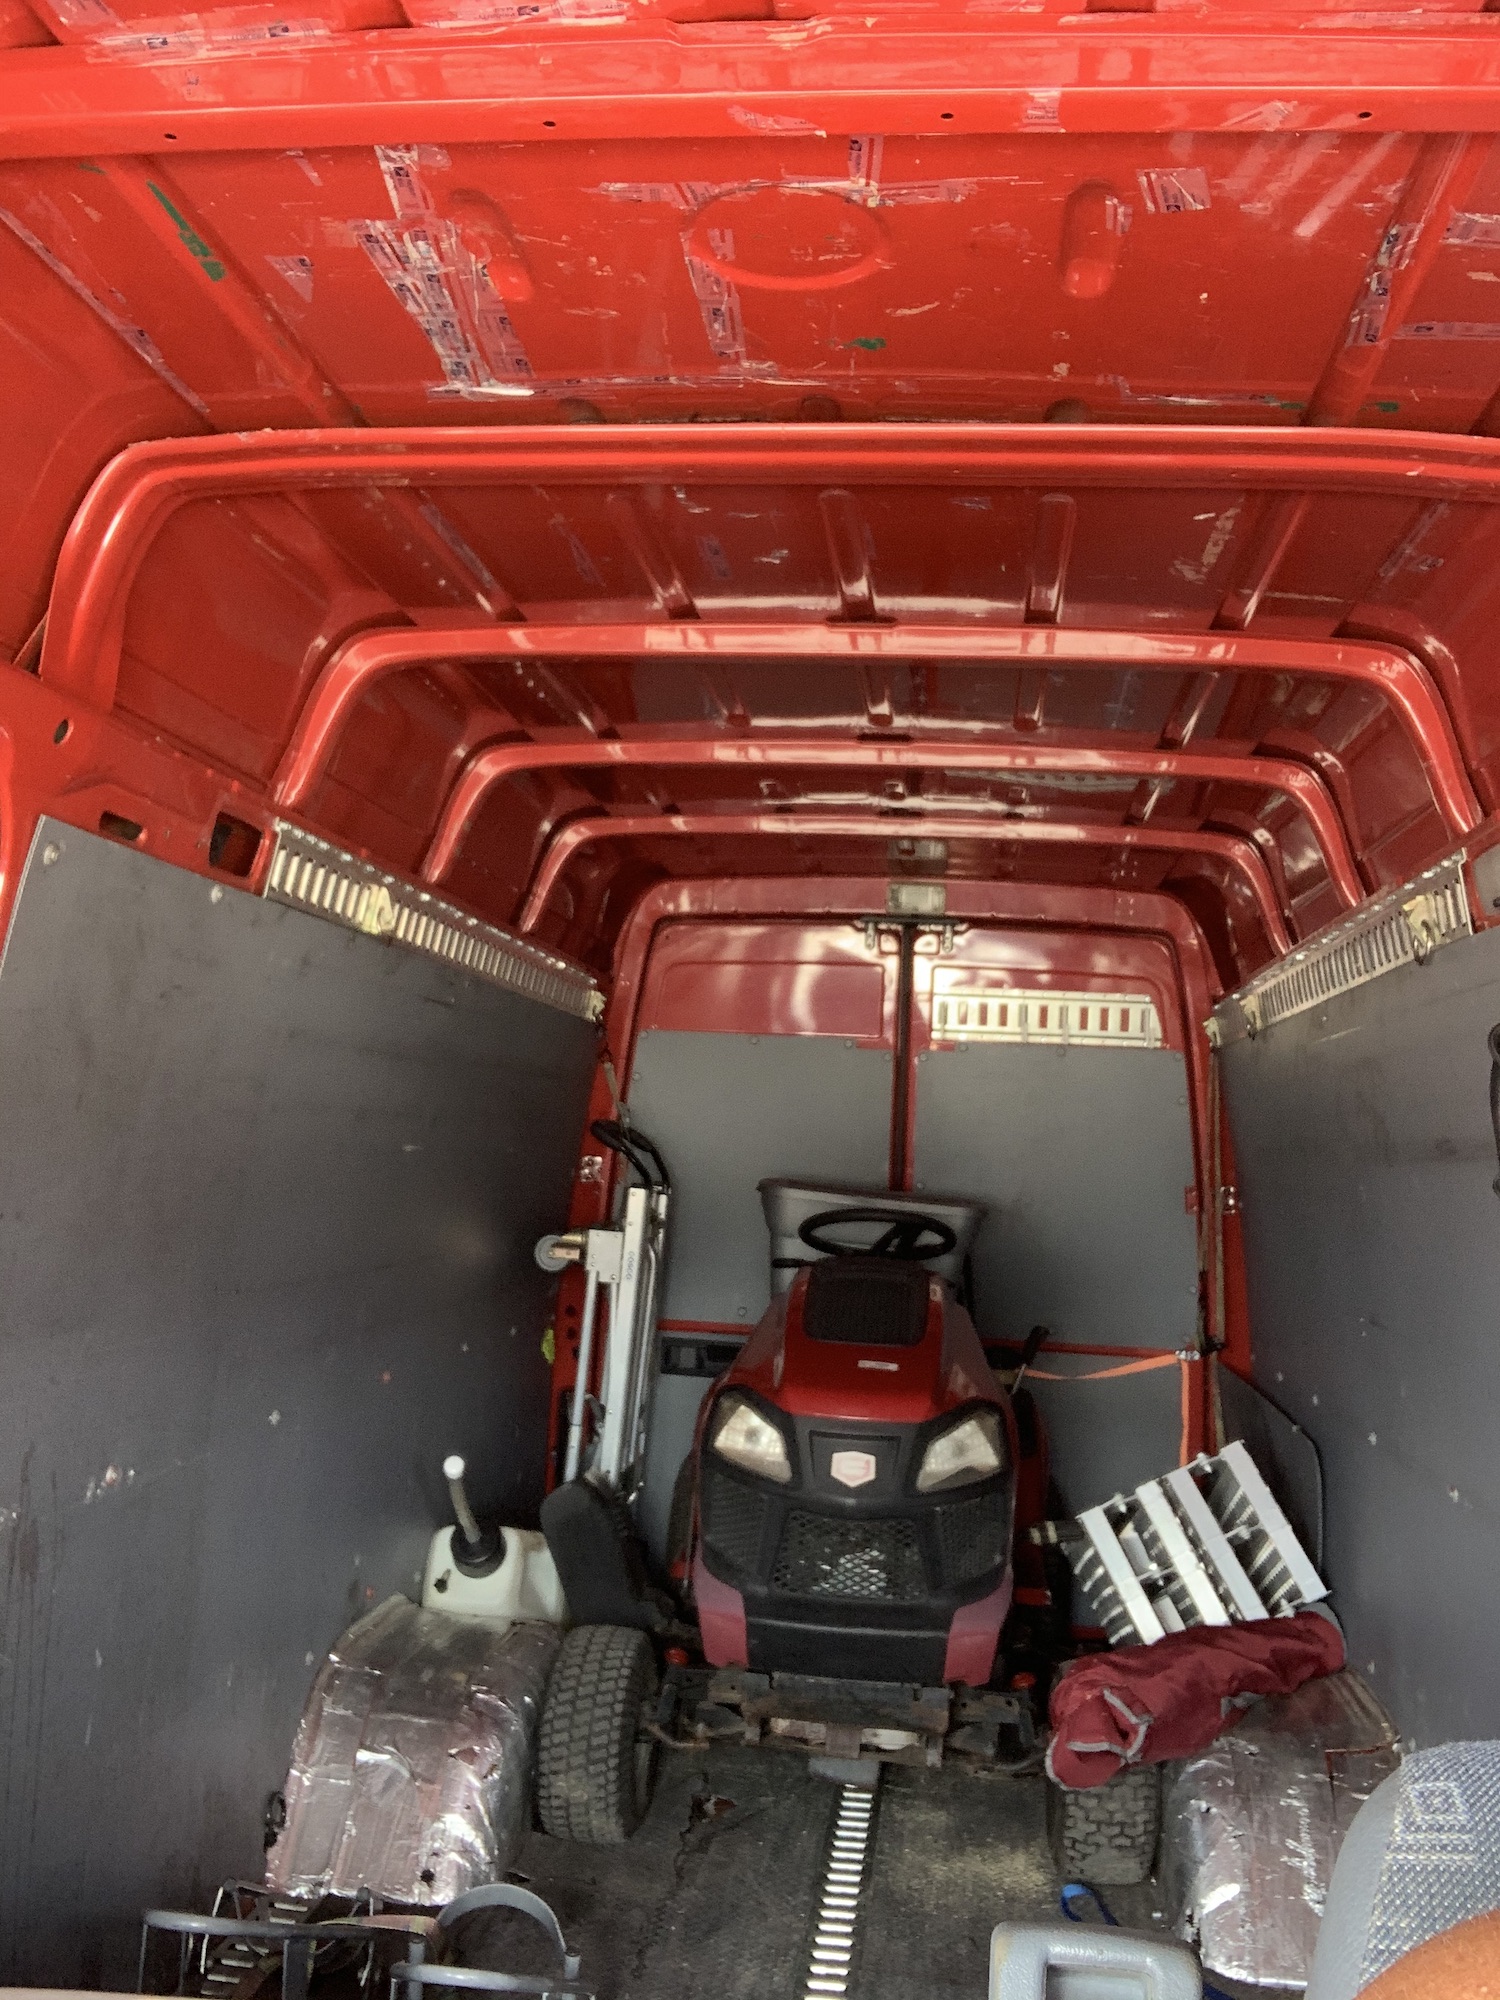
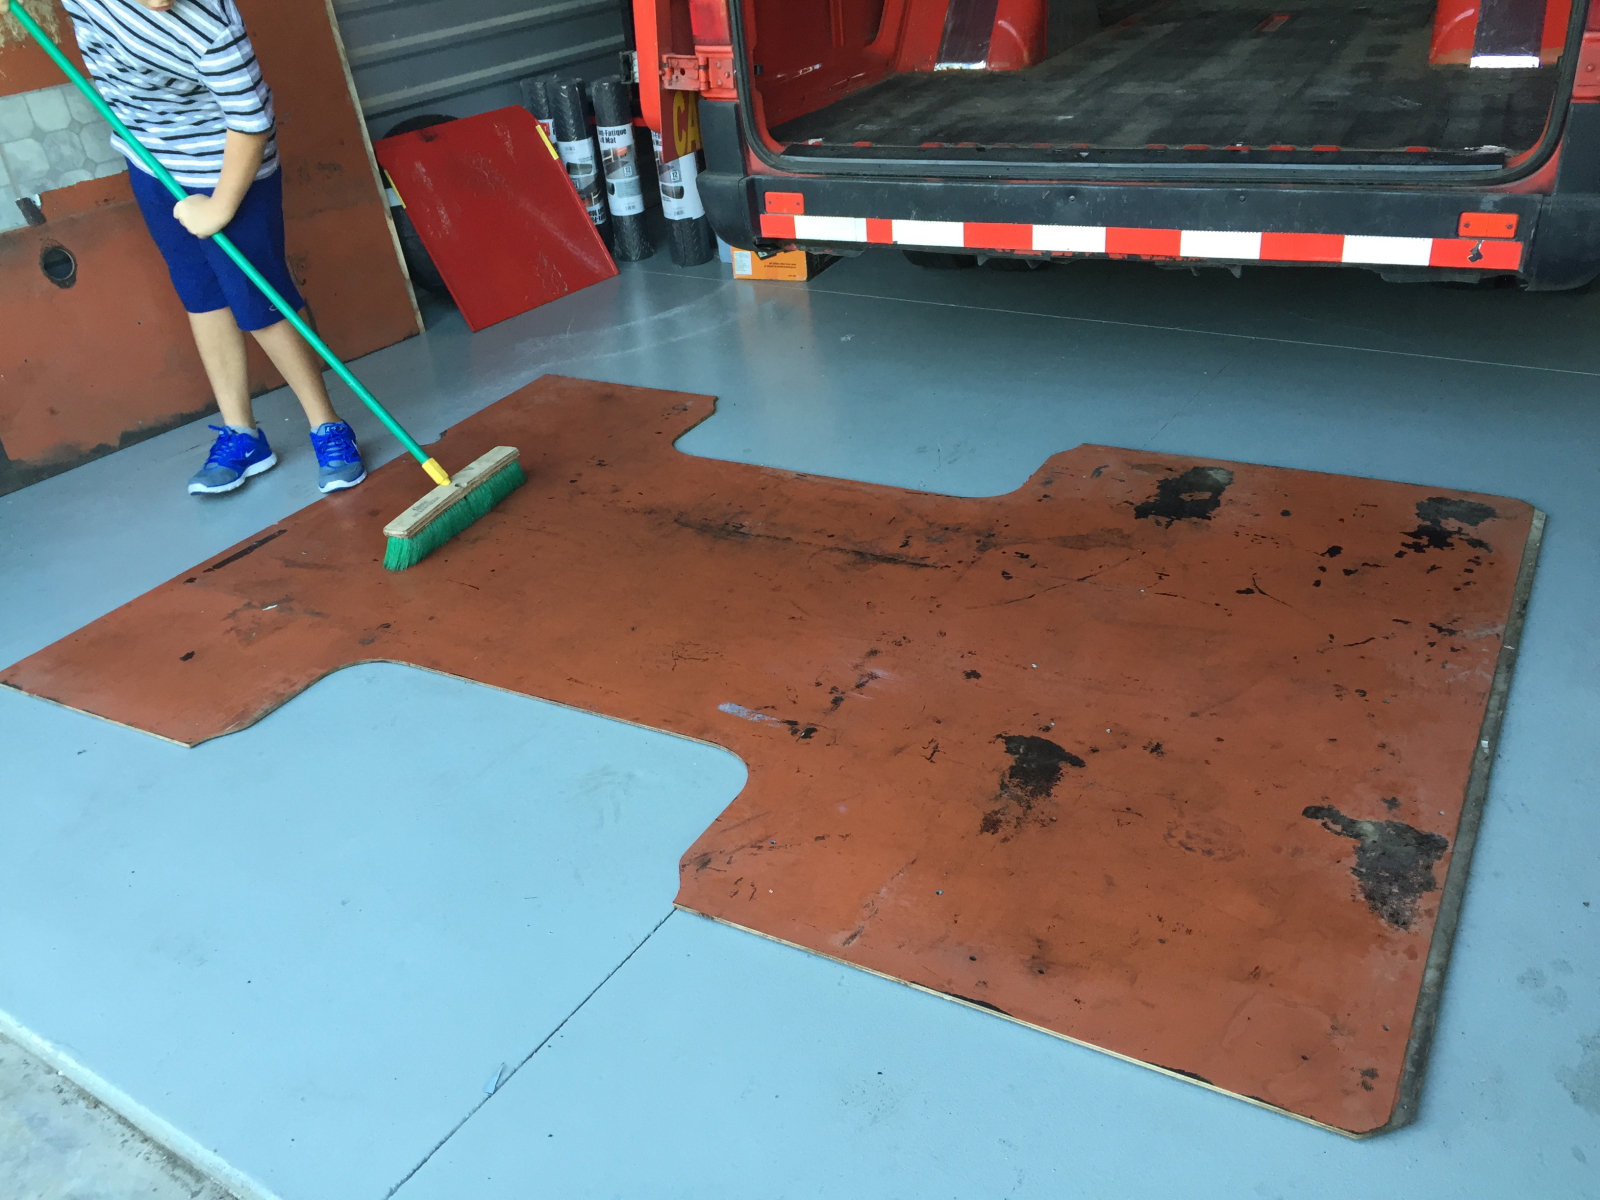
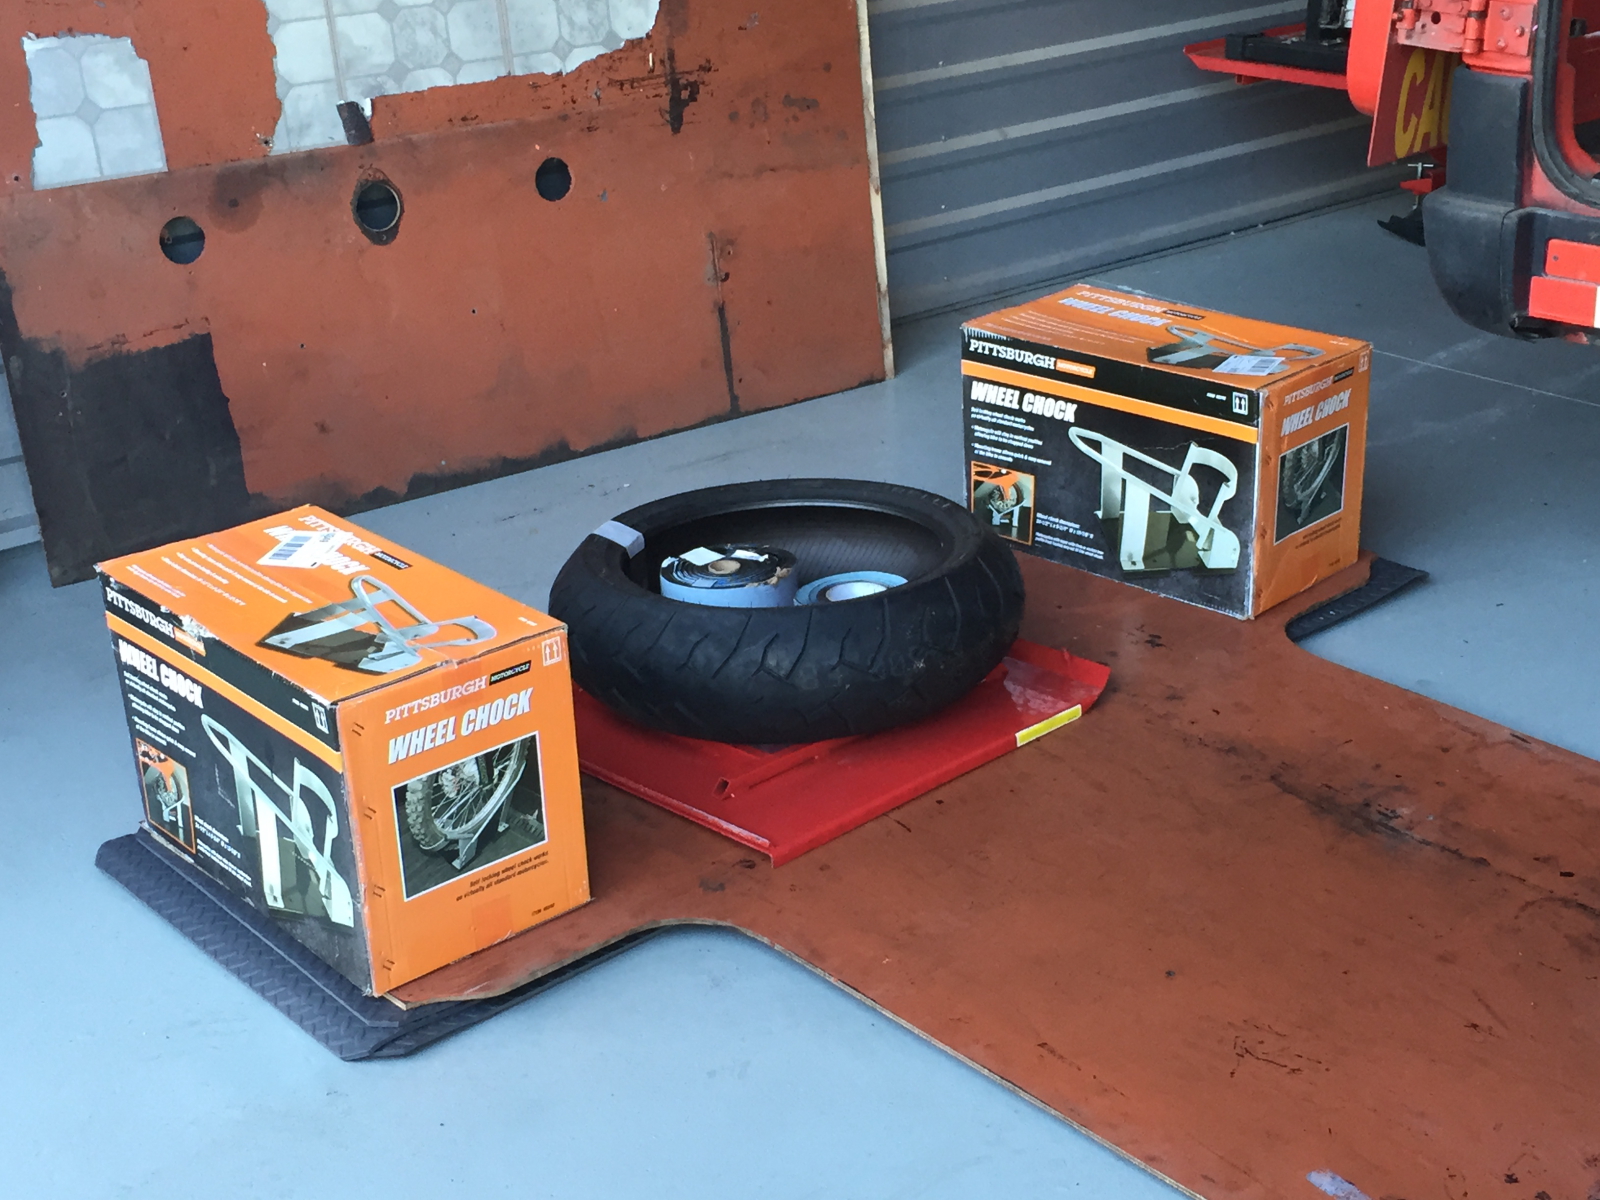
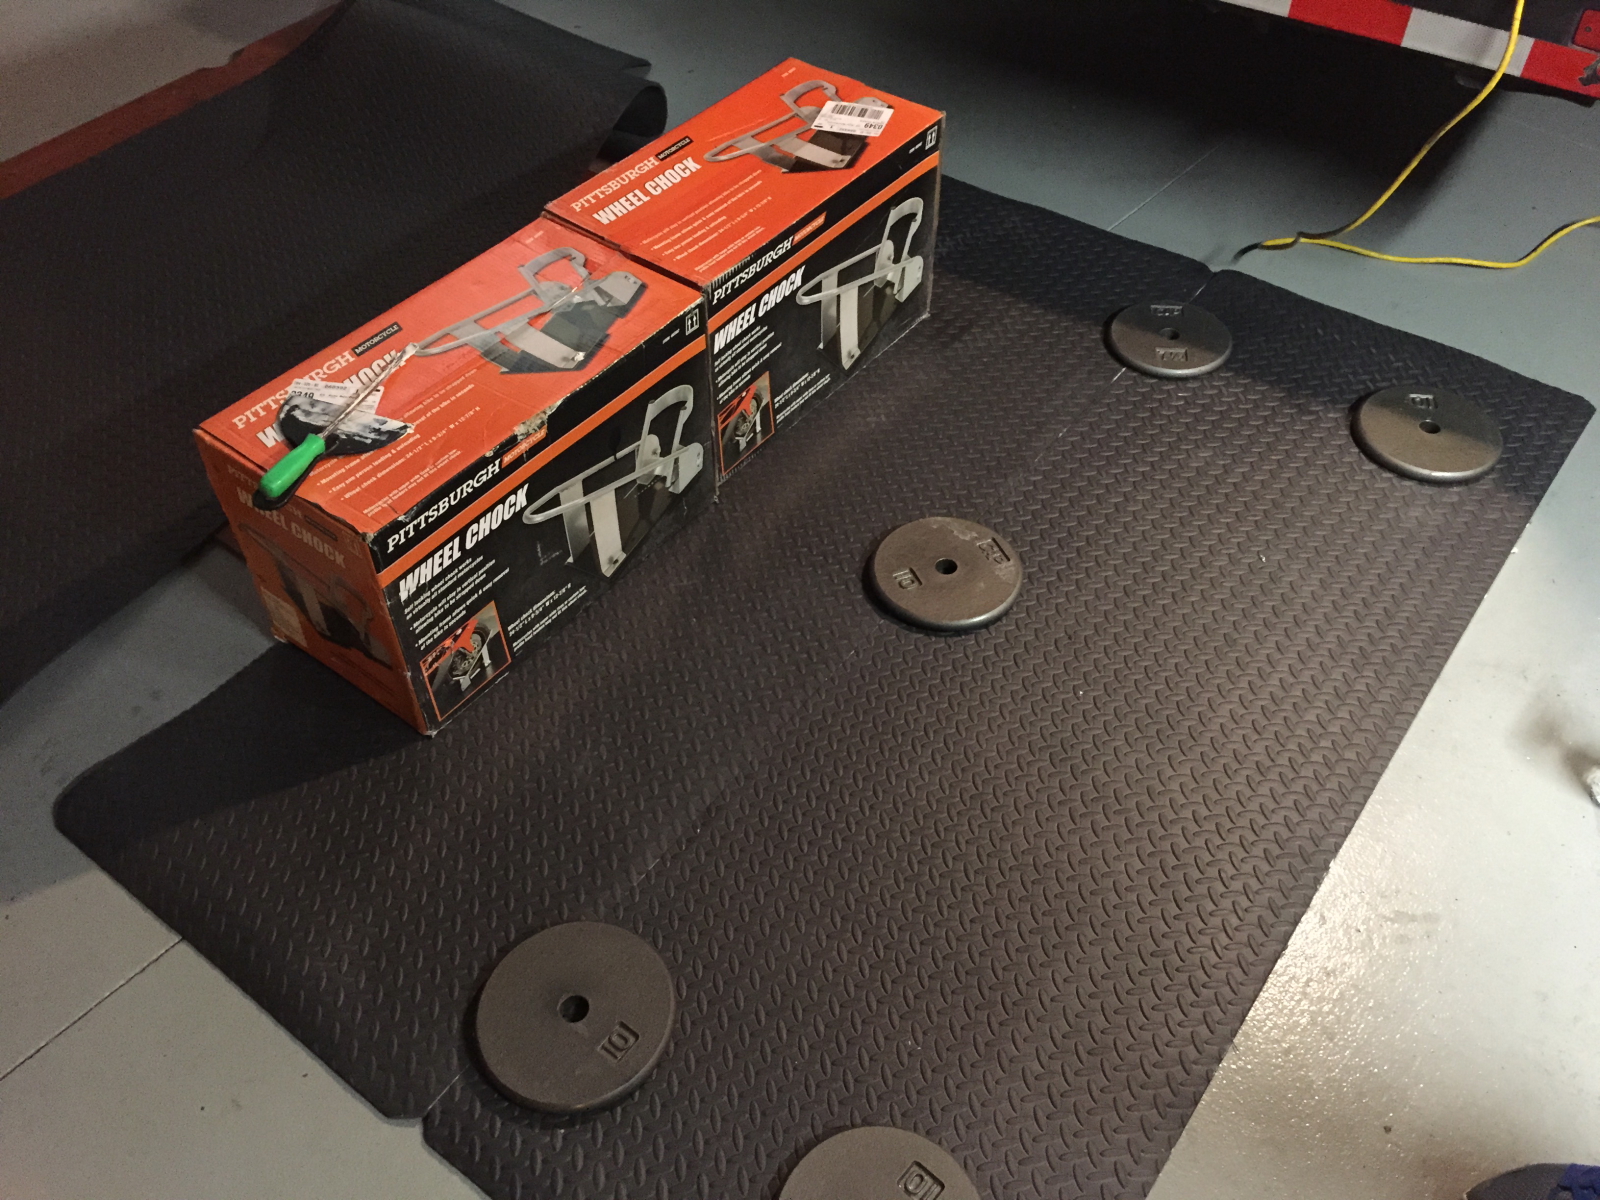
While waiting for repair parts, and researching the possible causes for the alternator deaths… I brought over The Boy to help out with some cleanup and conversion prep.
The original flooring was actually in very good shape, other than the poor paint job applied by a previous owner. I set the boy to scrubbing it down with a high-tech degreaser and a lower tech broom. Some of the old loose paint easily came up but the rest seemed adequately adhered for the next step of the project; new flooring.
The rubber flooring I planned to use came in rolls from China, so they had been in that state for a long time. To ease installation when that phase comes around they were unrolled flat and stacked under the plywood floor. Then I found some stuff to stack on top of it to make sure they were reasonably flat.
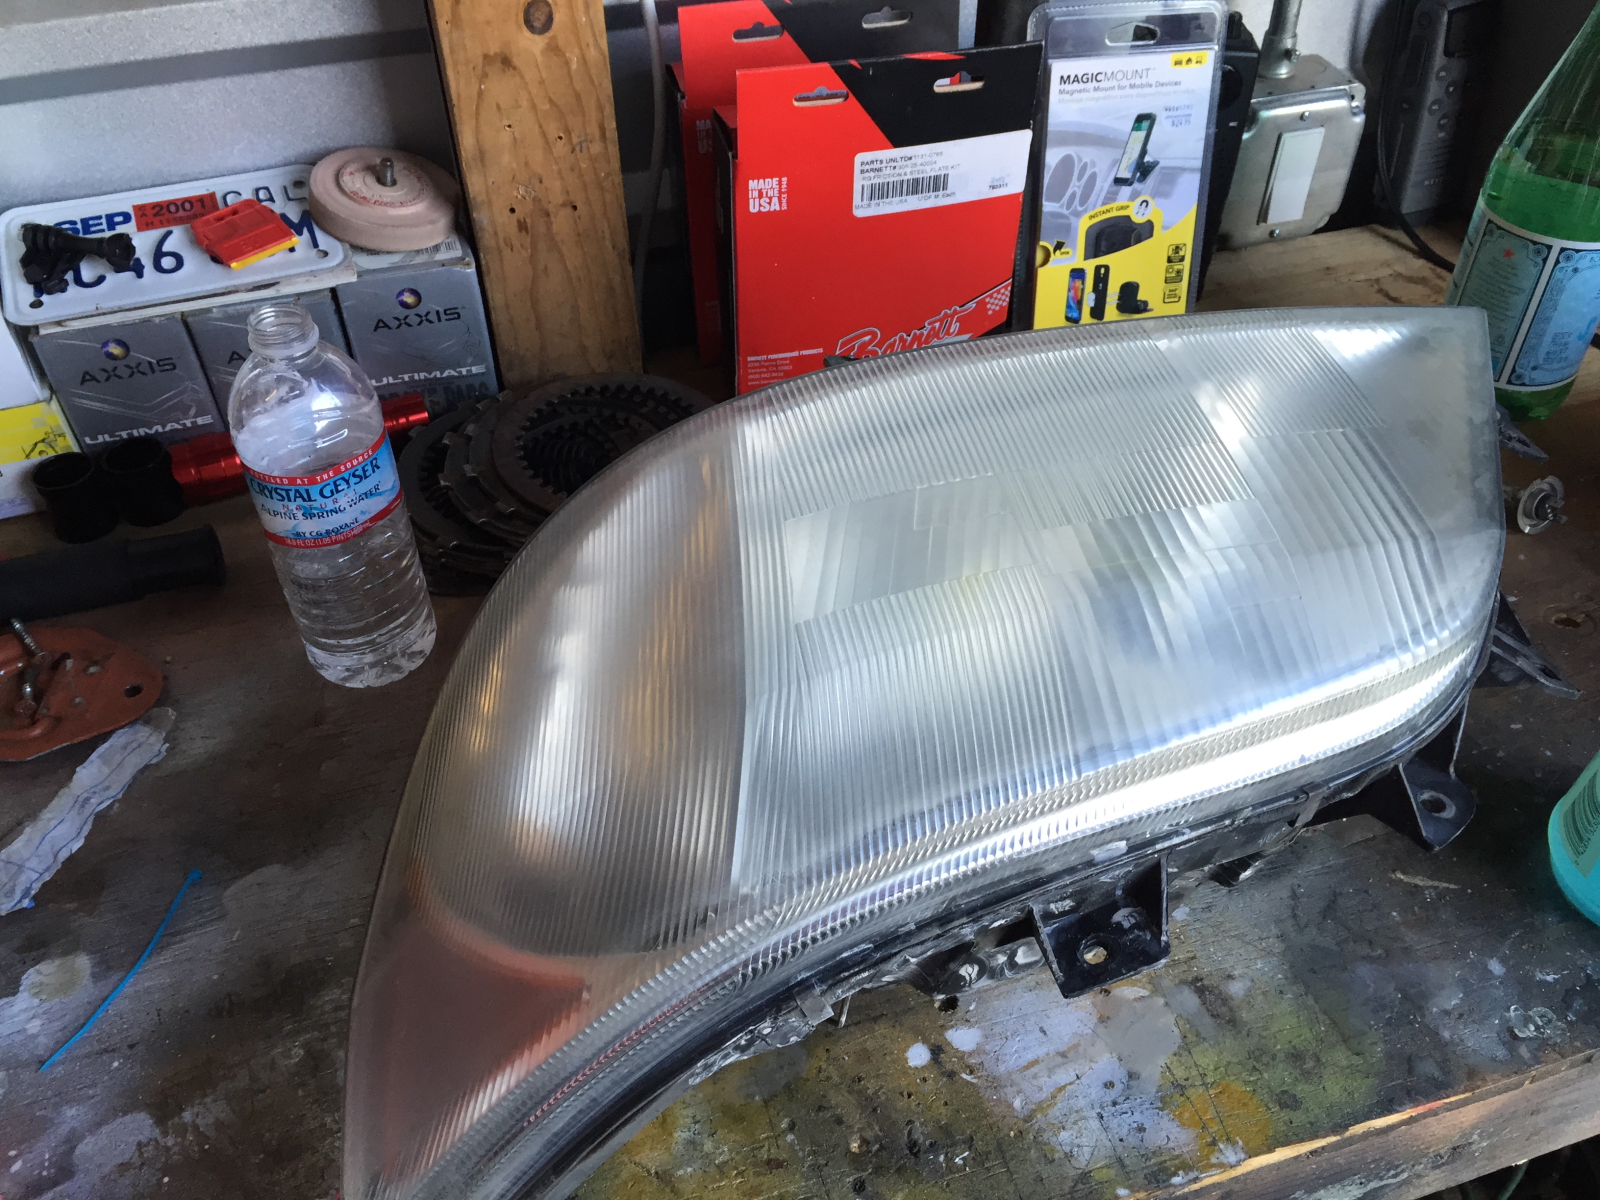
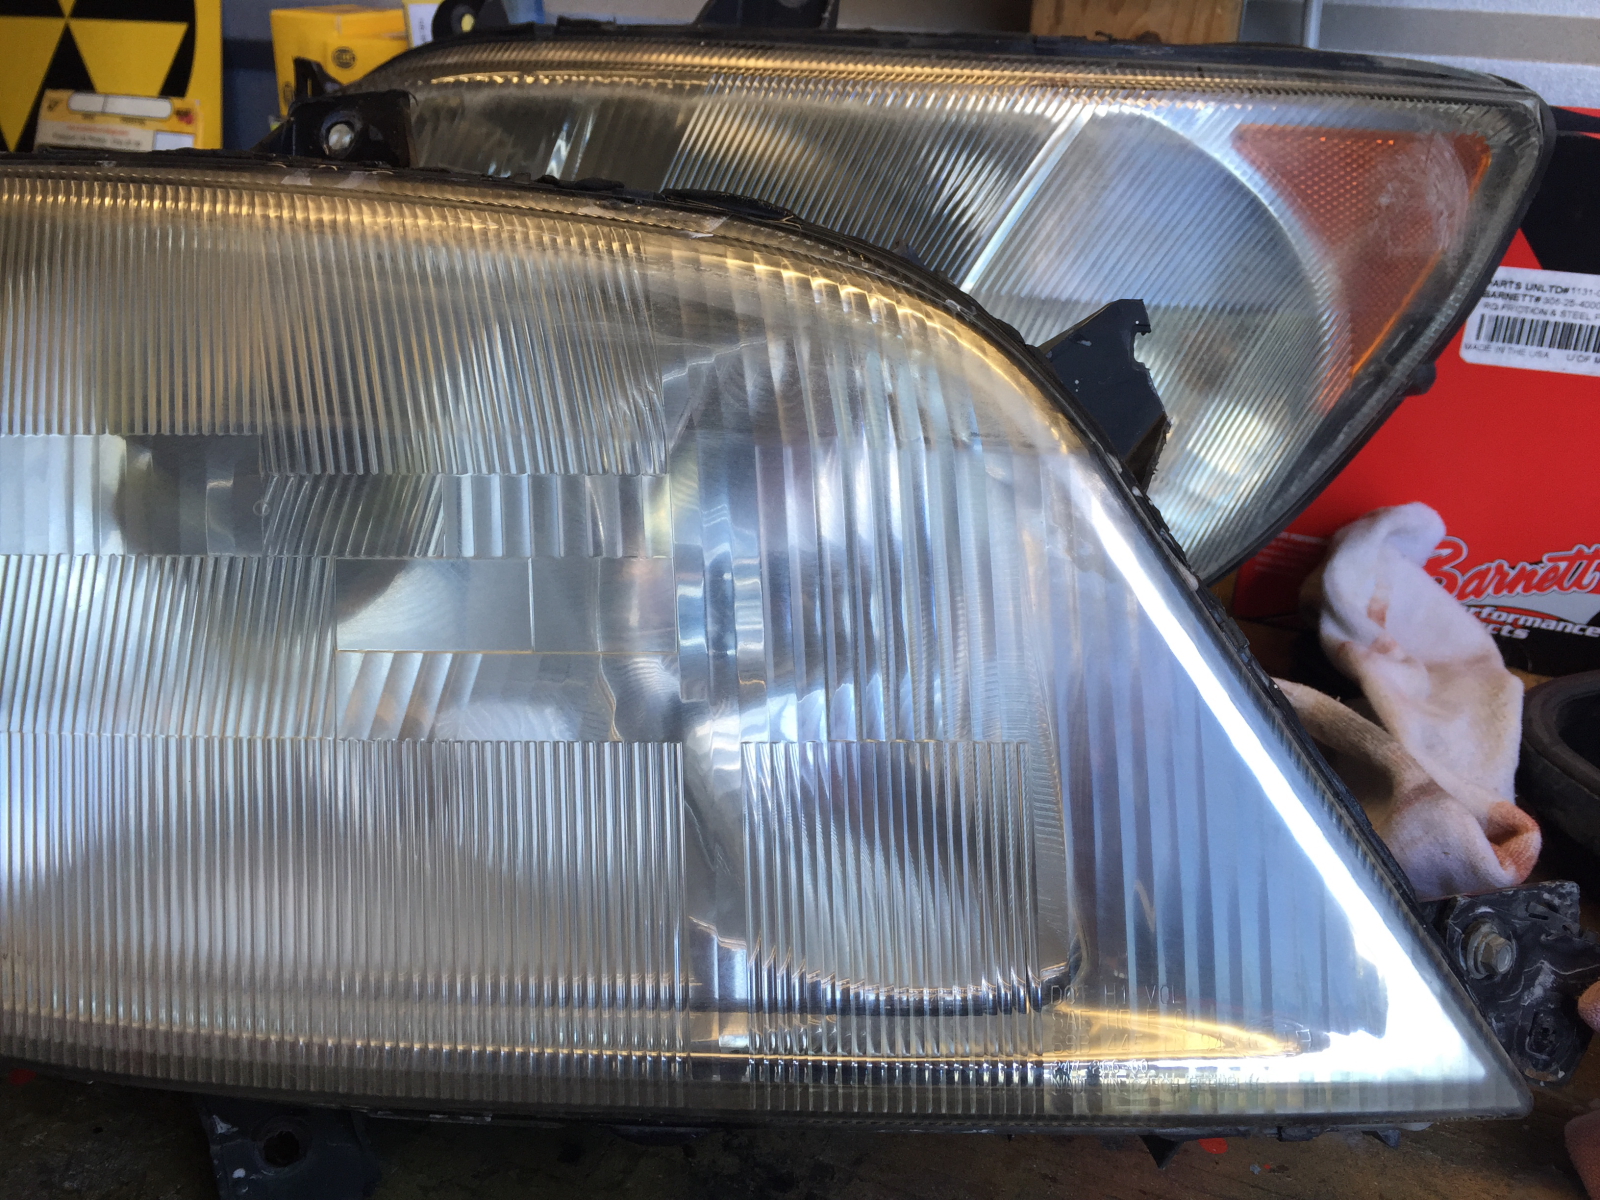
Back to the headlights… as you can see, the still need a lot of work. This is the 2nd of the pair. Again, it will be treated with sanding and polishing.
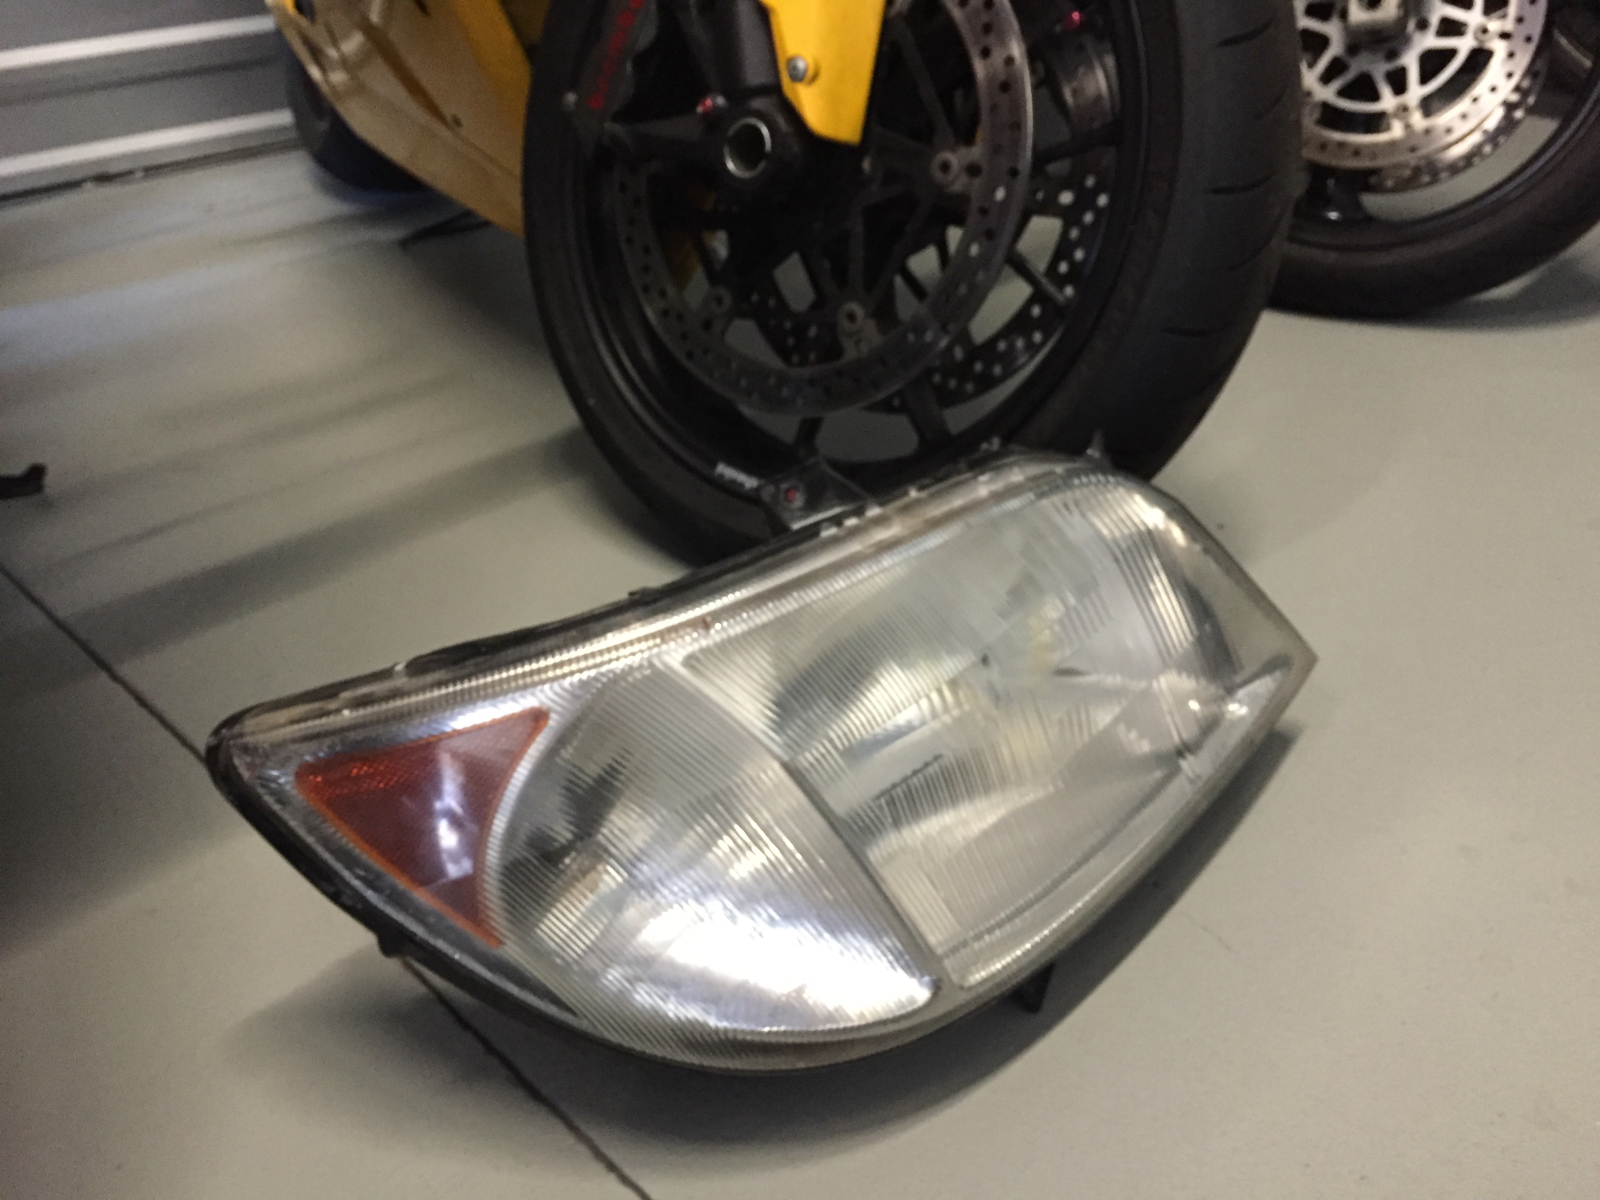
The other light is sufficiently refurbished for my needs, and was set aside during the previous day’s efforts. It doesn’t look too bad. But still not perfect. Note: I actually did one more round of this before re-installing them in the van.
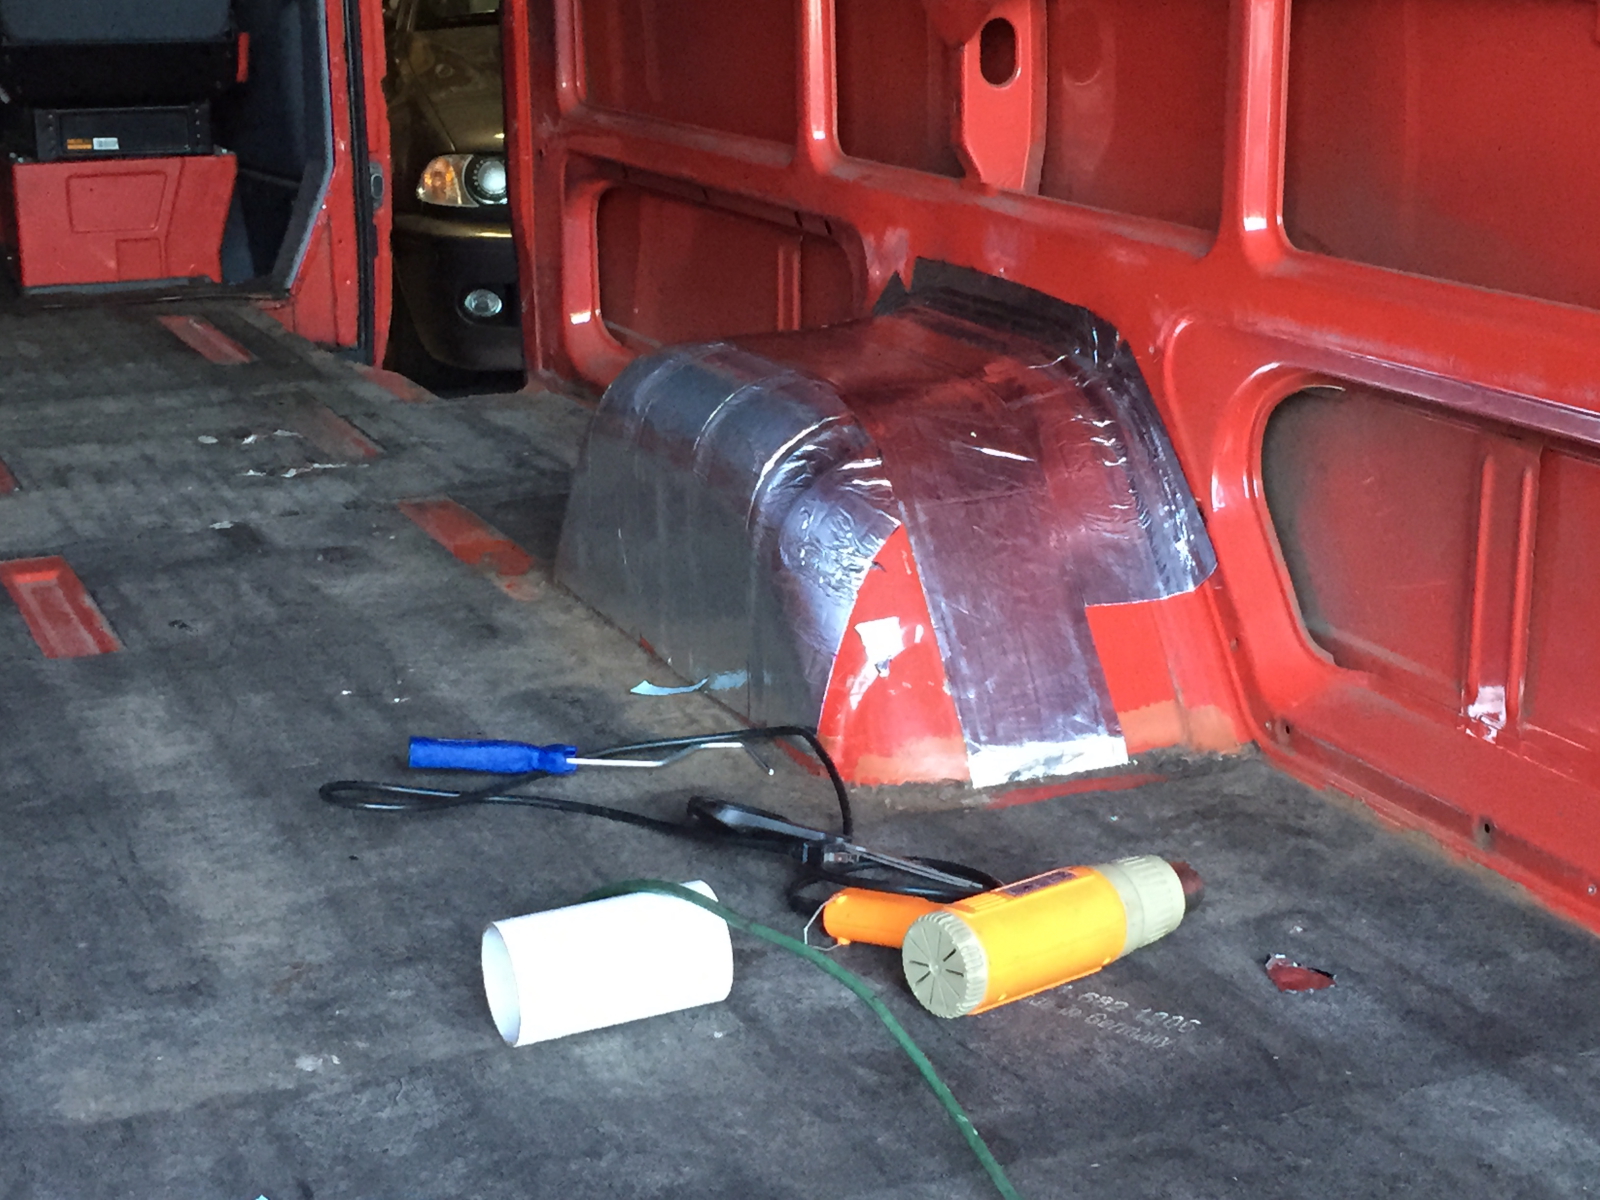
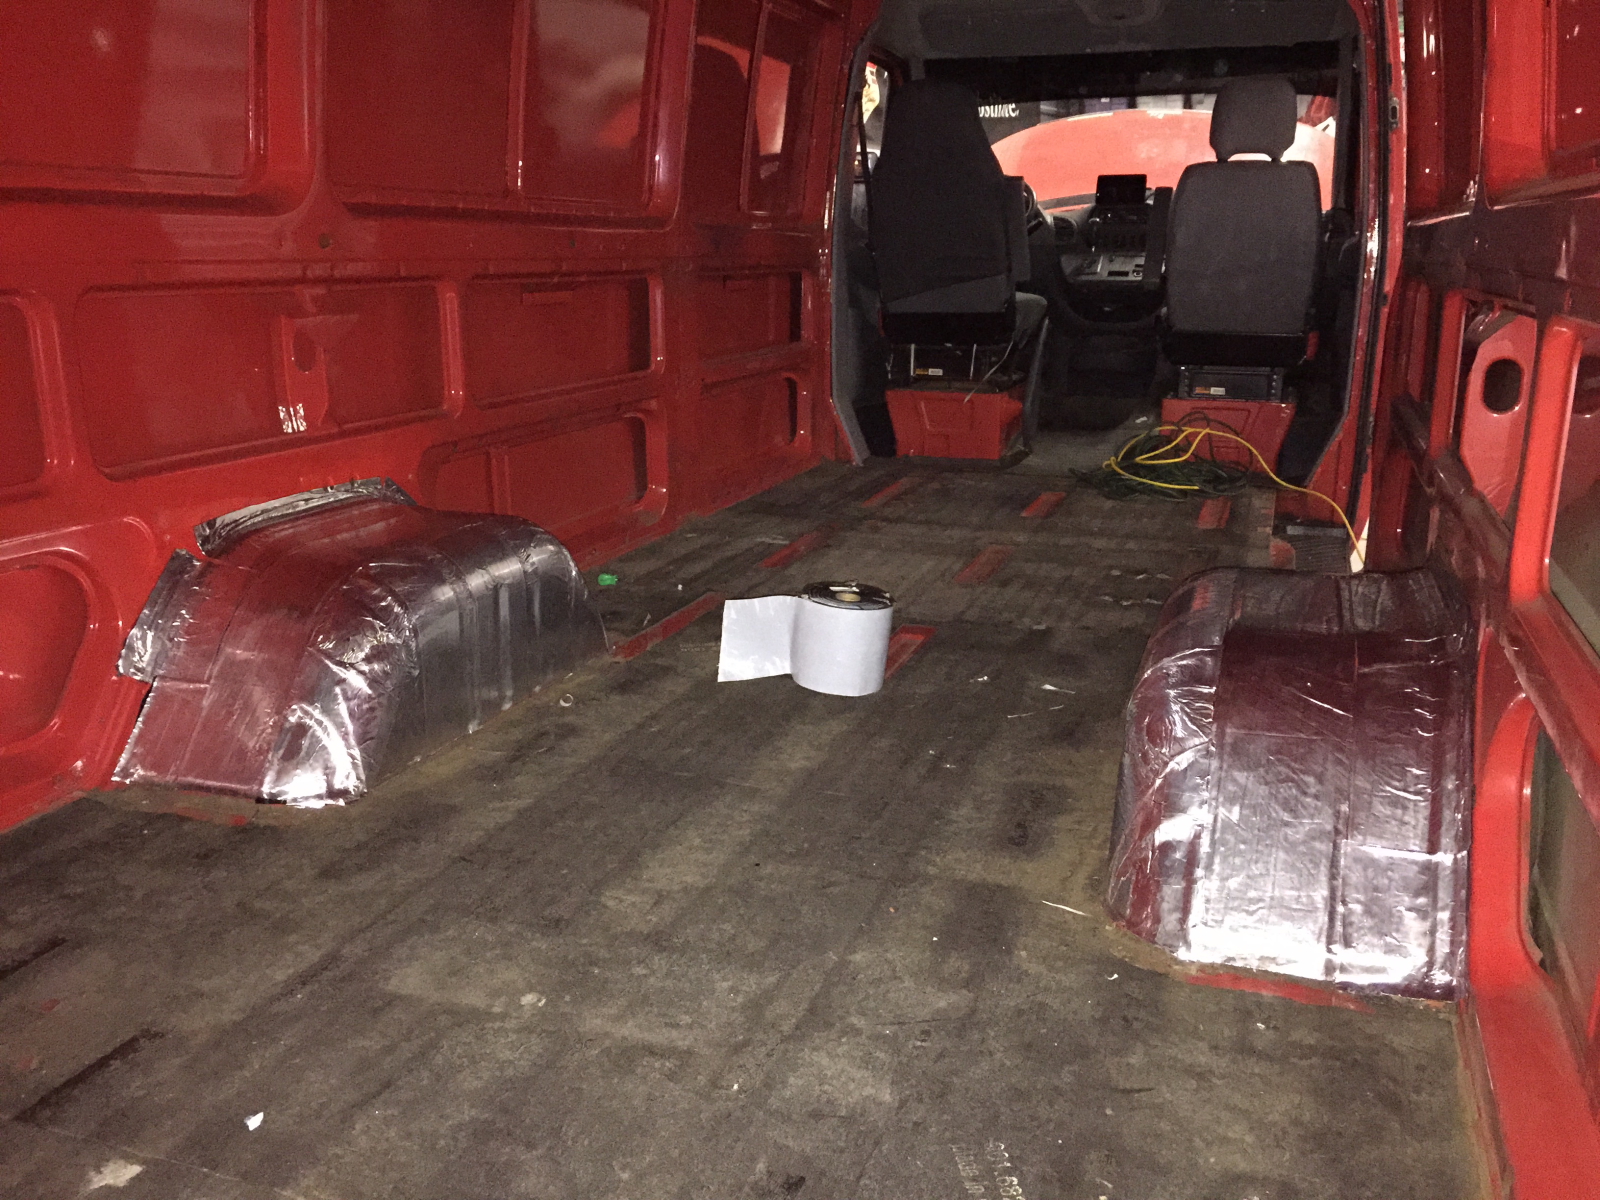
Back to the interior work. Getting the road noise levels down is an important part of this projects. If I plan to do long distance treking in this, I don’t want to be yelling all day, or fatigued from the noise. I did test it with an DB meter and the average level was 85db on a highway.
Here the poor-man’s Dynomat is being installed over the wheel wells. This asphalt roof repairing product is reported to have similar sound deadening properties as the vastly more expensive Dynomat. A small roll of this is available at the local hardware box for about $16.
Using a heat gun makes short work of complex curves. Easy-peasy. It’s just a little time consuming to cut the stuff, and press it into place.
The first (and eventually failed) effort to attach the rubber to the wood. In this first round I used a Liquid Nails product. The specs looked good; very low VOCs; water cleanup… what’s not to love?
Placing pressure on the mats then maintaining with some stuff laying around the shop so that it bonds nicely to the floor. At least that was the plan I executed.
Shifting gears a little bit, I removed the Turbo Resonator and examined it on my operating room quality work area. I have a separate write-up on this. In the end I determined that the part was failing and likely contributor to the alternator death syndrome.
Back to the interior. With some help from The Boy we finished covering the wheel wells. The aluminum backed roofing seal didn’t fully cover the wells, so a less expensive product (Jiffy Seal) without the aluminum backing was acquired to complete the product. The Jiffy Seal was then covered with aluminum tape to maintain the same “look”.
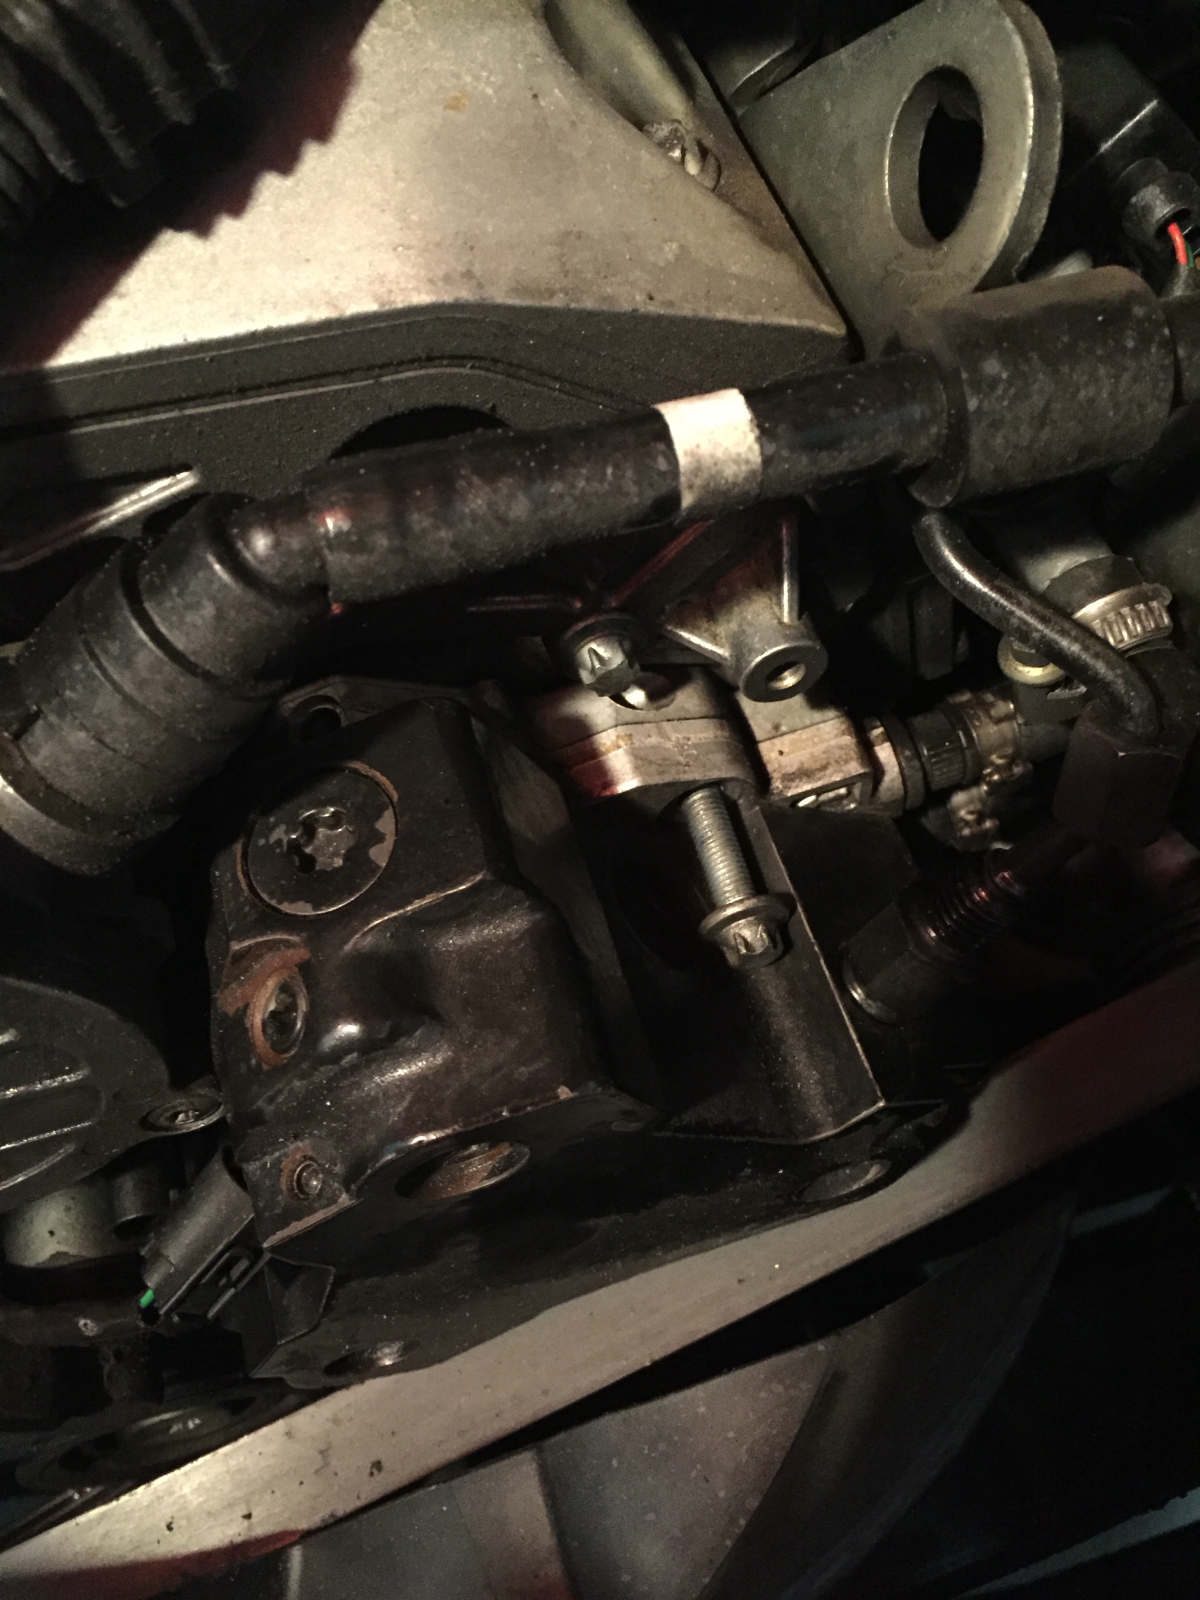
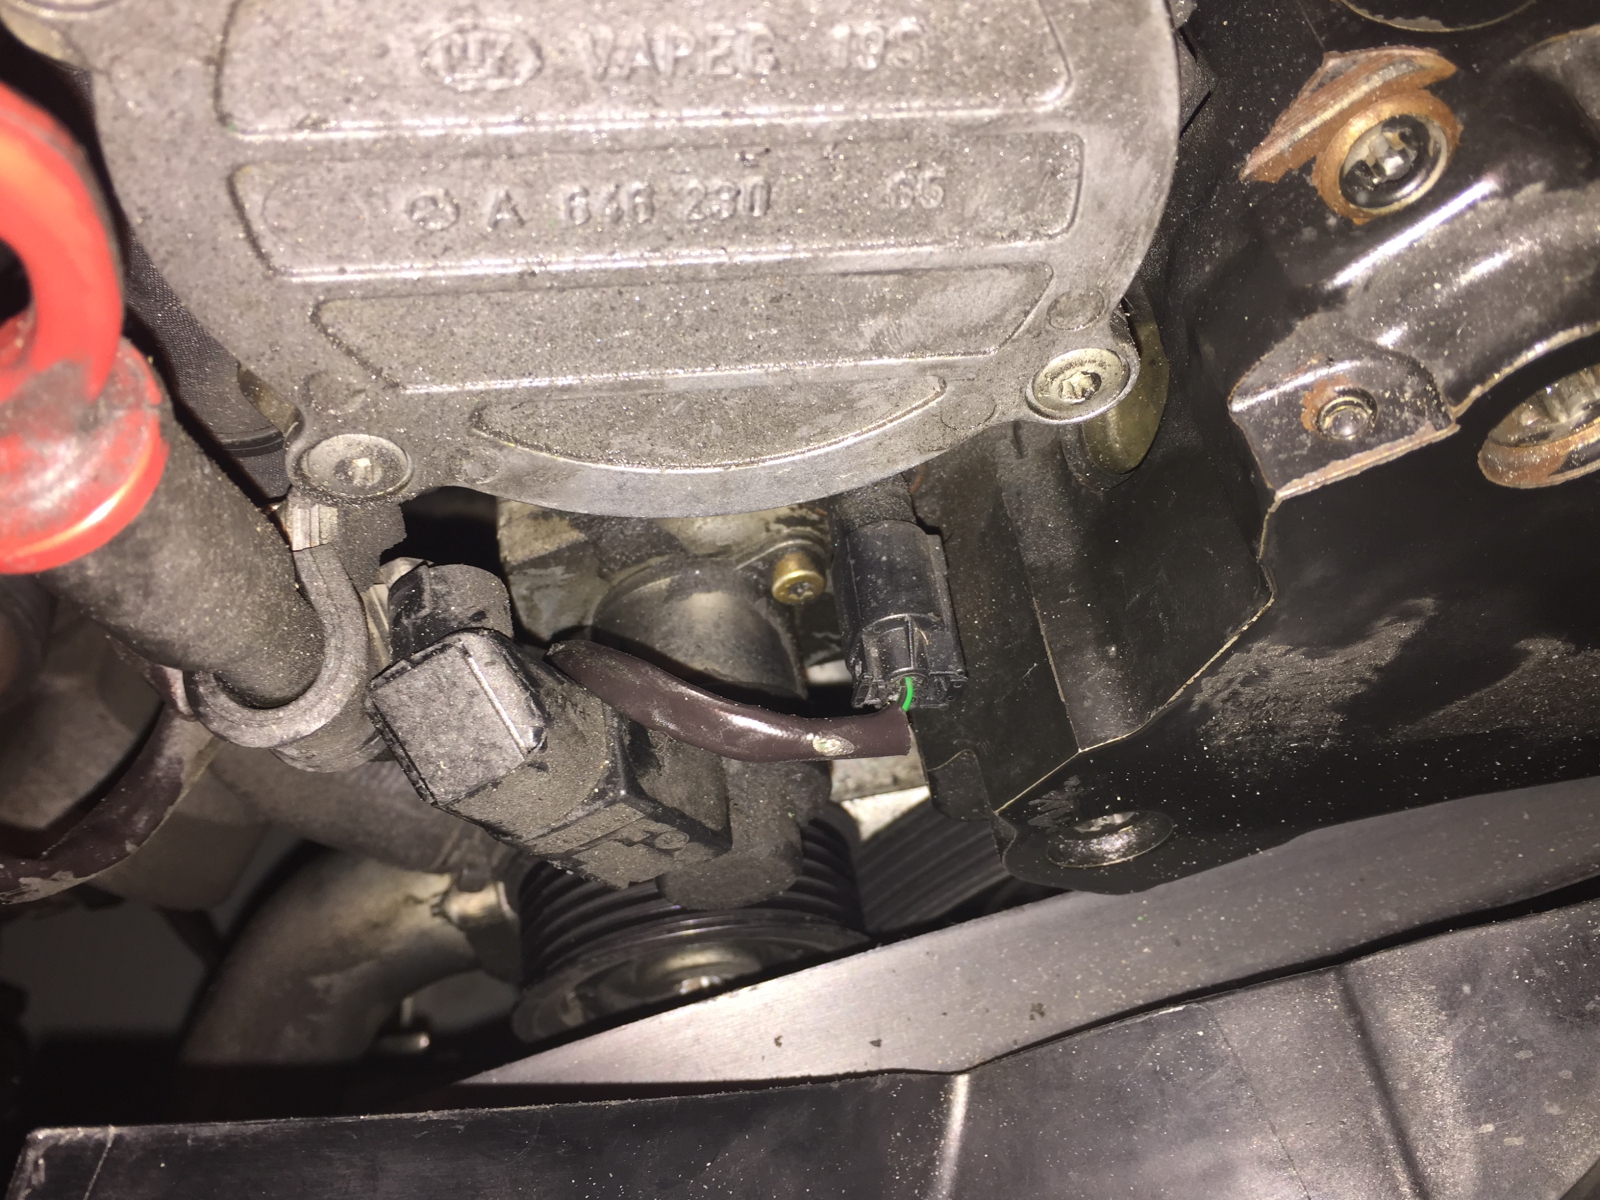
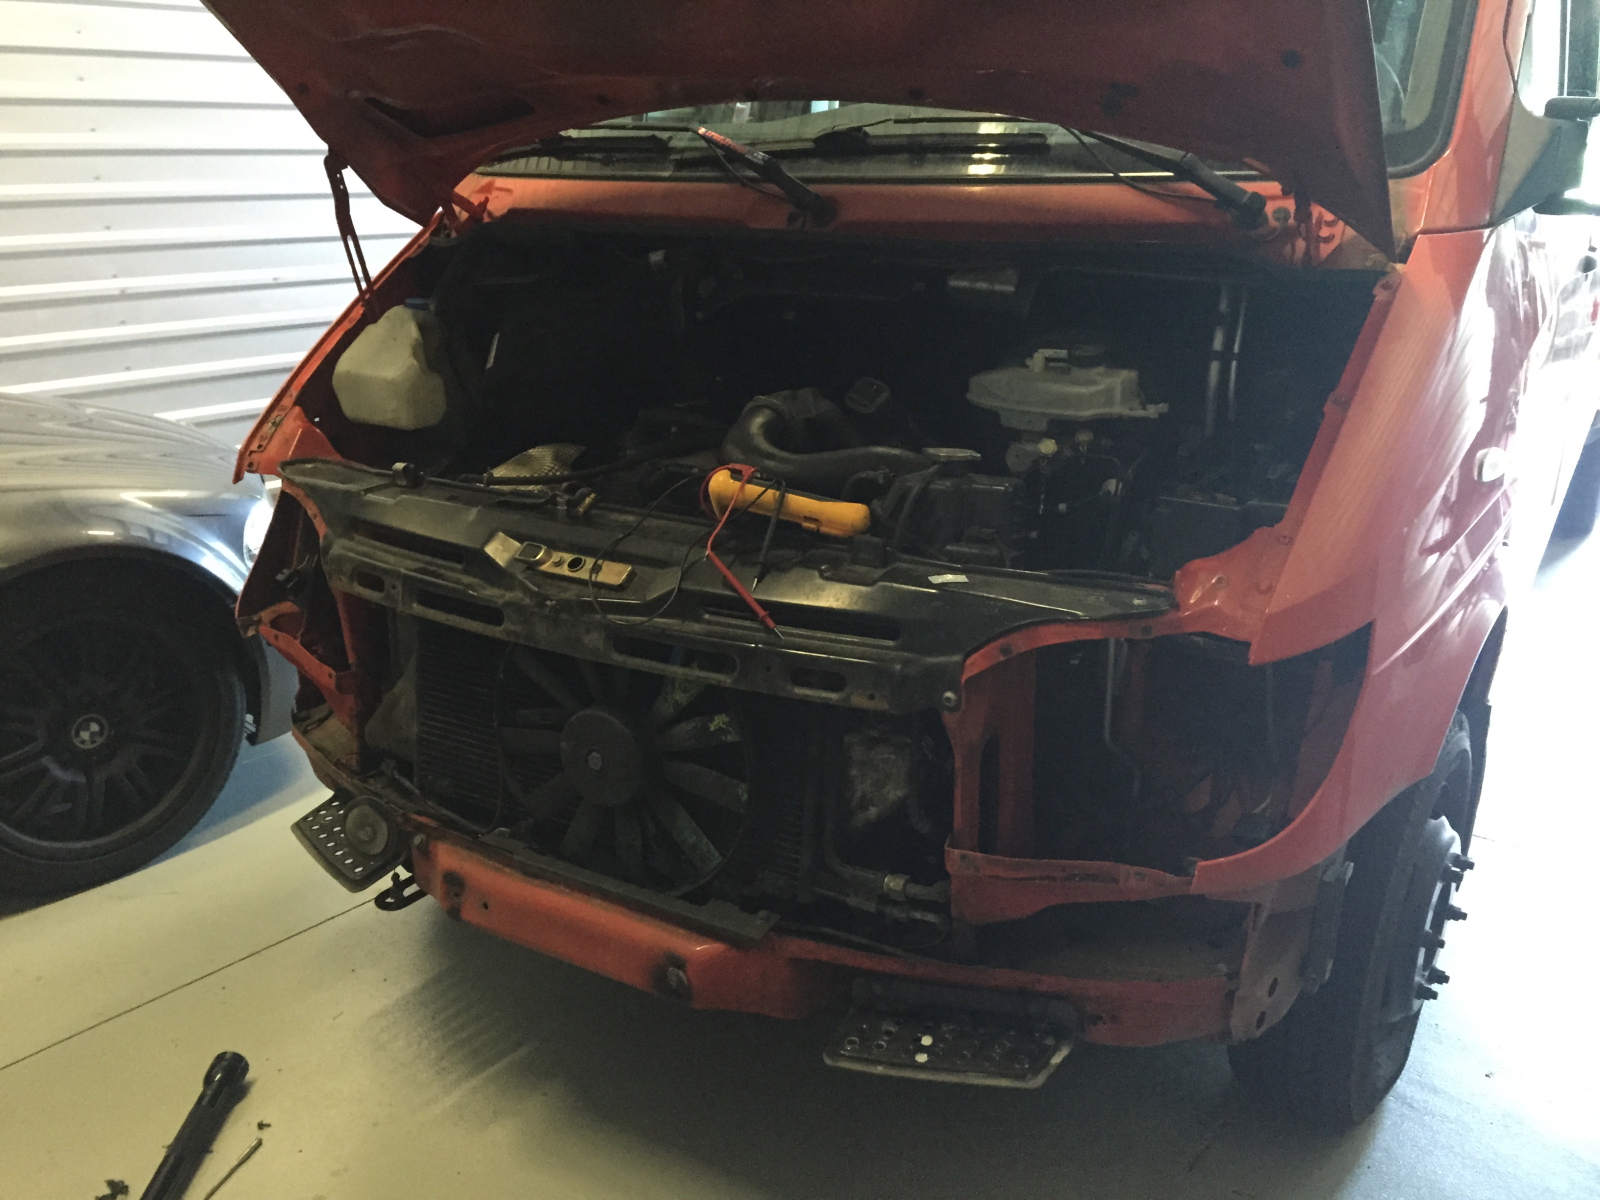
One done with the wheel wells, I popped back onto the internet to look at possible causes for the failure, the most ominous of which is a possible failure in the High Pressure injector pump (large black assembly on the right).
It does not look like a fun thing to remove and look for problems. I’m generally of the mind that if it’s not clearly broken or in need of refurbishing, I don’t want to mess with it. Some more investigation is underway.
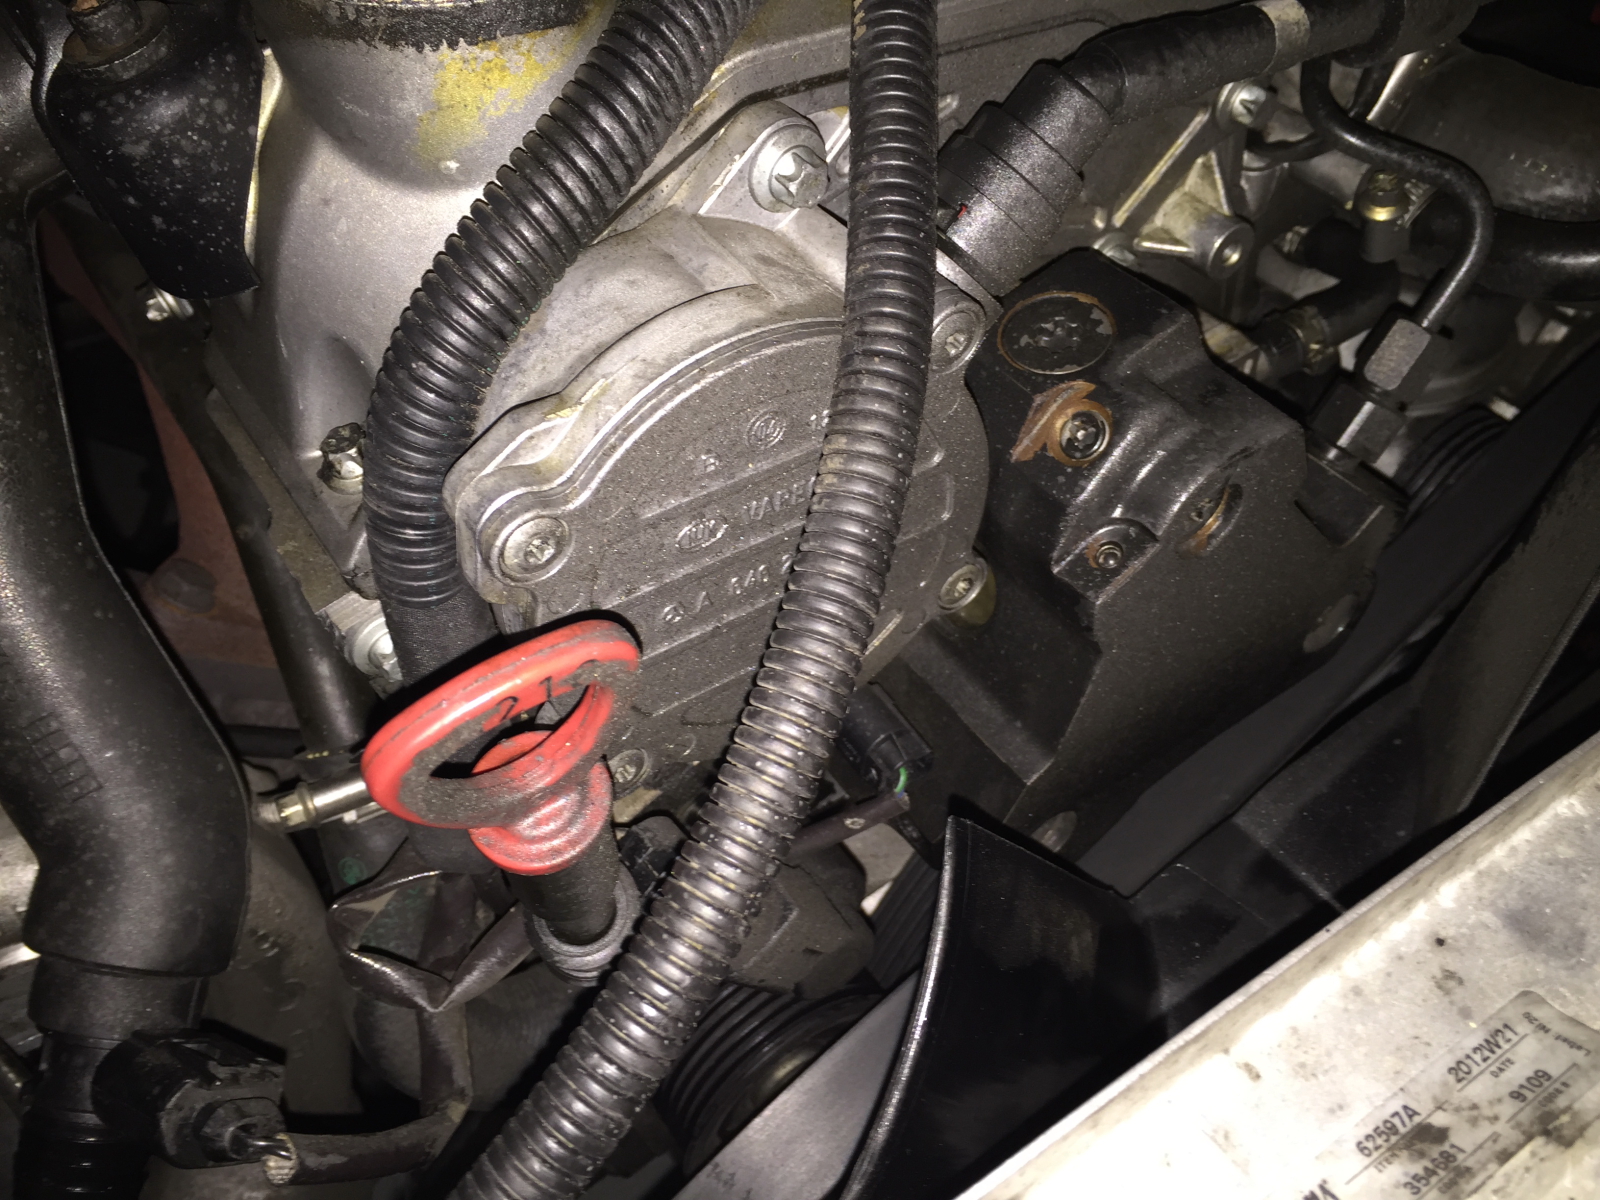
Below and to the left of the pump is the turbo charger. The intake hose as been removed and the high-pressure cold-side routing, which includes the turbo resonator has also been removed. Both the resonator and the pump are above the alternator and could possible cause it to fail should they leak fuel or high-pressure intake gasses.
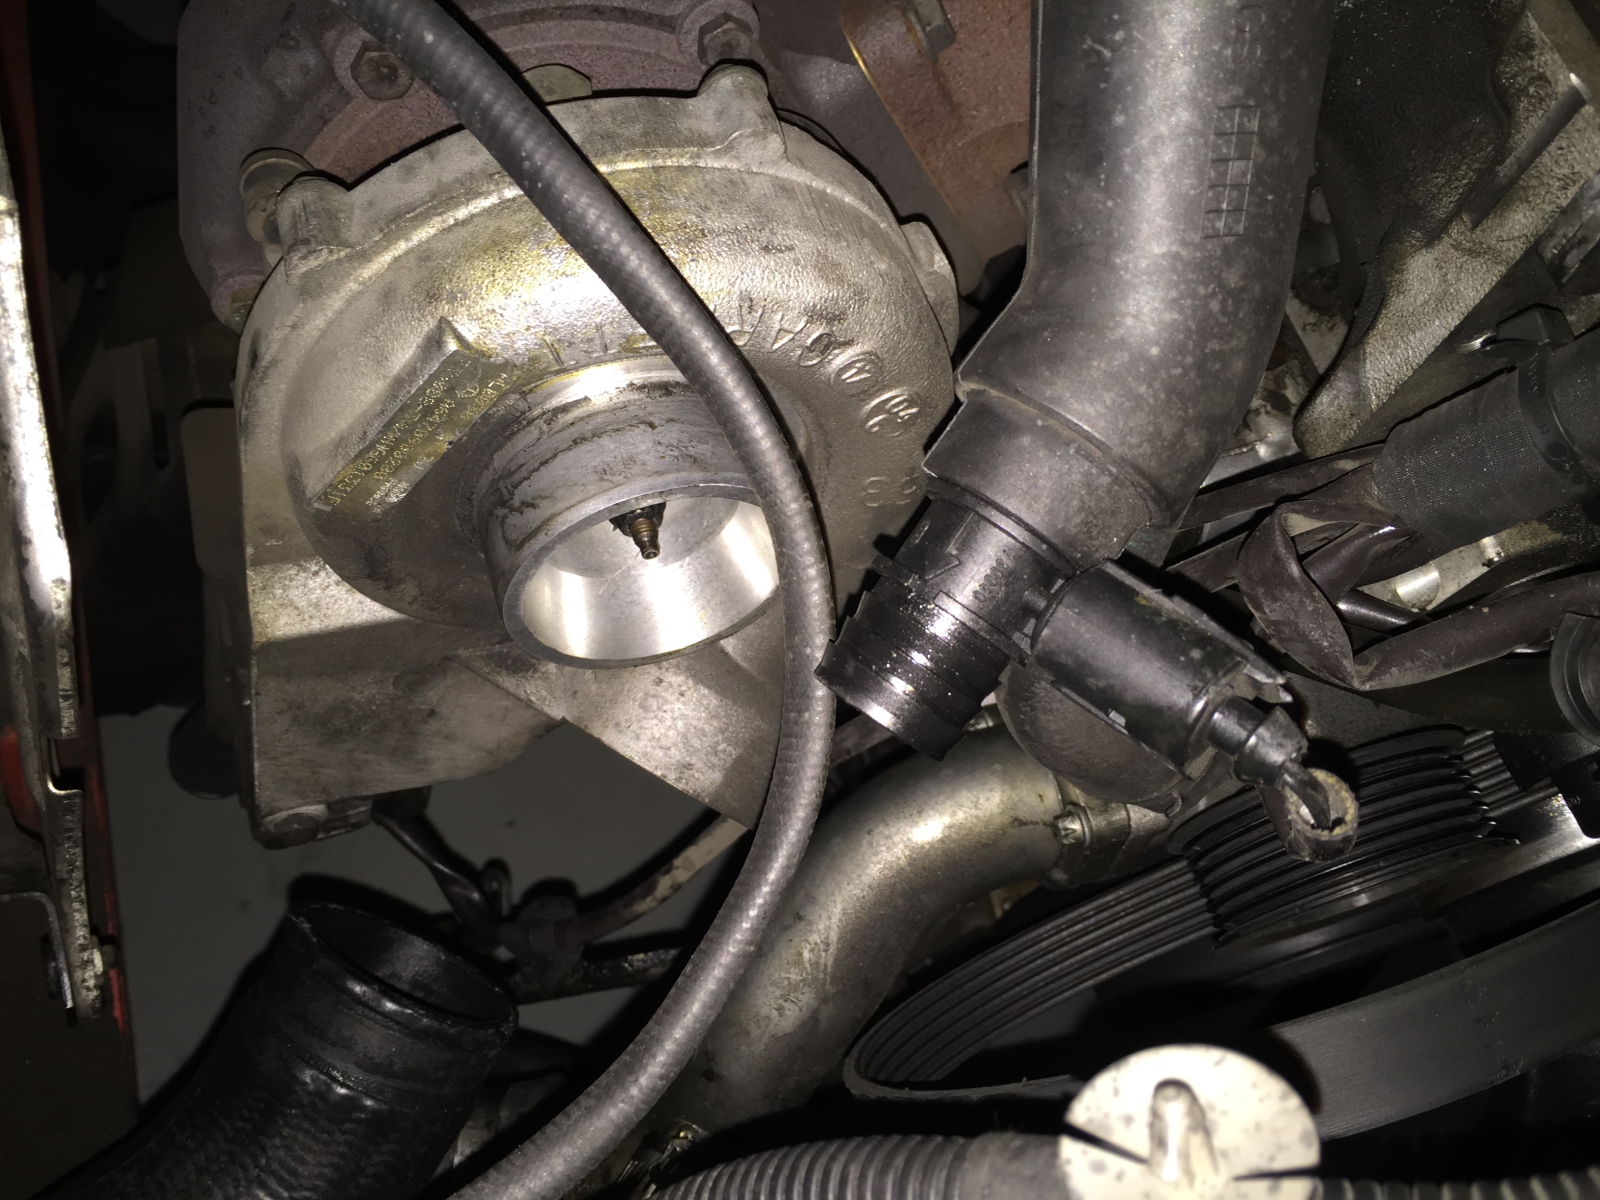
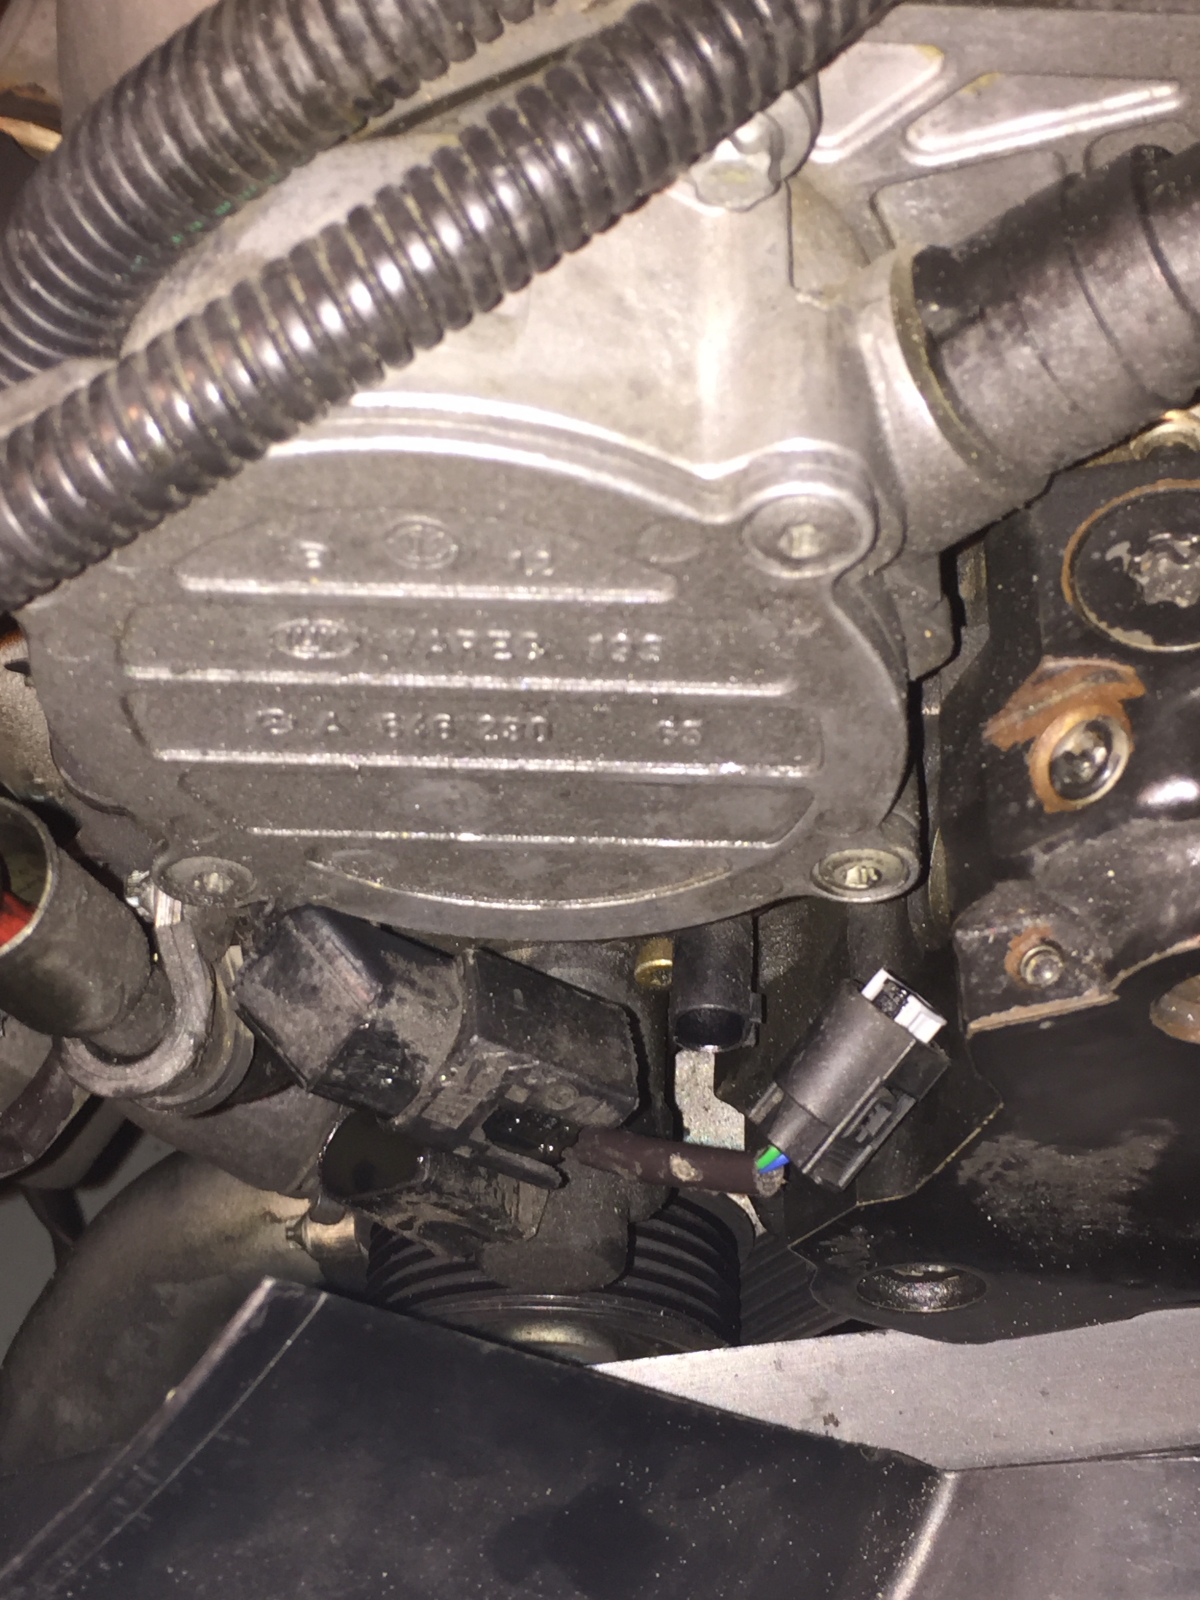
High pressure pump in close up. The black part is the front block, which bolts to a larger raw aluminum block with the drive assembly. It’s said that the pump can leak between the two plates if the bolts that hold it together, internally, begin to loosen. This is a known issue with the 2004-2006 model year.
Next effort will be to consider removal of the high pressure pump. At least the front end is mostly stripped down and access will not be horribly difficult.
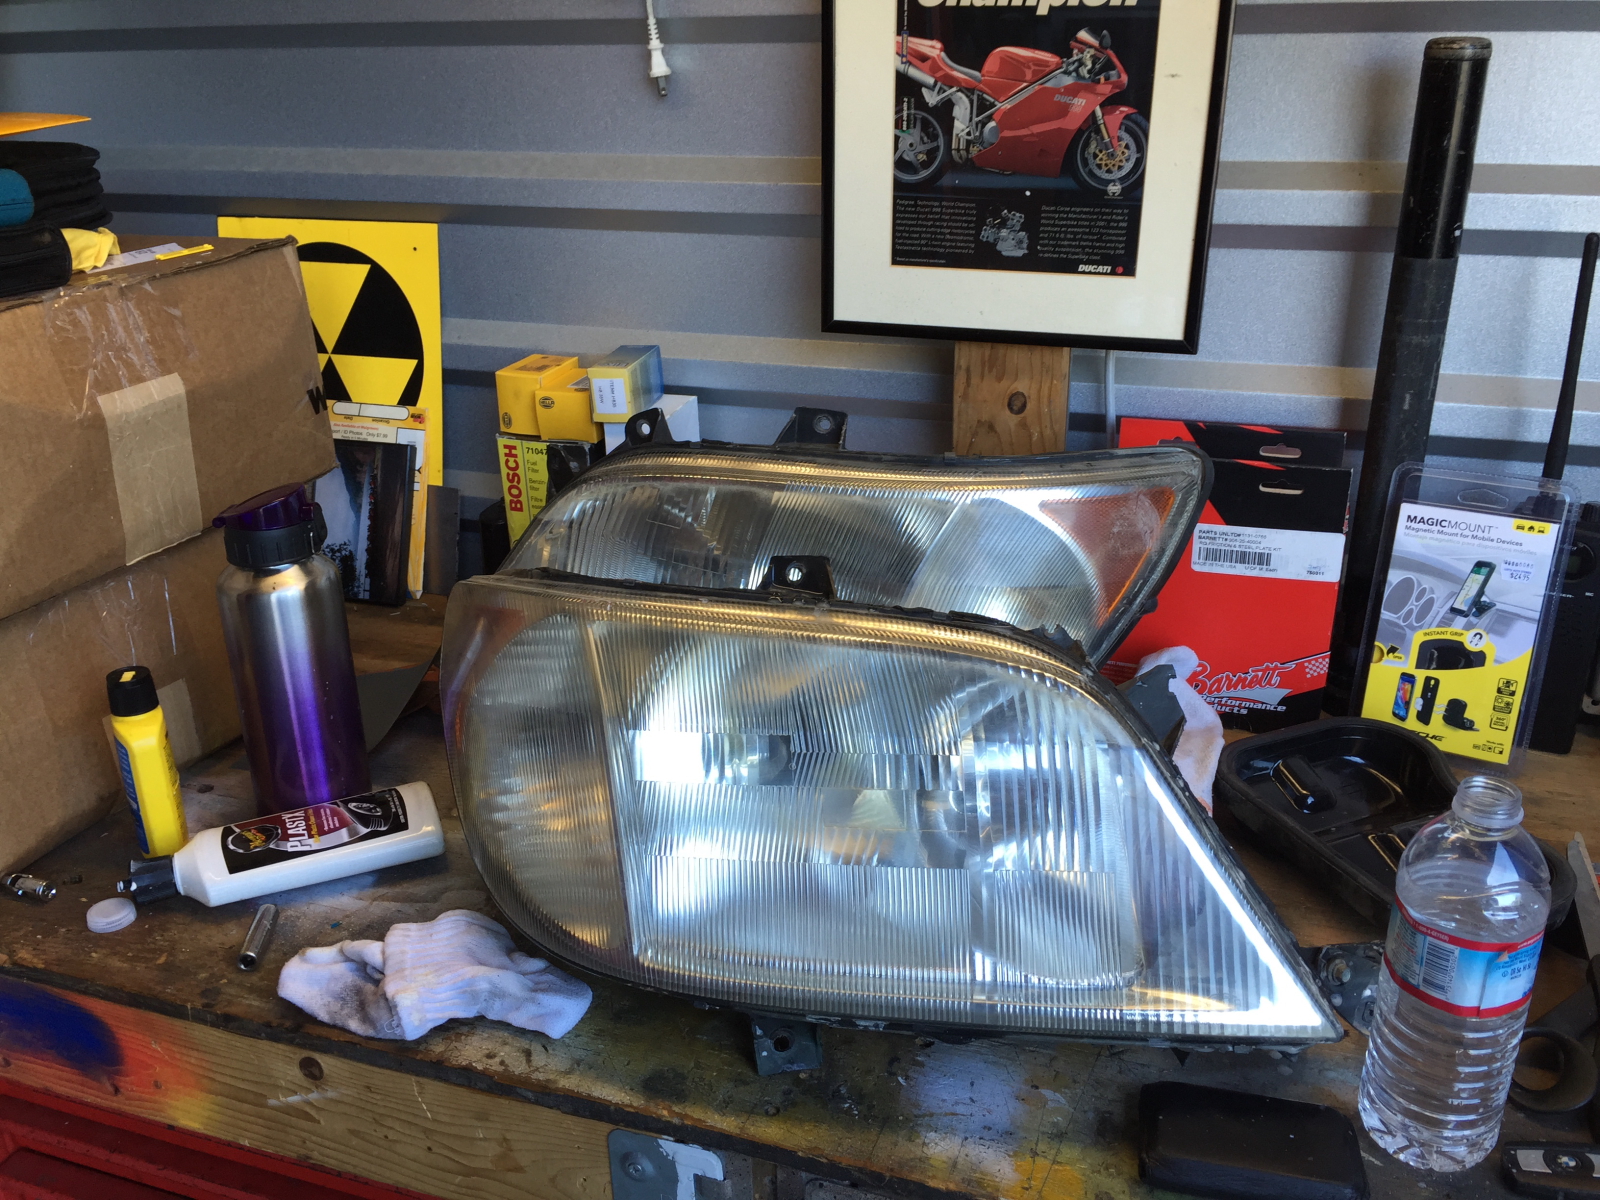
While doing some research on the problem and waiting for parts, I decided to pull out the headlamps to work on them.
Removed from the truck, they are easier to work on.
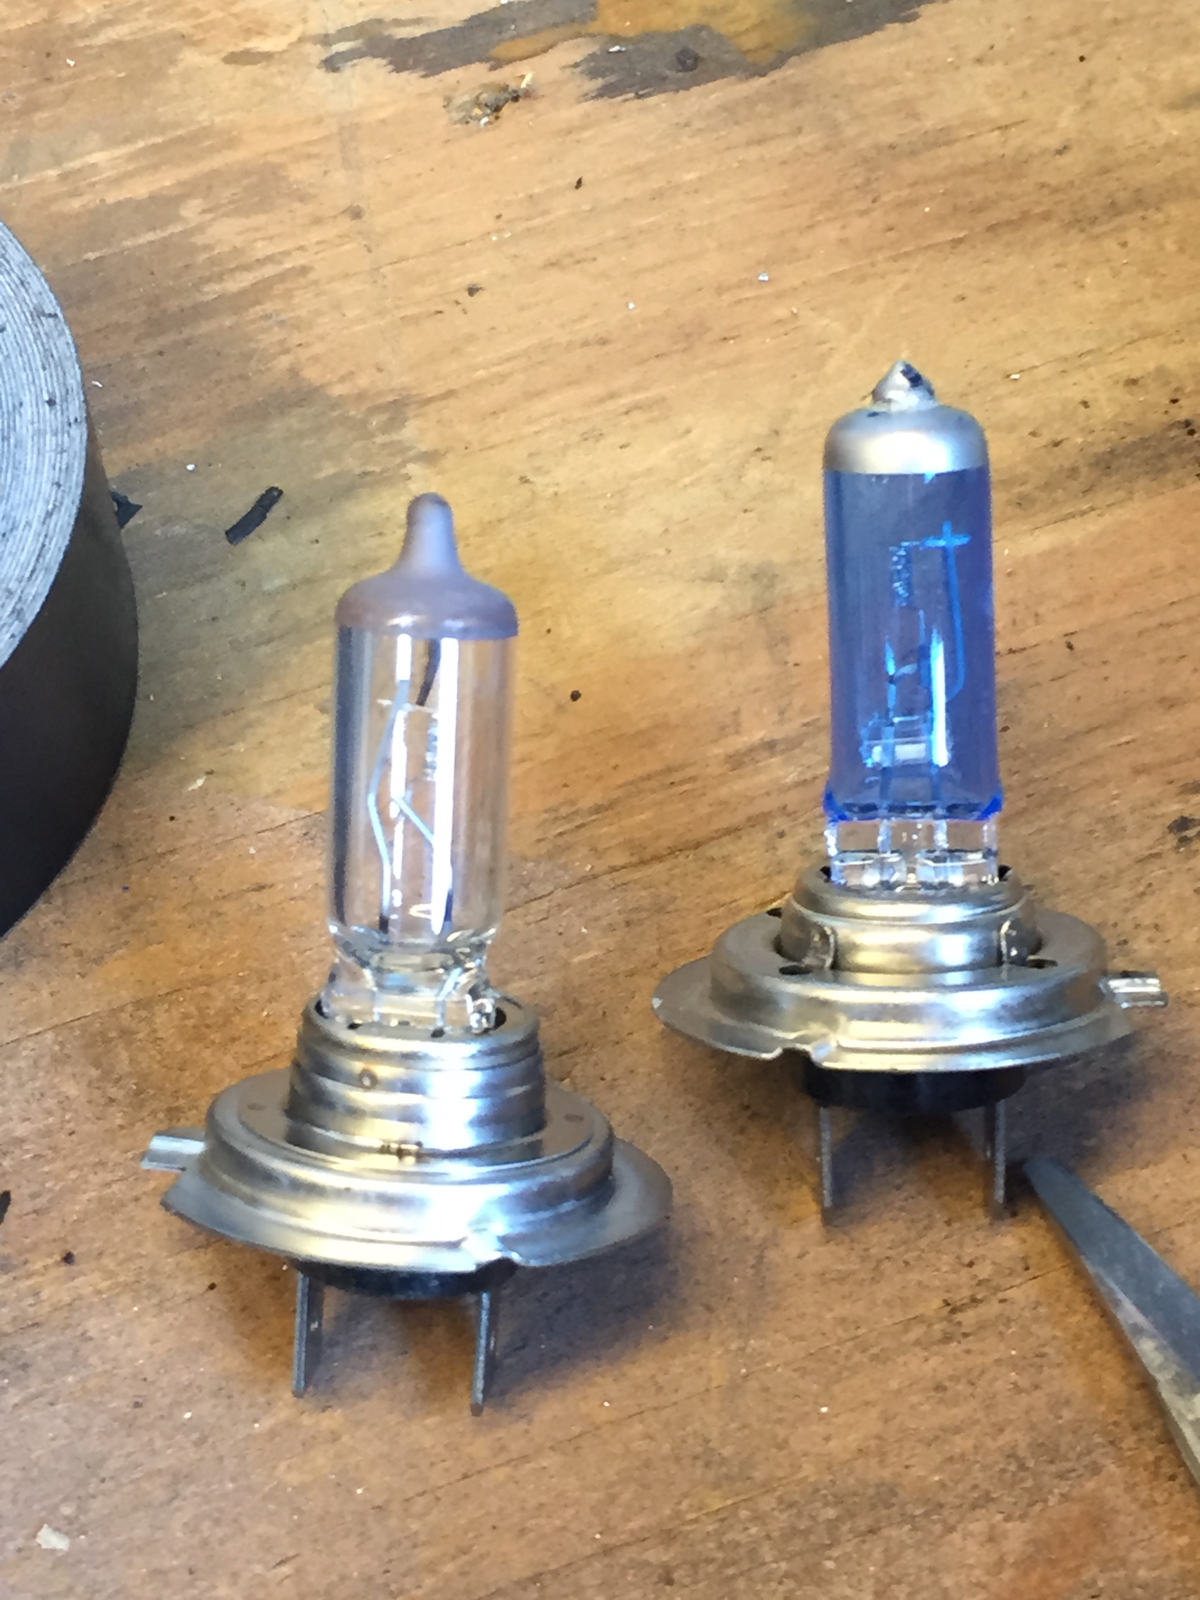
One diagnostic task, is to look for unusual current loads in the system. First stop was the headlamps, looking for evidence that some clown hat put in 100w bulbs or some other nonsense. What I found was just that sort of… nonsense. Luckily they didn’t over-watt the lamps, but at some point someone put in those inane blue headlamps (but they looks so cool.. no!). I didn’t detect this because the blue one was burned out. All the better. A pair of 55w H7 replacements will be procured.
With the lamps out, I’m going to do some sanding and polishing on them to return some of the original clarity. Right now, they are much better after that first attempt, but they are not where I want them to be.

Some sanding with 800, 1500 and 2000 grit wet-sand, then a light polish with Mequires… they don’t look too bad. But I know they can be better.
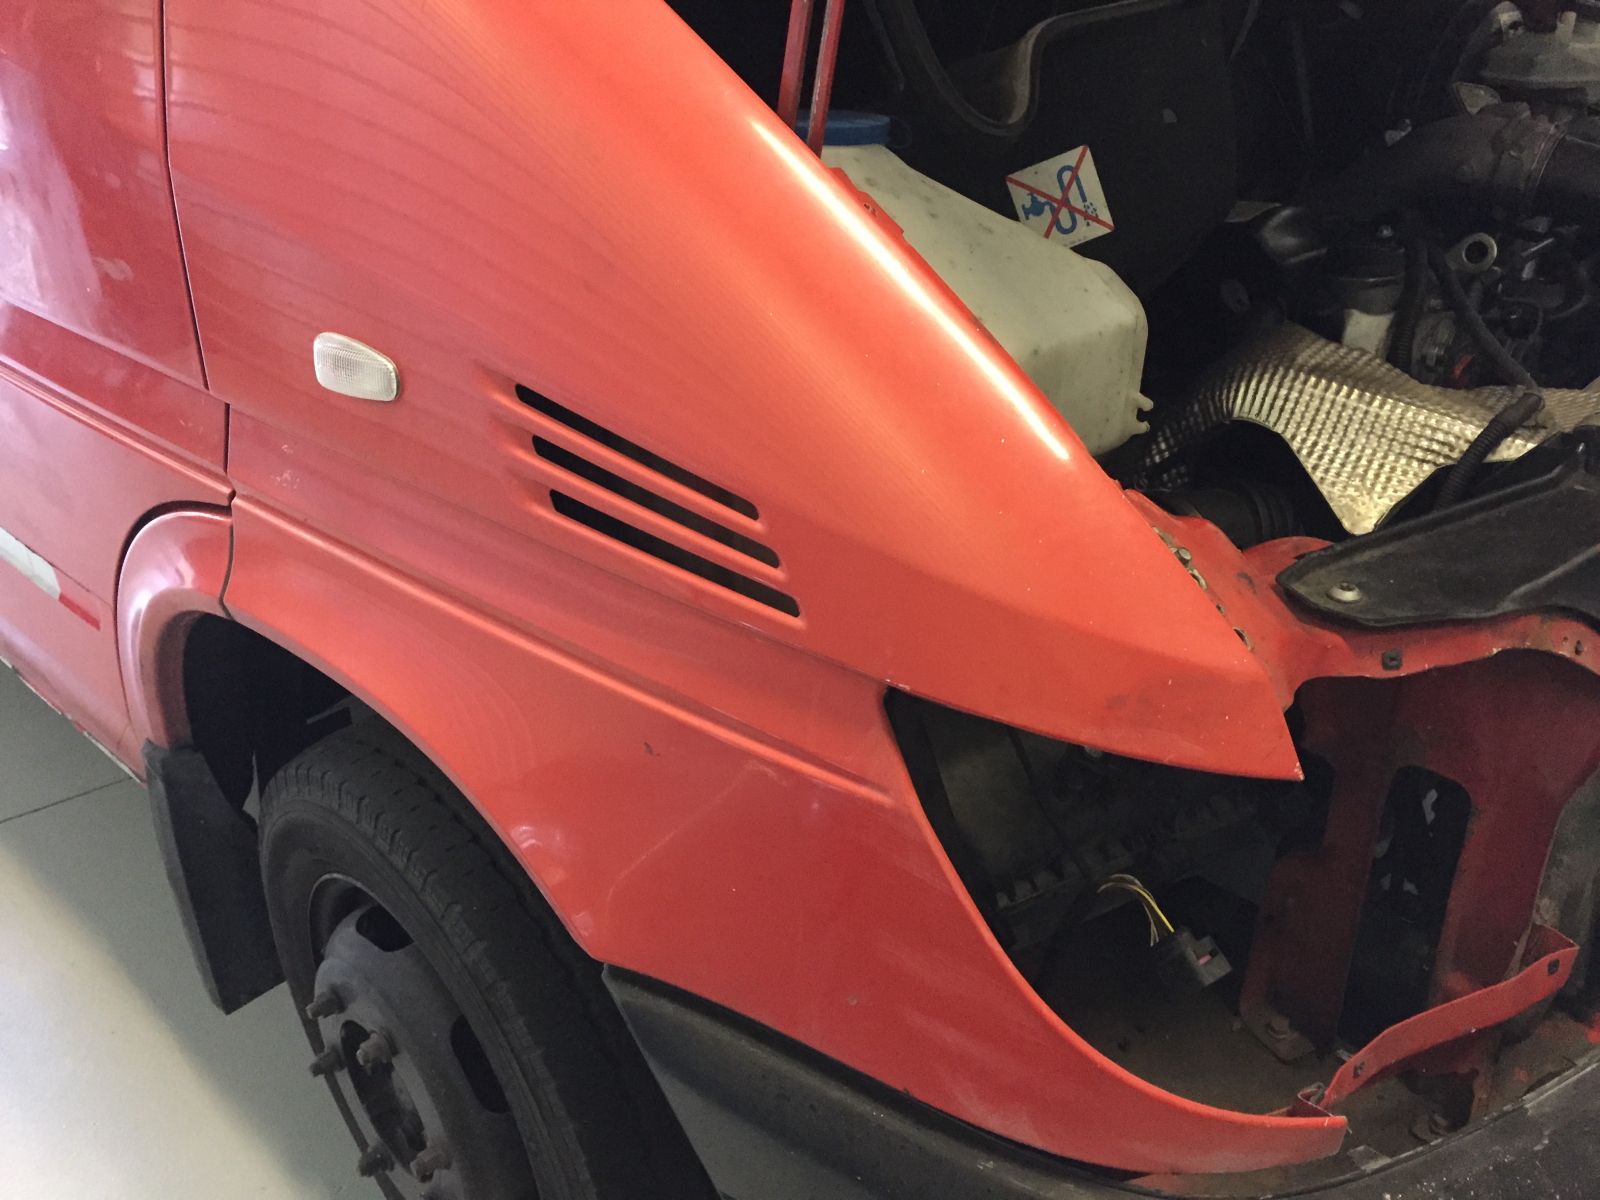
To fully diagnose the electrical gremlins that are plaguing me, getting unrestricted access to all the grounds and the glow plug relay pack, goes a long way. So.. I started to take apart the front bodywork.
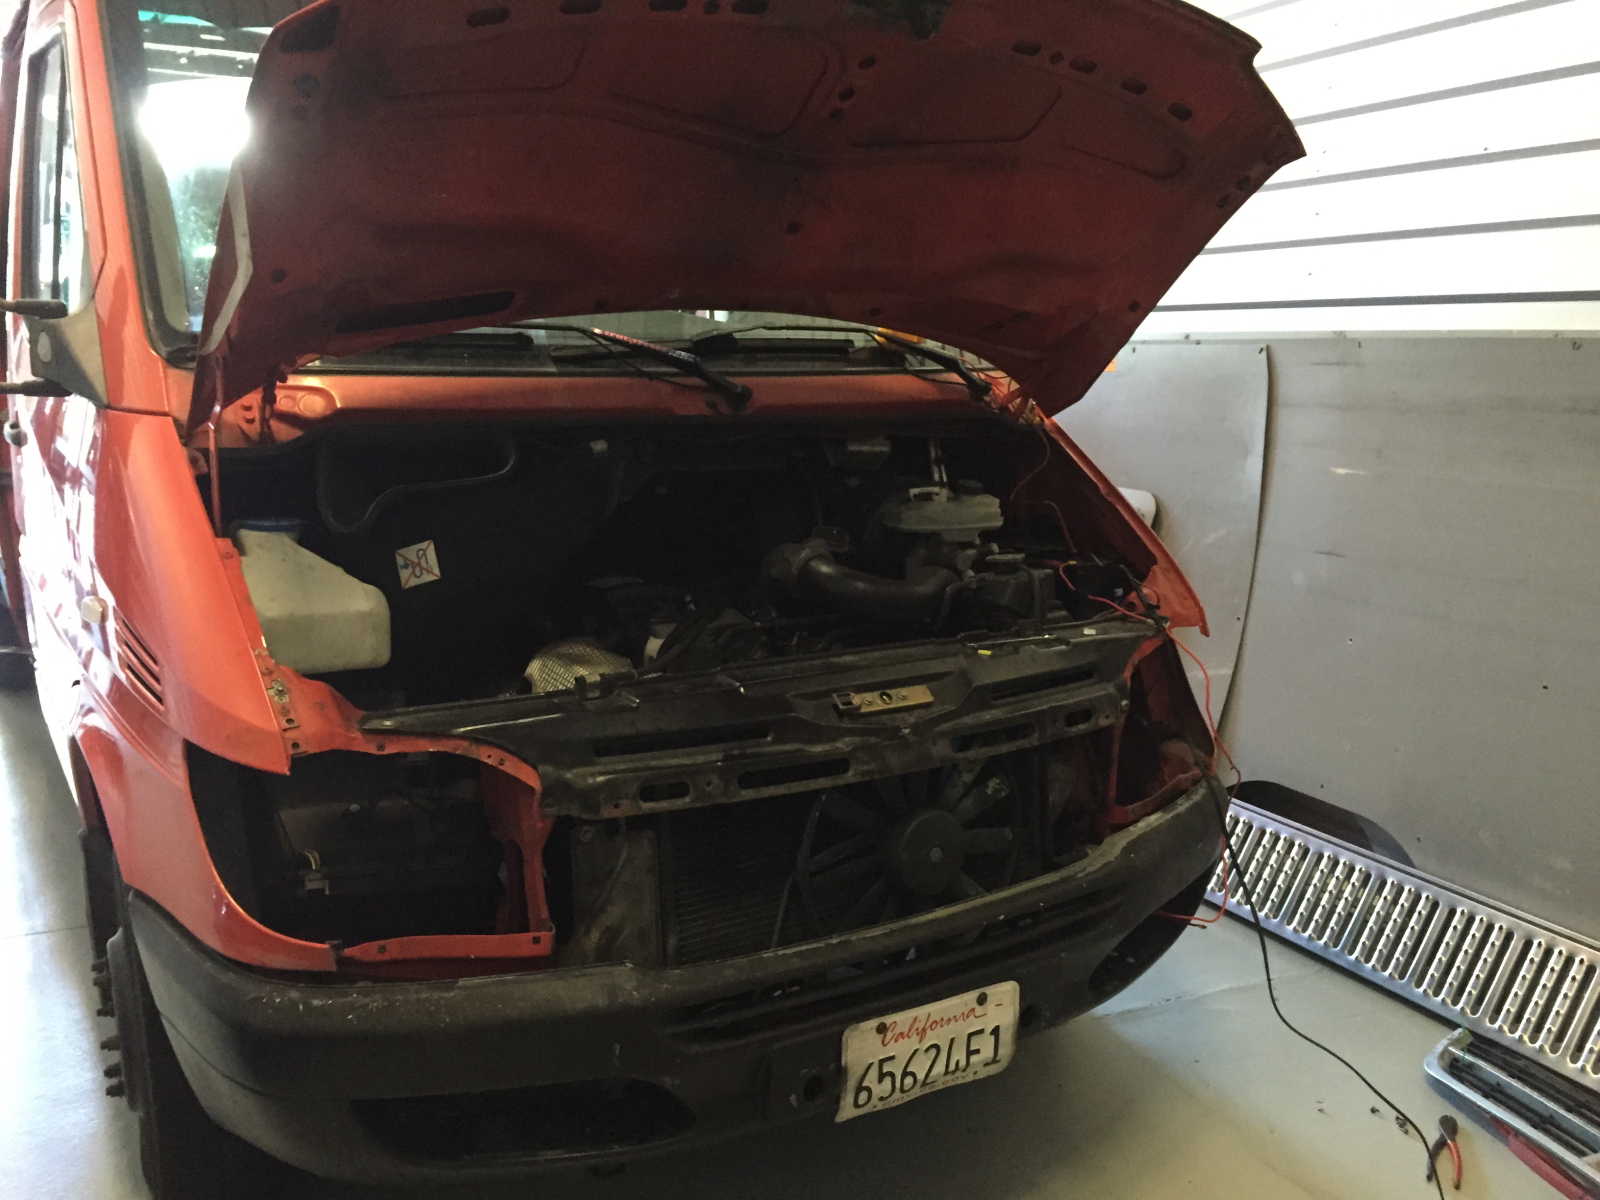
Neat Sprinter tidbit… this is the air intake (other side does not have this vent). This is a true cold-air intake. Air box is right there behind the headlamp (or where it would normally reside). Also, it’s possible to get at the grounds behind and under the headlamp with those parts out of the way.
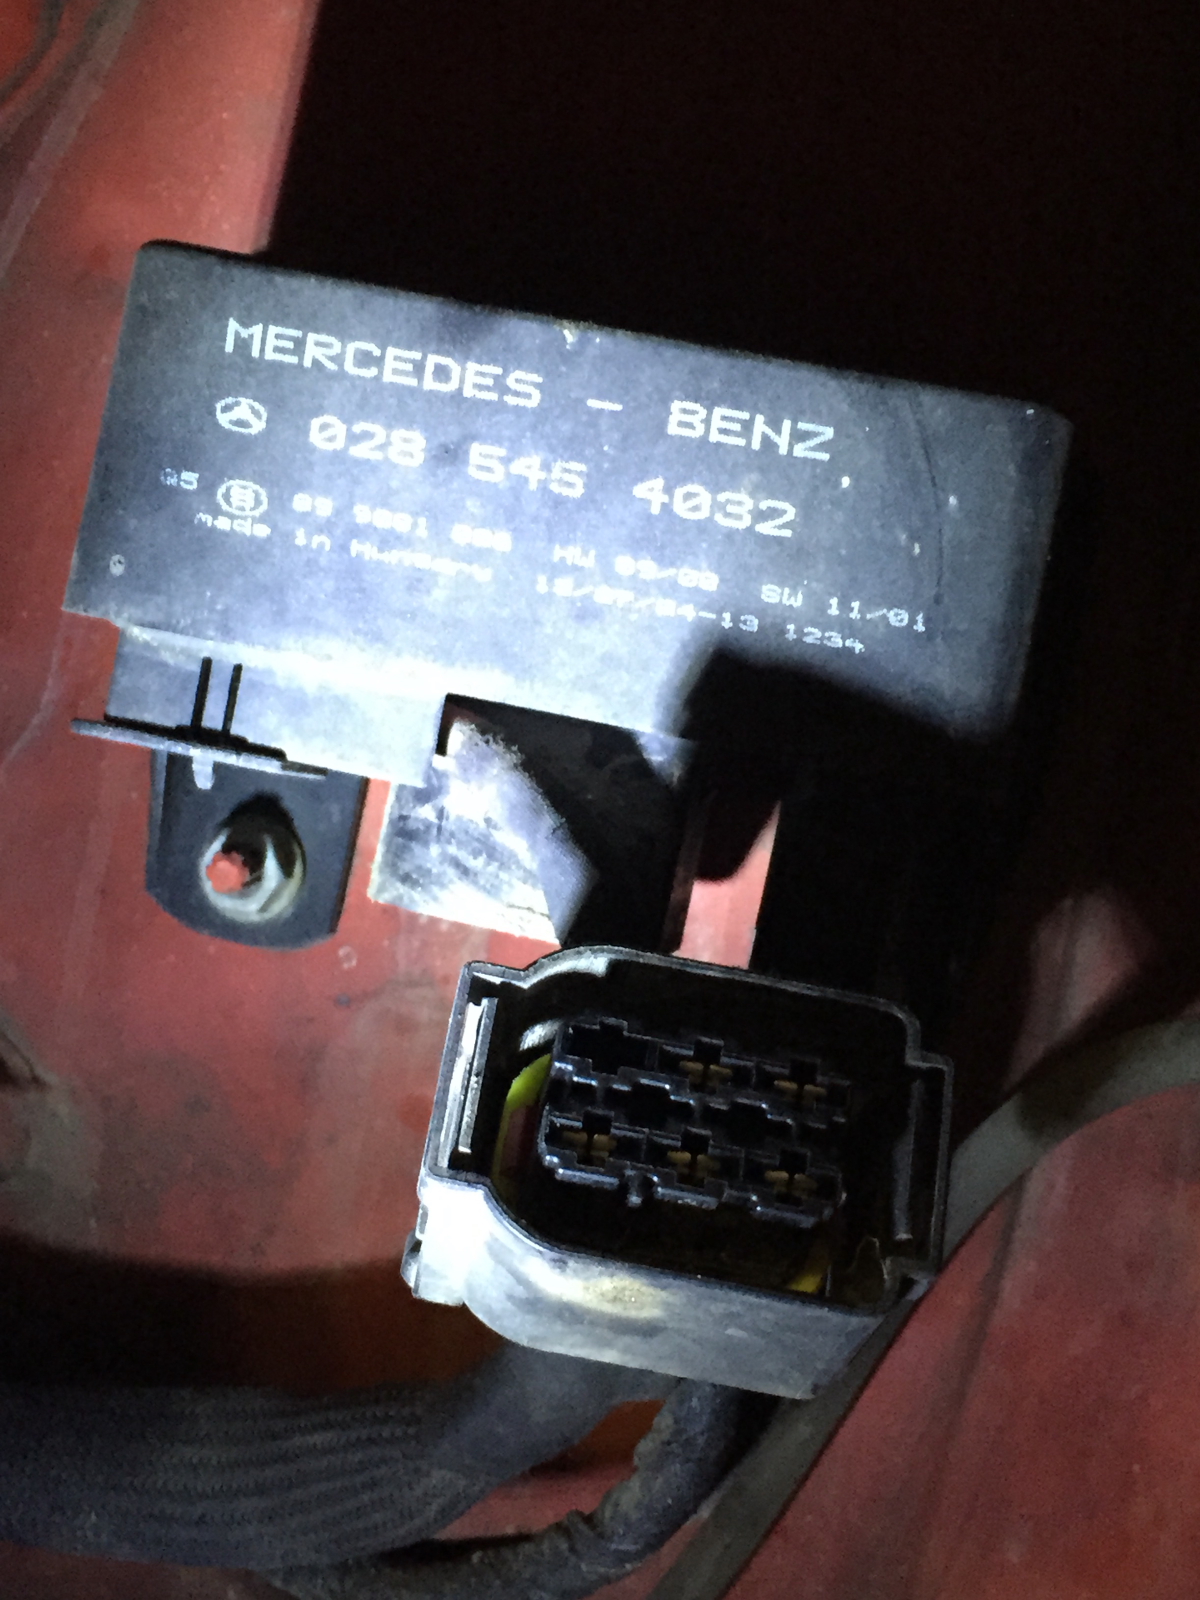
After re-checking and cleaning all the ground table locations, and there are plenty, I focused on the glow plug relay. Typically the relay itself does not fair hideously, but what more commonly happens is a glow plug (or 5) will short out, causing a heavy drain (more than 20A) on the electrical system. 5 glow plugs shorted out is over 100A of current and would easily kill the 90A stock alternator.
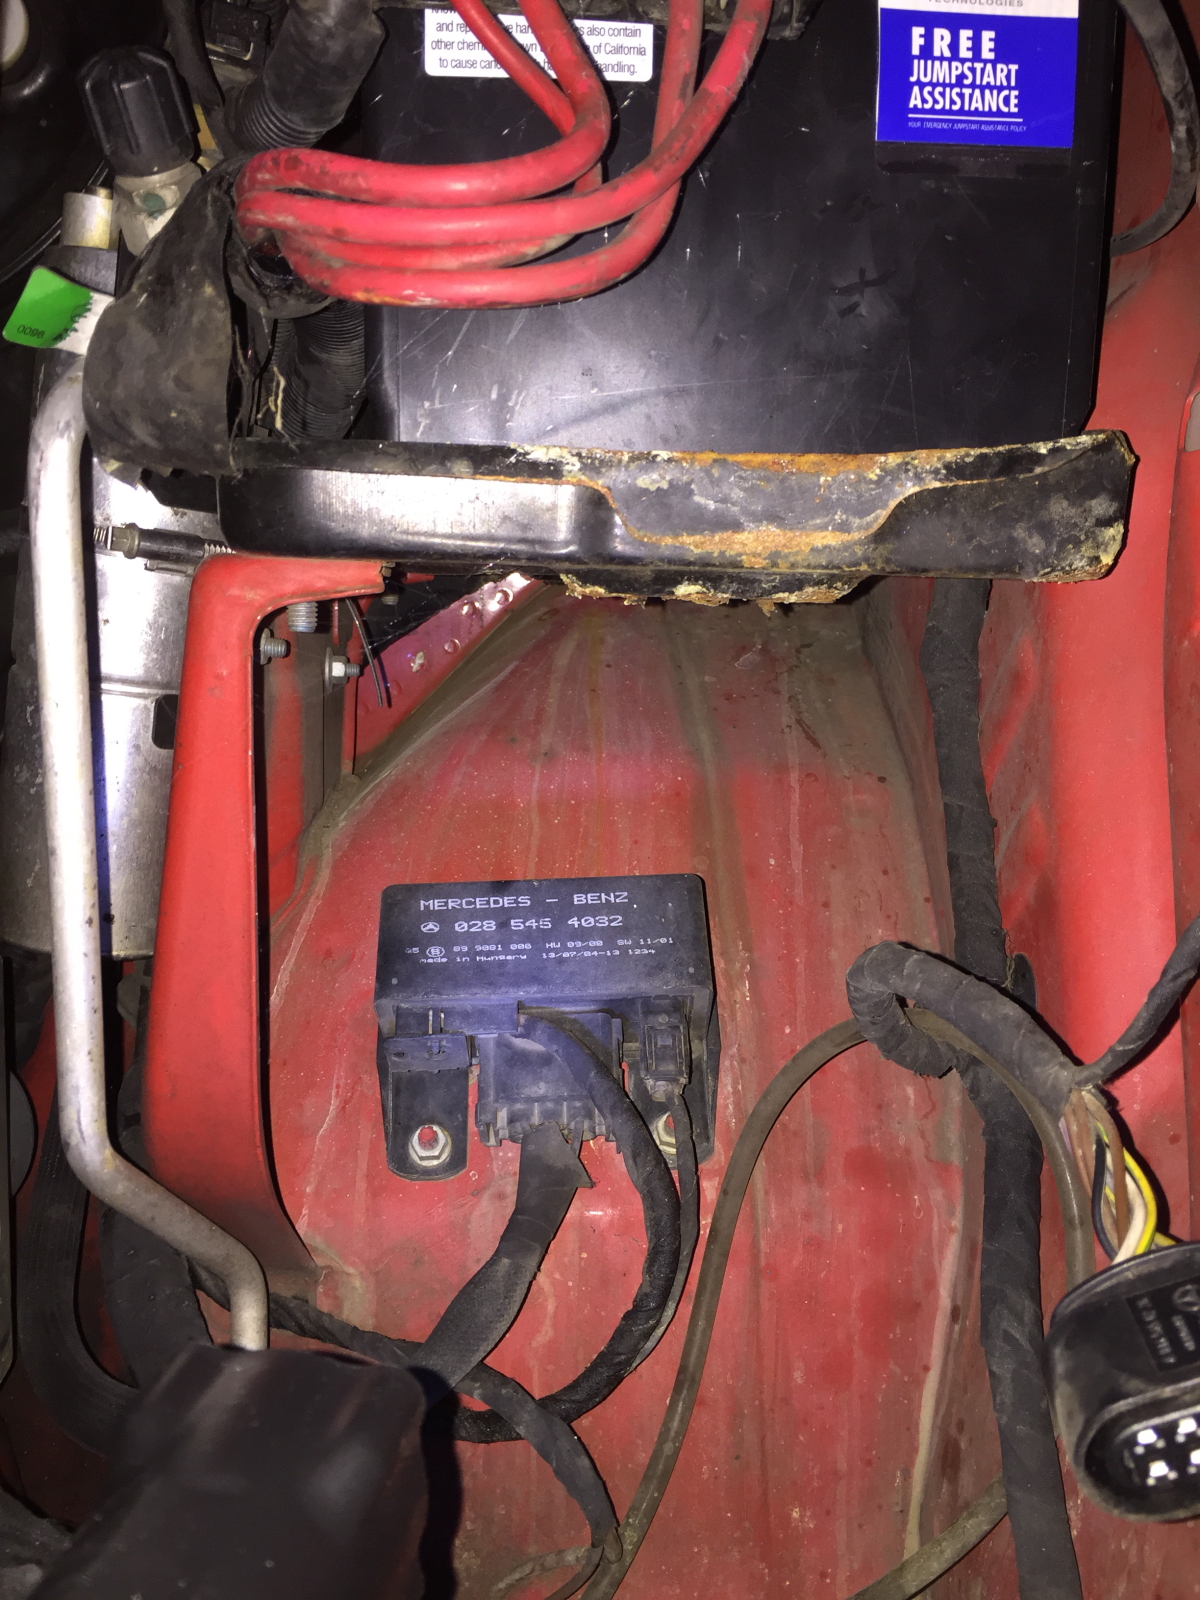
Based on information obtained from the various Sprinter forums, I fabricated (term used loosely) a jumper cable that can be used to test glow plugs for a shorted condition.
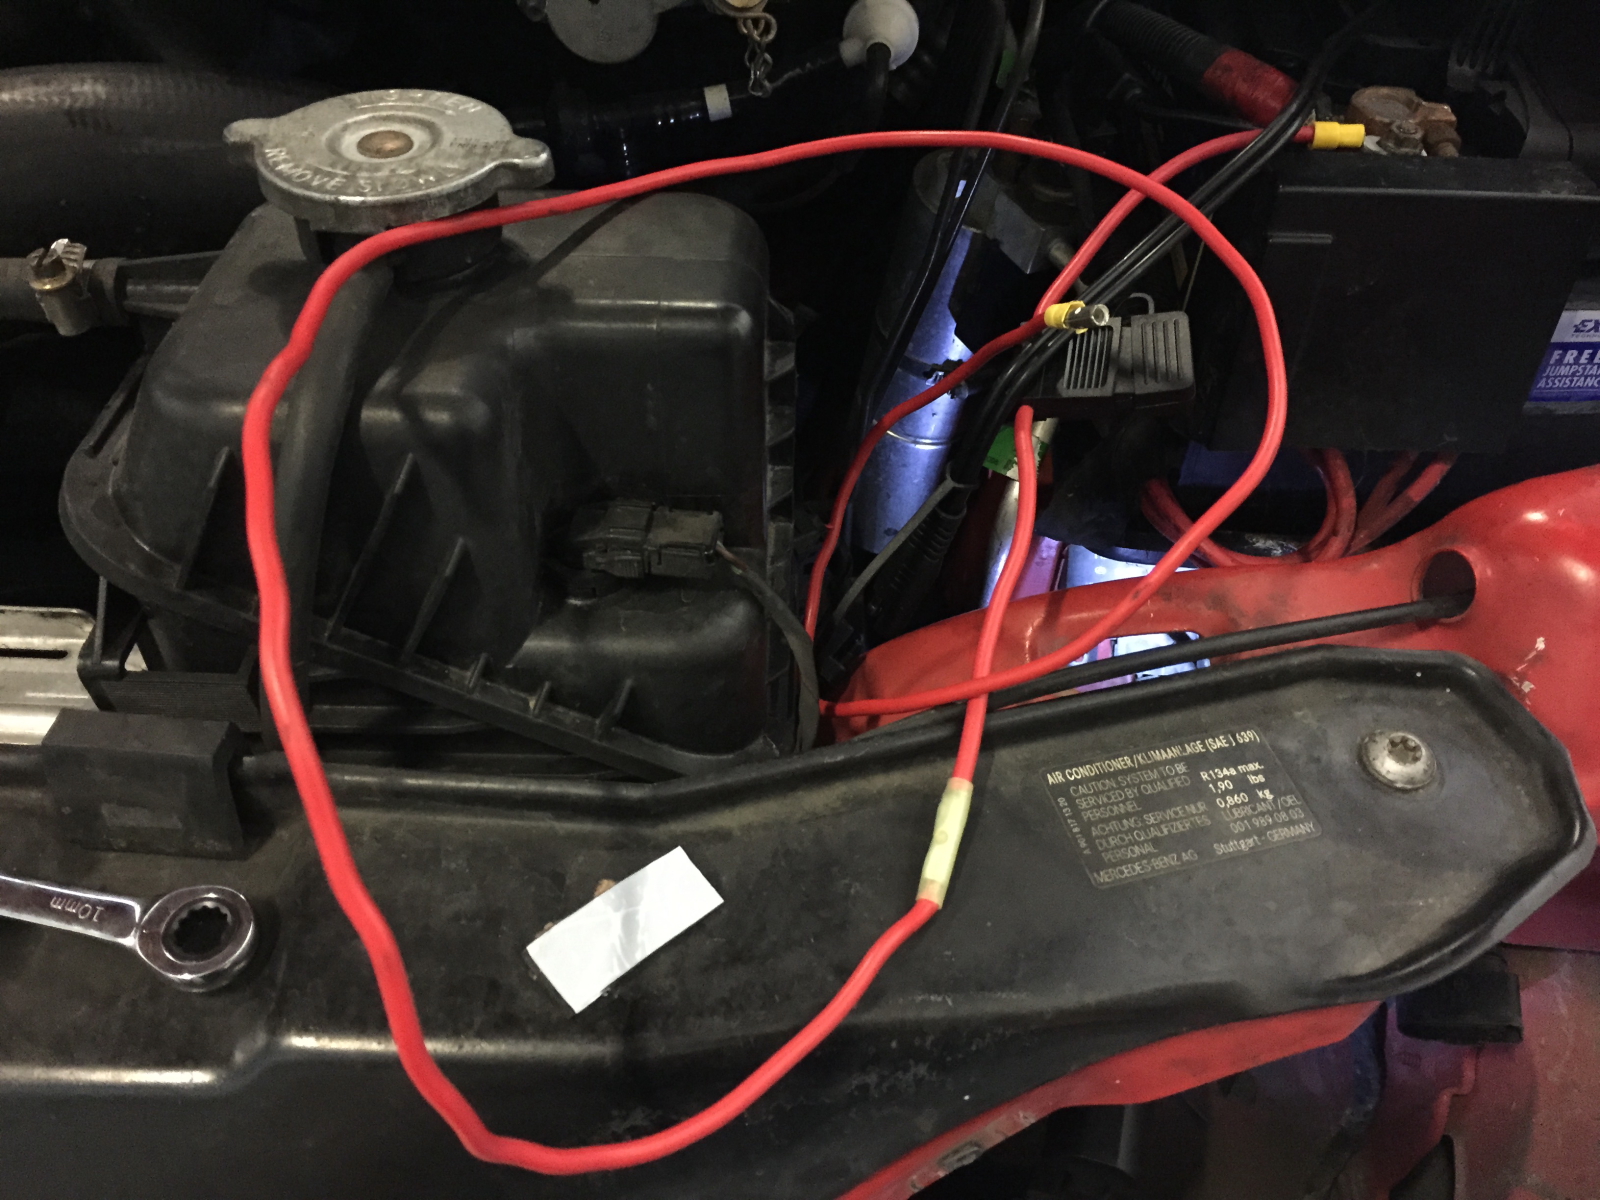
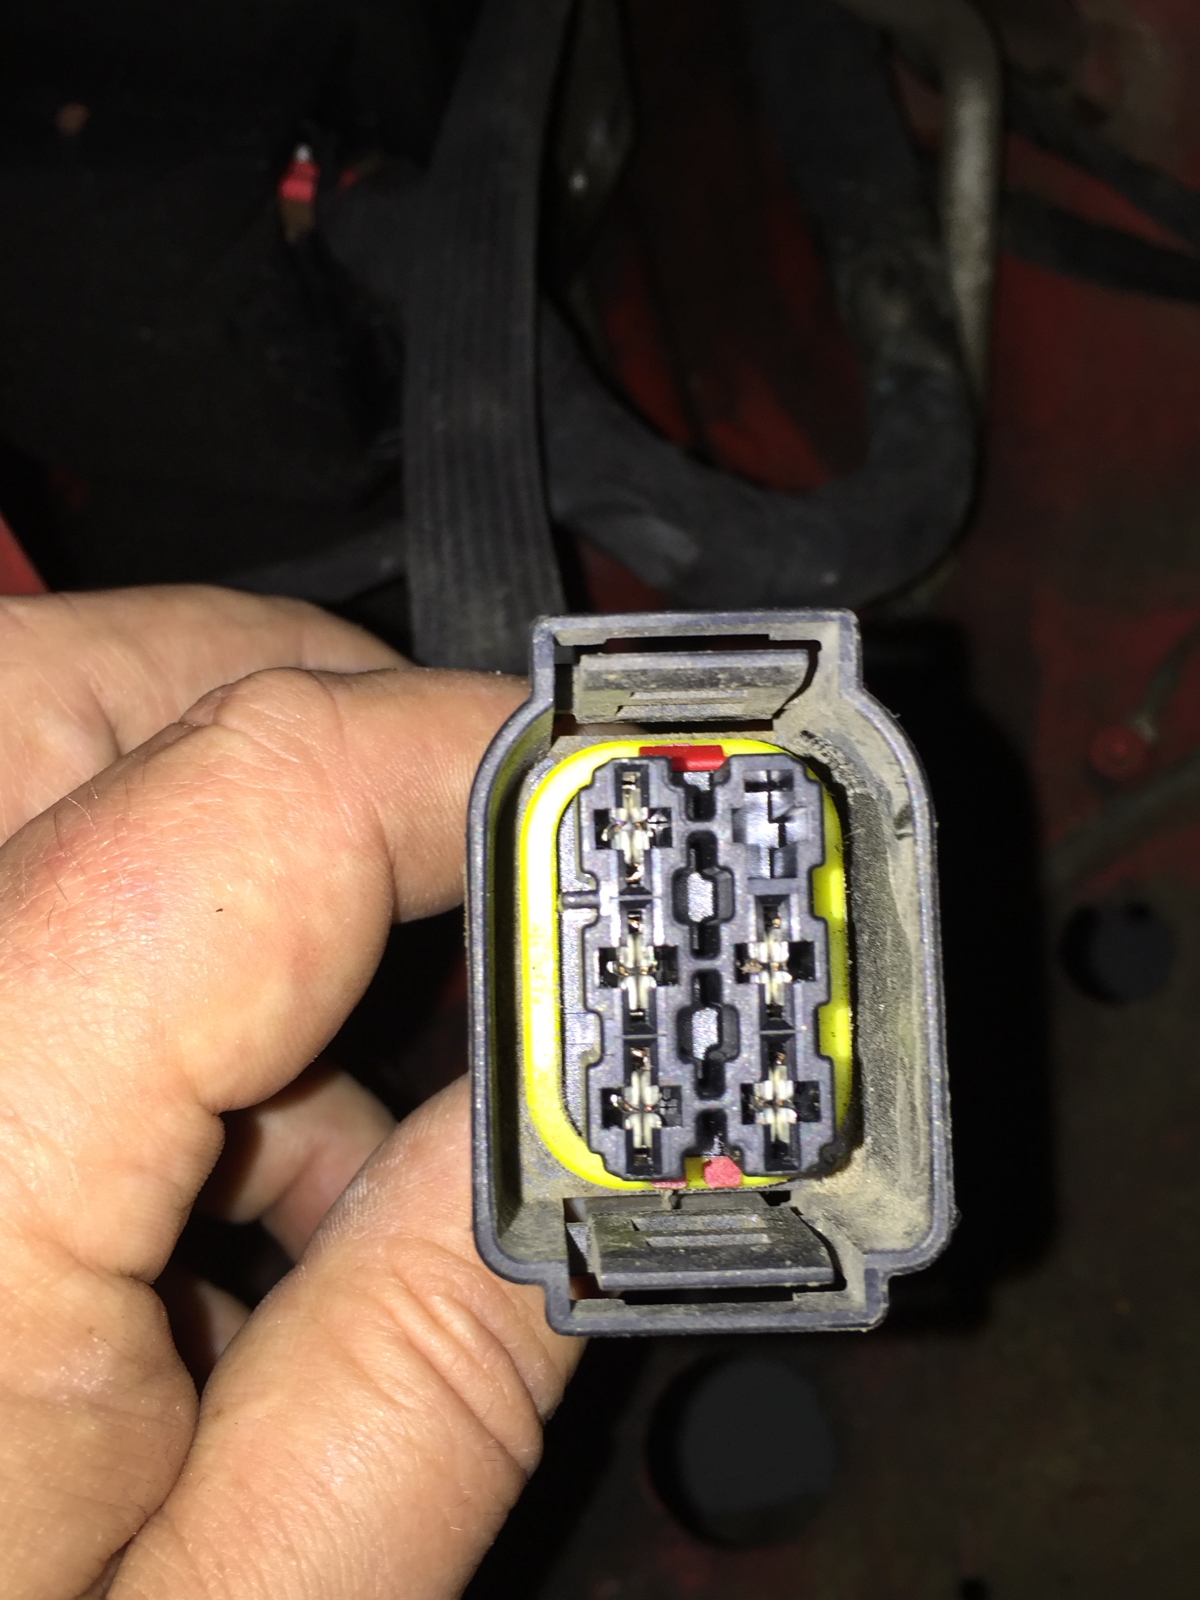
Because the simplest place to test it from the glow plug relay harness, I unplued the 5 wire connector (1 for each GP).
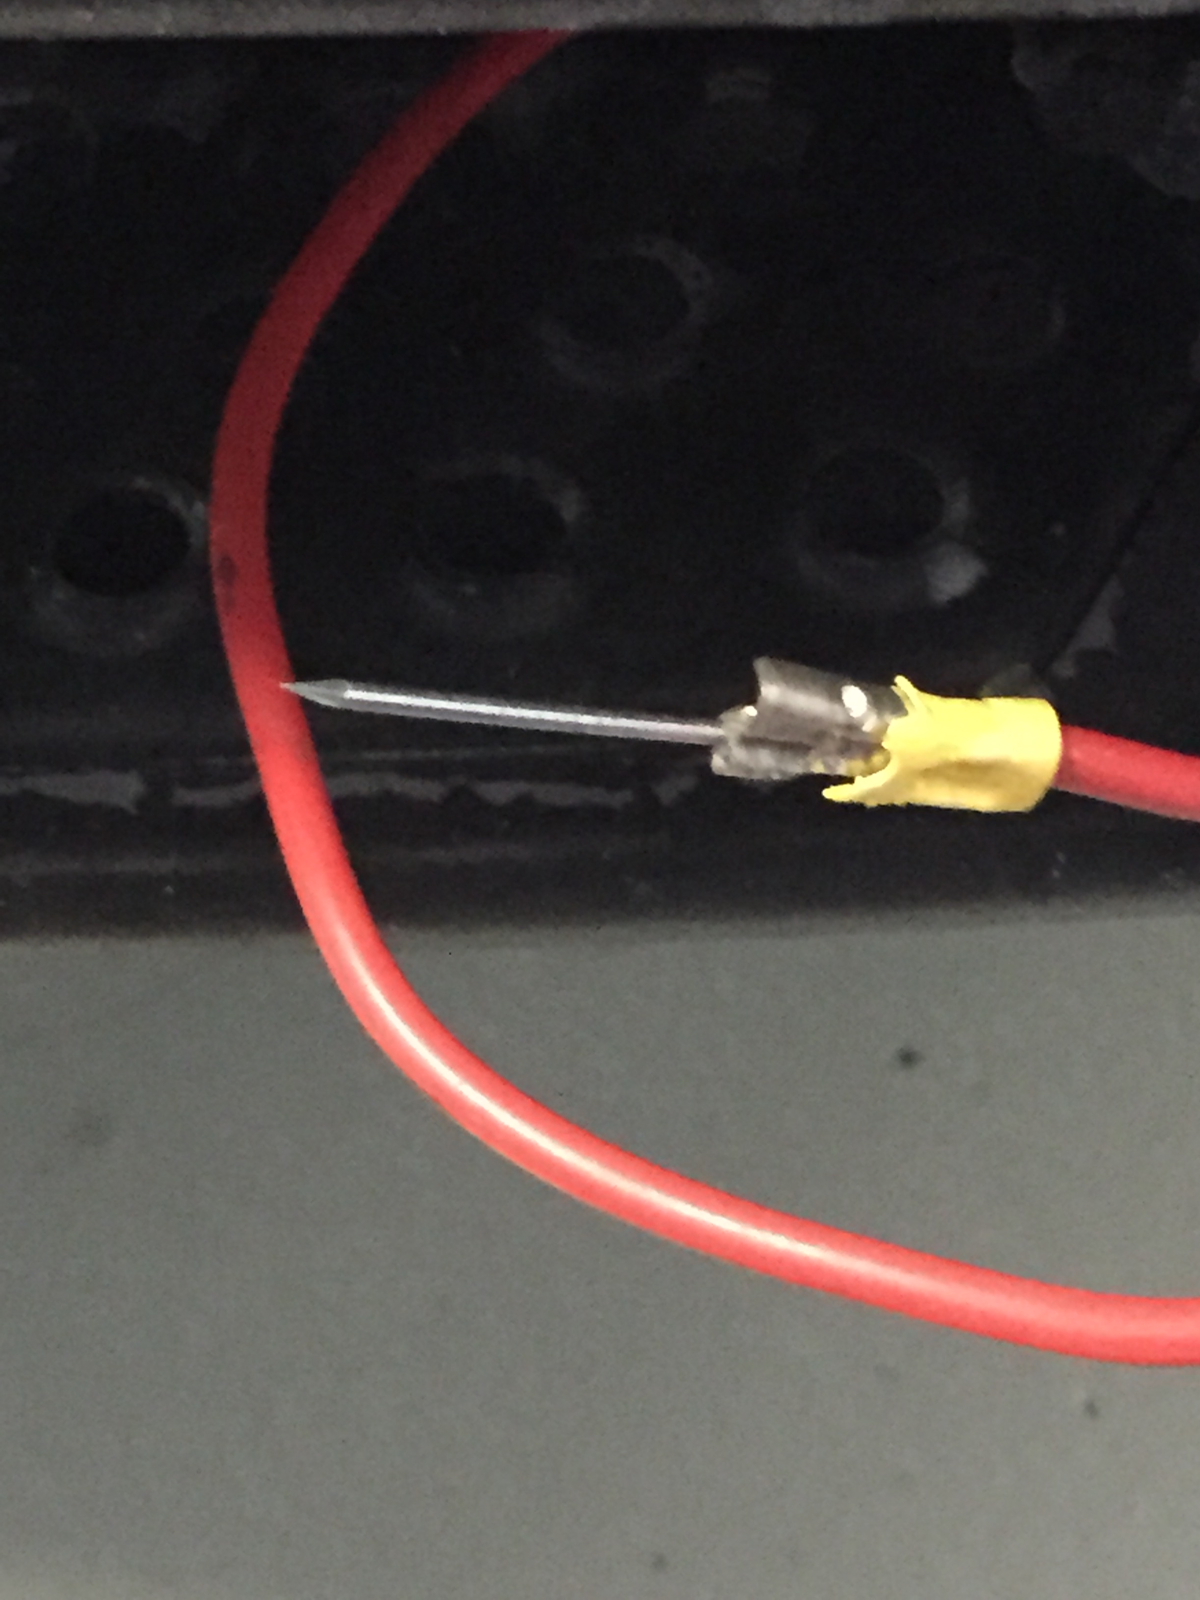
On one end of the wire is a spade connector that is screwed to the battery. I didn’t want to have to mess with holding both ends of the wire. On the other end, I crimped on a small finish nail. This is useful when testing the glow plugs from the glow plug harness.
Poking the wire into each of these connectors here, I was able to determine that none of the 5 glow plugs are exhibiting the signs of a short. When I bought the vehicle the owner assured me the glow plugs had all be replaced in the last 2 years. It seems very likely that was a truthy statement. All good in this arena. But that also means I must continue to look for the cause of my woes.
Since the bumper on this thing was in pretty bad cosmetic shape, I decided to remove it too for a little refurbishing at some point down the road.
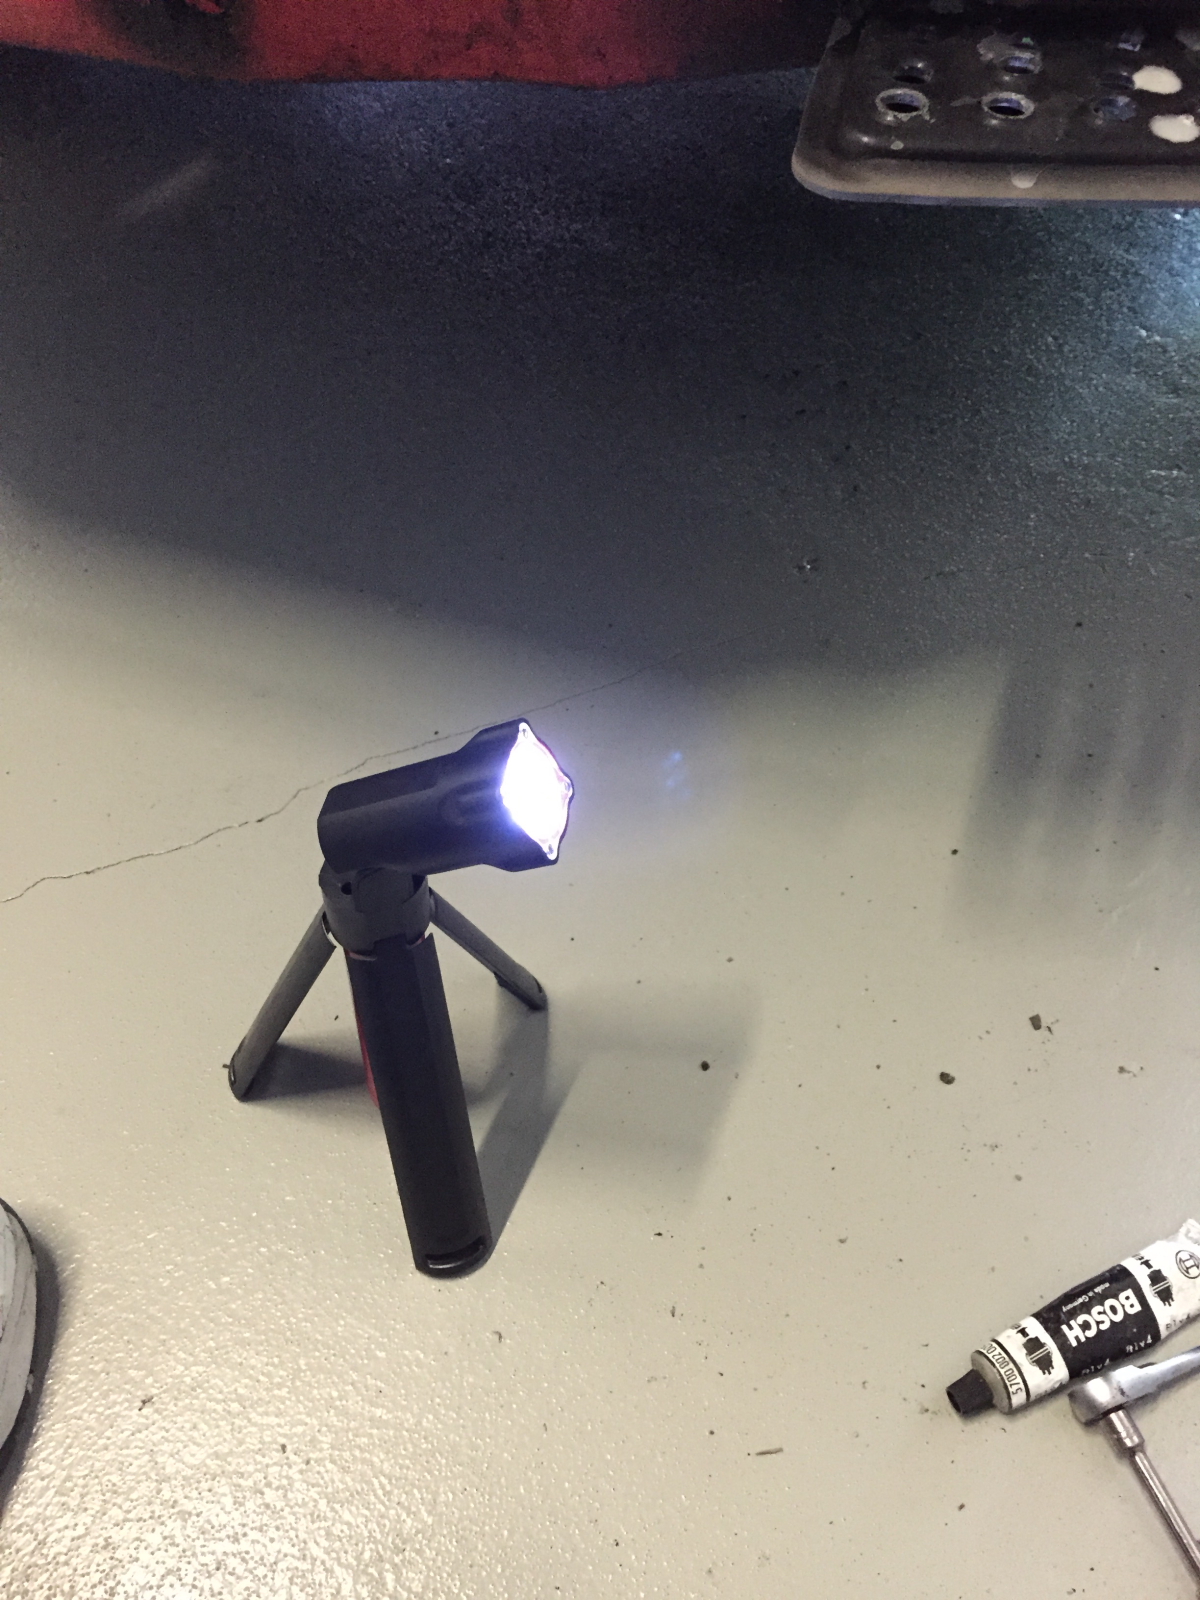
This little LED light really came in handy when working on things under the beast. Takes 3 C-cells and provides a pretty good amount of light, even if they LEDs are not the wide angle type. It was much easier than the conventional flashlights (due to built-in stand) and not hot and tangly like an old-school drop light (I really do have a heavy dislike for them).
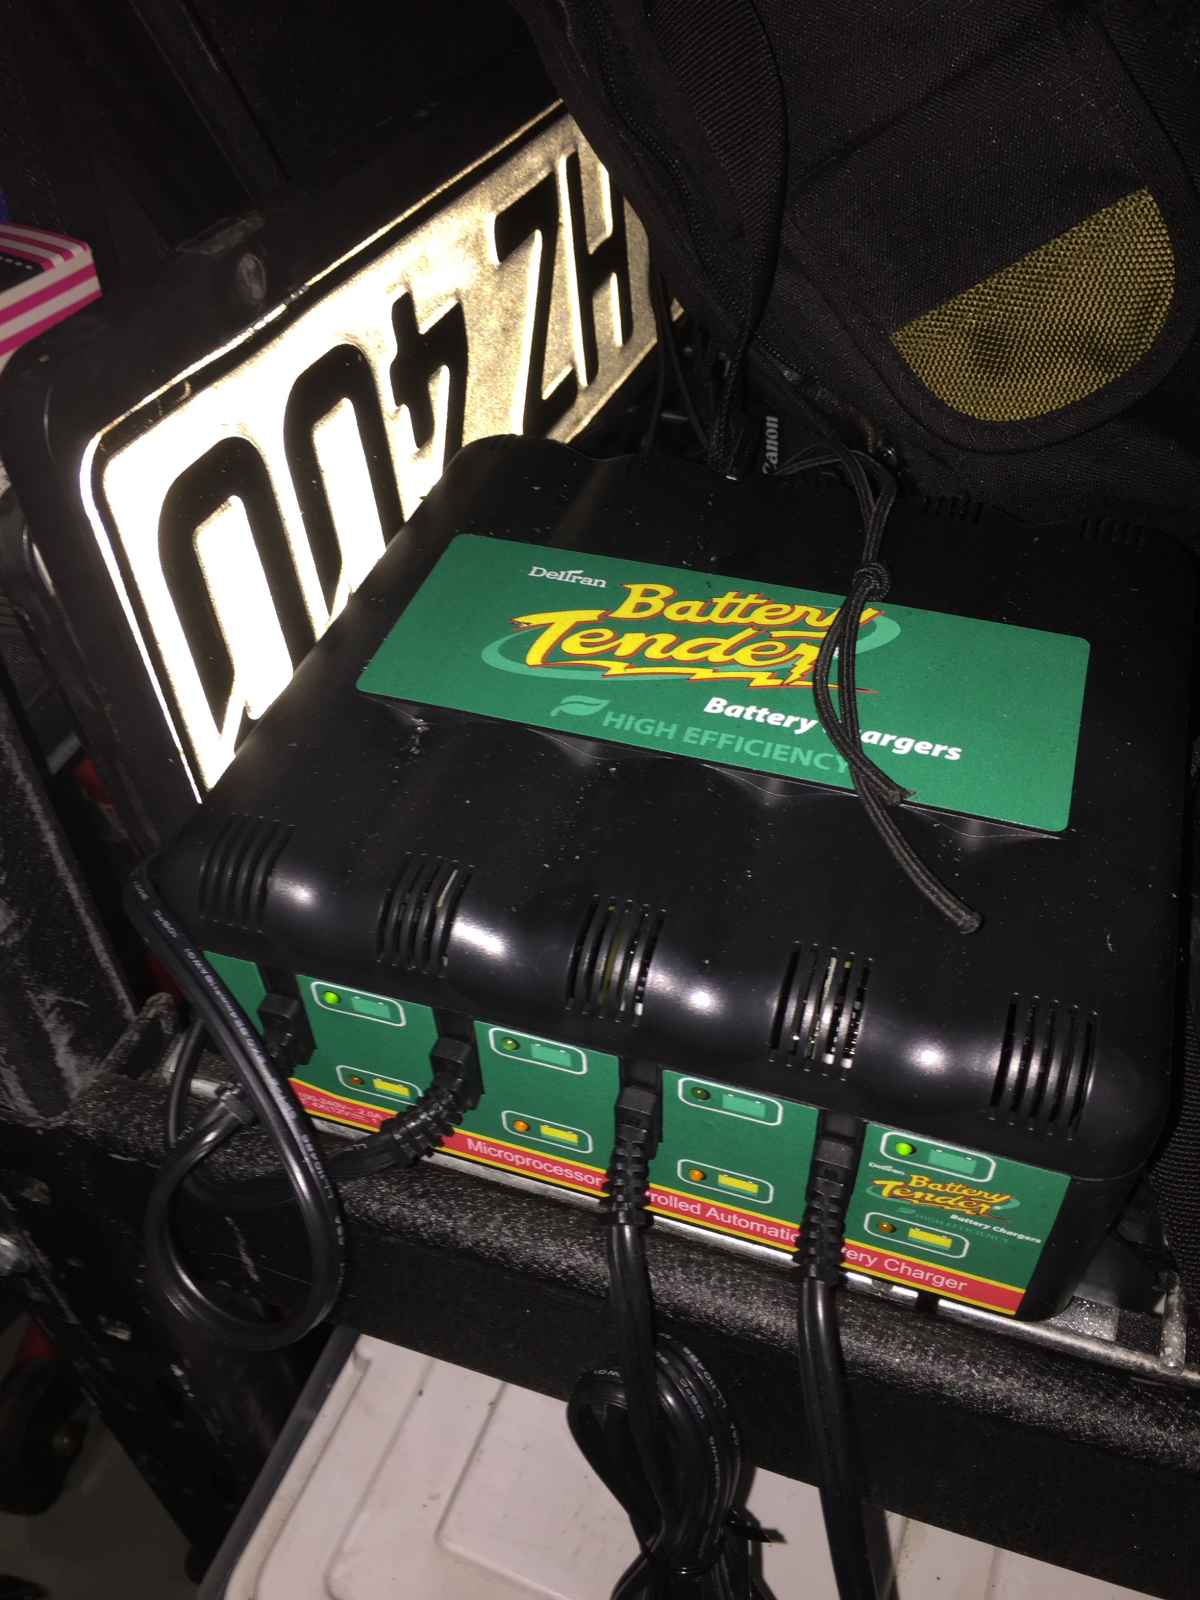
To keep the new battery charged up while I sorted out this mess, I re-purposed one of the 25′ charging cables from the MV Agusta, added the charging lugs to the Sprinter’s battery, and plugged it into this gem I picked up last month. Love having the computerized 1.25 AMP computer controlled charger.
With the Glow Plugs eliminated as the likely cause of my troubles.. the next step is more drastic… checking the turbo system and fuel system components. Good times ahead.