Tag Archives: node

Installing CasperJS 1.1.4 on AWS (CentOS)

Installing CasperJS to work with PhantomJSs latest version 2.1.1

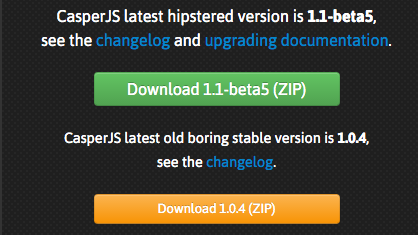
This is the current status of my test installation. My perviously hacked version of CaserpJS ( instructions are there: Helping CasperJS 1.1.0-beta3 play nice with PhantomJS 2.0.0 ), however it’s time to rev-up to the non-beta version of the code.

casperjs
CasperJS version 1.1.0-beta3 at /usr/lib/node_modules/casperjs, using phantomjs version 2.1.1

As of today:
Screen Shot 2016-02-08 at 10.42.19 AM

Step 1 — Clone CasperJS from Git

Hopefully you already have Git installed, and you are ready to clone:

git clone git://github.com/n1k0/casperjs.git
Cloning into ‘casperjs’…
remote: Counting objects: 14392, done.
remote: Compressing objects: 100% (7/7), done.
remote: Total 14392 (delta 0), reused 0 (delta 0), pack-reused 14385
Receiving objects: 100% (14392/14392), 8.50 MiB | 0 bytes/s, done.
Resolving deltas: 100% (8648/8648), done.
Checking connectivity… done.

Step 2 — Perform Installation

Using hints from the Instructions at CasperJS 1.1.0-DEV documentation, I first located my current casper image, moved it aside, then linked the new one into it’s location.

whereis casperjs
casperjs: /usr/bin/casperjs /usr/local/bin/casperjs /opt/n1k0-casperjs-e3a77d0/bin/casperjs /opt/casperjs/bin/casperjs /opt/casperjs/bin/casperjs.exe

mv /usr/bin/casperjs /usr/bin/casperjs.1.1.0-beta3

ln -sf `pwd`/bin/casperjs /usr/bin/casperjs

Step 3 — Verify Casper

Running casper, I checked to ensure it’s on the latest version:

casperjs
CasperJS version 1.1.0-beta5 at /opt/casperjs, using phantomjs version 2.1.1

This looks like it’s good to go.. now CASPER AWAY!!

Installing PhantomJS 2.1.1 on AWS (CentOS)

phantomjs-logoIt’s a gamble to do this, and according to the build script it’s going to take a long time to complete the compile / install of Phantom 2.1.1.

Note: If you are looking for instructions on building for Ubuntu, the steps are different. I’ve documented that process in this post: Installing PhantomJS 2.1.1 on Ubuntu.

Step 1 — install required dependencies

You may or may not have most of these on your AWS / CentOS system. I found that most of these were required to start the PhantomJS build.Here are the ones that I’ve confirmed I needed:

  • autoconf
  • pkgconfig.x86_64
  • python26-pyudev.noarch
  • python26-twisted.noarch
  • sip.x86_64
  • python27-pyudev.noarch
  • python27-twisted.noarch
  • gcc
  • flex
  • bison
  • xorg-x11-server-Xorg.x86_64
  • xorg-x11-server-devel.x86_64
  • xorg-x11-utils.x86_64
  • xorg-x11-proto-devel.noarch
  • sqlite-tcl.x86_64
  • sqlite-devel.x86_64
  • openssl.x86_64
  • crypto-utils.x86_64
  • openssl-devel.x86_64
  • libfontenc.x86_64
  • libfontenc-devel.x86_64
  • fontconfig.x86_64
  • fontconfig-devel.x86_64
  • libicu-devel.x86_64
  • freetype-devel.x86_64
  • libpng-devel.x86_64
  • libjpeg-turbo-devel.x86_64
  • libXext-devel.x86_64
  • libxcb-devel.x86_64
  • xcb-util.x86_64

Installing the packages went smoothly:

sudo yum install autoconf pkgconfig.x86_64 python26-pyudev.noarch python26-twisted.noarch sip.x86_64 python27-pyudev.noarch python27-twisted.noarch gcc flex bison xorg-x11-server-Xorg.x86_64 xorg-x11-server-devel.x86_64 xorg-x11-utils.x86_64 xorg-x11-proto-devel.noarch sqlite-tcl.x86_64 sqlite-devel.x86_64 openssl.x86_64 crypto-utils.x86_64 openssl-devel.x86_64 libfontenc.x86_64 libfontenc-devel.x86_64 fontconfig.x86_64 fontconfig-devel.x86_64 libicu-devel.x86_64 freetype-devel.x86_64 libpng-devel.x86_64 libjpeg-turbo-devel.x86_64 libXext-devel.x86_64 libxcb-devel.x86_64 xcb-util.x86_64

Step 2 — clone the Git repo to local drive:

git clone git://github.com/ariya/phantomjs.git
Cloning into ‘phantomjs’…
remote: Counting objects: 63695, done.
remote: Compressing objects: 100% (37/37), done.
remote: Total 63695 (delta 16), reused 0 (delta 0), pack-reused 63657
Receiving objects: 100% (63695/63695), 129.05 MiB | 4.08 MiB/s, done.
Resolving deltas: 100% (31013/31013), done.
Checking connectivity… done.

cd phantomjs

git checkout 2.1.1
Note: checking out ‘2.1.1’.
[…]
HEAD is now at d9cda3d… Set version to “2.1.1”

git submodule init
Submodule ‘3rdparty-win’ (https://github.com/Vitallium/phantomjs-3rdparty-win.git) registered for path ‘src/qt/3rdparty’
Submodule ‘qtbase’ (https://github.com/Vitallium/qtbase.git) registered for path ‘src/qt/qtbase’
Submodule ‘qtwebkit’ (https://github.com/Vitallium/qtwebkit.git) registered for path ‘src/qt/qtwebkit’

git submodule update
Cloning into ‘src/qt/3rdparty’…
Cloning into ‘src/qt/qtbase’…
Cloning into ‘src/qt/qtwebkit’…

Step 3 — Hack the QT build

It seemed that I needed to set some different flags for the qtbase build. It was not clear to me if this could be done with the build.py options, so I hacked the qt/qtbase/configure script.

vi src/qt/qtbase/configure

First off, I changed the settings of these two values near the top of the config file:

Then commented out part of the section around Werror, so that the build would not treat warnings as errors. The C++ macro options in the code will generate A LOT of errors, most of them from the flags defined in build.py. I tried the route of disabling those flags and ended up with more errors and more issues.. so changing the flags in the config was my next option:

[…]
#CFG_WERROR=auto
CFG_WERROR=no
[…]
#CFG_DEV=no
CFG_DEV=yes
[…]
warnings-are-errors|Werror)
# if [ “$VAL” = “yes” ] || [ “$VAL” = “no” ]; then
# CFG_WERROR=”$VAL”
# else
UNKNOWN_OPT=yes
# fi
;;
[…]

Step 4 — Build!

python build.py
—————————————-
WARNING
—————————————-

Building PhantomJS from source takes a very long time, anywhere from 30 minutes
to several hours (depending on the machine configuration). It is recommended to
use the premade binary packages on supported operating systems.

For details, please go the the web site: http://phantomjs.org/download.html.

Do you want to continue (Y/n)? Y

Step 5 — check the binary

Once the build has completed, you will find the binary to be built in the local directory bin/

ls -l bin/phantomjs
-rwxr-xr-x 1 root root 56736434 Feb 5 11:33 /usr/sbin/phantomjs

To complete the installation, you’ll need to replace the current phantomjs binary with the new one. To find the location if your current binary (if you have one), this should work:

whereis phantomjs
phantomjs: /usr/bin/phantomjs

Copy the new binary to that location and verify version:

cp bin/phantomjs /usr/bin/phantomjs
cp: overwrite ‘/usr/bin/phantomjs’? y

phantomjs -v
2.1.1

YOU ARE DONE!! It was just that easy

Installing PhantomJS 2.1.1 on Ubuntu

phantomjs-logoIt’s a gamble to do this, and according to the build script it’s going to take a long time to complete the compile / install of Phantom 2.1.1.

Note: If you run into build problems with some of the required components, such as the fonts, qtbase, etc., you will want to check my previous post Installing PhantomJS 2 on Ubuntu for some help.

Step 1 — install required dependencies

You may or may not have most of these on your Ubuntu system. I found that most of these were required to start the PhantomJS build.Here are the ones that I’ve confirmed I needed:

  • autoconf2.13

  • pkg-config

  • build-essential

  • qt5-qmake

  • g++

  • python

  • ruby

  • perl

  • sqlite

  • flex

  • bison

  • gperf

  • openssl

  • fontconfig

  • xorg

  • xorg-dev

  • xutils-dev

  • xcb-proto

  • libtool

  • libsqlite0

  • libssl-dev

  • libsqlite3-dev

  • libfontconfig1-dev

  • libicu-dev

  • libfreetype6

  • libssl-dev

  • libpng-dev

  • libpng12-dev

  • libjpeg-dev

  • libx11-dev

  • libxext-dev

  • libxcb-xkb-dev

Installing the packages went smoothly:

sudo apt-get install autoconf2.13 pkg-config build-essential qt5-qmake g++ python ruby perl sqlite flex bison gperf openssl fontconfig xorg xorg-dev xutils-dev xcb-proto libtool libsqlite0 libssl-dev libsqlite3-dev libfontconfig1-dev libicu-dev libfreetype6 libssl-dev libpng-dev libpng12-dev libjpeg-dev libx11-dev libxext-dev libxcb-xkb-dev x11proto-core-dev libxcb-render-util0 libqt5webkit5-dev

Step 2 — clone the Git repo to local drive:

git clone git://github.com/ariya/phantomjs.git
Cloning into ‘phantomjs’…
remote: Counting objects: 63695, done.
remote: Compressing objects: 100% (37/37), done.
remote: Total 63695 (delta 16), reused 0 (delta 0), pack-reused 63657
Receiving objects: 100% (63695/63695), 129.05 MiB | 4.08 MiB/s, done.
Resolving deltas: 100% (31013/31013), done.
Checking connectivity… done.

cd phantomjs

git checkout 2.1.1
Note: checking out ‘2.1.1’.
[…]
HEAD is now at d9cda3d… Set version to “2.1.1”

git submodule init
Submodule ‘3rdparty-win’ (https://github.com/Vitallium/phantomjs-3rdparty-win.git) registered for path ‘src/qt/3rdparty’
Submodule ‘qtbase’ (https://github.com/Vitallium/qtbase.git) registered for path ‘src/qt/qtbase’
Submodule ‘qtwebkit’ (https://github.com/Vitallium/qtwebkit.git) registered for path ‘src/qt/qtwebkit’

git submodule update
Cloning into ‘src/qt/3rdparty’…
Cloning into ‘src/qt/qtbase’…
Cloning into ‘src/qt/qtwebkit’…

python build.py
—————————————-
WARNING
—————————————-

Building PhantomJS from source takes a very long time, anywhere from 30 minutes
to several hours (depending on the machine configuration). It is recommended to
use the premade binary packages on supported operating systems.

For details, please go the the web site: http://phantomjs.org/download.html.

Do you want to continue (Y/n)? Y

NOTE: If you want to suppress the warning regarding perils of the long compile, you an use the –confirm flag to bypass the question. This is really helpful if you want to background the process and write it to a log. Where I find this most beneficial is when I want to/need to close the terminal window before the compile completes.

Here is an optional method of running that will background the process, auto-reply to the warning and write to a log file:

nohup ./build.sh –confirm –jobs 1 > build.log &

You might carp about not being able to monitor progress now! Well sure you can.. just do a following tail on the file. Exact command varies with system, I’ll provide the one for typical LINUX and for typical OSX:

For typical LINUX:
tailf build.log

For typical OSX:
tail -f build.log

Step 3 — check the binary

Once the build has completed, you will find the binary to be built in the local directory bin/

ls -l bin/phantomjs
-rwxr-xr-x 1 root root 56736434 Feb 5 11:33 /usr/sbin/phantomjs

To complete the installation, you’ll need to replace the current phantomjs binary with the new one. To find the location if your current binary (if you have one), this should work:

whereis phantomjs
phantomjs: /usr/bin/phantomjs

Copy the new binary to that location and verify version:

cp bin/phantomjs /usr/bin/phantomjs
cp: overwrite ‘/usr/bin/phantomjs’? y

phantomjs -v
2.1.1

YOU ARE DONE!! It was just that easy

Installing PhantomJS 2 on Ubuntu

phantomjs-logoIt’s a gamble to do this, and according to the build script it’s going to take a long time to complete the compile / install of Phantom 2.0.

Step 1 — locate the source, download and unzip:

wget https://bitbucket.org/ariya/phantomjs/downloads/phantomjs-2.0.0-source.zip
Length: 110092872 (105M) [application/zip]
Saving to: ‘phantomjs-2.0.0-source.zip’

unzip phantomjs-2.0.0-source.zip
Archive: phantomjs-2.0.0-source.zip
a2912c216d06df4d8b51f12ad4082a48c5fc7ba6
creating: phantomjs-2.0.0/
inflating: phantomjs-2.0.0/.gitignore
[…]
inflating: phantomjs-2.0.0/tools/preconfig.sh
inflating: phantomjs-2.0.0/tools/qscriptengine.h
inflating: phantomjs-2.0.0/tools/src.pro

Step 2 — install required dependencies

You may or may not have most of these on your Ubuntu system. I found that most of these were required to start the PhantomJS build.Here are the ones that I’ve confirmed I needed:

  • autoconf2.13
  • ruby
  • pkg-config
  • libicu-dev
  • gperf
  • bison
  • libjpeg-dev
  • g++
  • openssl
  • libtool
  • libssl-dev
  • libpng-dev
  • libpng12-dev
  • libjpeg-dev
  • fontconfig
  • sqlite
  • fontconfig
  • libsqlite0
  • qt5-qmake
  • xorg
  • xorg-dev
  • xutils-dev
  • xcb-proto
  • libxcb-xkb-dev
  • x11proto-core-dev
  • libxcb-render-util0
  • libqt5webkit5-dev

Installing the packages went smoothly:

apt-get install autoconf2.13 ruby pkg-config libicu-dev gperf bison libjpeg-dev g++ openssl libtool libssl-dev libpng-dev libpng12-dev libjpeg-dev fontconfig sqlite fontconfig libsqlite0 qt5-qmake xorg xorg-dev xutils-dev xcb-proto libxcb-xkb-dev x11proto-core-dev libxcb-render-util0 libqt5webkit5-dev

Step 3 — Build Freetype from source and link

Following this I grabbed the source code to install freetype2. Although freetype successfully installed, the required header files where not found. I decided it was bet to grab it and build from source:

wget http://download.savannah.gnu.org/releases/freetype/freetype-2.6.tar.gz
gunzip freetype-2.6.tar.gz
tar xvf freetype-2.6.tar
./configure
[…]
configure: creating ./config.status
config.status: creating unix-cc.mk
config.status: creating unix-def.mk
config.status: creating ftconfig.h
config.status: executing libtool commands
configure:
make & make install
[…]
/usr/bin/install -c -m 644 ./builds/unix/ftconfig.h \
/usr/local/include/freetype2/config/ftconfig.h
/usr/bin/install -c -m 644 /usr/local/freetype-2.6/objs/ftmodule.h \
/usr/local/include/freetype2/config/ftmodule.h
/usr/bin/install -c -m 755 ./builds/unix/freetype-config \
/usr/local/bin/freetype-config
/usr/bin/install -c -m 644 ./builds/unix/freetype2.m4 \
/usr/local/share/aclocal/freetype2.m4
/usr/bin/install -c -m 644 ./builds/unix/freetype2.pc \
/usr/local/lib/pkgconfig/freetype2.pc
/usr/bin/install -c -m 644 /usr/local/freetype-2.6/docs/freetype-config.1 \
/usr/local/share/man/man1/freetype-config.1

Now following that build, due to some inexplicable continuous oversight on the part of freetype’s maintainers.. OR.. phantom.. a link has to be make so that the build process can find the actual libraries required:

ln -s /usr/include/freetype2/freetype /usr/include/freetype

Step 4 — Install an updated version of libxkbcommon

Get the latest version.. and build it:

https://launchpad.net/ubuntu/+archive/primary/+files/libxkbcommon_0.5.0.orig.tar.gz
gunzip libxkbcommon_0.5.0.orig.tar.gz
tar xvf libxkbcommon_0.5.0.orig.tar
cd libxkbcommon-0.5.0
./autogen.sh
./configure

Step 5 — hack QtBase

After many times running thorough the process and resolving errors.. I decided to manually build QTBase. To do this I moved to the source directory for it under PhantomJS, and used this configuration command to get past a libxcb error:

cd src/qt/qtbase
./configure -developer-build -opensource -nomake examples -nomake tests -qt-xcb
./configure -opensource
make
make install

Step 6 — build

Now bulid.sh script. NOTE: if you are executing the compile on a VM (or in this case AWS), it’s recommended that the build process Does Not try to run parallel build jobs on the virtual cores. The PhantomJS website was not clear (to me) why.. but it did recommend using the –jobs 1 flag on the build.. which I am doing. You may omit that if you’d like to experiment.

cd phantomjs-2.0.0

./build.sh –jobs 1
—————————————-
WARNING
—————————————-

Building PhantomJS from source takes a very long time, anywhere from 30
minutes to several hours (depending on the machine configuration).
We recommend you use the premade binary packages on supported operating
systems.

For details, please go the the web site: http://phantomjs.org/download.html.

Do you want to continue (y/n)?
y
[…]

NOTE: If you want to suppress the warning regarding perils of the long compile, you an use the –confirm flag to bypass the question. This is really helpful if you want to background the process and write it to a log. Where I find this most beneficial is when I want to/need to close the terminal window before the compile completes.

Here is an optional method of running that will background the process, auto-reply to the warning and write to a log file:

nohup ./build.sh –confirm –jobs 1 > build.log &

You might carp about not being able to monitor progress now! Well sure you can.. just do a following tail on the file. Exact command varies with system, I’ll provide the one for typical LINUX and for typical OSX:

For typical LINUX:
tailf build.log

For typical OSX:
tail -f build.log

Step 7 — check the binary

Once the build has completed, you will find the binary to be built in the local directory bin/

ls -l bin/phantomjs
-rwxr-xr-x 1 root root 56587060 Sep 30 17:16 bin/phantomjs

To complete the installation, you’ll need to replace the current phantomjs binary with the new one. To find the location if your current binary (if you have one), this should work:

whereis phantomjs
phantomjs: /usr/bin/phantomjs

Copy the new binary to that location and verify version:

cp bin/phantomjs /usr/bin/phantomjs
cp: overwrite ‘/usr/bin/phantomjs’? y

phantomjs -v
2.0.0

YOU ARE DONE!! It was just that easy
node.js — using cheerio.js to find all script elements in a page

Finding <script> nodes in a page

Why.. why? Just because it’s useful when pages had dynamic content in javascript. Is there a way to subsequently evaluate the javascript parsed.. that’s for another article, but for now, I’m going to assume you have node.js installed, and you have at least come idea of how to use it.

The idea

Finding all the <script> nodes in an HTML page, rendered using

‘request.get()’

.

In the example, url (in this case www.amazon.com) is resolved and the HTML loaded. The loaded HTML is then passed to cheerio using this expression:

var $ = cheerio.load(html,{ normalizeWhitespace: false, xmlMode: false, decodeEntities: true });

.. then iterated upon using the .each( ..) object method.

$(‘script’).each( function () {…

In the very simple example the follows the script is logged to the console (STDOUT) for display. In an more advanced and useful implementation, the returned javascript would be interacted with, parsed or some other action taken.

The Script

// MAKE REQUIREMENTS
var request = require(‘request’);
var cheerio = require(‘cheerio’);

// Local Vars
var url = ‘https://www.amazon.com’;

// Define the requests default params
var request = request.defaults({
jar: true,
headers: { ‘User-Agent’: ‘Mozilla/5.0 (Macintosh; Intel Mac OS X 10.8; rv:24.0) Gecko/20100101 Firefox/24.0’ },
})

// execute request and parse all the javascript blocks
request(formUrl, function (error, response, html) {
if (!error && response.statusCode == 200) {

// load the html into cheerio
var $ = cheerio.load(html,{ normalizeWhitespace: false, xmlMode: false, decodeEntities: true });

// iterate on all of the JS blocks in the page
$(‘script’).each( function () {
console.log(‘JS: %s’,$(this).text());
});
}
else {
console.log(‘ERR: %j\t%j’,error,response.statusCode);
}
});

End