Tag Archives: automation

Replace Text Recursively using grep and sed on MacOS (osX).

As with many MacOS’isms, you have to change up your old school LINUX to work with the slightly different command syntax of the MacOS tools. Specifically in the this case xargs and sed.

xargs can be an amazingly powerful ally when automating commands line functionality, wrapping the reference command with auto-substitutions using the ‘@’ meta-character.

I’ll get to the meat of this. While trying to automated a grep -> sed pipeline, I encountered this error:

egrep -rl 'version 0.0.1' src/* | xargs -i@ sed -i 's/version 0.0.1/version 0.0.1c/g' @
xargs: illegal option -- i

It turns out that MacOS xargs like -I instead of -i.. (a quick trip to man sorted that out).

     -I replstr
             Execute utility for each input line, replacing one or more occurrences of replstr in up to replacements (or 5 if no -R flag is specified) arguments to utility
             with the entire line of input.  The resulting arguments, after replacement is done, will not be allowed to grow beyond 255 bytes; this is implemented by con-
             catenating as much of the argument containing replstr as possible, to the constructed arguments to utility, up to 255 bytes.  The 255 byte limit does not apply
             to arguments to utility which do not contain replstr, and furthermore, no replacement will be done on utility itself.  Implies -x.

Next I ran into an errors with sed.. when using the ‘edit in place’ flag -i. (yes, that makes for a confusing debug when you have the “offending” switch in two places).

egrep -rl 'version 0.0.1' src/* | xargs -I@ sed -i 's/version 0.0.1/version 0.0.1c/g' @
sed: 1: "src/com/ingeniigroup/st ...": bad flag in substitute command: 'a'
[...]

With a little testing of the individual command, and another trip to man, it took a little noodly to deduce that the error message was being generated because it was trying the sed commmand as the output file suffix and the filename as the sed command! Adding an empty string designator after sed’s -i solved this.

     -i extension
             Edit files in-place, saving backups with the specified extension.  If a zero-length extension is given, no backup will be saved.  It is not recommended to give
             a zero-length extension when in-place editing files, as you risk corruption or partial content in situations where disk space is exhausted, etc.

Final Command Query
The objective was to simply hammer through the source code and update the version tag from 0.0.1 to 0.0.1c. Running egrep in recursive filename list mode ( egrep -rl ) for the string I wanted ( ‘version 0.0.1’ ) gave me a file list, which was then piped into xargs, which expanded that list into the sed command ( sed -i ” ‘s/version 0.0.1/version 0.0.1c/g’ ). And viola.. 18 files changed with just a little big of effort:

egrep -rl 'version 0.0.1' src/* | xargs -I@ sed -i '' 's/version 0.0.1/version 0.0.1c/g' @

Since this took me more than 5 minutes to figure out, I decided I’d take 5 more and hopefully help someone else down the line.
casperJS – passing parameters on the command line (cli)

I like using the command line / shell to pass information to scripts and programs. Sure it has limitations but it’s generally pretty effective.

Each language seems to have it’s own method of handing them, and CasperJS does not seem to be any different. What I did find a little different from others, is how CapserJS splits out arguments from parameters (options in CapserJS speak).

Passing Arguments

Passing arguments is a fairly simple affair. His an example of passing some arguments on the command line to a screen capture utility I’m working on:

casperjs generic.screenshot.cjs http://www.someplace.com save_local
[
“http://www.someplace.com”,
“save_local”
]

They are placed into a list (integer indexed array), and can be addressed in the following way:

url = casper.cli.args[0];
mode = casper.cli.args[1];

This would result in ‘url’ = ‘http://www.someplace.com’ and ‘mode’ = ‘save_local’. Pretty straight forward. One major drawback, you must know the order of the parameters, add a new one, get one out of place and the entire house of cards collapses.

There is a better way!

Passing Parameters (options)

Passing options is a fairly simple affair as well. His an example of passing some option on the command line:

casperjs generic.screenshot.cjs –url=http://www.someplace.com –mode=save_local
{
“casper-path”: “/opt/casperjs”,
“cli”: true,
“url”: “http://www.someplace.com”,
“mode”: “save_local”
}

Note: “casper-path” and “cli” are injected automatically

They are placed into an array, and can be addressed in the following way:

url = casper.cli.options[‘url’];
mode = casper.cli.options[‘mode’];

This would result in ‘url’ = ‘http://www.someplace.com’ and ‘mode’ = ‘save_local’. Now, you do not need to worry about ordering of options, and adding more options doesn’t mean that you’ll have to worry about re-coding the variable localization, ordering etc. It’s also CLEAR to any user how the cli is formatted.

Now, go forth and parse, screen capture and automate your testing until your heart is content!

Installing CasperJS 1.1.4 on AWS (CentOS)

Installing CasperJS to work with PhantomJSs latest version 2.1.1

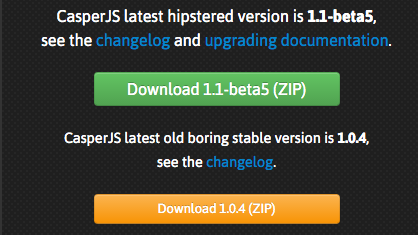
This is the current status of my test installation. My perviously hacked version of CaserpJS ( instructions are there: Helping CasperJS 1.1.0-beta3 play nice with PhantomJS 2.0.0 ), however it’s time to rev-up to the non-beta version of the code.

casperjs
CasperJS version 1.1.0-beta3 at /usr/lib/node_modules/casperjs, using phantomjs version 2.1.1

As of today:
Screen Shot 2016-02-08 at 10.42.19 AM

Step 1 — Clone CasperJS from Git

Hopefully you already have Git installed, and you are ready to clone:

git clone git://github.com/n1k0/casperjs.git
Cloning into ‘casperjs’…
remote: Counting objects: 14392, done.
remote: Compressing objects: 100% (7/7), done.
remote: Total 14392 (delta 0), reused 0 (delta 0), pack-reused 14385
Receiving objects: 100% (14392/14392), 8.50 MiB | 0 bytes/s, done.
Resolving deltas: 100% (8648/8648), done.
Checking connectivity… done.

Step 2 — Perform Installation

Using hints from the Instructions at CasperJS 1.1.0-DEV documentation, I first located my current casper image, moved it aside, then linked the new one into it’s location.

whereis casperjs
casperjs: /usr/bin/casperjs /usr/local/bin/casperjs /opt/n1k0-casperjs-e3a77d0/bin/casperjs /opt/casperjs/bin/casperjs /opt/casperjs/bin/casperjs.exe

mv /usr/bin/casperjs /usr/bin/casperjs.1.1.0-beta3

ln -sf `pwd`/bin/casperjs /usr/bin/casperjs

Step 3 — Verify Casper

Running casper, I checked to ensure it’s on the latest version:

casperjs
CasperJS version 1.1.0-beta5 at /opt/casperjs, using phantomjs version 2.1.1

This looks like it’s good to go.. now CASPER AWAY!!

Installing PhantomJS 2.1.1 on AWS (CentOS)

phantomjs-logoIt’s a gamble to do this, and according to the build script it’s going to take a long time to complete the compile / install of Phantom 2.1.1.

Note: If you are looking for instructions on building for Ubuntu, the steps are different. I’ve documented that process in this post: Installing PhantomJS 2.1.1 on Ubuntu.

Step 1 — install required dependencies

You may or may not have most of these on your AWS / CentOS system. I found that most of these were required to start the PhantomJS build.Here are the ones that I’ve confirmed I needed:

  • autoconf
  • pkgconfig.x86_64
  • python26-pyudev.noarch
  • python26-twisted.noarch
  • sip.x86_64
  • python27-pyudev.noarch
  • python27-twisted.noarch
  • gcc
  • flex
  • bison
  • xorg-x11-server-Xorg.x86_64
  • xorg-x11-server-devel.x86_64
  • xorg-x11-utils.x86_64
  • xorg-x11-proto-devel.noarch
  • sqlite-tcl.x86_64
  • sqlite-devel.x86_64
  • openssl.x86_64
  • crypto-utils.x86_64
  • openssl-devel.x86_64
  • libfontenc.x86_64
  • libfontenc-devel.x86_64
  • fontconfig.x86_64
  • fontconfig-devel.x86_64
  • libicu-devel.x86_64
  • freetype-devel.x86_64
  • libpng-devel.x86_64
  • libjpeg-turbo-devel.x86_64
  • libXext-devel.x86_64
  • libxcb-devel.x86_64
  • xcb-util.x86_64

Installing the packages went smoothly:

sudo yum install autoconf pkgconfig.x86_64 python26-pyudev.noarch python26-twisted.noarch sip.x86_64 python27-pyudev.noarch python27-twisted.noarch gcc flex bison xorg-x11-server-Xorg.x86_64 xorg-x11-server-devel.x86_64 xorg-x11-utils.x86_64 xorg-x11-proto-devel.noarch sqlite-tcl.x86_64 sqlite-devel.x86_64 openssl.x86_64 crypto-utils.x86_64 openssl-devel.x86_64 libfontenc.x86_64 libfontenc-devel.x86_64 fontconfig.x86_64 fontconfig-devel.x86_64 libicu-devel.x86_64 freetype-devel.x86_64 libpng-devel.x86_64 libjpeg-turbo-devel.x86_64 libXext-devel.x86_64 libxcb-devel.x86_64 xcb-util.x86_64

Step 2 — clone the Git repo to local drive:

git clone git://github.com/ariya/phantomjs.git
Cloning into ‘phantomjs’…
remote: Counting objects: 63695, done.
remote: Compressing objects: 100% (37/37), done.
remote: Total 63695 (delta 16), reused 0 (delta 0), pack-reused 63657
Receiving objects: 100% (63695/63695), 129.05 MiB | 4.08 MiB/s, done.
Resolving deltas: 100% (31013/31013), done.
Checking connectivity… done.

cd phantomjs

git checkout 2.1.1
Note: checking out ‘2.1.1’.
[…]
HEAD is now at d9cda3d… Set version to “2.1.1”

git submodule init
Submodule ‘3rdparty-win’ (https://github.com/Vitallium/phantomjs-3rdparty-win.git) registered for path ‘src/qt/3rdparty’
Submodule ‘qtbase’ (https://github.com/Vitallium/qtbase.git) registered for path ‘src/qt/qtbase’
Submodule ‘qtwebkit’ (https://github.com/Vitallium/qtwebkit.git) registered for path ‘src/qt/qtwebkit’

git submodule update
Cloning into ‘src/qt/3rdparty’…
Cloning into ‘src/qt/qtbase’…
Cloning into ‘src/qt/qtwebkit’…

Step 3 — Hack the QT build

It seemed that I needed to set some different flags for the qtbase build. It was not clear to me if this could be done with the build.py options, so I hacked the qt/qtbase/configure script.

vi src/qt/qtbase/configure

First off, I changed the settings of these two values near the top of the config file:

Then commented out part of the section around Werror, so that the build would not treat warnings as errors. The C++ macro options in the code will generate A LOT of errors, most of them from the flags defined in build.py. I tried the route of disabling those flags and ended up with more errors and more issues.. so changing the flags in the config was my next option:

[…]
#CFG_WERROR=auto
CFG_WERROR=no
[…]
#CFG_DEV=no
CFG_DEV=yes
[…]
warnings-are-errors|Werror)
# if [ “$VAL” = “yes” ] || [ “$VAL” = “no” ]; then
# CFG_WERROR=”$VAL”
# else
UNKNOWN_OPT=yes
# fi
;;
[…]

Step 4 — Build!

python build.py
—————————————-
WARNING
—————————————-

Building PhantomJS from source takes a very long time, anywhere from 30 minutes
to several hours (depending on the machine configuration). It is recommended to
use the premade binary packages on supported operating systems.

For details, please go the the web site: http://phantomjs.org/download.html.

Do you want to continue (Y/n)? Y

Step 5 — check the binary

Once the build has completed, you will find the binary to be built in the local directory bin/

ls -l bin/phantomjs
-rwxr-xr-x 1 root root 56736434 Feb 5 11:33 /usr/sbin/phantomjs

To complete the installation, you’ll need to replace the current phantomjs binary with the new one. To find the location if your current binary (if you have one), this should work:

whereis phantomjs
phantomjs: /usr/bin/phantomjs

Copy the new binary to that location and verify version:

cp bin/phantomjs /usr/bin/phantomjs
cp: overwrite ‘/usr/bin/phantomjs’? y

phantomjs -v
2.1.1

YOU ARE DONE!! It was just that easy