All posts by David

Playing with Code — hacking a CraigsList Parser

Intro:

While watching the sky fall here on the California Coast, I decided to hack together a fun little toy for scouring some of the local Craigs List sites for things; such as Track Bikes. 🙂

The Concept:

  • Collect regions of interest list for Craigs List.
  • Execute search in each region using AJAX’ed page grabs.
  • Display parsed results in a list on the final page.

The Execution:

Using a multi-dimetional array of States, with sub-regions, hostnames were collected recorded. It looks something like this:

/*  Craigs List Stores */
$CLStores = array(
	'California' => array(
		'San Francisco' => 'http://sfbay.craigslist.org',
		'Chico' => 'http://chico.craigslist.org',
		'Sacramento' => 'http://sacramento.craigslist.org',
...
		),
	'Nevada' => array(
		'Reno' => 'http://reno.craigslist.org',
		'Elko' => 'http://elko.craigslist.org',
...
		),
...

This list is iterated upon, with each entry being passed to and AJAX worker bot. When the bot completed the page grab and parsing, the data is returned to the main document, and dynamically inserted.

foreach($CLStores as $state => $center){
        printf('
  • %s
    • ',$state); ... printf('
    • %s
      Loading...
    • ',$url,$state,$name,$id); ...

    This is all pretty basic stuff, but automation of searches is a specialty of mine, and it’s kept me gainfully employed with many contracts over the last 15 years.

    THE LINK:

    Here is THE TRACK BIKE SEARCH LINK

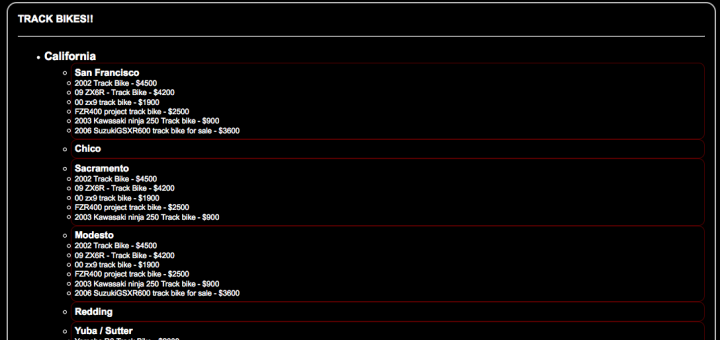
    Final results look like this:
    Screen Shot 2014-12-12 at 7.57.16 AM

    Fiding my “long lost” Ducati 998

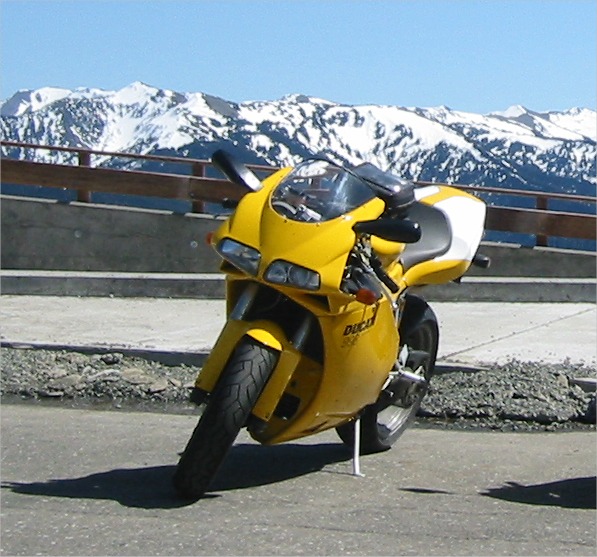
    So.. I just lucked upon the VIN number of my first Ducati; a gorgeous yellow 998Mono… here she is on the day I bought her:
    P5291722cru

    About the bike

    2002 Ducati 998 Mono
    Termi aftermarket exhaust
    HID headlamp upgrade
    DP adjustable steering damper
    Custom flywheel
    VIN: ZDM1SB5V52****46

    Yes, it’s been a GREAT many years, but there is a special place in my heart for this girl.. and I’d like to see if I can track here down. We sure had a lot of good times together!:

    Goofing around on the best roads in the the Pacific North Wet;

    bike_03
    foto.veloce.pic.02
    fvmp.ducati.998.olympics.02
    hurricane.ridge.ducati
    IMG_3871

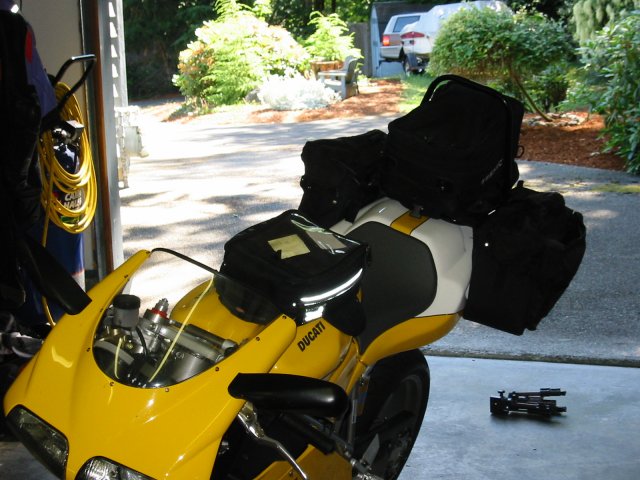
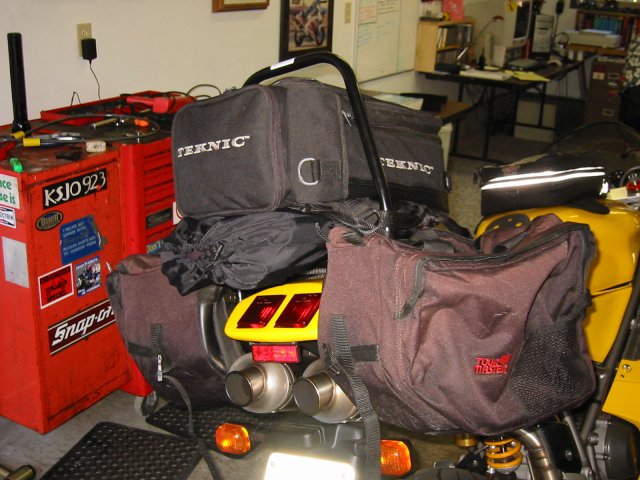
    Riding was not limited to the PNW either, I rode her all the way to the World Superbike Races in California one year!

    duc998.soft.luggage.01
    duc998.soft.luggage.02

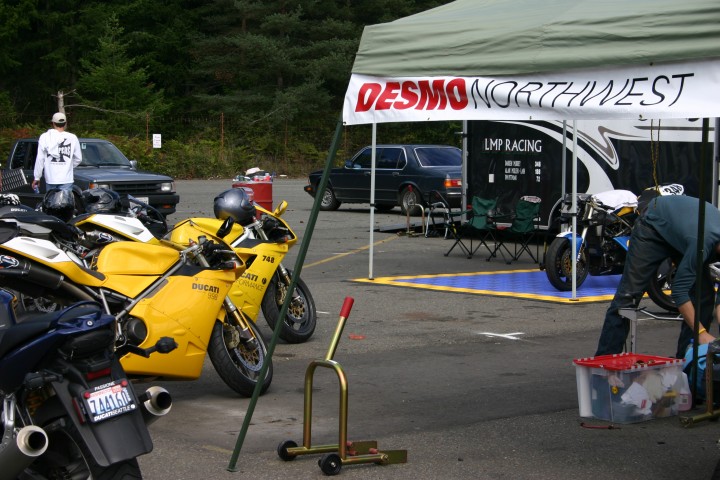
    Had some fun out on the race track too!!

    holeshot_PIR_turn_8
    PR091704.003.full
    PR091704.146.full

    The bike always held a special place:

    IMG_0002
    IMG_0003

    I’m going to see what I can do to find her. I hope it survived over the years, and maybe I’ll get lucky enough to see her (and maybe own her) again. Only time will time.

    UPDATE 1: 13-NOV-2014

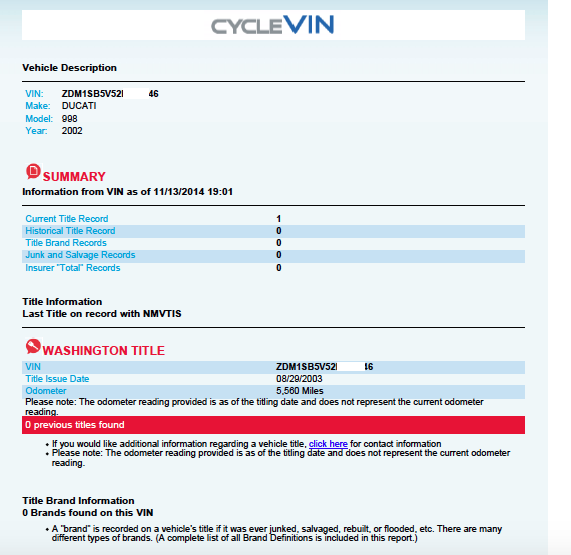
    So, looking for something like CarFax for bikes, I found this website https://www.cyclevin.com/ and ran a report. $25.00 later I find the first resale of the bike in 2003, and NOTHING after that! True, they had a record, but it’s basically worthless. 🙁 Lesson learned… technically they provided the info they said they would.. but it’s totally incomplete.

    CycleVin BUYER BEWARE!
    Screen Shot 2014-11-13 at 4.24.08 PM

    UPDATE 2: 12-DEC-2014

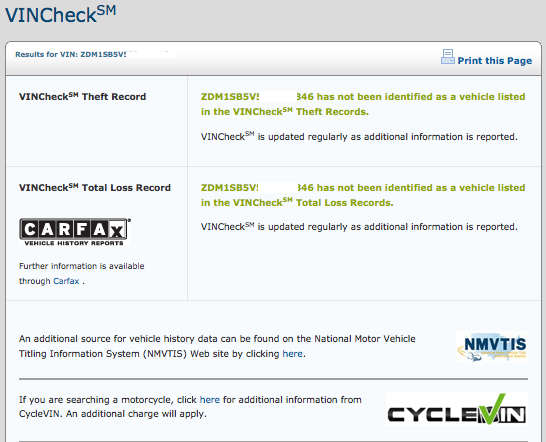
    Stumbled across this site, while looking at some Track Bike posts on Craig’s List. It’s the National Insurance Crime Bureau Running a VIN check on that indicates that the bike has not been reported a stolen or a total loss. More evidence that she’s still out there.. somewhere… waiting to be found.
    Screen Shot 2014-12-12 at 8.09.33 AM

    The Most Outrageous Car I Ever Owned

    It was a 1966 Mustang notchback, powered by a 1970 BOSS 302. In a word, outrageous.

    The year was 1986. Not long out of high school, and starting up my first software “company” (sold a few copies of this and that, but it never got off the ground). I’d been driving some of the worst cars on the planet, and I happened to spy and add in the Mercery News for a 1964 V8 Mustang for $3000. I went to look, and I just HAD to have it!

    The Car

    Following some creative financing (i.e. loan from my Grandparents), I made the deal and brought home this red beast. An early 1966 FORD Mustang (no backup lamps in rear valance):
    64_Mustang_01

    The machine was really, something else. Those that drove it were blown away at it’s raw speed, acceleration, and most notably it’s drum brakes. It’s about as close to a “Fuel Injected Suicide Machine” as I’ve ever helmed. Despite this short-coming; I, nor anyone else that drove it crashed, despite some less than responsible driving this thing was know to induce.

    The Power

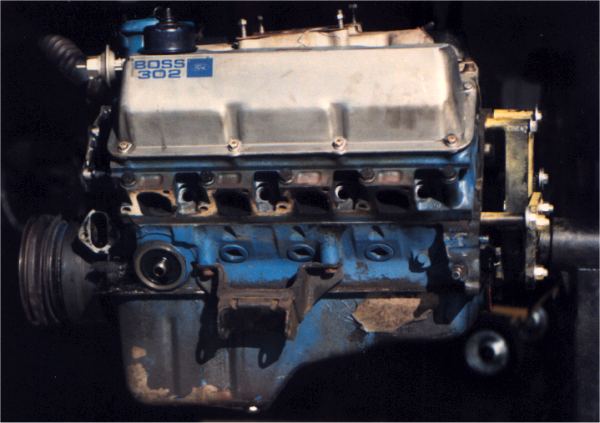
    I’m guessing more than a few of you are saying “No.. it’s not a true BOSS 302, it’s a Windsor 302 with a 4bbl carb, and people are just saying it’s BOSS“. Well, let me assure that it was not some cobbled together 351C + 289W Frankenblock. Really, the only way to know for SURE if you’re dealing with a BOSS 302, is to pull the motor and check the casting numbers. So.. that’s what I did:
    64_Mustang_03

    It’s a true 4-bolt main block with forged crankshaft. Notice the screw-in freeze plugs. That’s the easist way to externally ID an authentic BOSS block. After checking the numbers I found that it was a 1970 “small valve” (and I say that as relative to the 69 “big valve”)
    motor. Here are the specifications (as was common at the time for these special edition cars, the HP was grossly under-rated):

    FORD BOSS 302 Engines
    1969 1970
    Bore: 4.004″
    Stroke: 3.0028″
    Compression: 10:5:1
    Horsepower: 290 BHP @ 5800 RPM
    Torque: 290 ft./lb. @ 4300 RPM
    Redline: 7800 RPM
    Intake Valve: 2.23″ 2.19″
    Exhaust Valve: 1.72″ 1.72″
    Carburation: Holly 780 cfm. 4bbl

    In fact, the valves where so large, the tops of the cylinder blocks were notched at the factory to keep them from hitting the top of the cylinder block at lift. The canting of the valves allowed this little trick to be employed. Another unique aspect to the BOSS 302 engine.

    NOTE:At the time Hot Rod Magazine tested the motor in the 1970 BOSS 302 and found: “It produced a solid 372 hp @ 6,800rpm and 325 lb-ft of torque @ 4,200rpm.”.

    The motor was a screamer. But I knew there was a lot more in there to be extracted, so I started doing some research on how these motors were built for Trans AM Racing. It took a little while but I located an engine builder in Santa Clara named Frey Racing, that specialized in building motors for the Trans AM racing series. These are the guys I wanted to work on my mill.

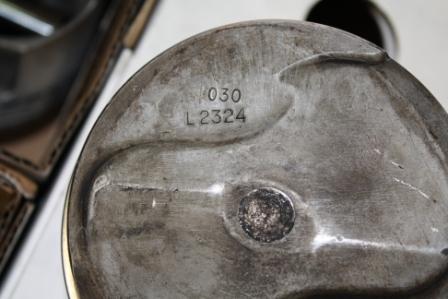
    After discussion, we found that only 1 manufacture still made pistons for this beast; TRW. The downside is that these were true track pistons that would give the motor a 12.5:1 compression ratio. Far too high for the fuel available to peasants. They would have to be milled down. I performed volume calculations on the cylinder head chamber and the piston displacement (these were heavily domed), and we came up with the proper milling to get the motor to the 11:1 ratio.
    64_Mustang_TRW_Piston

    To let them breath, I’d need a new camshaft, and again, not many parts where still available, however I did locate a part in the FORD SVO catalog for the BOSS 302 (which uses a solid-lifter camshaft, requiring frequent valve adjustments). The camshaft featured a .620″ lift with 300 degree of duration and a 92 degree overlap. Idling below 2500 RPM was simply not possible. 🙂

    Finishing off the drivetrain was a close-ratio top-loader 4speed manual transmission (virtually bullet-proof) and a custom 5 link 9″ nodular rear end (it too should have been basically bullet proof but it blew up under the power of the re-worked 302).

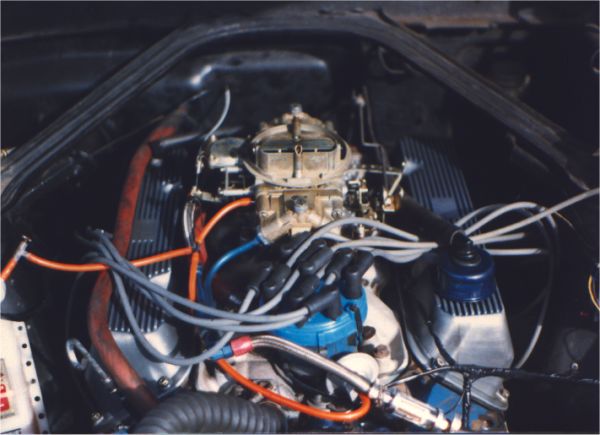
    Now all of this, as many surmised, simply could not fit in the very cramped engine compartment of the early mustangs. Designed to hold a straight 6 engine, when FORD shoe-horned in the 260 and 289 V8’s thee was little room to spare. The massive heads on the BOSS 302 were so much larger, it would seem impossible without cutting back the shock towers, or using a custom built set of headers that would snake through the very limited space. Basically, little on this car, was off the shelf.

    Here is what it looked like back home inside the little notch-back
    64_Mustang_02

    I eventually sold this car in 1989 to purchase a new FORD Mustang GT (red of course). I was sad to see it go, but it was really a very dangerous car to drive, and I just didn’t have the money at the time to resolve the issue of the drum brakes. If I still had this car today, it would be a VERY different story. It would be interesting to see what became of this beast. If I could find the VIN number somewhere, I might be able to track it down, but I suspect those records are long lost. Regardless, I had GREAT memories of cursing, street racing, and other activities best left off the interwebs.
    Upgrading OSX and impacts to Gearman PHP components

    Originally posted June 2013
    Being on the Apple Developers list, I’ve installed the latest edition of the OS and am doing some Beta testing of my apps.

    A few days after upgrading, my Gearman test code stopped working with this error:

    Fatal error: Class ‘GearmanClient’ not found in connect.class.php on line 35

    That triggered a slight bit of panic, however I knew my libraries were mostly in tact as I was able to start my gearmand service without a problem at all. Hoping against odds I decided to simply run a new make and install of the Gearman PHP components.
    UPDATE: If you do not have the latest Gearman libraries for PHP, they are located here: http://pecl.php.net/package/gearman I recommend you download the latest version and build from that.. My page on building PHP Gearman on OSX is located [HERE]

    I cd’d to the directory where I’d built my Gearman PHP libraries a few days prior:

    david$ cd /usr/local/gearman-1.1.2

    NOTE: If you have not recently built PHP Gearman modules, this page [ HERE ] detailed getting to the next step.

    Then I ran a make and a make install in the directory.

    gearman-1.1.1 david$ make
    /bin/sh /usr/local/gearman-1.1.2/libtool –mode=install cp ./gearman.la /usr/local/gearman-1.1.2/modules
    cp ./.libs/gearman.so /usr/local/gearman-1.1.2/modules/gearman.so
    cp ./.libs/gearman.lai /usr/local/gearman-1.1.2/modules/gearman.la
    […]
    Build complete.
    Don’t forget to run ‘make test’.

    gearman-1.1.1 david$ sudo make install
    /bin/sh /usr/local/gearman-1.1.2/libtool –mode=install cp ./gearman.la /usr/local/gearman-1.1.2/modules
    cp ./.libs/gearman.so /usr/local/gearman-1.1.2/modules/gearman.so
    cp ./.libs/gearman.lai /usr/local/gearman-1.1.2/modules/gearman.la
    ———————————————————————-
    Libraries have been installed in:
    /usr/local/gearman-1.1.2/modules

    […]
    ———————————————————————-
    Installing shared extensions: /usr/lib/php/extensions/no-debug-non-zts-20090626/

    This worked perfectly, and following a RE-CREATION of my /etc/php.ini file (which I also lost), I was good to go!

    include_path=.:/mnt/crawler
    extension=”gearman.so”

    Viola.. Gearman development back underway!!

    Installing Gearman PHP components for OSX

    Locating the latest PHP Components

    The Gearman.org page has links to the PHP code on the Downloads page, however the link is very old. The latest code is located at: http://pecl.php.net/package/gearman.

    As of 23-OCT-2014, the current stable version is gearman-1.1.2.

    I like to drop these files in my /opt directory, and work on them there and unball the package.

    mv ~/Downloads/gearman-1.1.2.tgz /opt/.
    tar xvzf gearman-1.0.2.tgz
    cd gearman-1.0.2

    Configuring for Build

    The following commands prepared the PHP package to build on OSX Yosemite (10.10).

    phpize
    Configuring for:
    PHP Api Version: 20121113
    Zend Module Api No: 20121212
    Zend Extension Api No: 220121212

    ./configure
    checking for grep that handles long lines and -e… /usr/bin/grep
    checking for egrep… /usr/bin/grep -E
    checking for a sed that does not truncate output… /usr/bin/sed
    […]
    appending configuration tag “CXX” to libtool
    configure: creating ./config.status
    config.status: creating config.h

    Building the Library

    Next step is to run the compile and install the built objects:

    make
    /bin/sh /opt/gearman-1.1.2/libtool –mode=compile cc -I. -I/opt/gearman-1.1.2 -DPHP_ATOM_INC -I/opt/gearman-1.1.2/include -I/opt/gearman-1.1.2/main -I/opt/gearman-1.1.2 -I/usr/include/php -I/usr/include/php/main -I/usr/include/php/TSRM -I/usr/include/php/Zend -I/usr/include/php/ext -I/usr/include/php/ext/date/lib -I/usr/local/include -I/usr/local/include -DHAVE_CONFIG_H -g -O2 -Wall -c /opt/gearman-1.1.2/php_gearman.c -o php_gearman.lo
    mkdir .libs
    […]
    Build complete.
    Don’t forget to run ‘make test’.

    make install
    Installing shared extensions: /usr/lib/php/extensions/no-debug-non-zts-20121212/

    Telling PHP about gearman

    You will need to identify your relevant php.ini file, and edit it, letting PHP know where the library file are located.

    Typically under OSX, this file does not exist, and it must be created.

    Edit the file:

    vi /etc/php.ini

    Either way, make sure these two lines are in the file:

    Add these lines:

    include_path=.:/mnt/crawler
    extension=gearman.so

    DONE

    At this point you should be able to reference Gearman library in your PHP code.

    These lines of code, should not throw an error:

    $client = new GearmanClient(); // instance
    $worker = new GearmanWorker(); // instance

    node.js — using cheerio.js to find all script elements in a page

    Finding <script> nodes in a page

    Why.. why? Just because it’s useful when pages had dynamic content in javascript. Is there a way to subsequently evaluate the javascript parsed.. that’s for another article, but for now, I’m going to assume you have node.js installed, and you have at least come idea of how to use it.

    The idea

    Finding all the <script> nodes in an HTML page, rendered using

    ‘request.get()’

    .

    In the example, url (in this case www.amazon.com) is resolved and the HTML loaded. The loaded HTML is then passed to cheerio using this expression:

    var $ = cheerio.load(html,{ normalizeWhitespace: false, xmlMode: false, decodeEntities: true });

    .. then iterated upon using the .each( ..) object method.

    $(‘script’).each( function () {…

    In the very simple example the follows the script is logged to the console (STDOUT) for display. In an more advanced and useful implementation, the returned javascript would be interacted with, parsed or some other action taken.

    The Script

    // MAKE REQUIREMENTS
    var request = require(‘request’);
    var cheerio = require(‘cheerio’);

    // Local Vars
    var url = ‘https://www.amazon.com’;

    // Define the requests default params
    var request = request.defaults({
    jar: true,
    headers: { ‘User-Agent’: ‘Mozilla/5.0 (Macintosh; Intel Mac OS X 10.8; rv:24.0) Gecko/20100101 Firefox/24.0’ },
    })

    // execute request and parse all the javascript blocks
    request(formUrl, function (error, response, html) {
    if (!error && response.statusCode == 200) {

    // load the html into cheerio
    var $ = cheerio.load(html,{ normalizeWhitespace: false, xmlMode: false, decodeEntities: true });

    // iterate on all of the JS blocks in the page
    $(‘script’).each( function () {
    console.log(‘JS: %s’,$(this).text());
    });
    }
    else {
    console.log(‘ERR: %j\t%j’,error,response.statusCode);
    }
    });

    End

    node.js — parse page title (simple example)

    node.js — Toolkit of the Code Gods!!

    Or, so some would have you believe. Is it pretty awesome, YES. I’m I sold on it yet, NO. But it’s growing on me.

    Since parsing webpages has been my business for nearly 15 years now, I’ve used a lot of tools and strategies, but it was only recently I decided to try out node.js for a few of my projects.

    Starting with node.js

    If you are new to node.js, go check out these URLS here. They more than successfully cover getting started with node.

    The goal here is to answer a question that for some reason eluded my best searches for code examples. I thought I had the syntax dialed but still saw some strange responses. This page will show you definitively how to get a page title. Every time (every time the page loads at least).

    How I parsed the title off a page

    Here is how I did it, using cheerio and request:

    /*
    * MAKE REQUIREMENTS
    */
    var request = require(‘request’);
    var cheerio = require(‘cheerio’);

    /*
    * Handle Commandline Params
    */
    var url = process.argv[2];

    /*
    * Local Vars
    */
    // Define the requests default params
    var request = request.defaults({
    headers: { ‘User-Agent’: ‘Mozilla/5.0 (Macintosh; Intel Mac OS X 10.8; rv:24.0) Gecko/20100101 Firefox/24.0’ },
    })

    // DO THE WORK!!
    request(url, function (error, response, html) {
    if (!error && response.statusCode == 200) {
    var $ = cheerio.load(html,{ normalizeWhitespace: true, decodeEntities: true });
    var title = $(‘title’).text();
    console.log(“TITLE: %j”,title);
    }
    else {
    console.log(‘ERR: %j\t%j’,error,response.statusCode);
    }
    });

    Running the example from the command line looks like this (I’m using the 1st available parameter to pass my URL, hard-coding is for fools):

    node get.title.js http://www.yahoo.com
    TITLE: “Yahoo”

    Conclusion

    The reason I’ve posted this blog, is that this specific node.js cheerio syntax was not clearly specd:

    var title = $(‘title’).text();

    Enjoy toying around with node.js to parse your super-awesome pages.

    Patching OSX against the ‘ShellShock’ exploit

    While everyone waits for Apple to release a patch for the ShellShock bug, one of the maintainers of BASH assisted with detailing out how to patch BASH (and SH) on OSX to prevent the Vuln. This comes from the helpful Apple section of Stack Exchange.

    NOTE: To perform this patch you MUST be granted sudo privs on your machine — if not you won’t be able to move the new files into the required location.

    Testing to see if you are vulnerable

    First things first.. see if you are vulnerable by checking your version of BASH. The desired version is this; GNU bash, version 3.2.54:
    Screen Shot 2014-09-29 at 8.05.00 AM

    If you are not seeing that, then you should check to see if you have the vuln. When I checked my updated version of OX Mavericks, I was on Bash 3.2.52 and it was vulnerable to the exploit.

    If you see the word ‘vulnerable’ when you run this, your at risk!
    env x='() { :;}; echo vulnerable' bash -c 'echo hello'

    This is a PASS (OK):
    env x='() { :;}; echo vulnerable' bash -c 'echo hello'
    hello

    This is a FAIL:
    env x='() { :;}; echo vulnerable' bash -c 'echo hello'
    vulnerable
    hello

    Time to get down to patching

    This process is going to require you to do some command line work, namely compiling bash and replacing the bad versions with the good ones. If you are NOT comfortable do that.. best to wait for Apple to create the installable patch. If your geek level is above basic, continue forward:

    First, agree to using xcodebuild
    If you have no run xcodebuild, you are going to need to run it, then agree to the terms, before you’ll be able to finish this build. I recommend you run it NOW and get that out of the way:
    xcodebuild

    Set environment to NOT auto-include
    This capability is part of the reason the exploit exists. It’s highly recommend you turn this on before starting the build. Ignore at your own peril. This parameter is used in the build stage for two patches:

    export ADD_IMPORT_FUNCTIONS_PATCH=YES

    Make a place to build the new objects
    I dropped everything into the directory ‘new-bash’… and did it thus. NOTE: I am not using sudo, (yet)

    mkdir new-bash

    Download base-92 source
    Move to that directory and download the the bash-92 source using good old curl and extract the compressed tarball:

    cd new-bash
    curl https://opensource.apple.com/tarballs/bash/bash-92.tar.gz | tar zxf -

    Get the patch packages next
    CD to the source directory for bash, and then download 2 patch packages:

    cd bash-92/bash-3.2
    curl https://ftp.gnu.org/pub/gnu/bash/bash-3.2-patches/bash32-052 | patch -p0
    curl https://ftp.gnu.org/pub/gnu/bash/bash-3.2-patches/bash32-053 | patch -p0

    Start creating the patches
    Execute these two commands, in order two build and apply the two patches:

    [ "$ADD_IMPORT_FUNCTIONS_PATCH" == "YES" ] && curl http://alblue.bandlem.com/import_functions.patch | patch -p0
    [ "$ADD_IMPORT_FUNCTIONS_PATCH" == "YES" ] || curl https://ftp.gnu.org/pub/gnu/bash/bash-3.2-patches/bash32-054 | patch -p0

    Start building!
    Traverse back up the tree and start running the builds. It is recommended that you NOT run xcodebuild at this point. Doing so could enable root powers in the shell and that is something that you certainly do not want!

    xcodebuild

    OK.. PATCH MADE!
    At this point you have a new bash and sh object build to replace the exploitable ones. Backup your old versions, move these into place and you are now safe.

    # Test your versions:
    build/Release/bash --version # you should see "version 3.2.54(1)-release"
    build/Release/sh --version # you should see "version 3.2.54(1)-release"

    # move the files into location
    sudo mv /bin/bash /bin/bash.BAD
    sudo mv /bin/sh /bin/sh.BAD
    sudo mv build/Release/bash /bin
    sudo mv build/Release/sh /bin

    Now clean up the local mess
    Now the local directory where you build bash is no longer needed. I don’t like to leave cruft around on my system that creates a confusing environment. Removing the source tree is my last task. You can leave it if you like, but if I need to do this again I’m going to perform a full fresh rebuild, so this will not be re-used.

    cd
    rm -rf new-bash

    YOU ARE DONE!

    BIG HUGE THANKS TO ALL THAT DID THE REAL WORK HERE.. the people maintaining bash, the people that post awesome solutions to StackExchange and all the other fantastic resources on the net!