Category Archives: Entrepreneurship

Installing PhantomJS 2.1.1 on AWS (CentOS)

phantomjs-logoIt’s a gamble to do this, and according to the build script it’s going to take a long time to complete the compile / install of Phantom 2.1.1.

Note: If you are looking for instructions on building for Ubuntu, the steps are different. I’ve documented that process in this post: Installing PhantomJS 2.1.1 on Ubuntu.

Step 1 — install required dependencies

You may or may not have most of these on your AWS / CentOS system. I found that most of these were required to start the PhantomJS build.Here are the ones that I’ve confirmed I needed:

  • autoconf
  • pkgconfig.x86_64
  • python26-pyudev.noarch
  • python26-twisted.noarch
  • sip.x86_64
  • python27-pyudev.noarch
  • python27-twisted.noarch
  • gcc
  • flex
  • bison
  • xorg-x11-server-Xorg.x86_64
  • xorg-x11-server-devel.x86_64
  • xorg-x11-utils.x86_64
  • xorg-x11-proto-devel.noarch
  • sqlite-tcl.x86_64
  • sqlite-devel.x86_64
  • openssl.x86_64
  • crypto-utils.x86_64
  • openssl-devel.x86_64
  • libfontenc.x86_64
  • libfontenc-devel.x86_64
  • fontconfig.x86_64
  • fontconfig-devel.x86_64
  • libicu-devel.x86_64
  • freetype-devel.x86_64
  • libpng-devel.x86_64
  • libjpeg-turbo-devel.x86_64
  • libXext-devel.x86_64
  • libxcb-devel.x86_64
  • xcb-util.x86_64

Installing the packages went smoothly:

sudo yum install autoconf pkgconfig.x86_64 python26-pyudev.noarch python26-twisted.noarch sip.x86_64 python27-pyudev.noarch python27-twisted.noarch gcc flex bison xorg-x11-server-Xorg.x86_64 xorg-x11-server-devel.x86_64 xorg-x11-utils.x86_64 xorg-x11-proto-devel.noarch sqlite-tcl.x86_64 sqlite-devel.x86_64 openssl.x86_64 crypto-utils.x86_64 openssl-devel.x86_64 libfontenc.x86_64 libfontenc-devel.x86_64 fontconfig.x86_64 fontconfig-devel.x86_64 libicu-devel.x86_64 freetype-devel.x86_64 libpng-devel.x86_64 libjpeg-turbo-devel.x86_64 libXext-devel.x86_64 libxcb-devel.x86_64 xcb-util.x86_64

Step 2 — clone the Git repo to local drive:

git clone git://github.com/ariya/phantomjs.git
Cloning into ‘phantomjs’…
remote: Counting objects: 63695, done.
remote: Compressing objects: 100% (37/37), done.
remote: Total 63695 (delta 16), reused 0 (delta 0), pack-reused 63657
Receiving objects: 100% (63695/63695), 129.05 MiB | 4.08 MiB/s, done.
Resolving deltas: 100% (31013/31013), done.
Checking connectivity… done.

cd phantomjs

git checkout 2.1.1
Note: checking out ‘2.1.1’.
[…]
HEAD is now at d9cda3d… Set version to “2.1.1”

git submodule init
Submodule ‘3rdparty-win’ (https://github.com/Vitallium/phantomjs-3rdparty-win.git) registered for path ‘src/qt/3rdparty’
Submodule ‘qtbase’ (https://github.com/Vitallium/qtbase.git) registered for path ‘src/qt/qtbase’
Submodule ‘qtwebkit’ (https://github.com/Vitallium/qtwebkit.git) registered for path ‘src/qt/qtwebkit’

git submodule update
Cloning into ‘src/qt/3rdparty’…
Cloning into ‘src/qt/qtbase’…
Cloning into ‘src/qt/qtwebkit’…

Step 3 — Hack the QT build

It seemed that I needed to set some different flags for the qtbase build. It was not clear to me if this could be done with the build.py options, so I hacked the qt/qtbase/configure script.

vi src/qt/qtbase/configure

First off, I changed the settings of these two values near the top of the config file:

Then commented out part of the section around Werror, so that the build would not treat warnings as errors. The C++ macro options in the code will generate A LOT of errors, most of them from the flags defined in build.py. I tried the route of disabling those flags and ended up with more errors and more issues.. so changing the flags in the config was my next option:

[…]
#CFG_WERROR=auto
CFG_WERROR=no
[…]
#CFG_DEV=no
CFG_DEV=yes
[…]
warnings-are-errors|Werror)
# if [ “$VAL” = “yes” ] || [ “$VAL” = “no” ]; then
# CFG_WERROR=”$VAL”
# else
UNKNOWN_OPT=yes
# fi
;;
[…]

Step 4 — Build!

python build.py
—————————————-
WARNING
—————————————-

Building PhantomJS from source takes a very long time, anywhere from 30 minutes
to several hours (depending on the machine configuration). It is recommended to
use the premade binary packages on supported operating systems.

For details, please go the the web site: http://phantomjs.org/download.html.

Do you want to continue (Y/n)? Y

Step 5 — check the binary

Once the build has completed, you will find the binary to be built in the local directory bin/

ls -l bin/phantomjs
-rwxr-xr-x 1 root root 56736434 Feb 5 11:33 /usr/sbin/phantomjs

To complete the installation, you’ll need to replace the current phantomjs binary with the new one. To find the location if your current binary (if you have one), this should work:

whereis phantomjs
phantomjs: /usr/bin/phantomjs

Copy the new binary to that location and verify version:

cp bin/phantomjs /usr/bin/phantomjs
cp: overwrite ‘/usr/bin/phantomjs’? y

phantomjs -v
2.1.1

YOU ARE DONE!! It was just that easy

Social Media Click-farming — (New Republic Article)

Screen Shot 2015-04-21 at 8.09.22 AMA new article at the New Republic caught my eye this morning. It is about Facebook (and other social media) click-farming.

The Bot Bubble (New Republic)

I encourage everyone to read the entire article. Yes, it will require some time and attention, but I found it very informative.

For those without the time, or inclination to read it, here are some of my takeaways:

  • Facebook Like Farms are real business. The one in the article discussed is as noted, more a ‘start-up’ type business than the old spam-factories of days mostly gone by.
  • Paying Facebook to boost your reach can be dangerous and destructive to your marketing efforts. One case study explains how a music company basically destroyed their accounts usability by paying for increased traffic from Facebook itself.
  • Facebook plans to further dilute organic exposure of posts, specifically from business pages. Currently that organic exposure is approximately 6%; unless you pay Facebook for more. But that comes with it’s own pitfalls.
  • Marketing on Facebook is going to become more and more difficult for small business to effectively use Facebook to market and grew community. This gives me serious pause to a current initiative that is requiring significant development time in an attempt to integrate with Facebook.

Is Google looking at a rough 2015?

Screen Shot 2014-12-18 at 10.09.15 AMInteresting read about possibly looming troubles for Google. I will say that in the past I used Google to look for products, but most of the items I found that way were from shaky looking distributors, or links to Amazon, where I found they had a very competitive price.

Perception is reality, my personal perception is that Amazon is a trustworthy enough for me to buy from them. Over the last few months I’ve simply quit Googling for products and checked Amazon first, and only using Google if I felt that Amazon didn’t offer the product or the price was more than I wanted to pay.


Google’s stocks have taken a dive recently. It was a rocky 2014 but the last month has seen a nose dive in stock trading value:
Screen Shot 2014-12-18 at 10.12.44 AM

That’s not all. As the Mercury News (headquartered in Silicon Valley) reported last month, FireFox has dropped Google as it’s default search engine:
http://www.mercurynews.com/business/ci_26971412/firefox-drops-google-yahoo-default-search-engine

Here is a link to an opinion piece on LinkedIn that discusses this further:

https://www.linkedin.com/pulse/googles-very-rough-transition-nicholas

Startup Launch – thoughts

Big things happening on July 13!
Banner.Vert.web1
Bootstrapping a start-up is hard, expensive work. But when you hear the call, it simply must be done. This was the case with OutspokenNinja. Balancing life and business is sometimes a tricky tight-rope affair. I believe it can only be done with an understanding and supporting partnership with the family. I’m blessed to have such a partnership.

For those embarking on the road to starting up, or even re-inventing your business, having buy-in from your family is critical, for they are the true support system when the road gets bumpy, and it will.

I’m looking forward to sharing more about this experience, once we’ve come out of semi-stealth mode, so I hope you follow me and the team on this new adventure.

Ciao!

PHP array_shift() not a function for general use

While looking at metrics an monitoring the processing of a CBMHDHS*, I noticed that the active job queue would become quiescent for minutes at a time. Most markedly with the one specific tasklist. My gut told me it was an issue with the way PHP was handling my simple list (700,000 items give or take). So some performance testing was required. What I found was astonishing. PHP’s array_shift is horribly inefficient.

Here is an example to demonstrate this.

When shifting 2500 items (one at a time) off the array (list), it can take 30 or more seconds. Keep in mind this is all in memory! This test is with only 108,000 items:


2013-08-16 18:21:06 # STARTING ARRAY_SHIFT TEST: Q:108581
2013-08-16 18:21:43 # DONE removed 2500 Q:106081

It took 37 seconds, to be exact. To me, that seemed like a long time. Doing a little research I found that when you rewind an array to it’s beginning (using PHP), one of it’s side effects is that it returns the element at that pointer. Reset looks like a scary operation. It does not ‘reset’ the array in the sense of flushing it out, it just resets the pointer to the top. At any rate. the code looked like this:


$element = reset($array);

So, in theory one could use this to get the first element off an array automatically, without removing it. OK, but shift_array does this ANY removes the element. So this is not really the same action. However… (and you know there is a point there), there is another PHP function with a useful side effect. The ‘key() function‘ that returns the key value of at the current pointer (which in this case is the same location we returned the element above). It looks like this:


$key = key($array);

Now, with those two lines of code I have the element (value) and the key at the top of the array. So this is 2 lines of code where array_shift() is just one.. but we’re not even done yet.. we have to perform the most important part (for this exercise) and remove the element. So.. that’s a 3rd line of code like this, right?


unset($array[$key]);

OK.. so taking a line of code right out of the processor, there is a direct comparison. array_shift on the left, reset, key, unset on the right.

Array Shift method Array Reset, Key and Unset method
$key = array_shift($this->QUEUE)) {
$payload = $this->DATA[$key];
$appkey  = reset($this->QUEUE);
$payload = $this->DATA[$appkey];
$key     =  key($this->QUEUE);
unset($this->QUEUE[$key]);

What I didn’t expect to find is how dramatically FASTER the more complex (looking) code is. In The numbers don’t lie.. see for yourself.

Array Shift method.

Total time for 2500 items removed is 37 seconds:


2013-08-16 18:21:06 # STARTING ARRAY_SHIFT TEST: Q:108581
2013-08-16 18:21:43 # DONE removed 2500 Q:106081

Array Reset, Key + Unset method.

Total time for 2500 items removed is <1 second:


2013-08-16 18:21:46 # STARTING ARRAY_RESET TEST: Q:108581
2013-08-16 18:21:46 # DONE removed 2500 Q:106081

Those numbers include getting the payload data out of the 2nd array.

Mind blowing in my opinion. It’s not even a contest. Writing your own is at least 15 times faster than PHP’s native operation, that for all intents, accomplishes the same objective.

The point of all this?

If you are seeing an inexplicable slowdown somewhere in PHP.. and you can narrow it down to 1-2 operations… it’s probably worth your while to try to do it another way, even if that way looks more complex!

I could not believe this when I tried it. When I implement this in the processor, I should be able to remove hours of useless waiting to ‘shift’ items off the list. At some point I’d hope Zend would fix this. Keep in mind I ran this test on PHP 5.5.3 (the latest stable release I could get my mitts on, at the time).

*Cloud Based Massivly Horizontal Distributed Harvesting System

Battling with WiFi performance

It’s been a challenge the last few days to keep a good solid WiFi signal in our office, despite the device being only 20′ feet away with not even a door for obstruction.

Distance to wireless device

The most recent wireless performance test using DSL reports is here:

To verify if it’s the device, something upstream, or a wireless performance issue (look at the signal strength, it’s as good as it gets),

I jacked straight into the router and re-ran the test:

That’s a massive drop in performance for WiFi. Clearly not our internet on-ramp.

So far, my only guess is that there is a transient amount of interference from some device nearby. We’re not running anything in our office or shop that should cause this sort of drop in performance. We are located in a light industrial environment, so there could be some large electrical loads causing radio noise. The question is, how do we find it and how do we mitigate it?

JIRA – tracking projects in an Agile way

With the kick-off of my new Start-Up Company (this is #8 for me, since I started my first company in 1984, Bay Auto Electronics), after taking 10 years to pursue some potentially lucrative (only time will tell if those efforts ever pay off, I’m not holding my breath) employment opportunities in the Internet Security / Anti-Fraud sector.

The short term plan is for that work to continue on a project consulting basis for the remainder of the year (that is the plan.. always subject to change), however in addition to that I’ve taken on two additional clients with very diverse project needs. Those needs need to be carefully manged and time properly allocated to each of these clients and their projects.

In the past, I’ve had adequate success using Work Diary spreadsheets to call out time per project and how it was spent within each of these projects. I continue to do that now. However I want a more useful, powerful and visual tool to track efforts, tasks, sprints, milestones, etc. And in addition to that I want to expose that information to each of my clients so they can get a status update on their projects near-real time, any time, day or night, and also help project their expenses as the projects move forwards.

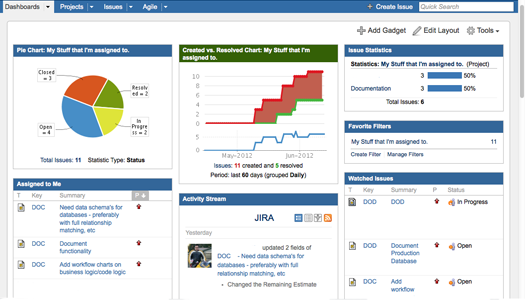
To make this goal a reality, I have decided to Trail out a tool recently implemented at one of my former employers. It’s name is JIRA. And so far, having only used it there for 30 days or so, I’m impressed. Here is a screen shot of my current JIRA Dashboard (projects, names etc changed to protect the innocent, etc. etc. etc.).

My Sample JIRA Project Dashboard

All that said, and after communicating with one of the helpful JIRA engineers to make sure this tool would do what I want, and provide information for my clients as well, all on one system I host, the decision was made to move forward to the project!

To get further feet-wet, I’m first downloading the distributions for both MAC and LINUX. Initially I will be installing this on a MAC workstation to get the project defines, users entered etc. To test out the waters and learn on a test environment before cutting it loose in the wild. Eventually this will roll out with a public facing (for those with the right credentials) interface for project tracking. One of the first projects that I’ll be defining in my private installation will my forthcoming programming book. After 20+ years as a professional developer, trainer, sales engineer, IT Director and Entrepreneur, there are unique perspectives I can bring to the practice of programming. Keep any eye out for announcements on this by September! 🙂

Getting JIRA – downloading distributions

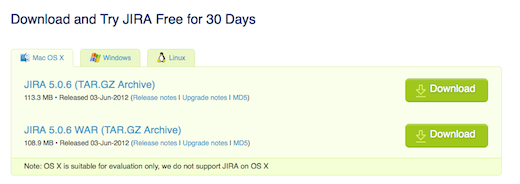
The current distributions, as of this blog, are located here:
http://www.atlassian.com/software/jira/download

JIRA Download Page

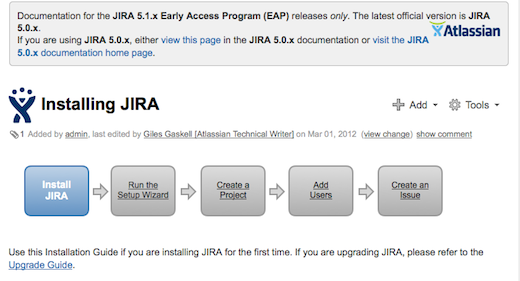
Installation Instructions are found here, a Confluence site (another Atlassian product):

https://confluence.atlassian.com/display/JIRA/Installing+JIRA

Installing JIRA Instructions

NOTE: – regarding OSX
As noted in the pages, installing on OSX is only suitable for evaluation purposes. That’s OK, not a big issue, I’ll have hardware available to host it in the next two weeks. Until then, running a local evaluation will be just fine. Unfortunate that the product can support Windows, but it’s not a surprising point since Apple has shuttered it’s proper Server production lines and is no only shipping MacMini servers and those horrendous beasts know as MAC Pro workstations. There IS A LOT to be said for 19″ rack compatible system, when it comes to REAL CORPORATE operations

Installing on MAC (in this case a laptop of all things)

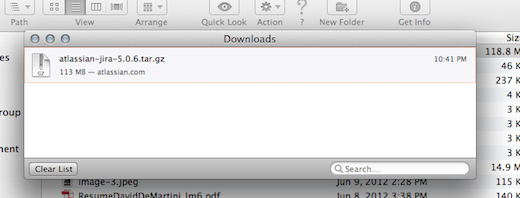
I selected this package named: JIRA 5.0.6 (TAR.GZ Archive).

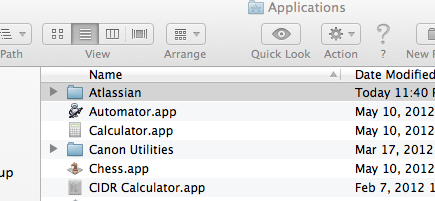
Instead of just creating more muck in my Downloads directory, I created a dedicates Atlassian directory under Applications.

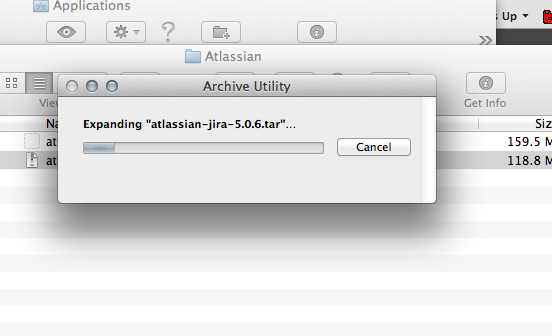
I moved the file there and ran the extraction:

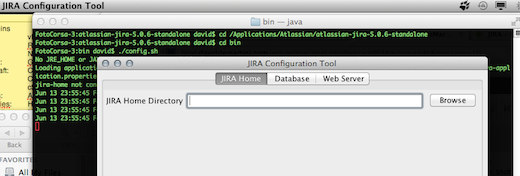
First order of business was setting my JIRA Home Directory. The instructions are found here at this link:
https://confluence.atlassian.com/display/JIRA050/Setting+your+JIRA+Home+Directory.

I chose to use the LINUX configuration script located at bin/config.sh to get JIRA setup. This I ran from a console:

You must also setup an environmen var that points to the same directory you configured using the JAVA Config dialog. Since I use the ‘bash’ shell (please, no need to comment on the virtues of ksh, sh, bash.. whatever… I’m not going to listen), I edited my .bash_profile adding these two lines:


## Required Element for JIRA
export JIRA_HOME=/Applications/Atlassian/atlassian-jira-5.0.6-standalone

With that little step completed, I returned to the bin/ directory where I installed JIRA and lit up the night:

FotoCorsa-3:bin david$ ./start-jira.sh

To run JIRA in the foreground, start the server with start-jira.sh -fg
executing as current user
                .....
          .... .NMMMD.  ...
        .8MMM.  $MMN,..~MMMO.
        .?MMM.         .MMM?.

     OMMMMZ.           .,NMMMN~
     .IMMMMMM. .NMMMN. .MMMMMN,
       ,MMMMMM$..3MD..ZMMMMMM.
        =NMMMMMM,. .,MMMMMMD.
         .MMMMMMMM8MMMMMMM,
           .ONMMMMMMMMMMZ.
             ,NMMMMMMM8.
            .:,.$MMMMMMM
          .IMMMM..NMMMMMD.
         .8MMMMM:  :NMMMMN.
         .MMMMMM.   .MMMMM~.
         .MMMMMN    .MMMMM?.

      Atlassian JIRA
      Version : 5.0.6
                  
Detecting JVM PermGen support...
PermGen switch is supported. Setting to 256m

If you encounter issues starting or stopping JIRA, please see the Troubleshooting guide at http://confluence.atlassian.com/display/JIRA/Installation+Troubleshooting+Guide

Using JIRA_HOME:       /Applications/Atlassian/atlassian-jira-5.0.6-standalone

Server startup logs are located in /Applications/Atlassian/atlassian-jira-5.0.6-standalone/logs/catalina.out
Using CATALINA_BASE:   /Applications/Atlassian/atlassian-jira-5.0.6-standalone
Using CATALINA_HOME:   /Applications/Atlassian/atlassian-jira-5.0.6-standalone
Using CATALINA_TMPDIR: /Applications/Atlassian/atlassian-jira-5.0.6-standalone/temp
Using JRE_HOME:        /System/Library/Frameworks/JavaVM.framework/Versions/CurrentJDK/Home
Using CLASSPATH:       /Applications/Atlassian/atlassian-jira-5.0.6-standalone/bin/bootstrap.jar
Using CATALINA_PID:    /Applications/Atlassian/atlassian-jira-5.0.6-standalone/work/catalina.pid

Opening up JIRA for the first time..

Having started JIRA on my localbox, I connected to port 8080 (the one I used as the default in the installation) and started to complete the setup:

It turns out I’ve made some sort of configuration/installation errors that was not called out in the documentation. Such is the story of software installation. I’ll have to get this one sorted out before continuing on.

JIRA startup error.. this might take a little time to sort out my installation error.

Creating a dedicated JIRA user

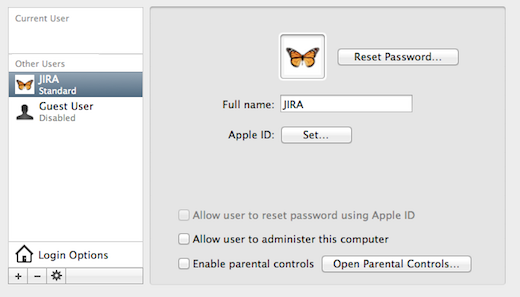
Performing a little re-wind, I decided to create separate user account, that can be the JIRA home. This was suggested in the docs but I just didn’t grok it at the time (it’s after midnight.. some slack should be afforded).

Created dedicated JIRA user.

Now.. back to the environment files… first I’m going to log into the new user and create a place for JIRA, copy it’s path, then update the configs.

I logged in to the new user, via the terminal window, then edited (creates actually) the .bash_profile for the user setting the following as the JIRA environment:


jira$ vi .bash_profile

## Required Element for JIRA
export JIRA_HOME=/Users/jira/jira-home

Next, I had to sort out one permissions issue in the Applications directory, and that had to do with the permissions to updates config files in the Altassian directory. To do this, I switched to my root user (su –), moved to the install directory and executed this command to allow group write at all the directory levels for the group user (in this case ‘staff’).


su
Password:
sh-3.2# pwd
/Applications/Atlassian/atlassian-jira-5.0.6-standalone
sh-3.2# chmod -R 775 *

I closed that terminal window, then logged my desktop into my new jira user and re-launched the configuration program (see above if you’ve forgotten how that is started up), and reset the home directory:

Re-Setting the home directory

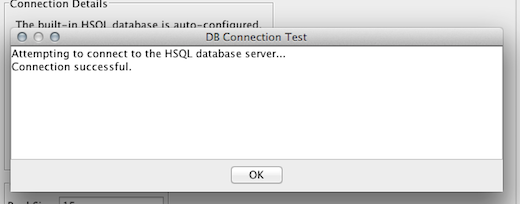
Tested the connection:

Testing DB connection.

Set the ports I wanted to use for JIRA (defaults shown):

Checking / Setting ports

Then kicked off JIRA again, but this time as the jira user. This time it stuck, took and started:

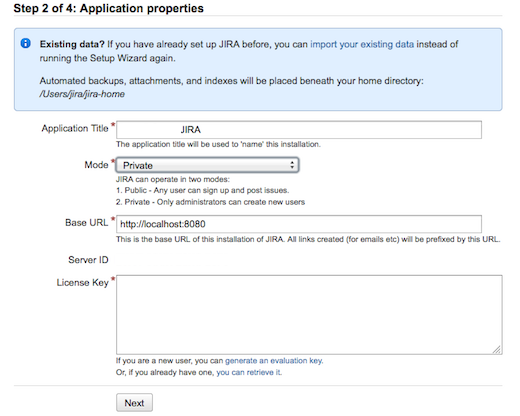
Next step 2 of the installation is presented, and the requisite settings defined. I’m going to run in PRIVATE mode, as I don’t want to have people attempt to add users to my JIRA without my permissions. That sounds like a licensing seat disaster in the making….

Step 2 of Setup.

NOTE: You will need to sign up and get an evaluation license key to go any further. Since I intend to purchase the product in the new future, unless the evaluation determines another course of action is required, this is a non-issue for me. You may be hesitant to do so, for some reason, one I won’t guess, but if so, be aware of that before digging yourself too deep a hole.

Two more quick steps follow, such as setting up your primary Admin User (sorry, NOT going to show you my settings there), and one last step confirming the setup was successful, before being shuttled over to your new Dashboard!

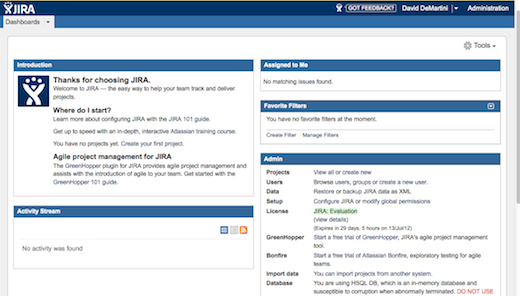
Dashboard Login

And.. VIOLA!!! Notice the red warning at the far lowest left, the Evaluation DB attached is IN MEMORY only and most likely will be wrecked on a power fail or other shutdown. This could be a big issue on a laptop, wouldn’t you say? Regardless, this IS an evaluation after all…. so… next steps tomorrow will be to see how this all holds up over the next week when I’m back in CA and can install this on my office’s internal servers.

Running, living, breathing JIRA!

MORE TO COME….

Creating a Logo – birth of a brand

With the impending launch of my new enterprise, it’s time to get down to the business of creating a logo. This article will document the process, good or bad, success for fail, the steps I take will be detailed here for your amusement, edification or horror. You be the judge.

STEP 1 – Get the idea formulated.

Get get started, sketch out a general idea for the logo. Since this I am still a pre-launch state, that drawing will remain a work of the readers imagination. I will tell you though, that after a few iterations I knew what I wanted to go after, and what base information I needed.

First I decided that one of the components I needed for this logo project was an image of the crescent moon. This was of course very easy to locate on the web. There is no lack of such images.

Google search for some sample images

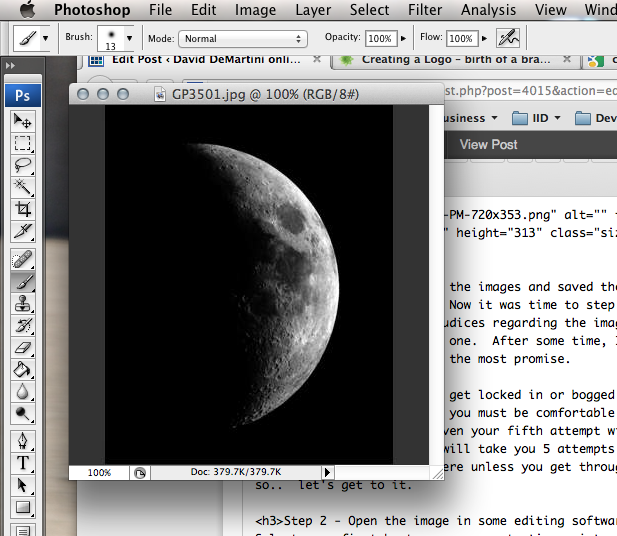
I decided on a sampling of the images and saved them off to a special directory on my computer. Now it was time to step away for a few minutes, clear my mind and and prejudices regarding the images, and then re-open the directory and look at each one. After some time, I selected one of the images that seemed to have the most promise.

Now, it’s important to NOT get locked in or bogged down on one image. Don’t shoot for perfection here, you must be comfortable with the concept that your first, seconds, or maybe even your fifth attempt will be abject failure. It’s a process, and if it will take you 5 attempts to get it right, you’ll never get there unless you get through those first four… so.. let’s get to it.

Step 2 – Open and adjust image to suit

Select your first best guess as a starting point and open the image in some photo editing software. My choice is Photoshop:

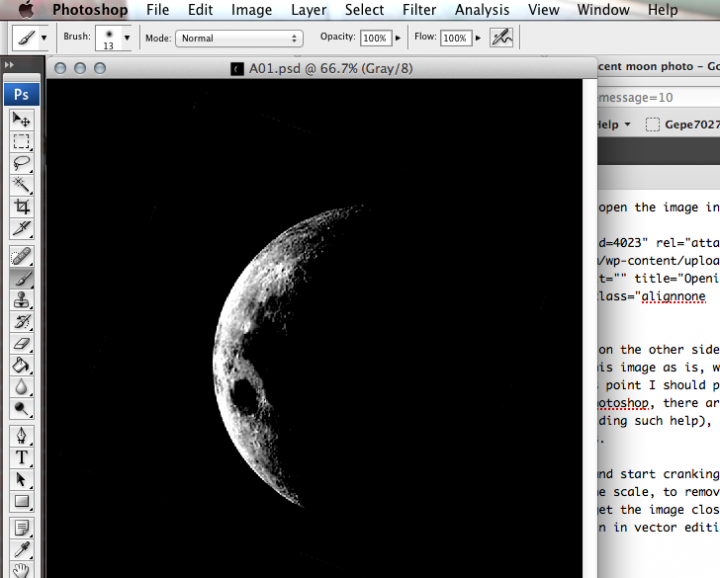
The goal I have in mind, requires the crescent to be on the other side of the logo, and the curve must extend over the top. So, this image as is, will not do. Opening up a variety of Photoshop tools (at this point I should point out this is NOT going to be tutorial on how to use photoshop, there are plenty of those done by people better than I at providing such help), I flipped the image and rotated it clockwise 22 degrees.

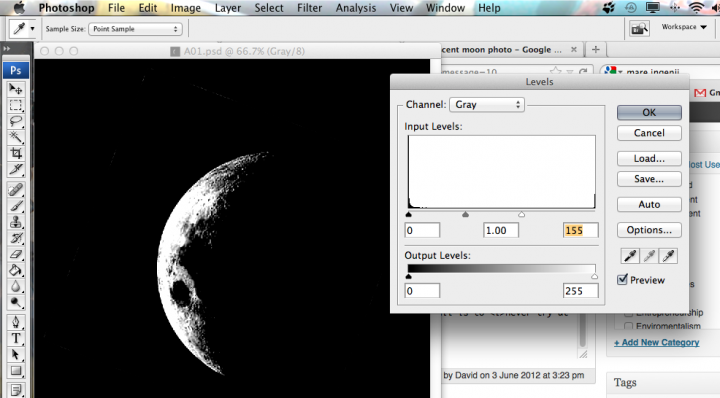
The next step was to then upon up the ‘Levels’ tool and start cranking in as much contrast, at both the white and black ends of the scale, to remove as much detail as I felt practical. This is needed to get the image close to something you can work with then we open this up again in vector editing suite. This will hopefully make sense, shortly.

This is when things start to get tricky. I know that I may need to go back to photoshop and crank in more contract, or maybe I need to change which end of the contrasting I apply to get just the right amount needed when I move to Illustrator and start my vector editing. Take a few moments to look at your image, if you are attempting something yourself, and apply any tweaks you feel you need now. You’ll notice the file name has changed. I like to keep a good clean copy of the original files aside in case I really destroy the current version. Hitting the “reset button” is more likely to happen than not. Don’t get discouraged if you have to start over. It’s better to have tried and failed than to have never tried at all, simply because you’re afraid to fail. The only way to completely fail is to never try at all.. Be a DOER… not a WISH I DIDer! Here I am making a few more adjustments.

STEP 3 – Open in vector editor

Now, it’s time to find out if I did enough contrast adjustment. This is also the point when I find out if I have a clue what I’m going in Illustrator. caveat emptor, you’re getting what you paid for here.

Now, before doing anything, I’m going to save the workspace. Again, it’s nice to be able to get back to the beginning if something goes wrong.

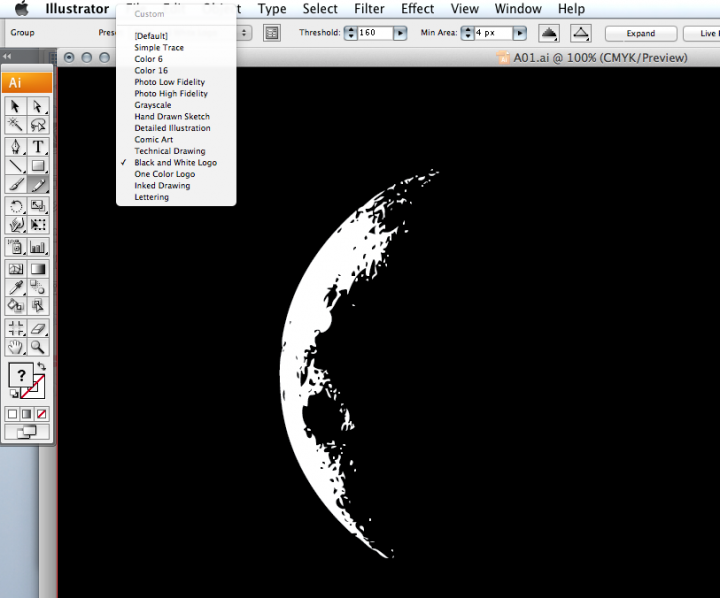
Next step I want to increase the size of the workspace into roughly a 2×9 ratio (height x width). This will give me room for the next parts of the logo, including text etc., and finally used one of the built in tools called “Live Trace” to convert the image into an Illustrator vector:

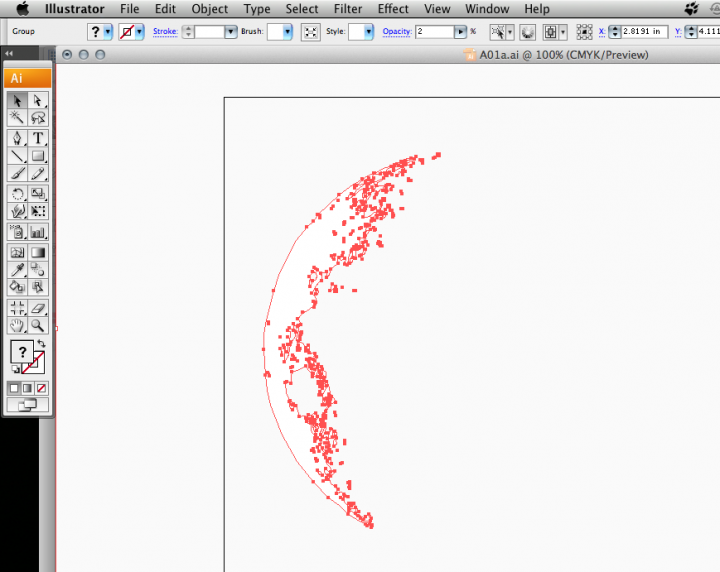
Here is what the resulting vector nodes look like once the trace is complete. I adjusted the minimum pixel and path size vars up and down until I had a trace I liked.

After inverting the image, using live trace and use the ‘Auto convert to Live Paint, I had the primary image I wanted. Following the conversion, I added a target and underline, then selected a text I wanted to use. Again, I’m not totally in love with this text and I way decide to change this later, but for now, to test this image, I have to start somewhere. Of course, Sample Company is *not* the name I’m going to be using, this is just that, a sample. After about 3 hours of work, mostly poking around in Illustrator for the options I really wanted to use I have this concept proof.

Step 4 – wrapping things up

Once the new image is saved, make sure cropping is properly set and export the image to the apps you need. For me, I needed it in a transparent .png for use with invoices, letterheads and publishing.

This is just the beginning. Once the new company is fully launched I’ll be posting the final logos. Keep an eye out for more news on Jun 18th!

California Dreamin’ — setting up the new California Office

It has been a long 8 months since the decisions was made to re-locate operations to Santa Cruz, California. On April 16th, the first of the equipment, furniture, and transient stuff arrived in California from the Washington office.

Despite all the best intentions and plans, construction of the office conference room is still underway, so equipment remains temporarily stacked until they can be placed in their designated locations.

Below is a gallery of photos taken yesterday as things got closer and closer to completion.

After 8 days of 10+ hours each moving equipment, negotiating with contractors, delivering two 16′ box trucks, a 20′ trailer and countless pickup truck loads, we have accomplished a lot. Much work remains to be done before the offices are fully functional, but we are already generating revenue of the new location.

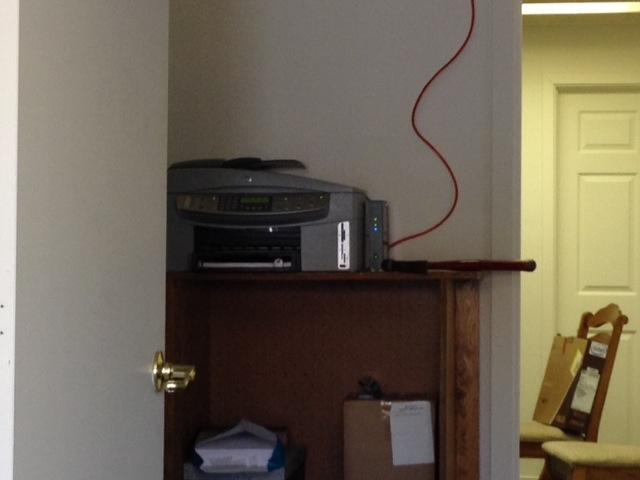
When I return to California following the final contractors work, presentation monitors, servers and printers will be installed in their proper locations. I’m looking forward to getting this all wrapped up so we can concentrate on moving forward with day to day operations.

Setting up a Java build env to prepare for Cassandra development

Getting it all ready…
PREV: Cassandra and Big Data – building a single-node “cluster”

First, I wanted to see how much of a system footprint 3 instances of Cassandra had on this little system. Here you can see the 3 instances patiently waiting for something todo. Sitting idle for about 24 hours (note, TIME+ is system time, not wall clock), total memory utilization has crept up from 11% to 14% per process.


PID USER PR NI VIRT RES SHR S %CPU %MEM TIME+ COMMAND
4554 bigdata 20 0 891m 134m 4388 S 7.6 14.4 7:47.96 java
4632 bigdata 20 0 917m 133m 4340 S 0.7 14.3 7:45.64 java
4593 bigdata 20 0 896m 133m 4168 S 0.3 14.3 7:40.37 java

Keep in mind this test box has a single core CPU with a whopping 1GB of memory. If I can get it to work on this box without pushing it over, you should be able to run a single instance on any box with a reasonable expectation of function.

The data model I wanted to use is pretty basic: IP traffic, consisting of the following elements:

* IPv4 address
* destination port
* timestamp
* TTL (this is a Cassandra construct to allow auto-tombstoning of data when it’s usefulness has expired)

To get this data, I’m thinking of simply running TCPdump on a box, or possibly my laptop, to generate some traffic, then stream that into a program to insert into Cassandra as fast as the packets go by.

With the limited disk space on the box (see below) I can’t run it indefinitely, but I should be able to run it for an afternoon to load a keyspace, then start to figure out how to get the data back out!


Filesystem 1K-blocks Used Available Use% Mounted on
/dev/sda1 75956320 4344788 67753152 7% /
none 470324 640 469684 1% /dev
none 478024 420 477604 1% /dev/shm
none 478024 108 477916 1% /var/run
none 478024 0 478024 0% /var/lock

One thing I could do is load the data into the database, then run a 2nd pass processor on it and mutate the data with reverse lookups. Sort of a poor-man’s Wireshark type of tool. Now, if I wire this into my eventually to be setup RPZ enabled DNS resolver, I could track all data on my network, including all the requests from my Apple TV device. It might be interesting to see what it’s *really* doing on the network.


Downloading Support Packages for Development Environment

Before staring to code though, it looks like I need to ensure my JDK / Java libs are all up to date… and also to facilitate working with the documentation I’m reviewing.. Apache ANT will be installed too.

Java JDK – Java Software Development Kit

The JDK is a development environment for building applications, applets, and components using the Java programming language.
The JDK includes tools useful for developing and testing programs written in the Java programming language and running on the Java&™; platform.

Package URL: http://download.oracle.com/otn-pub/java/jdk/7u3-b04/jdk-7u3-linux-x64.tar.gz


mkdir jdk
cd jdk
wget http://download.oracle.com/otn-pub/java/jdk/7u3-b04/jdk-7u3-linux-x64.tar.gz

Extract the package:

tar xvzf jdk-7u3-linux-x64.tar.gz

Although I could simply run the JDK from the local user location, I decided to go for the ‘System Install’ option, and created a jdk location in user/lib, then copied the parts there according to the info in the docs. In this case I just downloaded the JRE again… you could skip that step and copy the .gz file already downloaded above. Your call.


sudo mkdir /usr/lib/jdk
cd /usr/lib/jdk
sudo wget http://download.oracle.com/otn-pub/java/jdk/7u3-b04/jdk-7u3-linux-x64.tar.gz
sudo tar xvzf jdk-7u3-linux-x64.tar.gz
sudo rm jdk-7u3-linux-x64.tar.gz

Oracle’s page says that it’s now ‘installed’ but I suspect there are a more than a few more steps required here! This is almost as good as Oracle technical support… I’ll try to be a little more helpful.

Setting the path in my ~/.bash_profile will resolve the path issue for Ant and JUnit. This is what I set in my file:

export JAVA_HOME=/usr/lib/jdk/jdk1.7.0_03

ANT – Apache Ant

Apache Ant is a Java library and command-line tool whose mission is to drive processes described in build files as targets and extension points dependent upon each other. The main known usage of Ant is the build of Java applications. Ant supplies a number of built-in tasks allowing to compile, assemble, test and run Java applications. Ant can also be used effectively to build non Java applications, for instance C or C++ applications. More generally, Ant can be used to pilot any type of process which can be described in terms of targets and tasks.

Package URL: http://www.carfab.com/apachesoftware//ant/binaries/apache-ant-1.8.3-bin.tar.gz


mkdir ant
cd ant
wget http://www.carfab.com/apachesoftware//ant/binaries/apache-ant-1.8.3-bin.tar.gz

Extract the package:


tar xvzf apache-ant-1.8.3-bin.tar.gz

Docs inside Ant say to go back to the web and read the installation instructions, located here: http://ant.apache.org/manual/install.html#installing I happen to like where my ant stuff was installed so I’m going to set ANT_HOME in my ~/.bash_profile to the location where I extracted the stuff. Ideal? Probably not but I’m doing this research on a perfectly good Saturday.. you get what you’re paying for.


export ANT_HOME=/home/bigdata/ant/apache-ant-1.8.3
export PATH=$PATH:$ANT_HOME/bin

Testing to see if the paths and parts are there worked. This error is actually expected (we’ll write the build.xml later).

$ ant
Buildfile: build.xml does not exist!
Build failed

JUnit – Test framework for test based development

JUnit is a simple framework to write repeatable tests. It is an instance of the xUnit architecture for unit testing frameworks.


mkdir junit
cd junit
wget https://github.com/downloads/KentBeck/junit/junit-4.10.jar
wget https://github.com/downloads/KentBeck/junit/junit4.10.zip

Extract the source package, in case I need it:


unzip junit4.10.zip

I can’t say this is the best way to do this, it’s cookie-cutter implementation from documentation. If you see something that does not make sense or is flat out stupid, post comment and let me know!


Development Environment Setup

Create primary development folder and expected sub-folders. You’re naming conventions may vary:


mkdir cBuild
mkdir cBuild/src
mkdir cBuild/src/{java,test}
mkdir cBuild/lib

Populate the lib with libraries from the Cassandra distribution and Junit.


cp cassA-1.0.8/lib/*.jar cBuild/lib/.
cp junit/*.jar cBuild/lib/.

To employ JUnit testing harness via Ant Java builder, a build.xml file is required in the cBuild base directory. Here are sample contents. You’re paths may differ if you went your own way on the directories.

vi cBuild/build.xml

<project name="jCas" default="dist" basedir=".">
  <property name="src" location="src/java"/>
  <property name="test.src" location="src/test"/>
  <property name="build" location="build"/>
  <property name="build.classes" location="build/classes"/>
  <property name="test.build" location="build/test"/>
  <property name="dist" location="dist"/>
  <property name="lib" location="lib"/>
  <!-- Tags used by Ant to help build paths, most useful when multiple .jar files are required --> 
  <path id="jCas.classpath">
    <pathelement location="${build.classes}"/>
    <fileset dir="${lib}" includes="*.jar"/>
  </path>
  <!-- exclude test cases from the final .jar file, this defines that policy -->
  <path id="jCas.test.classpath">
     <pathelement location="${test.build}"/>
     <path refid="jCas.classpath"/>
  </path>
  <!-- Define the 'init' target, used by other build phases -->
  <target name="init">
    <mkdir dir="${build}"/>
    <mkdir dir="${build.classes}"/>
    <mkdir dir="${test.build}"/>
  </target>
  <!-- 'compile' target -->
  <target name="compile" depends="init">
    <javac srcdir="${src}" destdir="${build.classes}">
       <classpath refid="jCas.classpath"/>
    </javac>
  </target>
  <!-- 'test compile' target -->
  <target name="compile-test" depends="init">
    <javac srcdir="${test.src}" destdir="${test.build}">
      <classpath refid="jCas.test.classpath"/>
    </javac>
  </target>
  <!-- setup policies that tell JUnit to execute tests on files in test that end with .class -->
  <target name="test" depends="compile-test,compile">
    <junit printsummary="yes" showoutput="true">
      <classpath refid="jCas.test.classpath"/>
      <batchtest>
        <fileset dir="${test.build}" includes="**/Test.class"/>
      </batchtest>
    </junit>
  </target>
  <!-- on a good build, dist target creates final JAR  jCas.tar -->
  <target name="dist" depends="compile">
    <mkdir dir="${dist}/lib"/>
    <jar jarfile="${dist}/lib/jCas.jar" basedir="${build.classes}"/>
  </target>
  <!-- run target allows execution of the built classes -->
  <target name="run" depends="dist">
    <java classname="${classToRun}">
      <classpath refid="jCas.classpath"/>
    </java>
  </target>
  <!-- clean target gets rid of all the left over files from builds -->
  <target name="clean">
    <delete dir="${build}"/>
    <delete dir="${dist}"/>
  </target>
</project>

NOTE!. There is a bug in Ant 1.8 that requires the addition of this element, or you will be plagued with nasty warnings:

...

This is the proper way to modify that above two javac blocks to include these element:

<javac srcdir="${src}" destdir="${build.classes} includeantruntime="false"">
<javac srcdir="${test.src}" destdir="${test.build}" includeantruntime="false">

Testing this build environment
Having created the build.xml file, it needs to be tested to make sure it even works.

Create a test case and build case

cd cBuild/src
vi Test.java

import junit.framework.*;
public class Test extends TestCase {
  public void test() {
    assertEquals( "Equality Test", 0, 0);
  }
}

Create a really simple program..

vi X1.java

public class X1 {
  public static void main (String [] args) {
    System.out.println("This is Java.... drink up!");
  }
}

Now the rubber meets the road if everything is setup properly and we can build a file!

Run ant with target set to 'test'

~/cBuild$ ant test
Buildfile: /home/bigdata/cBuild/build.xml

init:

compile-test:

compile:
[javac] Compiling 1 source file to /home/bigdata/cBuild/build/classes

test:

BUILD SUCCESSFUL
Total time: 7 seconds

Run ant with target set to 'diet'

~/cBuild$ ~/cBuild$ ant dist
Buildfile: /home/bigdata/cBuild/build.xml

init:

compile:

dist:
[jar] Building jar: /home/bigdata/cBuild/dist/lib/jCas.jar

BUILD SUCCESSFUL
Total time: 1 second

It's a good idea to check your .jar to make sure your class is actually in it. Ant, for some reason beyond understanding or logic, WON'T let you know if your lib was skipped (had it happen in my first build.. exceptionally ungood).


~/cBuild$ jar -tf dist/lib/jCas.jar
META-INF/
META-INF/MANIFEST.MF
X1.class

As you can see, there is no Whiskey, but X1 is in the jar.

RUN!!!

~/cBuild$ ant -DclassToRun=X1 run
Buildfile: /home/bigdata/cBuild/build.xml

init:

compile:

dist:

run:
[java] This is Java.... drink up!

BUILD SUCCESSFUL
Total time: 1 second

SUCCESS!!!

All told it took me about 3 1/2 hours to get this setup, parts installed, these notes written up and a SIMPLE Java program executed. So.. let your own expectations accordingly. Hopefully you'll save a lot of time with the build.xml file.. I typed that in char for char. You could just do a cut-paste, fix up anything you don't like in my path names and let it rip.

Good luck.. more to follow on Cassandra!!! (even though this post was more about getting ready to write code to access it).

NEXT: Re-Configuring an Empty Cassandra Cluster