Category Archives: Technology

PHP’s cURL and how to use CURLPROXY_SOCKS5_HOSTNAME

So, you’re running a proxy (say, something like TOR) on your locallopback.. but you keep getting this error (must have VERBOSE set to true to catch it):

* Hostname was NOT found in DNS cache
* Can’t complete SOCKS5 connection to 0.0.0.0:0. (2)
* Closing connection 0

Your code looks simple enough.. but it doesn’t work:

A little research later you find that the PROPER SOCKS5 protocol is SOCKS5H (hostname), so you use the proper flag..

[…]
curl_setopt($ch, CURLOPT_PROXYTYPE, CURLPROXY_SOCKS5_HOSTNAME);
[…]

only to get told that TOR doesn’t want to be used as an HTTP proxy (what’s the deal)?


It appears you have configured your web browser to use Tor as an HTTP proxy.
This is not correct: Tor is a SOCKS proxy, not an HTTP proxy.
Please configure your client accordingly.

Have not fear script-kiddies.. even though PHP as of 5.5.x does not seem to include this CRITICAL cURL FLAG, you can reference it directly with the integer value of 7. So… if you change your code to this… you’re as golden as the proverbial goose!

curl_setopt($ch, CURLOPT_PROXYTYPE, 7); // 7 = CURLPROXY_SOCKS5_HOSTNAME

So… now you know!

find my article helpful? print some coupons!

AWS EC2 Sendmail Configuration (with .procmail)

Sendmail.. how you frustrate people; but the power makes it difficult to turn away. I’ll now detail the steps required for me to setup a simple e-mail auto-processing service on an AWS EC2 instance without a dedicated hostname.

Setting up the Procmail Recepie

.procmail — you can do a lot of things with .procmail. The online resources are many, but for this example I’m going to keep it VERY simple.

First, create a procmail file in your local account. My AWS instances are CentOS based, and use the ‘ec2-user’ as the default account. I’m going to keep it simple here and stick with that paradigm.

-bash-4.1$ vi .procmailrc

I’m going to setup my .procmailrc file to look like this:

SHELL=/usr/bin/php
MAILDIR=$HOME/mail
LOGFILE=$HOME/logs/procmail.log

:0 # catch errors
* ^Subject: Returned mail:.*
logs/procmail.error.log

# — auto-catches
:0
|”$HOME/prod/MailIntake/process.mail.php” $1

Now that I have a .procmail setup… time to get down to making sendmail work.

Sendmail — allowing server to accept messages

To configure the sendmail files, I assume super user powers. If you are unable to assume superuser powers or run sudo.. I doubt you’ll be able to complete these configurations. Hopefully your responsible IT person is going to handle all this for you instead.

Main Sendmail File — sendmail.mc

Setting up the main Sendmail file. This file is fairly large, so I’m only going to highlight the sections I felt needed to be updated.

vi sendmail.mc

To allow use of the AWS mail relay, defined in this section:

define(`SMART_HOST’, `email-smtp.us-east-1.amazonaws.com’)dnl

Setup local hostname / domain identity

dnl # Also accept email sent to “localhost.localdomain” as local email.
dnl #LOCAL_DOMAIN(`localhost.localdomain’)dnl
LOCAL_DOMAIN(`ec2-52-6-000-000.compute-1.amazonaws.com’)dnl

Setting up the masquerade

MASQUERADE_DOMAIN(`ec2-52-6-000-000.compute-1.amazonaws.com’)dnl
MASQUERADE_AS(`ec2-52-6-000-000.compute-1.amazonaws.com’)dnl

access db configuration

Editing the access file to setup the local host relay, so messages can be sent from the various network interfaces on the machine. Obviously. one of those IP addresses was obscured. Where you see #private ip# substitute your AWS private IP (such as 172.123.321.1)

## By default we allow relaying from localhost…
localhost RELAY
127.0.0.1 RELAY
#private ip# RELAY
email-smtp.us-east-1.amazonaws.com RELAY

## Allowed Connections
Connect:127.0.0.1 OK
Connect:#private ip# OK
Connect:email-smtp.us-east-1.amazonaws.com OK

Defining Local Hostnames — local-host-names

For my configuration, I wanted to make sure the system understood it’s local non-FQDN identitiy, so I edited the local-host-names file to include three different ways to reference the system. The AWS DSN, public IP and private IP:

vi local-host-names

Contents of my file looks like this (my file contains real IPs and hostname)

# local-host-names – include all aliases for your machine here.
ec2-52-6-000-000.compute-1.amazonaws.com
52.6.000.000
172.30.000.000

The Mailer Table — mailertable

At this point I didn’t see a need to implement functions of the mailertable

Setting up trusted user file — trusted-users

Modified the trusted users file to allow my primary user, root and one alias to send mail without warnings:

vi /etc/mail/trusted-users

File contents:

# trusted-users – users that can send mail as others without a warning
# apache, mailman, majordomo, uucp, are good candidates
ec2-user, apps, proxy, root

Aliases — virtusertable

Entering user aliases to capture mail sent to various users, and route them to the local ‘ec2-user’.

vi /etc/mail/virtusertable

Contents of my file with aliases:

# A domain-specific form of aliasing, allowing multiple virtual domains to be
# hosted on one machine.
#
ec2-user@ec2-52-6-000-000.compute-1.amazonaws.com ec2-user@localhost
stuff@ec2-52-6-000-000.compute-1.amazonaws.com ec2-user@localhost
things@ec2-52-6-000-000.compute-1.amazonaws.com ec2-user@localhost

Rebuild Settings

Run a make on the directory to rebuild the sendmail db files

make -C /etc/mail
make: Entering directory `/etc/mail’
make: Leaving directory `/etc/mail’

Restart Sendmail!

Restart sendmail… watch for majik!

/etc/init.d/sendmail restart
Shutting down sm-client: [ OK ]
Shutting down sendmail: [ OK ]
Starting sendmail: [ OK ]
Starting sm-client: [ OK ]

Helping CasperJS 1.1.0-beta3 play nice with PhantomJS 2.0.0

As of today, 30-SEP-2015, the latest build for CasperJS 1.1.0-beta3. Not exactly comforting for production use, but it is the most recent and decently capable version available outside of a pull request. So.. let’s get started:

First, I checked the current version of

[root@ip-10-153-205-78 ~]# casperjs –version
1.1.0-beta3
Unsafe JavaScript attempt to access frame with URL about:blank from frame with URL file:///usr/local/lib/node_modules/casperjs/bin/bootstrap.js. Domains, protocols and ports must match.

NOTE:You may notice that simply running casper causes PhantomJS to hurl out worthless warning messages. This is the very reason I’m undergoing this exercise.

Next, I dropped the new binary on target server and verified that I am dealing with pJS 2.0, and it’s functioning:

[root@ip-10-153-205-78 ~]# phantomjs -v
2.0.0

Next step is to get to the meat of the errors.

The first I encountered was this:

[root@ip-10-153-205-78 ~]# casperjs –version
CasperJS needs PhantomJS v1.x

/usr/local/lib/node_modules/casperjs/bin/bootstrap.js:91 in __die

Opening this file, around line 91 the following is found:

function __die(message) {
if (message) {
console.error(message);
}
phantom.exit(1);

Tracing back to the caller, the test is performed here:

(function(version) {
// required version check
if (version.major !== 1) {
return __die(‘CasperJS needs PhantomJS v1.x’);
} if (version.minor < 8) { return __die('CasperJS needs at least PhantomJS v1.8 or later.'); } if (version.minor === 8 && version.patch < 1) { return __die('CasperJS needs at least PhantomJS v1.8.1 or later.'); } })(phantom.version);

Next I tried to make it accept version 2, by changing that block to this:

(function(version) {
if (version.major == 1) {
if (version.minor < 8) { return __die('CasperJS needs at least PhantomJS v1.8 or later.'); } if (version.minor === 8 && version.patch < 1) { return __die('CasperJS needs at least PhantomJS v1.8.1 or later.'); } } if (version.major < 2) { return __die('CasperJS needs PhantomJS v1.x or v2.x'); } })(phantom.version);

Next error message was this:

[root@ip-10-153-205-78 ~]# casperjs –version
Couldn’t find nor compute phantom.casperPath, exiting.

/usr/local/lib/node_modules/casperjs/bin/bootstrap.js:91 in __die

It’s origin was in this block:

// CasperJS root path
if (!phantom.casperPath) {
try {
phantom.casperPath = phantom.args.map(function _map(arg) {
var match = arg.match(/^–casper-path=(.*)/);
if (match) {
return fs.absolute(match[1]);
}
}).filter(function _filter(path) {
return fs.isDirectory(path);
}).pop();
} catch (e) {
return __die(“Couldn’t find nor compute phantom.casperPath, exiting.”);
}
}

Based upon information found in this post.. Latest pull of casperjs not working with latest pull of phantomjs2 I made the following modifications:

Paste this section of code in above the first non-comment section in bootstrap file:

// Mods to get Casper and PhantomJS playing nice
var system = require(‘system’);
var argsdeprecated = system.args;
argsdeprecated.shift();
phantom.args = argsdeprecated;

Once you have done that, you should be able to use Casper 1.1.0-beta3 with PhantomJS 2.0 (and look.. NO MORE LAME WARNINGS!!!)

[root@ip-10-153-205-78 ~]# casperjs –version
1.1.0-beta3

Upgrade PhantomJS 1.9 to 2.0 on AWS

phantomjs-logoIt’s a gamble to do this, and according to the build script it’s going to take a long time to complete, but to try and solve some issues that PhantomJS has with CasperJS 1.1-beta3 (latest version) I wanted to upgrade to Phantom 2.0.

A lot of things have changed, and it’s been suggested that a number of features that CasperJS wants to use, are deprecated in the 2.0 version of Phantom. But forward I’ll forge regardless.

Step 1 is to locate the source, download and unzip:

wget https://bitbucket.org/ariya/phantomjs/downloads/phantomjs-2.0.0-source.zip
Length: 110092872 (105M) [application/zip]
Saving to: ‘phantomjs-2.0.0-source.zip’

unzip phantomjs-2.0.0-source.zip
Archive: phantomjs-2.0.0-source.zip
a2912c216d06df4d8b51f12ad4082a48c5fc7ba6
creating: phantomjs-2.0.0/
inflating: phantomjs-2.0.0/.gitignore
[…]
inflating: phantomjs-2.0.0/tools/preconfig.sh
inflating: phantomjs-2.0.0/tools/qscriptengine.h
inflating: phantomjs-2.0.0/tools/src.pro

Step 2 – install required dependancies

You may or may not have most of these from your previous PhantomJS 1.9.x install, but I found that most of these were required to start the PhantomJS build.Here are the ones that I’ve confirmed I needed:

  • gcc
  • gcc-c++
  • make
  • flex
  • ruby
  • openssl-devel
  • fontconfig-devel
  • sqlite-devel
  • libicu-devel
  • libpng-devel
  • libjpeg-devel
  • freetype-devel
  • bison
  • gperf

Installing the packages went smoothly:

sudo yum -y install gcc gcc-c++ make flex bison gperf ruby openssl-devel freetype-devel fontconfig-devel libicu-devel sqlite-devel libpng-devel libjpeg-devel

Following this I grabbed the source code to install freetype2. Although freetype successfully installed, the required header files where not found. I decided it was bet to grab it and build from source:

wget http://download.savannah.gnu.org/releases/freetype/freetype-2.6.tar.gz
gunzip freetype-2.6.tar.gz
tar xvf freetype-2.6.tar
./configure
[…]
configure: creating ./config.status
config.status: creating unix-cc.mk
config.status: creating unix-def.mk
config.status: creating ftconfig.h
config.status: executing libtool commands
configure:
make & make install
[…]
/usr/bin/install -c -m 644 ./builds/unix/ftconfig.h \
/usr/local/include/freetype2/config/ftconfig.h
/usr/bin/install -c -m 644 /usr/local/freetype-2.6/objs/ftmodule.h \
/usr/local/include/freetype2/config/ftmodule.h
/usr/bin/install -c -m 755 ./builds/unix/freetype-config \
/usr/local/bin/freetype-config
/usr/bin/install -c -m 644 ./builds/unix/freetype2.m4 \
/usr/local/share/aclocal/freetype2.m4
/usr/bin/install -c -m 644 ./builds/unix/freetype2.pc \
/usr/local/lib/pkgconfig/freetype2.pc
/usr/bin/install -c -m 644 /usr/local/freetype-2.6/docs/freetype-config.1 \
/usr/local/share/man/man1/freetype-config.1

Now following that build, due to some inexplicable continuous oversight on the part of freetype’s maintainers.. OR.. phantom.. a link has to be make so that the build process can find the actual libraries required:

ln -s /usr/include/freetype2/freetype /usr/include/freetype

Step 3 – build

Now bulid.sh script. NOTE: if you are executing the compile on a VM (or in this case AWS), it’s recommended that the build process Does Not try to run parallel build jobs on the virtual cores. The PhantomJS website was not clear (to me) why.. but it did recommend using the –jobs 1 flag on the build.. which I am doing. You may omit that if you’d like to experiment.

cd phantomjs-2.0.0

./build.sh –jobs 1
—————————————-
WARNING
—————————————-

Building PhantomJS from source takes a very long time, anywhere from 30
minutes to several hours (depending on the machine configuration).
We recommend you use the premade binary packages on supported operating
systems.

For details, please go the the web site: http://phantomjs.org/download.html.

Do you want to continue (y/n)?
y
[…]

NOTE: If you want to suppress the warning regarding perils of the long compile, you an use the –confirm flag to bypass the question. This is really helpful if you want to background the process and write it to a log. Where I find this most beneficial is when I want to/need to close the terminal window before the compile completes.

Here is an optional method of running that will background the process, auto-reply to the warning and write to a log file:

nohup ./build.sh –confirm –jobs 1 > build.log &

You might carp about not being able to monitor progress now! Well sure you can.. just do a following tail on the file. Exact command varies with system, I’ll provide the one for typical LINUX and for typical OSX:

For typical LINUX:
tailf build.log

For typical OSX:
tail -f build.log

Step 4 – check the binary

Once the build has completed, you will find the binary to be built in the local directory bin/

ls -l bin/phantomjs
-rwxr-xr-x 1 root root 56587060 Sep 30 17:16 bin/phantomjs

To complete the installation, you’ll need to replace the current phantomjs binary with the new one. To find the location if your current binary (if you have one), this should work:

whereis phantomjs
phantomjs: /usr/bin/phantomjs

Copy the new binary to that location and verify version:

cp bin/phantomjs /usr/bin/phantomjs
cp: overwrite ‘/usr/bin/phantomjs’? y

phantomjs -v
2.0.0

YOU ARE DONE!! It was just that easy

SOLR 5 — Fixing SSL WEAK SERVER EPHEMERAL DH_KEY

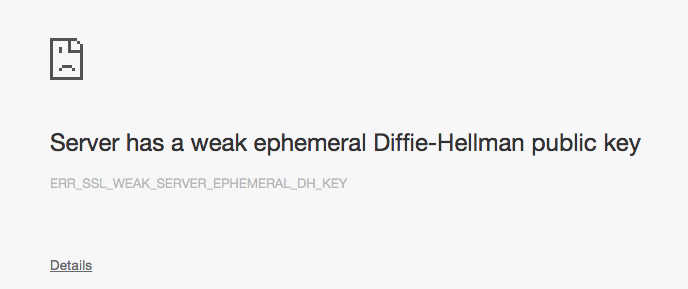
I ran into this short stopper today, which prevented access to the Admin interfaces of my Solr indexer:
ERR_SSL_WEAK_SERVER_EPHEMERAL_DH_KEY

Screen Shot 2015-09-09 at 10.48.15 AM

Recalling how difficult it was to first enable SSL with my Solr cluster.. I suspected this would be a major issue (and for the most part it was)

STACK OVERFLOW TO THE RESCUE!
Using this article: How to fix ERR_SSL_WEAK_SERVER_EPHEMERAL_DH_KEY I was able to modify my Solr 5 / Jetty configuration to stop use of the weaker DH keys.

The first solution using the wildcarded names did not work for me. After a couple of hours of testing and looking at my logs, I found that another un-voted solution fixed the issue without much hassle.

The Fix

The configuration file I modified to resolve this is the jetty-https-ssl.xml. It is located in /opt/solr/server/etc on my server.. your situation might be a little different (you’ll need to find that file that is in use by Solr yourself if it’s not in the above location).

[root@]cd /opt/solr/server/etc
[root@]vi jetty-https-ssl.xml

Locate the block where you have your SSL config. This is what mine looks like:

<Call name=”addConnector”>
<Arg>
<New class=”org.eclipse.jetty.server.ssl.SslSelectChannelConnector”>
<Arg>
<New class=”org.eclipse.jetty.http.ssl.SslContextFactory”>

<Set name=”keyStore”><SystemProperty name=”jetty.home” default=”.”/>/etc/solr-ssl.keystore.jks</Set>
<Set name=”keyStorePassword”>9290j2039fh09209h390h8f23</Set>
<Set name=”needClientAuth”><SystemProperty name=”jetty.ssl.clientAuth” default=”false”/></Set>

</New>
</Arg>

<Set name=”port”><SystemProperty name=”jetty.ssl.port” default=”8984″/></Set>
<Set name=”maxIdleTime”>30000</Set>
</New>
</Arg>
</Call>


Within the NEW block, below existing values.. I added this complete section, verbatim:


<!–  //START ADDED   9-SEP-2015 for  Diffie-Hellman  group size Fix –>

<Set name=”ExcludeCipherSuites”>
<Array type=”String”>
<Item>SSL_RSA_WITH_DES_CBC_SHA</Item>
<Item>SSL_DHE_RSA_WITH_DES_CBC_SHA</Item>
<Item>SSL_DHE_DSS_WITH_DES_CBC_SHA</Item>
<Item>SSL_RSA_EXPORT_WITH_RC4_40_MD5</Item>
<Item>SSL_RSA_EXPORT_WITH_DES40_CBC_SHA</Item>
<Item>SSL_DHE_RSA_EXPORT_WITH_DES40_CBC_SHA</Item>
<!– Disable small Diffie-Hellman key exchange to prevent Logjam attack —>
<Item>SSL_DHE_RSA_WITH_3DES_EDE_CBC_SHA</Item>
<Item>SSL_DHE_DSS_WITH_3DES_EDE_CBC_SHA</Item>
<Item>TLS_DHE_RSA_WITH_AES_256_CBC_SHA256</Item>
<Item>TLS_DHE_DSS_WITH_AES_256_CBC_SHA256</Item>
<Item>TLS_DHE_RSA_WITH_AES_256_CBC_SHA</Item>
<Item>TLS_DHE_DSS_WITH_AES_256_CBC_SHA</Item>
<Item>TLS_DHE_RSA_WITH_AES_128_CBC_SHA256</Item>
<Item>TLS_DHE_DSS_WITH_AES_128_CBC_SHA256</Item>
<Item>TLS_DHE_RSA_WITH_AES_128_CBC_SHA</Item>
<Item>TLS_DHE_DSS_WITH_AES_128_CBC_SHA</Item>
</Array>
</Set>

<Set name=”ExcludeProtocols”>
<Array type=”java.lang.String”>
<Item>SSLv3</Item>
</Array>
</Set>

<!–  //END  Diffie-Hellman  group size Fix                          –>

Once that was added, I saved the file and I restarted solr:

[root@]cd /opt/solr/server/etc

Sending stop command to Solr running on port 8984 … waiting 5 seconds to allow Jetty process 3861 to stop gracefully.
Waiting to see Solr listening on port 8984 [-]
Started Solr server on port 8984 (pid=4162). Happy searching!

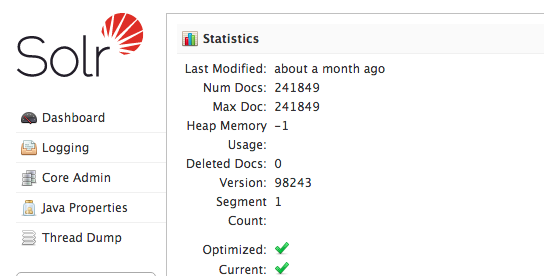
Re-trying my Solr Admin… BACK IN BUSINESS!!! 😀
Screen Shot 2015-09-09 at 11.02.26 AM

Installing Gearman on OSX Yosemite (usually)

logo

Another round of Gearman installs, following the update to OSX Yosemite. (Updated 12-AUG-2015)

Here is your guide to getting it done!

Make sure you have XCode developer tools

First step is to make sure you have the Command Line developer tools installed. To do this, or verify that it’s already done, while logged in as a non-root user, type:

xcode-select –install

A system dialog box should open up and request that you grant it permission to perform the command line install. Follow the steps and instructions in the dialogs to complete this step.

Collected the Packages

You will need the following packages

  • libevent
  • boost
  • gearmand

libevent

The latest version can be acquired here: http://libevent.org/

Unpack and compile

gunzip libevent-2.0.22-stable.tar.gz

tar xvf libevent-2.0.22-stable.tar

./configure

make install

boost

The latest version can be acquired here:
http://www.boost.org/users/download/

Unpack and compile

gunzip boost_1_58_0.tar.gz

tar xvf boost_1_58_0.tar

./bootstrap.sh

./b2 –a –build-type=complete –layout=versioned

Note: these paths reported by b2 during build are important to save:

The Boost C++ Libraries were successfully built!

The following directory should be added to compiler include paths:

/opt/boost_1_58_0

The following directory should be added to linker library paths:

/opt/boost_1_58_0/stage/lib

Gearman

The latest code can be acquired here: https://launchpad.net/gearmand

It is possible that the compiler won’t find libevent so the following environment variables may need to be set:

export CPPFLAGS=’-I/opt/boost_1_58_0′
export LDFLAGS=’-L/opt/boost_1_58_0/stage/lib’

Unpack and compile

gunzip gearmand-1.1.12.tar.tgz

tar xvf gearmand-1.1.12.tar

./configure –with-boost –with-boost-libdir=/opt/boost_1_58_0/stage/lib –prefix=/opt –with-sanitize –enable-fast-install –with-gnu-ld –enable-ssl

make && make install

At this point, you should be up and running!

If you also need to install gearman for PHP libraries, my post here should help: https://blog.daviddemartini.com/archives/5312

Install Redis on AWS EC2

redis-whiteRedis is fairly simple to install and get running. I found the best way to do this on CentOS based AWS EC2 nodes is to use the following steps.

Install Pre-Requisites

Redis will require several per-requisits. Your system may vary, but these are the cases I ran into when running the build in August 2015 with the latest AWS system updates. Some of these are required to run the tests, others are required for Redis itself.

TCL 8.5 or higher for Test

You need tcl 8.5 or newer in order to run the Redis test

yum install tcl

Download latest Redis package

Assume super user, move to a safe directory (I like /usr/local) and download the latest build:

sudo su –
cd /usr/local
wget http://download.redis.io/redis-stable.tar.gz

Extract Files

Once the main tarball has been downloaded, extract the files and start the configuration process.

tar xvzf redis-stable.tar.gz
cd redis-stable

Build the Binary

Build the binary. Redis does not seem to require ./config to be run, the necessary make files are already in place. Just run make and install!! If you decide to run the ‘make test’ (which I suggest you do), it maybe take 10-15 min. to complete depending on the power of your AWS instance.

make
make test
make install

Set Overcommit to TRUE

Redis is going to complain unless you have some level of overcommit memory enabled. This is easy to do (again, you must be root or sudoer to do this). Add ‘vm.overcommit_memory = 1’ to /etc/sysctl.conf and then reboot, IF you can safely do so on your machine (best to check and make sure there are no live service interruptions or other personnel using the system).

vi /etc/sysctl.conf

Add this to the end of the file:

# Required by Redis to enable overcommit setting:
vm.overcommit_memory = 1

Reboot

init 6

Configure Redis

Create a working directory for the redis disk files. I like to use the following:

mkdir /var/redis
mkdir /var/redis/db

Copy the base configuration file to /etc/ and customize to your environment.

mkdir /etc/redis
cp redis.conf /etc/redis/6379.conf
vi /etc/redis/6379.conf

I made the following changes to the configuration file. I can’t guarantee all or any of these will be correct for your configuration:

daemonize yes

bind 127.0.0.1

tcp-keepalive 60

logfile “/var/log/redis-server.log”

dir /var/redis/db

Copy the startup file into /etc/init.d

cp utils/redis_init_script /etc/init.d/redis

Add the start command to the root’s crontab. Yeah, so this might be a cheater method instead of adding this to the systems rd.X files, but it’s also easy to disable.

crontab -e

@reboot /etc/init.d/redis start

Start Redis Server

Starting the server from the command line is a good way to verify it’s functional. It’s easy to do, just type ‘resis-server’. Hit CNTL-C to kill and exit once you’ve tested launch. If it starts up, you should see something like this:

[root@ip-10-000-000-00 redis-stable]# redis-server

31408:C 04 Aug 21:55:00.578 # Warning: no config file specified, using the default config. In order to specify a config file use redis-server /path/to/redis.conf
31408:M 04 Aug 21:55:00.579 * Increased maximum number of open files to 10032 (it was originally set to 1024).

31408:M 04 Aug 21:55:00.581 # Server started, Redis version 3.0.3

31408:signal-handler (1438725473) Received SIGINT scheduling shutdown…
31408:M 04 Aug 21:57:53.628 # User requested shutdown…
31408:M 04 Aug 21:57:53.628 * Saving the final RDB snapshot before exiting.
31408:M 04 Aug 21:57:53.631 * DB saved on disk
31408:M 04 Aug 21:57:53.632 # Redis is now ready to exit, bye bye…

If that looks OK, then start using the startup back file. This should start redis as a deamon (service) depending on how you edited the configuration file. If you did it the way I did, then it will start as a deamon.

/etc/init.d/redis start

Starting Redis server…

Test to make sure it’s listening.. by using the ping command. If it’s alive and listening, you’ll receive back a ‘PONG’

redis-cli ping

PONG

FINAL STEPS — Reboot and Verify!

A good and proper final test, assuming you are able to reboot the system without causing trouble to any live services or other personnel… is.. REBOOT, then verify that it has restarted as expected.

init 6

Connection closed by remote host.

[ec2-user@ip-10-000-000-00 ~]$ redis-cli ping

PONG

CONGRATULATIONS!! You are now the proud owner/maintainer/RP of a Redis server!

NEXT…

Doing something productive with Redis… (to be continued)

Installing GnuPG 2 on OSX

Installing GnuPG onto OSX. If you are using Enigmail to provide your mail client (such as Thunderbird) with PGP signing, etc., this should help you out.

Get latest version of GnuPG

The latest version of GnuPG is 2.1.6. I located that here:
ftp://ftp.gnupg.org/gcrypt/gnupg/
I like to use curl to grab the package. Unpack the directory. You can try to build it right away, but most likely there will be additional libraries that need to be installed first (keep reading..)

curl -O ftp://ftp.gnupg.org/gcrypt/gnupg/gnupg-2.1.6.tar.bz2

To build this, you will need the latest versions of the following modules also installed, before you can start to build out the GnuPG.

Getting the required per-requesites

ibgpg-error

I like to use curl to download the package. Download the package, unpack, configure and build:

curl -O ftp://ftp.gnupg.org/gcrypt/libgpg-error/libgpg-error-1.19.tar.gz

tar xvzf libgpg-error-1.9.tar.gz
cd libgpg-error-1.19
./configure
make -j3
make install
ld

libgcrypt

I like to use curl to download the package. Download the package, unpack, configure and build:

curl -O ftp://ftp.gnupg.org/gcrypt/libgcrypt/libgcrypt-1.6.3.tar.gz

tar xvzf libgcrypt-1.6.3.tar.gz
cd libgcrypt-1.6.3
./configure
make -j3
make install
ld

libassuan

I like to use curl to download the package. Download the package, unpack, configure and build:

curl -O ftp://ftp.gnupg.org/gcrypt/libassuan/libassuan-2.2.1.tar.bz2

tar xvzf libassuan-2.2.1.tar.bz2
cd libassuan-2.2.1
./configure
make -j3
make install
ld

libksba

I like to use curl to download the package. Download the package, unpack, configure and build:

curl -O ftp://ftp.gnupg.org/gcrypt/libksba/libksba-1.3.3.tar.bz2

tar xvzf libksba-1.3.3.tar.bz2
cd libksba-1.3.3
./configure
make -j3
make install
ld

nPth

I like to use curl to download the package. Download the package, unpack, configure and build:

curl -O ftp://ftp.gnupg.org/gcrypt/npth/npth-1.2.tar.bz2

tar xvzf npth-1.2.tar.bz2
cd npth-1.2
./configure
make -j3
make install
ld

Build GnuPG

Unpack, configure and build:

tar xvzf gnupg-2.1.6.tar.bz2
cd gnupg-2.1.6
./configure
make -j3
make install
ld

If all goes well, you’ll be using GnuPHP 2.x! ENJOY!

Social Media Click-farming — (New Republic Article)

Screen Shot 2015-04-21 at 8.09.22 AMA new article at the New Republic caught my eye this morning. It is about Facebook (and other social media) click-farming.

The Bot Bubble (New Republic)

I encourage everyone to read the entire article. Yes, it will require some time and attention, but I found it very informative.

For those without the time, or inclination to read it, here are some of my takeaways:

  • Facebook Like Farms are real business. The one in the article discussed is as noted, more a ‘start-up’ type business than the old spam-factories of days mostly gone by.
  • Paying Facebook to boost your reach can be dangerous and destructive to your marketing efforts. One case study explains how a music company basically destroyed their accounts usability by paying for increased traffic from Facebook itself.
  • Facebook plans to further dilute organic exposure of posts, specifically from business pages. Currently that organic exposure is approximately 6%; unless you pay Facebook for more. But that comes with it’s own pitfalls.
  • Marketing on Facebook is going to become more and more difficult for small business to effectively use Facebook to market and grew community. This gives me serious pause to a current initiative that is requiring significant development time in an attempt to integrate with Facebook.