Tag Archives: linux

STRATUX – Add swap and logging partitions.

It’s back! The STRAUX project lives again. With a fresh build of Stratux, it’s time to re-configure the SD card for swap space (new!) and a large logging partition to keep a full filesystem from crashing the device.

Get Current Partition Information

Once logged into the Straux box, switch to the root user and interrogate the disk partitions.

pi@raspberrypi: sudo su -
root@raspberrypi: fdisk -l
[...]

Device Boot Start End Sectors Size Type
/dev/mmcblk0p1 8192 131071 122880 60M W95 FAT32 (LBA)
/dev/mmcblk0p2 131072 3700592 3569521 17.G Linux

The important aspects you will want to record as the End block ids for each partition, this is important in the next step, creating more partitions.

Creating the Extended Partition

First task is I want to create the extended partition that can be used for swap. This will eventually contain the swap and log partitions.

Running the fdisk tool, start to edit the partition. You will want to reference the base block of the device.. eg: /dev/mmcblk0

root@raspberrypi: fdisk /dev/mmcblk0

Command (m for help): p

Device Boot Start End Sectors Size Type
/dev/mmcblk0p1 8192 131071 122880 60M W95 FAT32 (LBA)
/dev/mmcblk0p2 131072 3700592 3569521 17.G Linux

Command (m for help): n

Partition type
p primary (2 primary, 0 extended)
l logical (numbered from 5)
Select (default p): l

At this point, the tool threw an error adding partition 5…

Partition 5 is already defined. Delete it before re-adding it

Listing the partitions shows this:

Device Boot Start End Sectors Size Type
/dev/mmcblk0p1 8192 131071 122880 60M W95 FAT32 (LBA)
/dev/mmcblk0p2 131072 3700592 3569521 1.7G Linux
/dev/mmcblk0p3 3700593 62333951 5863d359 28G Extended
/dev/mmcblk0p5 2191 4194446 4192256 2G Linux

Re-running ‘n option and letting it setup partition 6, got me where I wanted to be. This process didn’t seem like it worked right.. but the end result matches up with my goal of a huge partition and a smaller 2G to be used for swap:

Command (m for help): n

Partition type
p primary (2 primary, 0 extended)
l logical (numbered from 5)
Select (default p): l

Adding logical partition 6
First Sector: 4198400
Last Sector: 62333951

Created a new partition 6 of type 'Linux and a size of 27.7 GiB

Command (m for help): p
Device Boot Start End Sectors Size Type
/dev/mmcblk0p1 8192 131071 122880 60M W95 FAT32 (LBA)
/dev/mmcblk0p2 131072 3700592 3569521 1.7G Linux
/dev/mmcblk0p3 3700593 62333951 5863d359 28G Extended
/dev/mmcblk0p5 2191 4194446 4192256 2G Linux
/dev/mmcblk0p6 4198400 62333951 58135552 27.7G Linux

Command (m for help): w

.. this is where the Ending block of your p2 partition number comes into play. The starting sector will be the ending number of your last partition (3569521) + 1 for next sector:


First Sector: 3700593
Last Sector: 62333951 (this was the default/max)

Created a new partition 3 of type 'Extended' and of size 28 GiB

Command (m for help): n

Partition type
p primary (2 primary, 0 extended)
l logical (numbered from 5)
Select (default p): l

Adding the largest partition, for log file storage

Now repeat this process to add the 2nd new partition, this one will consume the rest of the device, and eventually will be where the `/log` directory is mounted.

root@raspberrypi: fdisk /dev/mmcblk0

Command (m for help): p

Device Boot Start End Sectors Size Type
/dev/mmcblk0p1 8192 131071 122880 60M W95 FAT32 (LBA)
/dev/mmcblk0p2 131072 3700592 3569521 1.7G Linux
/dev/mmcblk0p3 3700593 7895039 4194447 2G Extended

Command (m for help): n

Partition type
p primary (2 primary, 0 extended)
l logical (numbered from 5)
Select (default p): l

First Sector: 4194448

Replace Text Recursively using grep and sed on MacOS (osX).

As with many MacOS’isms, you have to change up your old school LINUX to work with the slightly different command syntax of the MacOS tools. Specifically in the this case xargs and sed.

xargs can be an amazingly powerful ally when automating commands line functionality, wrapping the reference command with auto-substitutions using the ‘@’ meta-character.

I’ll get to the meat of this. While trying to automated a grep -> sed pipeline, I encountered this error:

egrep -rl 'version 0.0.1' src/* | xargs -i@ sed -i 's/version 0.0.1/version 0.0.1c/g' @
xargs: illegal option -- i

It turns out that MacOS xargs like -I instead of -i.. (a quick trip to man sorted that out).

     -I replstr
             Execute utility for each input line, replacing one or more occurrences of replstr in up to replacements (or 5 if no -R flag is specified) arguments to utility
             with the entire line of input.  The resulting arguments, after replacement is done, will not be allowed to grow beyond 255 bytes; this is implemented by con-
             catenating as much of the argument containing replstr as possible, to the constructed arguments to utility, up to 255 bytes.  The 255 byte limit does not apply
             to arguments to utility which do not contain replstr, and furthermore, no replacement will be done on utility itself.  Implies -x.

Next I ran into an errors with sed.. when using the ‘edit in place’ flag -i. (yes, that makes for a confusing debug when you have the “offending” switch in two places).

egrep -rl 'version 0.0.1' src/* | xargs -I@ sed -i 's/version 0.0.1/version 0.0.1c/g' @
sed: 1: "src/com/ingeniigroup/st ...": bad flag in substitute command: 'a'
[...]

With a little testing of the individual command, and another trip to man, it took a little noodly to deduce that the error message was being generated because it was trying the sed commmand as the output file suffix and the filename as the sed command! Adding an empty string designator after sed’s -i solved this.

     -i extension
             Edit files in-place, saving backups with the specified extension.  If a zero-length extension is given, no backup will be saved.  It is not recommended to give
             a zero-length extension when in-place editing files, as you risk corruption or partial content in situations where disk space is exhausted, etc.

Final Command Query
The objective was to simply hammer through the source code and update the version tag from 0.0.1 to 0.0.1c. Running egrep in recursive filename list mode ( egrep -rl ) for the string I wanted ( ‘version 0.0.1’ ) gave me a file list, which was then piped into xargs, which expanded that list into the sed command ( sed -i ” ‘s/version 0.0.1/version 0.0.1c/g’ ). And viola.. 18 files changed with just a little big of effort:

egrep -rl 'version 0.0.1' src/* | xargs -I@ sed -i '' 's/version 0.0.1/version 0.0.1c/g' @

Since this took me more than 5 minutes to figure out, I decided I’d take 5 more and hopefully help someone else down the line.

AvMet Beta Release – STRATUX Database Reporter Project (open source!)

AvMet Beta Available on GitHub


For that last 6 months I have been capturing Aviation Mode-S and ADS-b data transmissions using my own customizd STRATUX Aviation Traffic Receiver running Raspberry Pi 3b. With my modifications, the device automatically shuts down daily for a few seconds to release the current SQLite3 database, and the start up pointing at a fresh database. Once released, the database is compressed to save space and for later download (I use rsync to automate that as well).

These database files can be very big, and contain hundreds of thousands of contact events each day. When these databases are generated every day, it doesn’t take long to get a backlog of them to examine for interesting things, such as NASA aircraft and some mysterious high-flyers using spoofed identities.

Being a professional programmer and data guru, this seemed like a perfect project to open-source and use a marketing tool for my consulting. After a week of design, development and preliminary tests.. it’s ready for comment.

What it does:


The tool is purpose built for my needs, so it might not (yet) be easily used on your own Stratux database files, but I feel I’ve made a reasonable effort in the interests of ease.

Each database file is opened and checked for a number of conditions and data:

  • Verify database contains expected STRATUX data tables.
  • Select first timestamp record and report it out. Since the name of the file might not be self descriptive, this is really helpful to know the dataset’s start time:
    Using Database File: './sqlite-stratux-temp'
    	Start: 2017-10-10 08:11:09.967 +0000 UTC
    	-----------------------------------------
    
  • Check dataset for obvious duplicates and remove them. It’s not uncommon for the message log to repeat a fixed position up to 5 times. Although this does not affect the current metrics, this bloats the dataset. There is an optional flag to disable this feature
  • Once duplicates are removed, each airframes dataset is checked for gross errors, such as changes in altitude or speed that would be possible only with alien spacecraft; records are also removed. There is an optional flag to disable this feature
      10486213 -- Bad Distance  	   24924 --> 51857   
      10617769 -- Bad Distance  	   82039 --> 206496  
      10707621 -- Bad Speed              318 --> 8303
    
  • Following data repair a few metrics are pulled from the dataset, looking for interesting boundary events such as Fastest and Furthest contacts. Each record reports the Callsign or Tail Registration number (when available), and the Mode-S ICAO24 code as well as altitude, speed and distance for the specific event. Example:
    	  FASTEST:   XAOLE [0D0AAE]   43000 ft.  @   529 kts.      23 mi.
    	  SLOWEST:   NDU45 [A6EBAF]    1150 ft.  @    61 kts.    2.26 mi.
    	  HIGHEST:   XAOLE [0D0AAE]   47025 ft.  @   505 kts.      92 mi.
    	   LOWEST:  N41218 [A4DE2A]     550 ft.  @    77 kts.    1.71 mi.
    	  CLOSEST:  N6464R [A87E79]    2525 ft.  @    84 kts.    0.00 mi.
    	 FURTHEST:  N229NN [A203A9]   36000 ft.  @   472 kts.     128 mi.
    

    Here is an example of an interesting contact captured last year along the coast of California; a high-altitude signal from a NASA 747 test aircraft almost 100 miles off the coast.

    	  HIGHEST: NASA747 [AA0DB8]   43025 ft.  @   473 kts.      32 mi.
    	 FURTHEST: NASA747 [AA0DB8]   43000 ft.  @   466 kts.      92 mi.
    
  • During this phase of the process, special Squawk Code events are trapped that might indicate special civil, science or military operations. Example:
    	**ALERT:  N7253N [A9B8ED] 4403     2500 ft.  @   118 kts.  SR-71, YF-12, U-2 and B-57, pressure suit flights
    	**ALERT:  N7272N [A9C038] 4402     2075 ft.  @   116 kts.  SR-71, YF-12, U-2 and B-57, pressure suit flights
    	**ALERT:  N7274N [A9C07E] 4404     1250 ft.  @   100 kts.  SR-71, YF-12, U-2 and B-57, pressure suit flights
    	**ALERT:  N907CH [AC8967] 4442     1800 ft.  @   140 kts.  SR-71, YF-12, U-2 and B-57, pressure suit flights
    

    In the above case, N7253N, N7272N and N7274N are Department of Homeland Security Border Patrol helicopter contacts.

Here is a recent report example:

        Start: 2017-10-10 08:11:09.967 +0000 UTC
        -----------------------------------------
          FASTEST: AFR6721 [3951C1]   32975 ft.  @   531 kts.      14 mi.
          SLOWEST:  N42894 [A51D07]     950 ft.  @    51 kts.    3.21 mi.
          HIGHEST:    JCB1 [43E9D5]   47025 ft.  @   469 kts.      34 mi.
           LOWEST:  N724DP [A9B2C1]     400 ft.  @    72 kts.    1.65 mi.
          CLOSEST:  N605CH [A7DA0C]   16200 ft.  @   400 kts.    0.02 mi.
         FURTHEST:  N9023N [AC7968]   33050 ft.  @   433 kts.     143 mi.

Where can you get it?

You can fork or pull the current source code from GitHub here: IngeniiCode AvMet

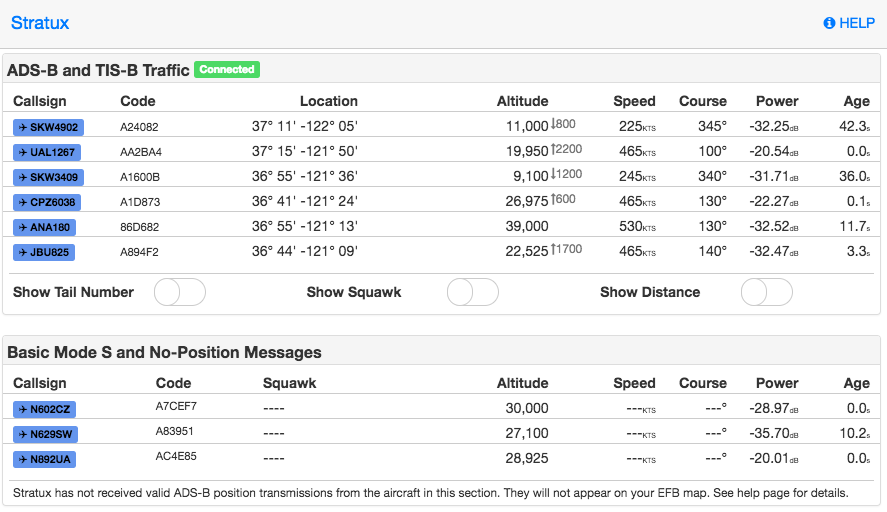
Stratux Webserver – what’s behind the scenes?

Stratux has a rich community of forums, and a lot of information about debugging Strtux, but so far good hacking information is really hard to find. One of the things of most interest to me was “What is severing up this webpage?”

Every search was a dead end, so I went back to my *NIX system administration roots and thought.. “Well, if someone wont admit what’s serving up the stream.. I’ll find out for myself.

Who’s Your Server? — gen_gdl90

A couple of quick commands told me which PID was hanging onto Port 80 and from there which process was associated with the PID:


root@raspberrypi:~# fuser 80/tcp
80/tcp: 3110
root@raspberrypi:~# ps aux | grep 3110
root 3110 51.9 2.9 973132 27600 ? Ssl 15:19 47:03 /usr/bin/gen_gdl90
root 6606 0.0 0.2 4276 1904 pts/0 S+ 16:50 0:00 grep 3110
What files does it have open?

Once I had an idea of who’m I was looking for, running lsof with the port number gave me 60 entries… and bingo.. there was the nugget of gold I was looking for:


root@raspberrypi:~# lsof -p 3110
COMMAND PID USER FD TYPE DEVICE SIZE/OFF NODE NAME
gen_gdl90 3110 root cwd DIR 179,2 4096 2 /
[...]
gen_gdl90 3110 root 35u IPv6 1849628 0t0 TCP StratuxWiFi.io:http->10.100.0.188:49157 (ESTABLISHED)
gen_gdl90 3110 root 36u IPv6 210216 0t0 TCP StratuxWiFi.io:http->10.100.0.188:64155 (ESTABLISHED)
gen_gdl90 3110 root 37u IPv6 1859641 0t0 TCP StratuxWiFi.io:http->10.100.0.188:49165 (ESTABLISHED)
gen_gdl90 3110 root 38u IPv6 1759876 0t0 TCP StratuxWiFi.io:http->10.100.0.188:65420 (ESTABLISHED)
gen_gdl90 3110 root 41u IPv6 1778784 0t0 TCP StratuxWiFi.io:http->10.100.0.188:65442 (CLOSE_WAIT)
gen_gdl90 3110 root 48r REG 179,2 146998 51146 /var/www/maui/js/angular.min.js
The Web Path

Once onto the trail of the web path, I see that this is an Angular based application (ugh.. I really despise Angular.. I just do.), and all based on some JS stuffs. I get it. for an app like this the two-way data binding of Angular is probably the right too; but I still do not (no do I have to) like it.


root@raspberrypi:~# cd /var/www/maui/
root@raspberrypi:/var/www/maui# ls -l
total 12
drwxr-xr-x 2 root root 4096 Mar 15 2016 css
drwxr-xr-x 2 root root 4096 Mar 15 2016 fonts
drwxr-xr-x 2 root root 4096 Mar 15 2016 js
root@raspberrypi:/var/www/maui#

What I was hoping to find was the location of the that status page.. but.. I believe that what I’m looking for now is the .JS file that manages that label. Initially this looked like a dead end…


root@raspberrypi:/var/www/maui# egrep -r Distance *
root@raspberrypi:/var/www/maui#

Realiazing this was some templating sub-directory, and the root was likely at /var/www, I ran another search that found the location of the desired string, and likely the location of the parts I’m looking for:


root@raspberrypi:~# cd ..
root@raspberrypi:/var/www# egrep -lnr 'Distance' *

plates/js/traffic.js
plates/traffic-help.html
plates/traffic.html

Stratux – handling a full filesystem

Running a Stratux in test-bench mode (not in an aircraft, and for days at a time), you’ll likely run into an issue with disk space. The ISO image I acquired from Stratux only provided a 1.8 BG partition for things to live in, and it’s quickly exhausted.

Here is the status of my system after running for about 36 hours… it’s full.

Filesystem Size Used Avail Use% Mounted on
/dev/root 1.8G 1.8G 0 100% /
devtmpfs 459M 0 459M 0% /dev
tmpfs 463M 0 463M 0% /dev/shm
tmpfs 463M 30M 434M 7% /run
tmpfs 5.0M 4.0K 5.0M 1% /run/lock
tmpfs 463M 0 463M 0% /sys/fs/cgroup
/dev/mmcblk0p1 60M 20M 41M 34% /boot

Now to get about the business of increasing the partition and filesystem size without destroying it. First

Locate the disk device

Instructions on the web are not exactly correct, some suggest /dev/sda as the main device, however my testing shows it’s actually this named ‘/dev/mmcblk0’.


root@raspberrypi:~# fdisk -l | grep Disk
[...]
Disk /dev/mmcblk0: 14.5 GiB, 15523119104 bytes, 30318592 sectors

… with the following partitions:

Device Boot Start End Sectors Size Id Type
/dev/mmcblk0p1 8192 131071 122880 60M c W95 FAT32 (LBA)
/dev/mmcblk0p2 131072 3887103 3756032 1.8G 83 Linux
Running fdisk

With the physical partition located.. start fdisk:


fdisk /dev/mmcblk0

Welcome to fdisk (util-linux 2.25.2).
Changes will remain in memory only, until you decide to write them.
Be careful before using the write command.

I ended up creating 3 primary partitions. The plan is to delete partition 3 and then re-size the main partition to use up remaining space:


Device Boot Start End Sectors Size Id Type
/dev/mmcblk0p1 8192 131071 122880 60M c W95 FAT32 (LBA)
/dev/mmcblk0p2 131072 3887103 3756032 1.8G 83 Linux
/dev/mmcblk0p3 2048 8191 6144 3M 5 Extended
/dev/mmcblk0p4 3887104 20664319 16777216 8G 83 Linux

Command (m for help): d
Partition number (1-5, default 5): 3

Partition 3 has been deleted.

Device Boot Start End Sectors Size Id Type
/dev/mmcblk0p1 8192 131071 122880 60M c W95 FAT32 (LBA)
/dev/mmcblk0p2 131072 3887103 3756032 1.8G 83 Linux
/dev/mmcblk0p4 3887104 20664319 16777216 8G 83 Linux

Write out the partition and… then run to enable it:


Command (m for help): w
The partition table has been altered.
Calling ioctl() to re-read partition table.

partprobe

Next, put a filesystem on this new partition. Using df to determine the type of filesystem currently in use; I recommend that you stick with it for this most basic of operations:


df -T

Filesystem Type 1K-blocks Used Available Use% Mounted on
/dev/root ext4 1815440 1799056 0 100% /

Run mkfs


/sbin/mkfs -t ext4 /dev/mmcblk0p4

Creating filesystem with 2097152 4k blocks and 524288 inodes
Filesystem UUID: e36a8f6c-a457-4531-b67d-bea4885a9583
Superblock backups stored on blocks:
32768, 98304, 163840, 229376, 294912, 819200, 884736, 1605632

Allocating group tables: done
Writing inode tables: done
Creating journal (32768 blocks): done
Writing superblocks and filesystem accounting information:... this might go on for a bit..

Once completed.. mount this where the logs and databases live. To do this the first thing that needs to happen is to check your current fstab:


cat /etc/fstab
proc /proc proc defaults 0 0
/dev/mmcblk0p1 /boot vfat defaults 0 2
/dev/mmcblk0p2 / ext4 defaults,noatime 0 1
# a swapfile is not a swap partition, no line here
# use dphys-swapfile swap[on|off] for that

My first order of business was to mount the new filesystem to a temporary location (/var/log2) and then copy the contents of /var/log to that location, then delete everything in the log directory, and then unmount log2.


/var/log2

mount -t ext4 /dev/mmcblk0p4 /var/logs

cp -R log/* log2/.

cd log
rm -rf *

umount /dev/mmcblk0p4

Edit the fstab file to create a mount point for the new partition where the logs used to be written (added the orange line), and ran mount to verify that it will automount on a restart.


vi /etc/fstab

proc /proc proc defaults 0 0
/dev/mmcblk0p1 /boot vfat defaults 0 2
/dev/mmcblk0p2 / ext4 defaults,noatime 0 1
/dev/mmcblk0p4 /var/log ext4 defaults,noatime 0 0

mount -a

df

Filesystem 1K-blocks Used Available Use% Mounted on
/dev/root 1815440 1768992 0 100% /
devtmpfs 469688 0 469688 0% /dev
tmpfs 474004 0 474004 0% /dev/shm
tmpfs 474004 35972 438032 8% /run
tmpfs 5120 4 5116 1% /run/lock
tmpfs 474004 0 474004 0% /sys/fs/cgroup
/dev/mmcblk0p1 61384 20400 40984 34% /boot
/dev/mmcblk0p4 8125880 333800 7356268 5% /var/log

Restart and verify

Restart the little box and verify that the mount was preserved.


init 6

Log back in, and run df to check the filesystem health. It should now has the the main filesystem has some breathing room again:

                                                                                              
 ad88888ba  888888888888  88888888ba          db    888888888888  88        88  8b        d8  
d8"     "8b      88       88      "8b        d88b        88       88        88   Y8,    ,8P   
Y8,              88       88      ,8P       d8'`8b       88       88        88    `8b  d8'    
`Y8aaaaa,        88       88aaaaaa8P'      d8'  `8b      88       88        88      Y88P      
  `"""""8b,      88       88""""88'       d8YaaaaY8b     88       88        88      d88b      
        `8b      88       88    `8b      d8""""""""8b    88       88        88    ,8P  Y8,    
Y8a     a8P      88       88     `8b    d8'        `8b   88       Y8a.    .a8P   d8'    `8b   
 "Y88888P"       88       88      `8b  d8'          `8b  88        `"Y8888Y"'   8P        Y8  

NOTE TO DEVELOPERS: Make sure that your system has an acceptable clock source, i.e., a GPS
with sufficient signal or enable ntpd (internet connection required).

Everything here comes with ABSOLUTELY NO WARRANTY, to the extent
permitted by applicable law.

Type 'stratux-help' (as root) for a few debugging commands.
pi@raspberrypi:~ $ df

Filesystem 1K-blocks Used Available Use% Mounted on
/dev/root 1815440 1389856 332592 81% /
devtmpfs 469688 0 469688 0% /dev
tmpfs 474004 0 474004 0% /dev/shm
tmpfs 474004 6336 467668 2% /run
tmpfs 5120 16 5104 1% /run/lock
tmpfs 474004 0 474004 0% /sys/fs/cgroup
/dev/mmcblk0p4 8125880 329820 7360248 5% /var/log
/dev/mmcblk0p1 61384 20400 40984 34% /boot

At a later date I’ll work on expanding the main partition, but for now this should stabilize the machine and resolve the main disk consumption issue.

Installing PhantomJS 2.1.1 on Ubuntu

phantomjs-logoIt’s a gamble to do this, and according to the build script it’s going to take a long time to complete the compile / install of Phantom 2.1.1.

Note: If you run into build problems with some of the required components, such as the fonts, qtbase, etc., you will want to check my previous post Installing PhantomJS 2 on Ubuntu for some help.

Step 1 — install required dependencies

You may or may not have most of these on your Ubuntu system. I found that most of these were required to start the PhantomJS build.Here are the ones that I’ve confirmed I needed:

  • autoconf2.13

  • pkg-config

  • build-essential

  • qt5-qmake

  • g++

  • python

  • ruby

  • perl

  • sqlite

  • flex

  • bison

  • gperf

  • openssl

  • fontconfig

  • xorg

  • xorg-dev

  • xutils-dev

  • xcb-proto

  • libtool

  • libsqlite0

  • libssl-dev

  • libsqlite3-dev

  • libfontconfig1-dev

  • libicu-dev

  • libfreetype6

  • libssl-dev

  • libpng-dev

  • libpng12-dev

  • libjpeg-dev

  • libx11-dev

  • libxext-dev

  • libxcb-xkb-dev

Installing the packages went smoothly:

sudo apt-get install autoconf2.13 pkg-config build-essential qt5-qmake g++ python ruby perl sqlite flex bison gperf openssl fontconfig xorg xorg-dev xutils-dev xcb-proto libtool libsqlite0 libssl-dev libsqlite3-dev libfontconfig1-dev libicu-dev libfreetype6 libssl-dev libpng-dev libpng12-dev libjpeg-dev libx11-dev libxext-dev libxcb-xkb-dev x11proto-core-dev libxcb-render-util0 libqt5webkit5-dev

Step 2 — clone the Git repo to local drive:

git clone git://github.com/ariya/phantomjs.git
Cloning into ‘phantomjs’…
remote: Counting objects: 63695, done.
remote: Compressing objects: 100% (37/37), done.
remote: Total 63695 (delta 16), reused 0 (delta 0), pack-reused 63657
Receiving objects: 100% (63695/63695), 129.05 MiB | 4.08 MiB/s, done.
Resolving deltas: 100% (31013/31013), done.
Checking connectivity… done.

cd phantomjs

git checkout 2.1.1
Note: checking out ‘2.1.1’.
[…]
HEAD is now at d9cda3d… Set version to “2.1.1”

git submodule init
Submodule ‘3rdparty-win’ (https://github.com/Vitallium/phantomjs-3rdparty-win.git) registered for path ‘src/qt/3rdparty’
Submodule ‘qtbase’ (https://github.com/Vitallium/qtbase.git) registered for path ‘src/qt/qtbase’
Submodule ‘qtwebkit’ (https://github.com/Vitallium/qtwebkit.git) registered for path ‘src/qt/qtwebkit’

git submodule update
Cloning into ‘src/qt/3rdparty’…
Cloning into ‘src/qt/qtbase’…
Cloning into ‘src/qt/qtwebkit’…

python build.py
—————————————-
WARNING
—————————————-

Building PhantomJS from source takes a very long time, anywhere from 30 minutes
to several hours (depending on the machine configuration). It is recommended to
use the premade binary packages on supported operating systems.

For details, please go the the web site: http://phantomjs.org/download.html.

Do you want to continue (Y/n)? Y

NOTE: If you want to suppress the warning regarding perils of the long compile, you an use the –confirm flag to bypass the question. This is really helpful if you want to background the process and write it to a log. Where I find this most beneficial is when I want to/need to close the terminal window before the compile completes.

Here is an optional method of running that will background the process, auto-reply to the warning and write to a log file:

nohup ./build.sh –confirm –jobs 1 > build.log &

You might carp about not being able to monitor progress now! Well sure you can.. just do a following tail on the file. Exact command varies with system, I’ll provide the one for typical LINUX and for typical OSX:

For typical LINUX:
tailf build.log

For typical OSX:
tail -f build.log

Step 3 — check the binary

Once the build has completed, you will find the binary to be built in the local directory bin/

ls -l bin/phantomjs
-rwxr-xr-x 1 root root 56736434 Feb 5 11:33 /usr/sbin/phantomjs

To complete the installation, you’ll need to replace the current phantomjs binary with the new one. To find the location if your current binary (if you have one), this should work:

whereis phantomjs
phantomjs: /usr/bin/phantomjs

Copy the new binary to that location and verify version:

cp bin/phantomjs /usr/bin/phantomjs
cp: overwrite ‘/usr/bin/phantomjs’? y

phantomjs -v
2.1.1

YOU ARE DONE!! It was just that easy